Dinner
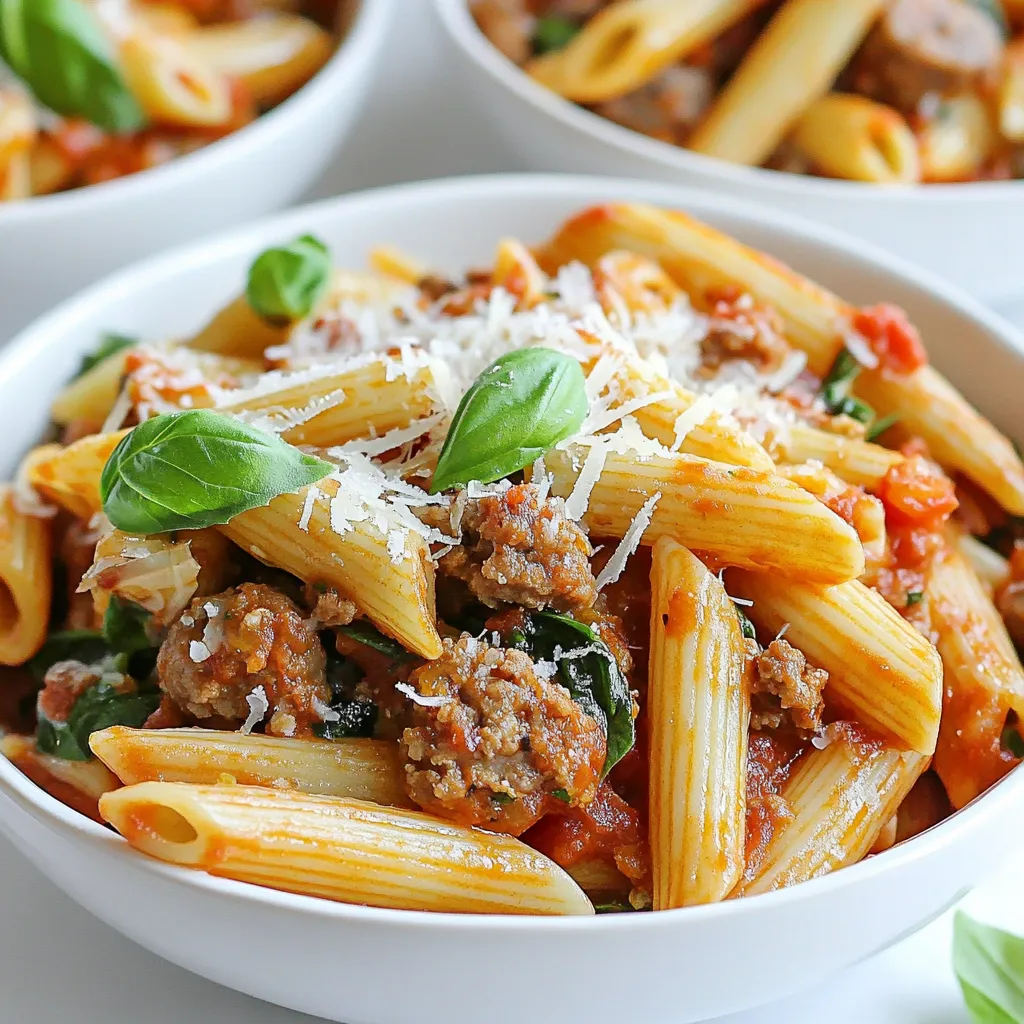
Spicy Italian Sausage Pasta Irresistible Comfort Food
If you’re craving a warm bowl of comfort, you’ve found it! My Spicy Italian Sausage Pasta is not just a meal; it’s a hug on

Ground Beef Tostadas 30-Minute Flavorful Fix
Are you ready for a quick and tasty meal? In just 30 minutes, you can whip up delicious Ground Beef Tostadas that are sure to

Teriyaki Chicken Noodles Savory and Quick Meal
Are you craving a meal that’s both quick and delicious? Look no further! Teriyaki Chicken Noodles combine tender chicken, colorful veggies, and a savory sauce
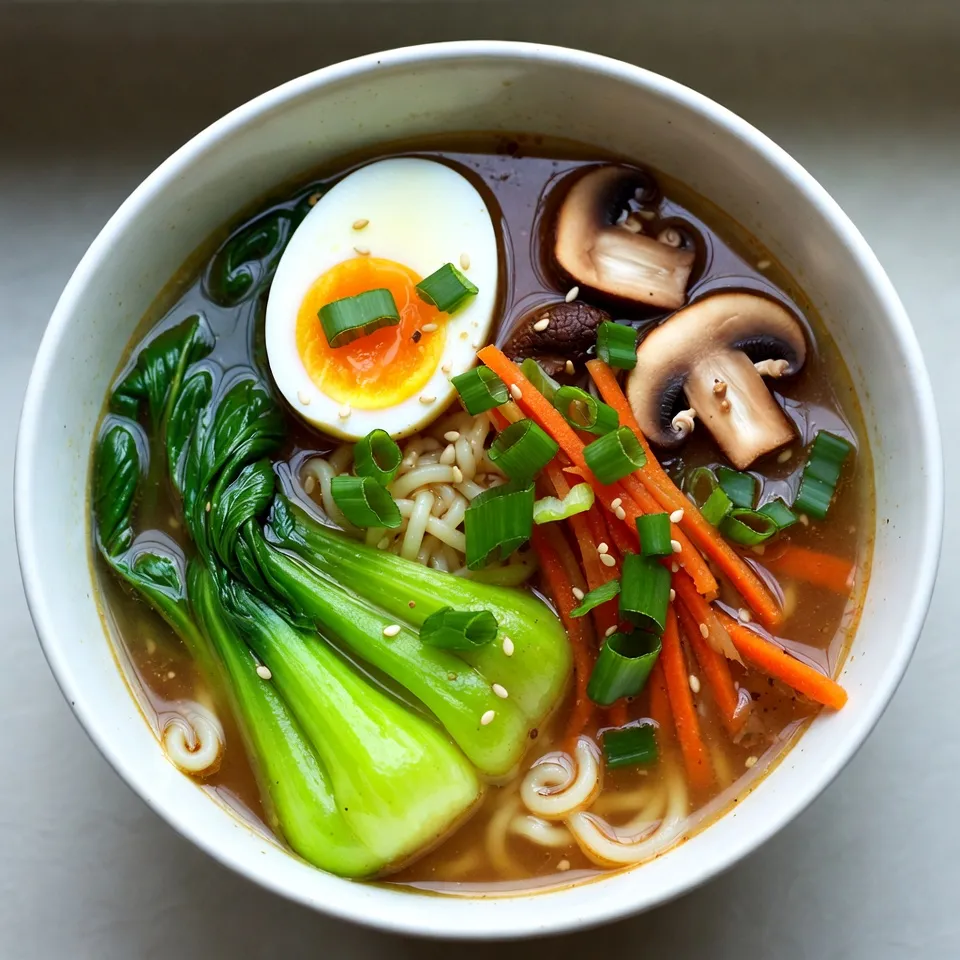
Miso Ginger Ramen Bowl Easy and Flavorful Recipe
Looking for a quick and tasty meal? Try my Miso Ginger Ramen Bowl! This easy recipe bursts with flavor, thanks to the warm miso and
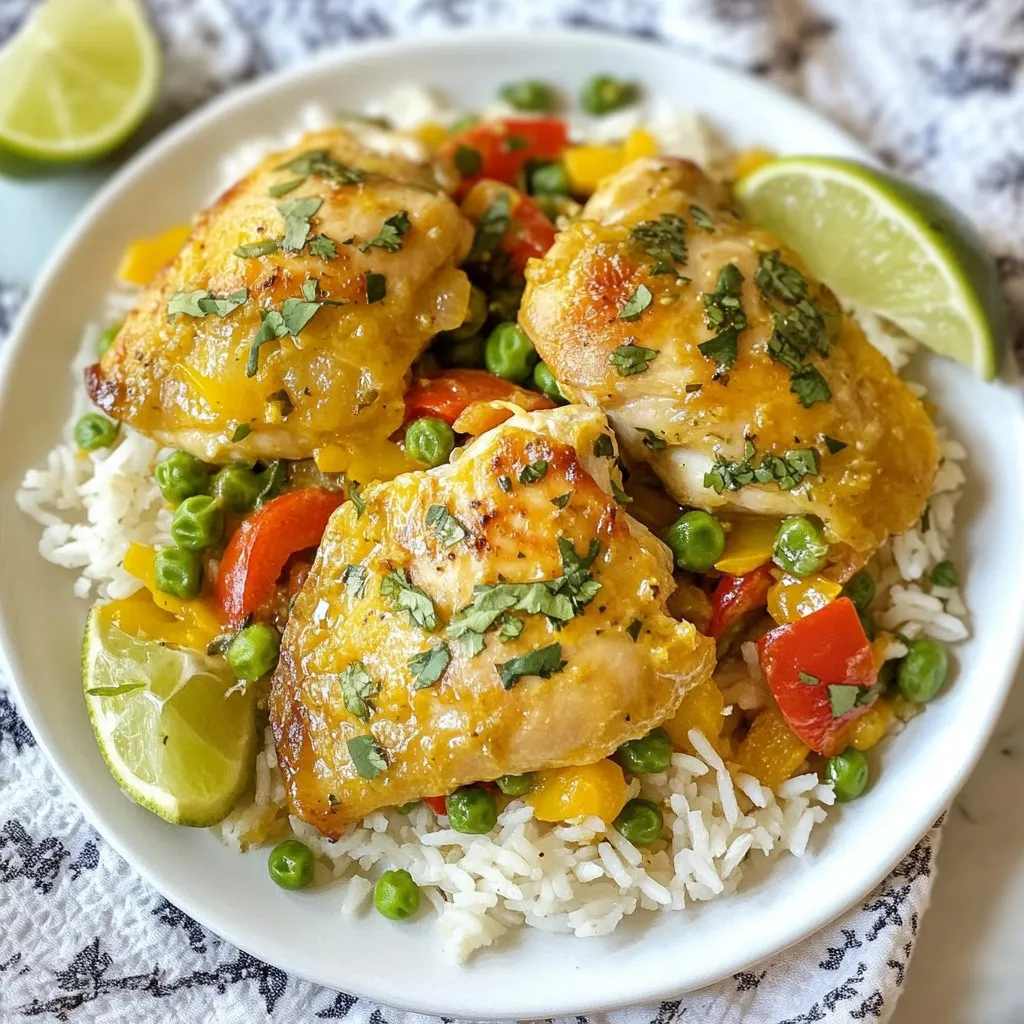
Coconut Chicken and Rice Simple Comfort Dish
Welcome to my kitchen, where comfort meets deliciousness! Coconut chicken and rice is a simple dish that warms the soul. With its creamy coconut flavor
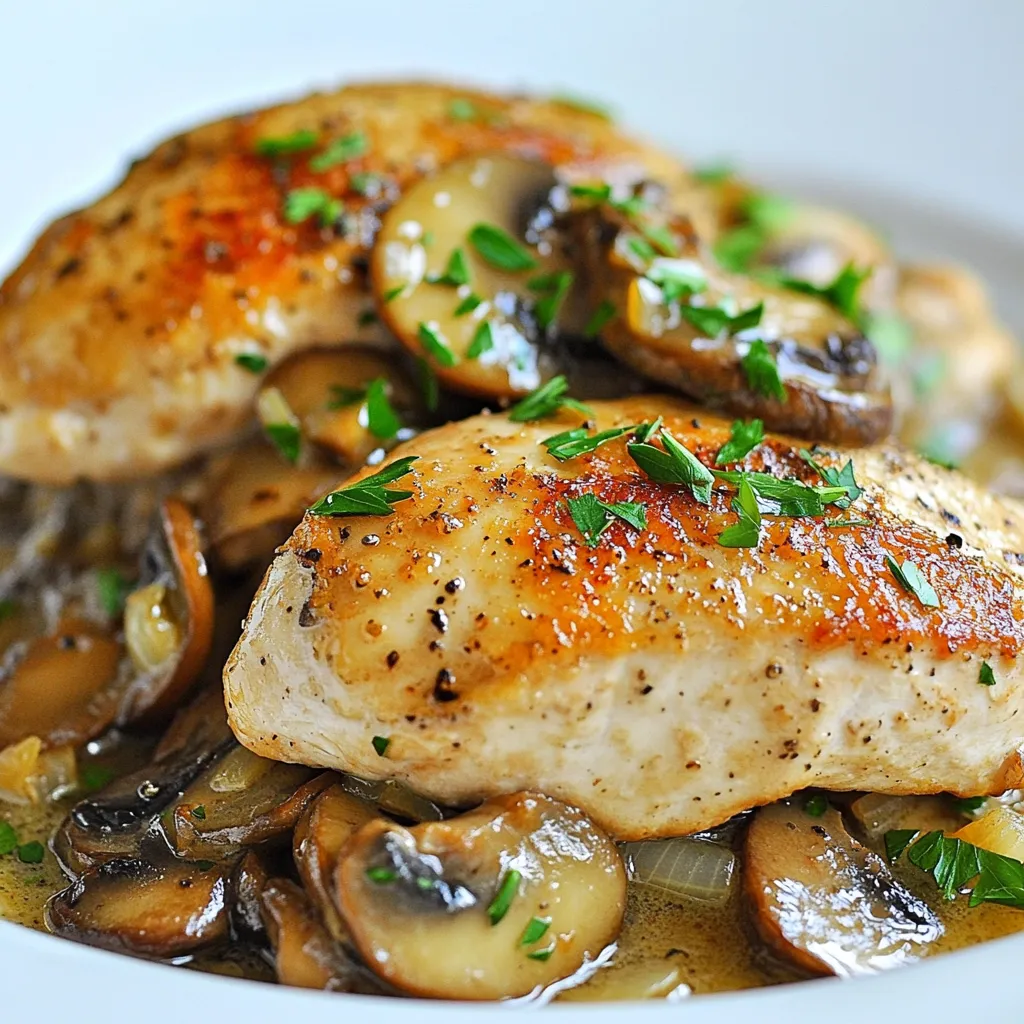
One-Pan Mushroom Chicken Easy and Flavorful Recipe
Looking for an easy and tasty weeknight dinner? You’ll love this One-Pan Mushroom Chicken recipe! It brings together juicy chicken breasts, fresh cremini mushrooms, and
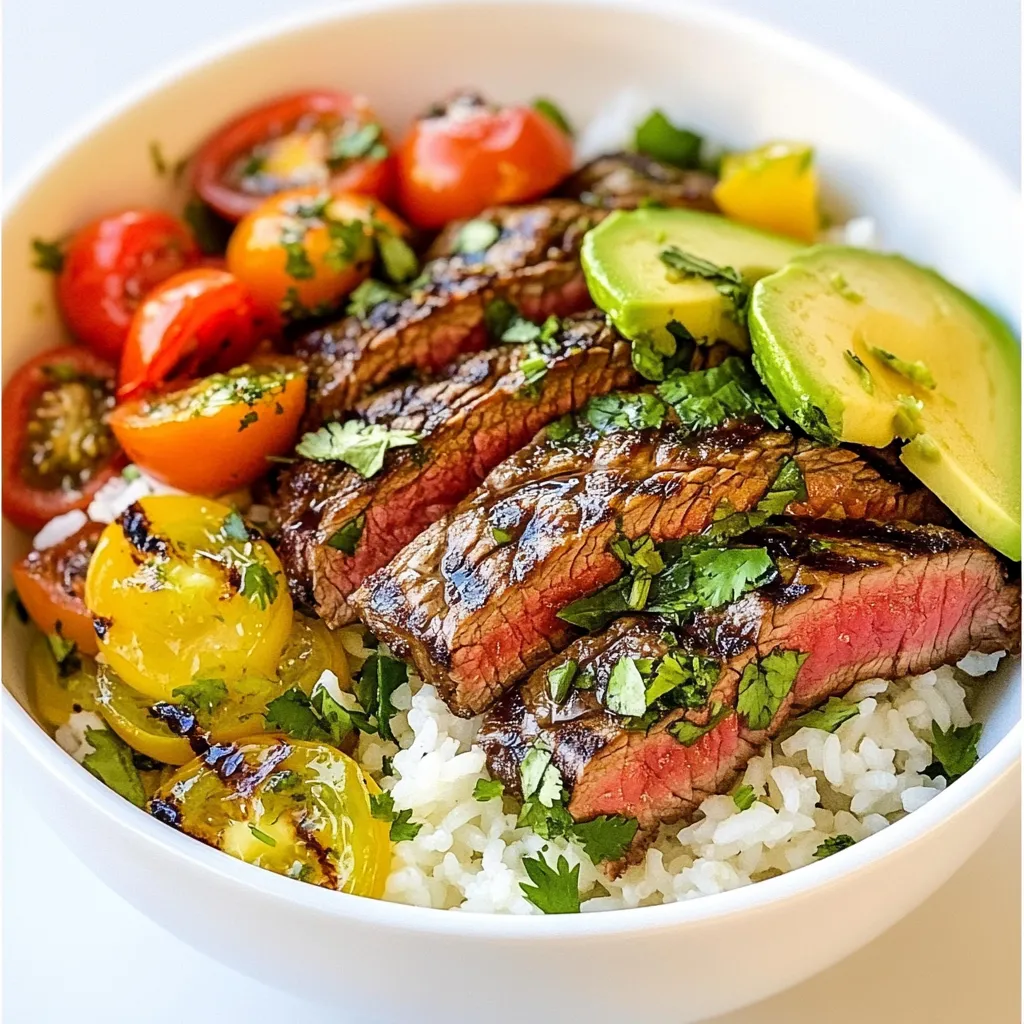
Cilantro Lime Steak Rice Bowls Flavorful and Easy Meal
Looking for a meal that’s both flavorful and easy to make? You’re in the right place! Cilantro Lime Steak Rice Bowls combine juicy steak with
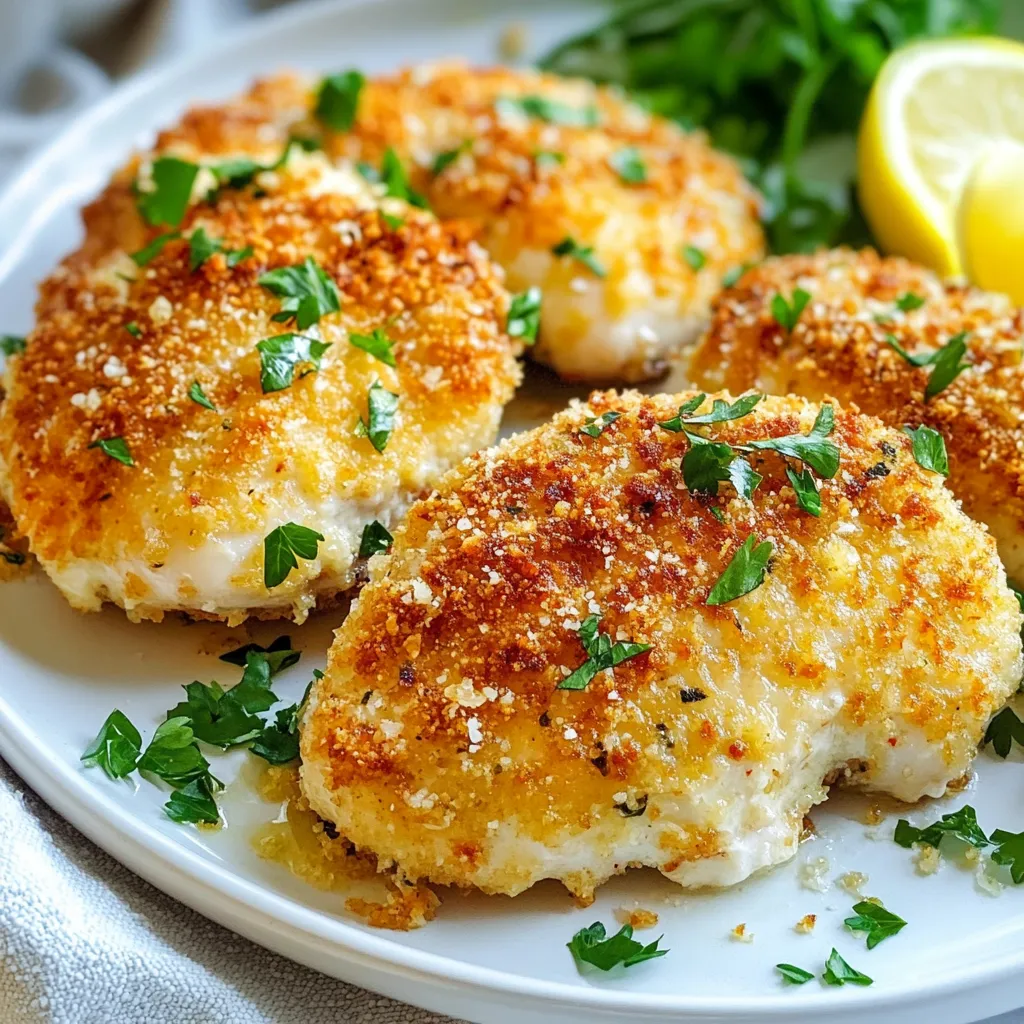
Air Fryer Parmesan Crusted Chicken Juicy and Easy Recipe
If you crave a quick, tasty meal, you’ll love my Air Fryer Parmesan Crusted Chicken recipe. This dish is easy to make and packed with
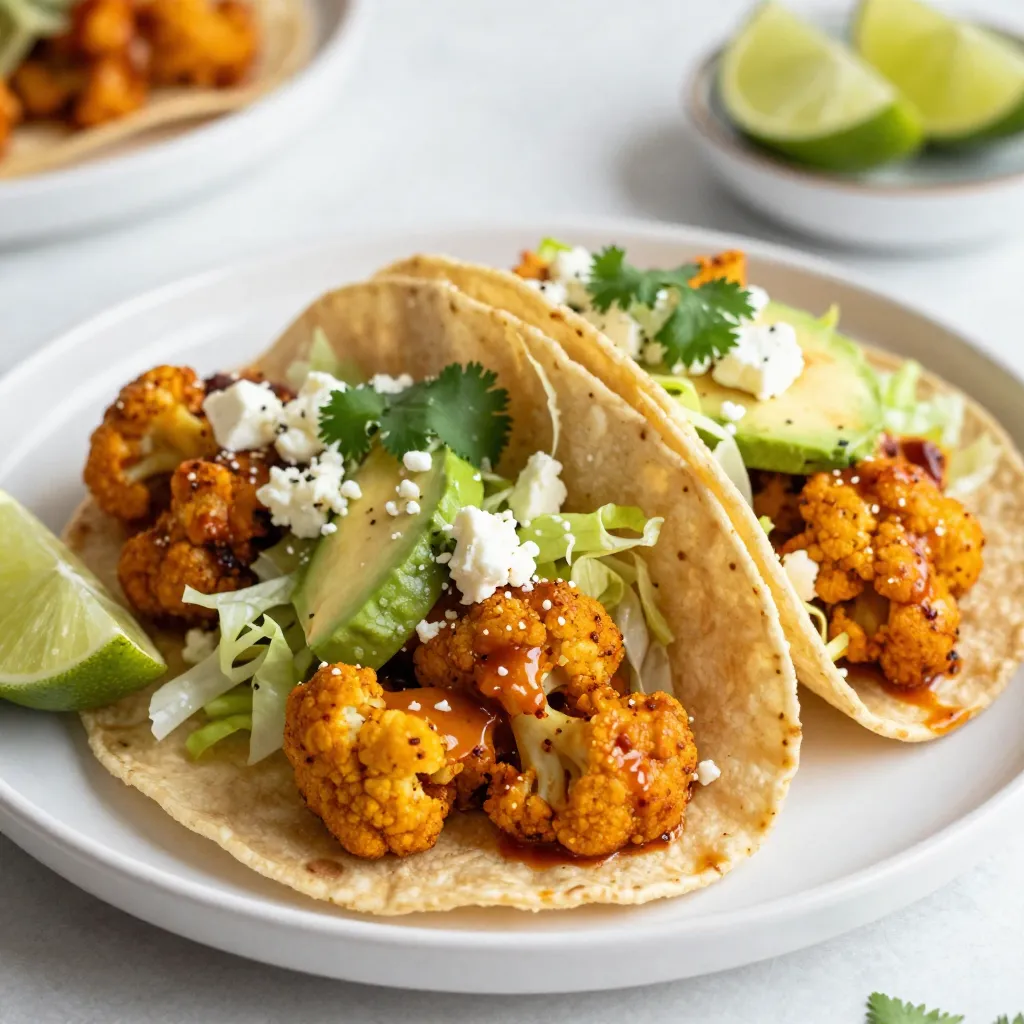
Buffalo Cauliflower Tacos Flavorful and Satisfying Meal
Are you ready to spice up your meal with something bold and delicious? Buffalo Cauliflower Tacos are the perfect blend of flavor and fun! These
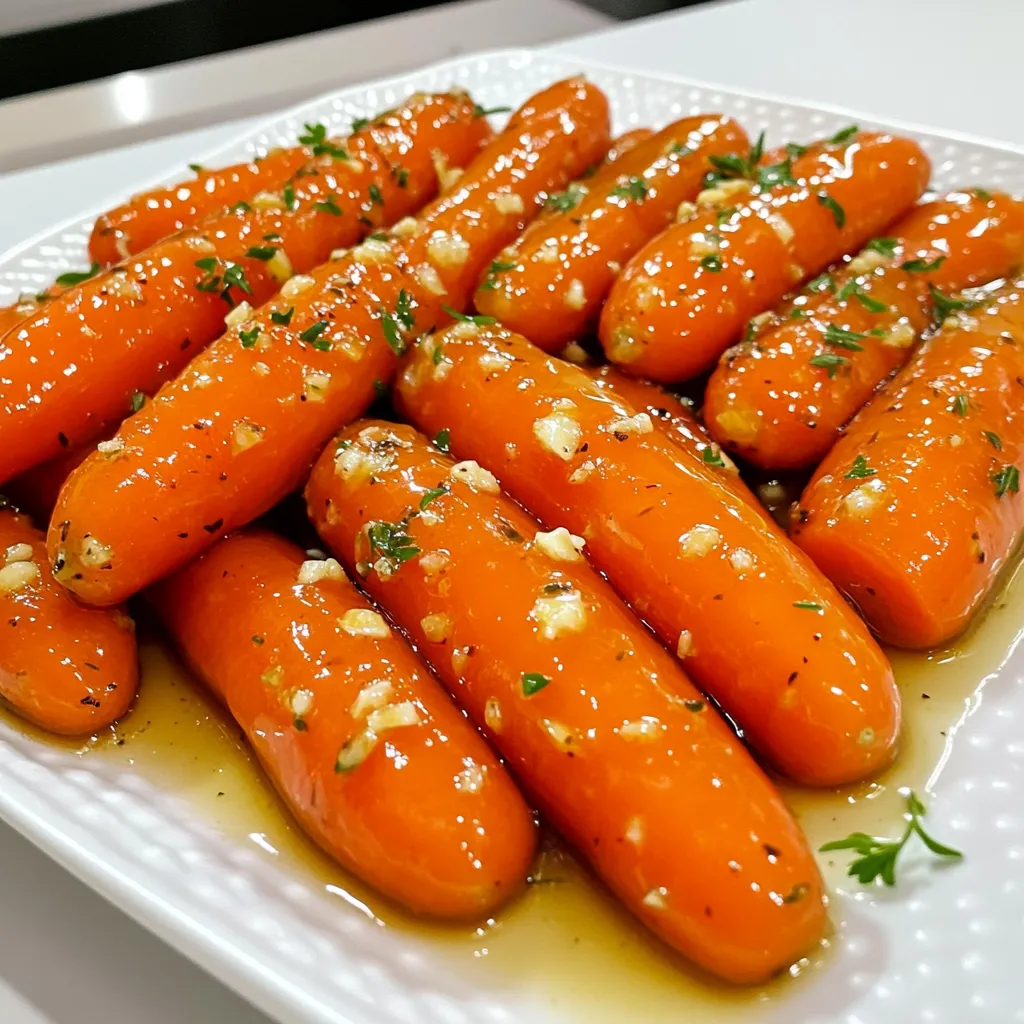
Honey Garlic Butter Carrots Simple and Tasty Side
Looking for a simple and tasty side dish that impresses? Honey Garlic Butter Carrots are the answer! With just a few fresh ingredients and pantry