Dinner
Cottage Cheese and Veggie Bake Flavorful Comfort Dish
Looking for a comforting dish that’s both healthy and delicious? My Cottage Cheese and Veggie Bake hits the spot! It combines creamy cottage cheese with
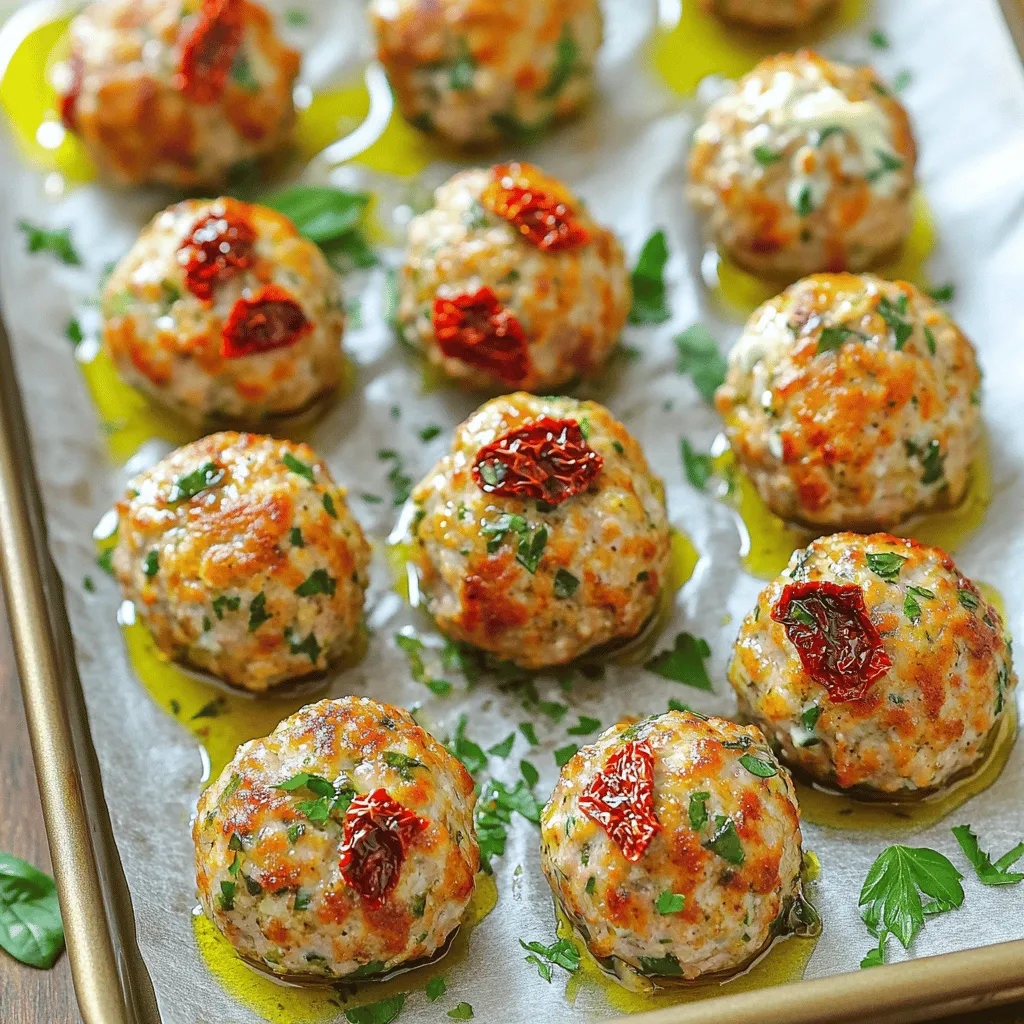
Healthy Greek Turkey Meatballs Simple and Tasty Recipe
Looking for a delicious yet healthy meal option? You’ve found it! These Greek turkey meatballs are simple to make and packed with flavor. With ground
![To make delicious honey garlic chicken, you need these main ingredients: - 4 chicken thighs, bone-in and skin-on - 1/2 cup honey - 1/4 cup soy sauce (low sodium) - 4 garlic cloves, minced - 1 tablespoon fresh ginger, grated - 1 tablespoon rice vinegar - 1 teaspoon sesame oil - Salt and pepper to taste These ingredients create a sweet and savory flavor. The chicken thighs stay juicy and tender. Honey adds a nice glaze that makes it look great. You can also add some fun garnishes to your dish: - 2 tablespoons green onions, chopped - Sesame seeds These add color and a little crunch. The green onions give a fresh taste. Sesame seeds add a nice touch. If you want to change things up, consider these substitutions: - Use maple syrup or agave for a different sweetener. - Try apple cider vinegar instead of rice vinegar. These swaps can give your dish a unique twist. You can make it your own while keeping the flavor. Check out the Full Recipe for more details! To make the marinade, mix six easy ingredients. In a bowl, whisk together: - 1/2 cup honey - 1/4 cup low sodium soy sauce - 4 minced garlic cloves - 1 tablespoon grated fresh ginger - 1 tablespoon rice vinegar - 1 teaspoon sesame oil This blend creates a sweet and savory taste. For the best flavor, let the chicken marinate for at least 1 hour in the fridge. If you have time, overnight is even better. This allows the chicken to soak up all that delicious goodness. First, preheat your oven to 375°F (190°C). This step is key for even cooking. Heat a large oven-safe skillet on medium-high heat. Take the chicken out of the marinade and season it with salt and pepper. Place the chicken thighs skin-side down in the skillet. Sear the chicken for about 5-7 minutes until golden and crispy. Flip the chicken and sear the other side for an additional 5 minutes. This searing gives your chicken a nice crust. After searing, pour the reserved marinade over the chicken. Then, move the skillet to your preheated oven. Bake for 25-30 minutes. Check that the chicken reaches an internal temperature of 165°F (74°C). The sauce should be sticky and bubbly when done. Once you take the chicken out of the oven, let it rest for 5 minutes in the sauce. This helps the flavors mix well. For plating, place the chicken on a large platter. Drizzle the sticky glaze from the skillet over the chicken. Garnish with chopped green onions and sesame seeds for color and crunch. Pair your honey garlic chicken with steamed rice and seasonal veggies. This combination makes for a beautiful and tasty meal. You can find the full recipe [here]. To get that perfect sear, heat your skillet well. A hot pan helps the chicken skin crisp up. If the pan is not hot enough, the chicken will steam and become dry. Place the chicken skin-side down first. This allows the fat to render out, making the skin crispy. Sear for 5-7 minutes, then flip and sear the other side for about 5 minutes. You can enhance the flavor by adding fresh herbs and spices. Try adding thyme or rosemary for a nice twist. A pinch of red pepper flakes can add some heat. You can also use fresh cilantro or parsley for a fresh taste. These additions can brighten the dish and elevate the flavor profile. Avoid overcooking the chicken. Check the internal temperature with a meat thermometer. It should reach 165°F (74°C). If you cook it too long, the chicken will become tough. Also, don’t skip marinating for long enough. At least one hour is key, but overnight is best. This helps the flavors soak in deeply, making each bite delicious. {{image_2}} You can swap chicken thighs for other proteins. Chicken breasts work well too. If you prefer plant-based options, try tofu. Tofu absorbs the sauce nicely and offers a great texture. Shrimp adds a quick-cooking seafood twist. Just adjust cooking times to keep everything tender. Want some heat? Add chili flakes or sriracha to the sauce. This will spice up your dish. You can also use teriyaki sauce for a different flavor. Teriyaki gives a sweet and savory taste that pairs well with the honey. Mix and match these ideas to create your favorite version. You can cook honey garlic chicken in different ways. Use a slow cooker for an easy meal. Just set it up and let it cook while you do other things. Stovetop cooking is quick and keeps the chicken juicy. An Instant Pot is great for a fast dinner. It gives you the same rich flavor in less time. Each method yields tasty results, so pick what works for you. To keep your honey garlic chicken fresh, store leftovers in an airtight container. This keeps out air and moisture. If you want to freeze it, place the chicken in a freezer-safe bag. Remove as much air as you can before sealing. Label the bag with the date. This way, you know how long it’s been in the freezer. When it’s time to enjoy your leftovers, reheat gently. Using an oven works best to keep the chicken moist. Preheat your oven to 350°F (175°C). Place the chicken in a baking dish with a splash of water or broth. Cover it with foil to trap steam. Heat for about 15-20 minutes, until warm. You can also use a microwave, but be careful not to dry it out. Heat in short intervals, checking often. Honey garlic chicken lasts three to four days in the fridge. If frozen, it can last up to three months. Just remember to thaw it in the fridge overnight before reheating. This keeps the chicken safe and tasty. Yes, you can use boneless chicken. Boneless chicken cooks faster. Just adjust the cooking time. I suggest checking it at 20 minutes. This ensures you do not overcook it. Searing boneless chicken will also give it a nice crust. The sweet and sticky glaze will still stick well. I love serving honey garlic chicken with steamed rice. It soaks up the tasty sauce. You can also add seasonal vegetables. Broccoli or green beans work well. A fresh salad can add a nice crunch too. Feel free to get creative with your sides! The best way to check is with a meat thermometer. The chicken should reach 165°F (74°C) at the thickest part. If you don't have one, you can cut into the chicken. The juices should run clear, not pink. This way, you can ensure it is safe to eat. This blog post covered how to make honey garlic chicken. You learned about key ingredients, steps, and easy variations. I shared tips to improve your cooking. Remember to avoid common mistakes and use the right tools. With these details, you can enjoy a delicious meal. Try it out and adjust flavors to suit your taste. Cooking can be fun and rewarding! Enjoy your honey garlic chicken and impress your friends and family.](https://grilledflavors.com/wp-content/uploads/2025/06/75e2104a-d37e-4c41-97f5-154fc069f83c.webp)
Honey Garlic Chicken Flavorful Dinner Made Easy
Looking to impress at dinner with minimal effort? Honey Garlic Chicken is your answer! This dish combines juicy chicken thighs with a sweet and savory
. To keep your Classic Spicy Moroccan Fish fresh, store it in an airtight container. Place it in the fridge within two hours of cooking. It will stay good for up to three days. For longer storage, you can freeze the fish. Wrap each fillet tightly in plastic wrap, then place it in a freezer-safe bag. This method helps prevent freezer burn. Your fish can last up to three months in the freezer. When it's time to enjoy your leftovers, reheating is key. You want to keep the fish moist and flavorful. One method is to use the microwave. Place the fish on a microwave-safe plate and cover it with a damp paper towel. Heat it in short bursts, checking every 30 seconds until warm. Another option is to reheat on the stovetop. Place the fish in a skillet with a splash of vegetable broth. Cover and heat on low until warmed through, about 5 minutes. This method helps maintain the dish's rich flavors while keeping the fish tender. What can I serve with Classic Spicy Moroccan Fish? You can serve this dish with couscous, rice, or warm crusty bread. These sides soak up the sauce well and add texture. A fresh salad or roasted vegetables also complement the meal nicely. How can I tell when the fish is cooked through? The fish is done when it flakes easily with a fork. It should be opaque and no longer translucent. Using a food thermometer, the internal temperature should reach 145°F (63°C). Can I make this recipe ahead of time? Yes, you can prepare the fish and sauce a day in advance. Just store them in the fridge. Reheat gently before serving. This allows the flavors to meld well. Is it possible to make this dish spicier? Absolutely! You can add more cayenne pepper or include chili flakes. Adjust the heat to your liking during cooking. What to do if the fish is too spicy? If the dish is too spicy, add a bit of sugar or honey. This helps balance the heat. You can also serve it with a side of yogurt or sour cream to cool it down. How to fix a bland sauce? To enhance a bland sauce, add more spices, garlic, or lemon juice. A splash of vinegar can also brighten the flavors. Taste as you go to reach your desired flavor. This blog post covered the essentials for making Classic Spicy Moroccan Fish. You learned about key ingredients, preparation steps, and tips for perfect results. I shared variations to fit your taste and details on how to store leftovers. Cooking this dish can be fun and rewarding. With practice, you'll master the flavors and techniques. Enjoy making it your own, and don’t be afraid to experiment. Happy cooking!](https://grilledflavors.com/wp-content/uploads/2025/06/0f98d561-5bf7-408a-a4ba-1ebcf61d56d0.webp)
Classic Spicy Moroccan Fish Savory and Flavorful Dish
Are you ready to spice up your dinner routine? My Classic Spicy Moroccan Fish recipe offers a burst of bold flavors and vibrant spices that
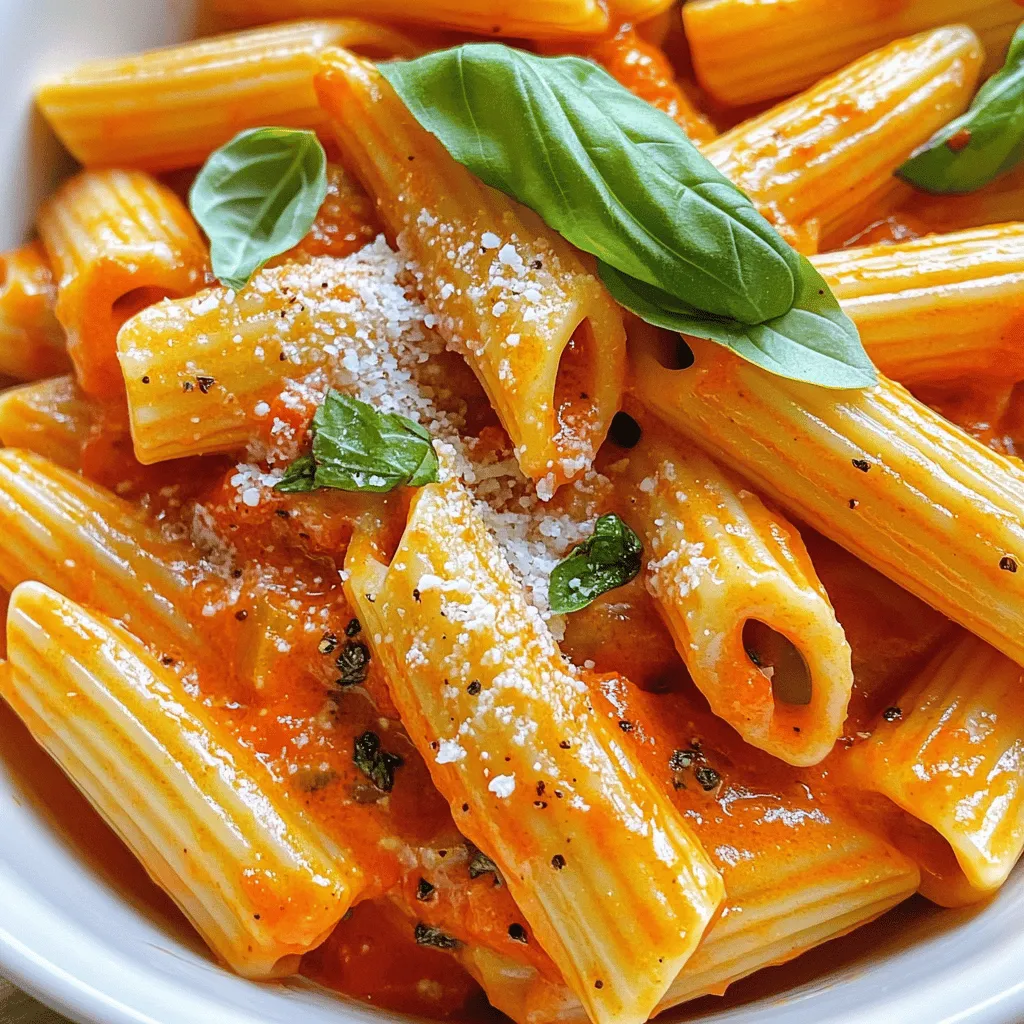
Creamy Tomato Pasta Delight in 30 Minutes or Less
Are you ready to whip up a delicious meal in no time? In Creamy Tomato Pasta Delight in 30 Minutes or Less, I’ll show you

High Protein Chicken Enchiladas Quick and Easy Recipe
Craving a tasty meal that packs a protein punch? I’ve got you covered with my quick and easy recipe for High Protein Chicken Enchiladas! These
![For this savory dump-and-bake chicken tzatziki casserole, you will need: - 2 cups cooked chicken, shredded - 1 cup Greek yogurt - 1 cup cucumber, diced - 1 cup cherry tomatoes, halved - 1 cup cooked quinoa or couscous - 1/2 cup red onion, finely chopped - 1/4 cup fresh dill, chopped - 2 tablespoons lemon juice - 1 tablespoon olive oil - 1 teaspoon garlic powder - Salt and pepper to taste - 1/2 cup feta cheese, crumbled - 1/2 cup grated mozzarella cheese If you need to swap ingredients, here are some options: - Use rotisserie chicken instead of cooked chicken for quick prep. - Substitute sour cream for Greek yogurt for a different texture. - Replace cucumber with zucchini for a similar crunch. - Cherry tomatoes can be swapped with diced bell peppers for sweetness. - If you don’t have quinoa, use rice or couscous instead. - You can omit feta cheese and use more mozzarella for a milder flavor. This casserole is not only tasty but also healthy. Here’s a rough idea of the nutritional value per serving (based on 6 servings): - Calories: 350 - Protein: 30g - Carbohydrates: 30g - Fat: 15g - Fiber: 3g - Sugar: 4g This dish packs protein and nutrients while being easy to make. For the full recipe, you can refer to the instructions above. First, gather your ingredients. You need cooked chicken, Greek yogurt, cucumber, cherry tomatoes, and quinoa or couscous. Also, have red onion, fresh dill, lemon juice, olive oil, garlic powder, salt, pepper, feta cheese, and mozzarella cheese. Preheat your oven to 375°F (190°C). In a large bowl, mix the shredded chicken and Greek yogurt. Add the diced cucumber, halved cherry tomatoes, and cooked quinoa or couscous. Then, stir in the chopped red onion, fresh dill, lemon juice, olive oil, garlic powder, salt, and pepper. Mix until it all blends well. Next, transfer your mixture to a greased 9x13-inch casserole dish. Spread it evenly across the dish. Now, sprinkle the crumbled feta cheese and grated mozzarella cheese on top. Cover the dish with aluminum foil and place it in the preheated oven. Bake for 25 minutes. After that, remove the foil. Bake for another 10 to 15 minutes, until the cheese is bubbly and golden brown. Once baked, take it out of the oven and let it cool for five minutes. Serve your Chicken Tzatziki Casserole warm. For a pop of color, garnish it with extra fresh dill. A wedge of lemon on the side adds a nice touch and brightens the dish. This recipe serves 4 to 6 people and works well for family dinners or gatherings. For more details, check the Full Recipe. To make the best Chicken Tzatziki Casserole, use cooked chicken. Shredded rotisserie chicken works great. It saves time and adds flavor. Mix the ingredients well to ensure even taste. Layer the cheese generously on top. This gives a rich crust. Bake until bubbly and golden brown. Let it cool for a few minutes before serving. This helps the flavors settle. Avoid using raw chicken in this casserole. The cooking time is not long enough. Don't skip the salt and pepper. They enhance the flavors of the dish. Watch the baking time. If overbaked, the cheese can burn. Also, do not rush the cooling time. It may crumble when you serve it hot. This dish pairs well with a fresh salad. A Greek salad adds a nice crunch. You could also serve it with pita bread. The bread helps scoop up the casserole. If you want more flavor, try tzatziki sauce on the side. It adds a cool, creamy touch. For a heartier meal, roasted vegetables work well too. They balance the dish nicely. For the full recipe, check out the [Full Recipe]. {{image_2}} You can easily adjust the recipe to fit your needs. If you're gluten-free, swap quinoa for rice or gluten-free couscous. For a dairy-free option, use a dairy-free yogurt for the tzatziki flavor. You could also skip the feta cheese or use a vegan alternative. If you want a lower-fat version, choose lean chicken breast and low-fat yogurt. These simple swaps keep the dish tasty while meeting different dietary needs. For extra flavor, consider adding spices to the mix. Try a teaspoon of smoked paprika for a warm, smoky taste. You could also add a pinch of cayenne pepper for some heat. Fresh herbs, like parsley or mint, can brighten up the dish. If you love garlic, increase the garlic powder to two teaspoons. These small changes can make your casserole even more exciting. Leftovers from this casserole are just as good. You can turn them into tasty wraps. Just take a tortilla and fill it with the casserole and some extra veggies. Another option is to add the leftovers to a salad for a quick lunch. You can even make a dip by mixing it with more yogurt and serving it with pita chips. These ideas keep your meals fresh and fun! After you enjoy the Dump-and-Bake Chicken Tzatziki Casserole, store leftovers in an airtight container. This keeps the flavors fresh. Let the casserole cool down to room temperature before packing it away. It will last in the fridge for up to three days. If you plan to eat it later, label your container with the date. This helps you keep track of how long it has been stored. To reheat, simply take the casserole out of the fridge. Preheat your oven to 350°F (175°C). Place the casserole in a baking dish. Cover it with aluminum foil to keep it moist. Heat for about 20 minutes or until warm. You can also microwave individual portions. Just cover them with a paper towel to avoid splatters. If you want to freeze the casserole, use a freezer-safe container. Wrap it well with plastic wrap and then foil. This helps prevent freezer burn. You can freeze the casserole for up to three months. When you’re ready to eat, thaw it in the fridge overnight. Then, reheat using the oven or microwave. This way, you can enjoy a taste of summer any time! For the full recipe, check out the Dump-and-Bake Chicken Tzatziki Casserole. It takes about 50 minutes to make this dish. You will spend 15 minutes prepping the ingredients. Then, the baking time is just 35 minutes in total. This makes it a quick meal for busy days. No, you should not use raw chicken. The chicken must be cooked before mixing it in. This keeps the dish safe to eat and ensures the chicken stays tender. Using cooked chicken also helps save time. This casserole pairs well with several sides. Here are some ideas: - A simple green salad - Pita bread or flatbreads - Roasted vegetables - Grilled zucchini or eggplant - Rice or couscous for extra carbs These options will add flavor and make your meal more filling. Enjoy your savory dump-and-bake chicken tzatziki casserole! For the full recipe, check out the provided link. This blog post guides you through making a delicious Dump-and-Bake Chicken Tzatziki Casserole. We covered ingredients, cooking steps, and tips for perfecting your dish. Remember to try ingredient swaps for any dietary needs and use our storage tips for leftovers. With these insights, you can enjoy a tasty meal that nourishes and delights. Happy cooking!](https://grilledflavors.com/wp-content/uploads/2025/06/345c3142-e350-4063-932e-f04f606c1956.webp)
Savory Dump-and-Bake Chicken Tzatziki Casserole
Are you ready to dive into a simple yet delicious recipe? This Savory Dump-and-Bake Chicken Tzatziki Casserole is a game-changer for busy nights. With minimal
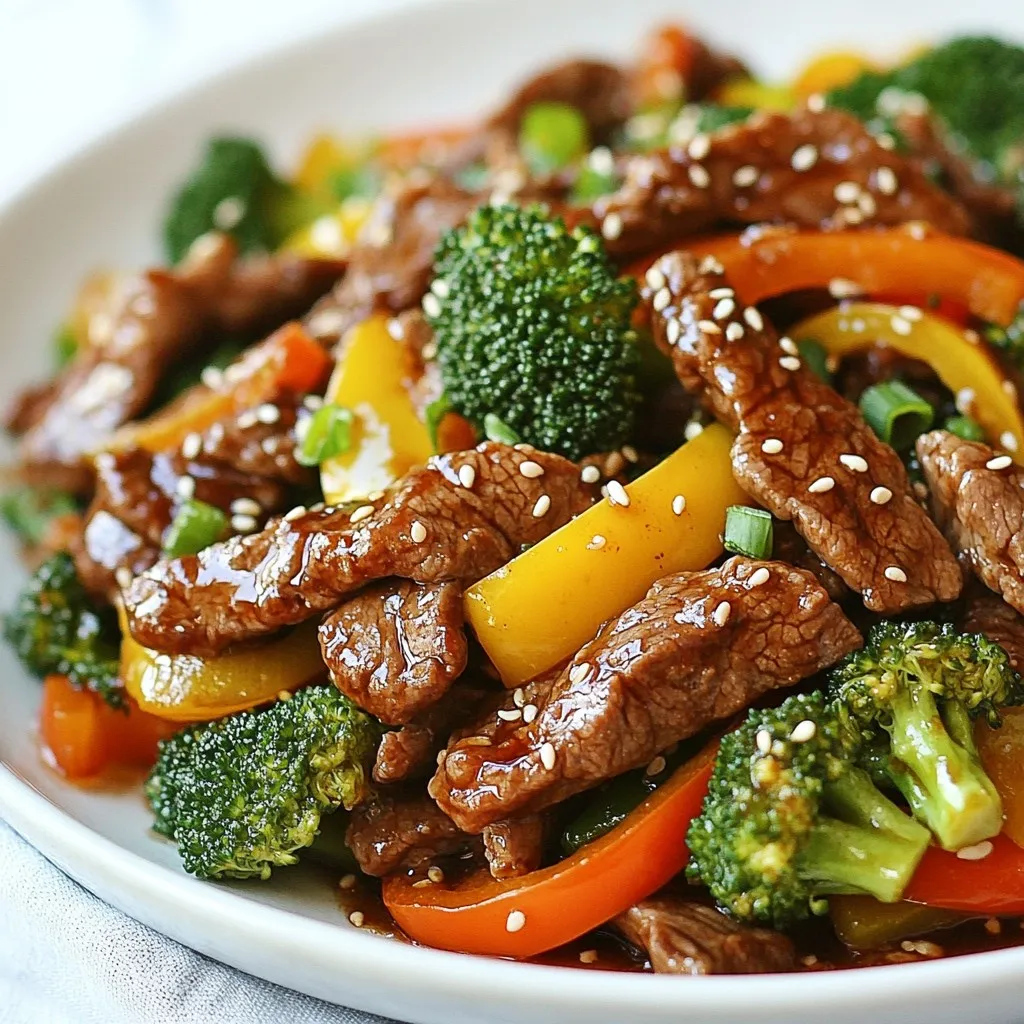
Easy Teriyaki Beef Stir-Fry Flavorful and Fast Meal
Craving a quick and tasty dinner? Try my Easy Teriyaki Beef Stir-Fry! This dish is packed with flavor and takes just minutes to prepare. With
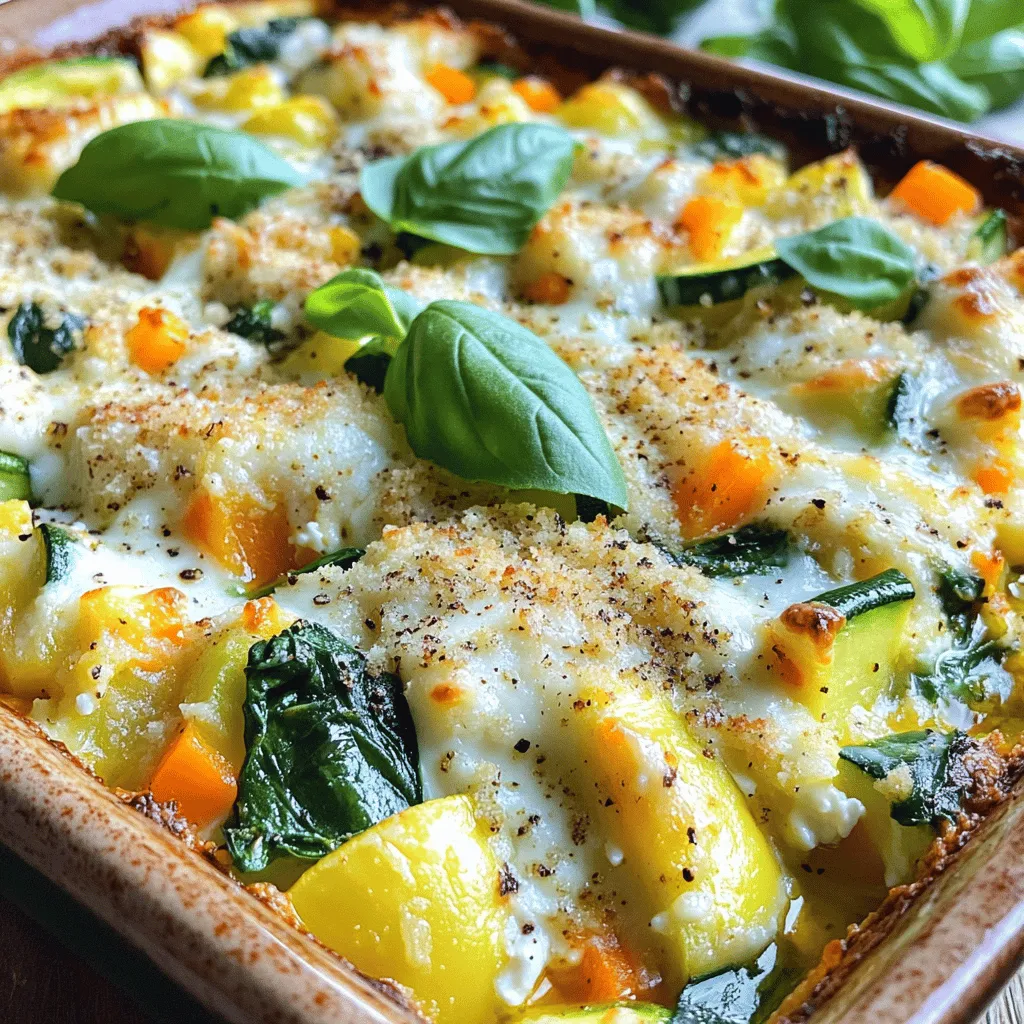
![To make an Easy Low Carb Chicken Casserole, you'll need these key ingredients: - 2 cups cooked chicken, shredded - 1 cup broccoli florets, steamed - 1 cup cauliflower rice - 1 cup shredded cheddar cheese - 1/2 cup cream cheese, softened - 1/2 cup sour cream - 1 teaspoon garlic powder - 1 teaspoon onion powder - Salt and pepper to taste - 1/4 cup green onions, chopped (for garnish) These ingredients work well together to create a tasty and filling dish. I recommend using fresh broccoli for crunch and flavor. The cream cheese and sour cream add creaminess, making each bite enjoyable. Each serving of this casserole has about: - Calories: 350 - Fats: 20g - Proteins: 30g - Carbs: 10g This casserole is low in carbs, perfect for those on a keto or low-carb diet. The chicken provides lean protein, while the broccoli and cauliflower add fiber and vitamins. This meal is not just tasty; it also offers health benefits, making it a smart choice for a weeknight dinner. For the full recipe, check out the link provided. Start by preheating your oven to 350°F (175°C). This helps the casserole cook evenly. In a large bowl, mix the softened cream cheese and sour cream until smooth. It’s best to use a whisk or a fork for this. Next, add 2 cups of shredded chicken, 1 cup of steamed broccoli florets, and 1 cup of cauliflower rice to the bowl. Sprinkle in 1 teaspoon of garlic powder, 1 teaspoon of onion powder, and salt and pepper to your taste. Stir all the ingredients together until everything is well mixed. If you want to save time, you can prep the chicken and veggies in advance. This makes the cooking process faster. Once your mixture is ready, transfer it to a greased 9x13-inch baking dish. Spread it evenly across the dish. Now, sprinkle 1 cup of shredded cheddar cheese on top. Place the dish in the preheated oven. Bake for about 25-30 minutes. Look for the cheese to be melted and bubbly. You can also check the casserole by inserting a fork in the center. If it’s hot all the way through, it’s done. When it’s ready, remove it from the oven and let it cool slightly before serving. Garnish with chopped green onions for a fresh touch. Enjoy your easy low carb chicken casserole! For the full recipe, check out the [Full Recipe]. To cook chicken ahead of time, use a slow cooker. This method keeps the chicken moist and tasty. You can also bake or boil it. Just be sure to shred the chicken once it's cool. This makes it easy to mix into the casserole. For the best flavor and texture, season the chicken well. Use salt, pepper, and herbs like thyme or rosemary. Marinate the chicken for a few hours or overnight for more depth in flavor. When you mix all the ingredients, stir gently. This way, you keep the chicken pieces intact and juicy. This casserole pairs well with a side salad. A fresh green salad with a light dressing complements the dish nicely. You can also serve it with steamed green beans or a side of roasted vegetables. This dish is perfect for family dinners or casual gatherings. You can also serve it on busy weeknights when you need something quick. Just pop it in the oven and enjoy! For the full recipe, check below. {{image_2}} You can change the protein in this casserole. If you want a twist, try turkey. It works well, too. For a plant-based option, use tofu instead of chicken. Tofu absorbs flavors nicely and adds protein. You can also switch up the veggies. Instead of broccoli, try spinach or bell peppers. Both add color and taste. Zucchini is another great choice. It brings moisture and freshness to the dish. For those needing gluten-free options, this casserole fits the bill. Just check your cream cheese and sour cream labels. Most brands are gluten-free. If you want a dairy-free version, use coconut cream in place of cream cheese. For sour cream, try a cashew-based option. If you're following paleo or keto diets, this casserole works well. Just ensure your cheese is low-carb. You can also add more cauliflower rice to keep carbs low. This makes the dish filling and healthy. Thinking about these variations can help you enjoy this easy low carb chicken casserole in new ways. Feel free to explore! For the full recipe, check back to the recipe section. To keep your Easy Low Carb Chicken Casserole fresh, store it in the fridge. Use an airtight container. This helps keep the flavors locked in. It is best to eat leftovers within three days. For longer storage, freeze portions. Divide the casserole into smaller containers. This makes it easy to grab a serving later. When freezing, let the casserole cool completely. Cover it well with plastic wrap, then foil. This prevents freezer burn. You can freeze it for up to three months. Just remember to label the containers with the date. When it’s time to enjoy your casserole again, reheat it in the oven. Preheat the oven to 350°F (175°C). Place the casserole in an oven-safe dish. Cover it with foil to keep it moist. Heat for about 20-25 minutes or until warm. You can also use the microwave. Put a serving in a microwave-safe bowl. Heat for 1-2 minutes, stirring halfway. Check to see if it’s hot all the way through. Before eating, look for these signs: no strange smells, no mold, and a good texture. If it looks or smells off, it’s best to toss it. Enjoy your delicious casserole! For the complete recipe, refer to the [Full Recipe]. How can I make this casserole ahead of time? You can prepare this casserole the night before. Mix all the ingredients and place them in the baking dish. Cover it with plastic wrap and refrigerate. When you're ready to bake, remove the wrap and pop it in the oven. Just add a few extra minutes to the baking time. Can I use frozen vegetables in this recipe? Yes, you can use frozen vegetables. Just thaw them first and drain any excess water. This helps keep the casserole from becoming too watery. Frozen broccoli or cauliflower works well without losing flavor. What can I serve with low carb chicken casserole? You can serve a fresh salad or steamed veggies on the side. A simple green salad with a light dressing adds a nice crunch. You could also pair it with a low carb bread for a fuller meal. How do I know if my casserole is done baking? Your casserole is done when the cheese is melted and bubbly. You can use a fork to check if it’s hot throughout. The edges should be slightly golden. If you see this, it's ready to enjoy! This blog post covered everything you need for an Easy Low Carb Chicken Casserole. We discussed crucial ingredients and quantities that boost flavor. You learned about the nutrition of each ingredient and their health perks. The step-by-step guide helped with preparation and baking for the perfect dish. Tips for cooking, serving ideas, and ingredient swaps keep it fun and flexible. Proper storage methods ensure your leftovers stay tasty. Follow these steps for a delicious meal, any day of the week. Enjoy making this casserole for your next gathering!](https://grilledflavors.com/wp-content/uploads/2025/06/8bbeffce-4dff-4006-b7b1-9f5ad257598c.webp)
Easy Low Carb Chicken Casserole Quick and Tasty Meal
Are you looking for a quick, tasty meal that won’t derail your low-carb goals? This Easy Low Carb Chicken Casserole is your answer! Packed with
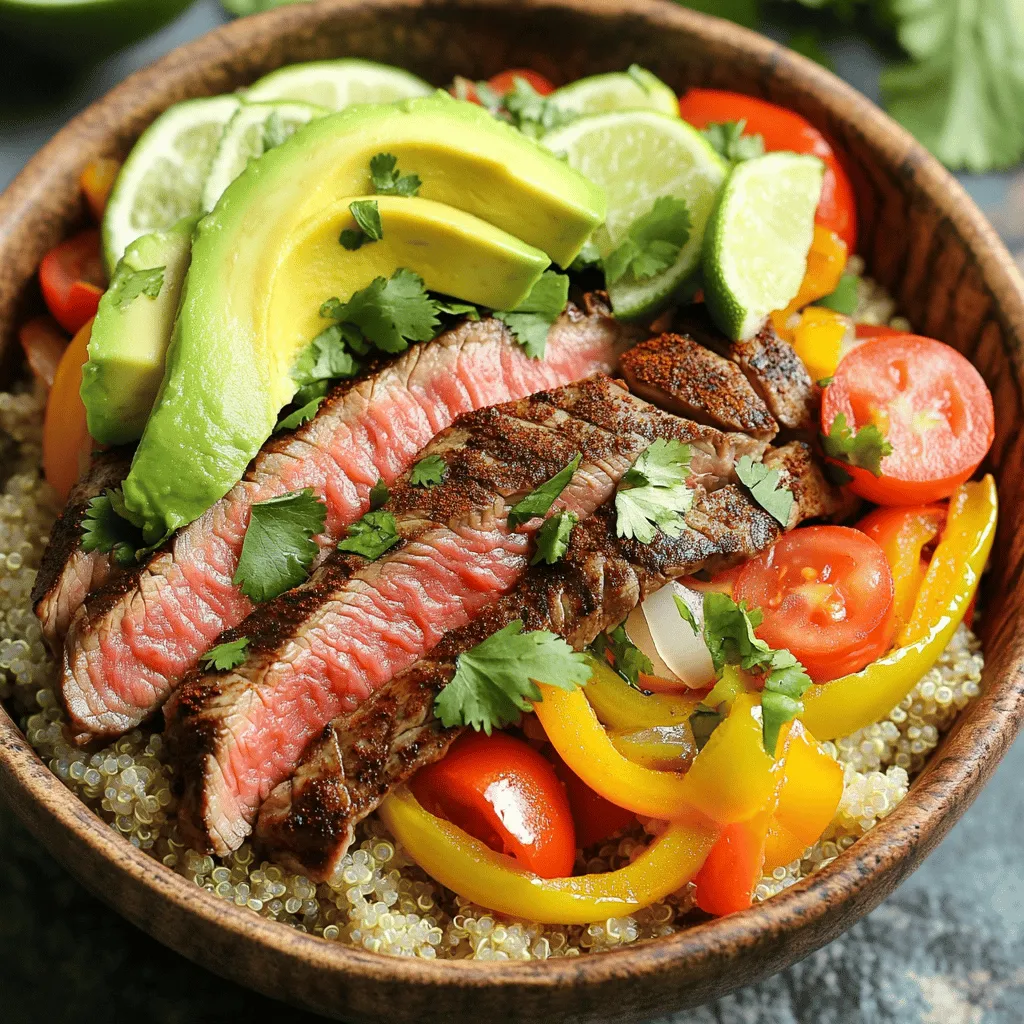
High Protein Steak Fajita Bowl Tasty and Satisfying
Looking for a tasty and healthy meal that’s packed with protein? My High Protein Steak Fajita Bowl combines juicy flank steak with fresh veggies, wholesome