Dinner
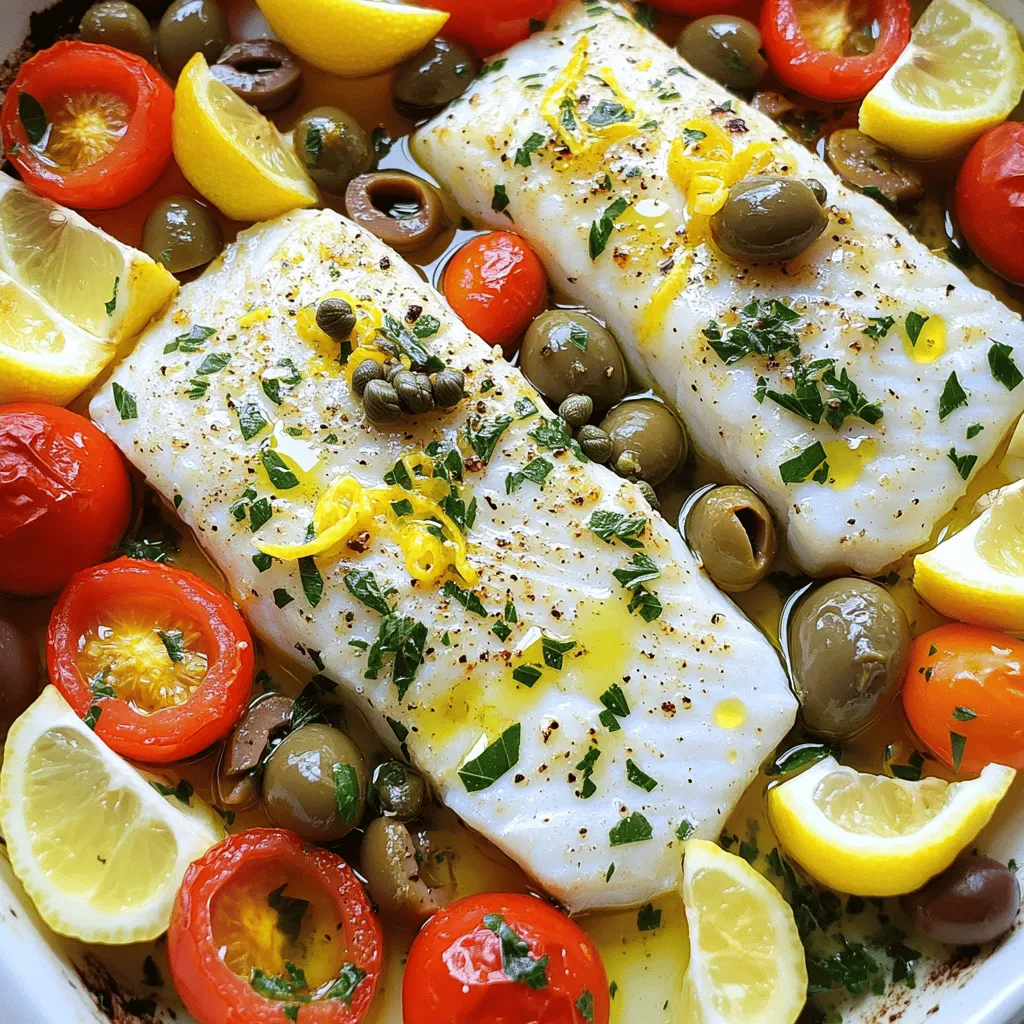
The Best Mediterranean Baked Fish Flavorful and Easy
If you love fresh flavors and healthy meals, you’ll adore this Mediterranean baked fish recipe. It’s packed with vibrant ingredients and simple steps that make
![- 1 pound lean ground turkey or chicken - 1 cup ricotta cheese - 1 cup shredded mozzarella cheese Lean ground turkey or chicken offers a great protein boost for this soup. These meats are easy to cook and mix well with flavors. Using ricotta and mozzarella cheese adds creaminess and richness. They also contribute to the protein content, making this dish satisfying. - 1 medium onion, finely chopped - 3 cloves garlic, minced - 1 carrot, diced - 2 celery stalks, diced Onions and garlic give this soup depth and aroma. They form the base for your flavors. Carrots and celery add sweetness and crunch. These veggies make the soup colorful and healthy. - 1 can (28 oz) crushed tomatoes - 4 cups low-sodium chicken or vegetable broth - 2 teaspoons dried Italian herbs (oregano, basil, thyme) - 1 teaspoon red pepper flakes (optional) - Salt and black pepper to taste Crushed tomatoes provide a rich and tangy base. They mix well with the broth, making it hearty. Italian herbs add a burst of flavor, while red pepper flakes can spice things up. Salt and pepper bring the whole dish together. For the full recipe, check out the details above. 1. Sautéing vegetables: Start by heating a splash of olive oil in a large pot over medium heat. Add the finely chopped onion. Sauté it for about 3-5 minutes until it turns translucent. Next, stir in the minced garlic, diced carrot, and diced celery. Cook these for another 5 minutes until the vegetables soften. 2. Browning the meat: Add the pound of lean ground turkey or chicken to the pot. Use a spoon to break it into smaller pieces. Cook it for about 6-8 minutes, stirring often, until the meat is nicely browned. This step builds the rich flavor base for your soup. 3. Adding tomatoes and broth: Pour in the can of crushed tomatoes and the 4 cups of low-sodium broth. This combination creates the heart of the soup. Stir in 2 teaspoons of dried Italian herbs and red pepper flakes if you want some heat. Bring the mixture to a gentle simmer. 4. Incorporating pasta: Once the soup simmers, add in the cup of whole wheat or gluten-free pasta. If you're using lasagna noodles, break them into smaller pieces beforehand. Cook the pasta for about 8-10 minutes until it's al dente. This gives your soup a hearty texture. 5. Mixing ricotta with seasonings: In a separate bowl, mix 1 cup of ricotta cheese with a pinch of salt and black pepper. This creamy mixture adds richness to your soup. 6. Adding cheese and herbs as toppings: Serve your soup in bowls. Top each bowl with a generous spoonful of the ricotta mixture and a sprinkle of shredded mozzarella. This allows the heat from the soup to melt the cheese beautifully. Finally, garnish with fresh basil or parsley for a pop of color and flavor. For the complete recipe, check out the [Full Recipe]. Enjoy every comforting spoonful of this high-protein lasagna soup! For a high-protein lasagna soup, start with lean ground turkey or chicken. These meats are great sources of protein and keep the dish light. You can also use plant-based proteins like lentils or chickpeas for a veggie twist. For dairy, ricotta and mozzarella cheese add creaminess and protein. Opt for low-fat versions if you want to cut calories but still pack in the protein. To make your soup burst with flavor, adjust the seasoning. Start with salt and pepper. Add dried Italian herbs like oregano and basil. If you like a kick, toss in red pepper flakes. Taste as you go, and don't be afraid to add more spices if needed. Fresh herbs at the end can really elevate the taste. Cooking the pasta to al dente is key. This keeps the pasta firm and prevents it from getting mushy in the soup. Follow the package instructions, checking a minute early. For creaminess, mix ricotta cheese with a pinch of salt and pepper before adding it to the soup. This adds richness and makes each bowl feel like a warm hug. For the full recipe, check out the High Protein Lasagna Soup. Enjoy your cooking adventure! {{image_2}} You can change the protein in your lasagna soup to fit your taste. For a plant-based option, try using lentils or chickpeas. They add protein and fiber, making the soup hearty. If you prefer, swap lean ground turkey or chicken for ground beef or sausage. Each protein brings its unique flavor and texture. Just cook it until it's browned, and you're good to go. If you're gluten-free, you can still enjoy this dish! Use gluten-free pasta shapes like rice noodles or quinoa pasta. They work well in the soup and keep the flavors intact. You can also experiment with different shapes. Try shells, rotini, or even broken lasagna sheets. Each shape gives a fun twist to the classic dish. To boost nutrition, add leafy greens like spinach or kale. They cook down nicely and blend with the soup. You can also toss in other veggies. Zucchini, bell peppers, or mushrooms add more color and nutrients. Just chop them up and throw them in while the soup simmers. This way, you create a delicious and healthy meal. For the full recipe, check out the High Protein Lasagna Soup section. Store your High Protein Lasagna Soup in airtight containers. Let the soup cool down before sealing. It keeps well in the fridge for up to three days. This way, you can enjoy it later without losing flavor. Keep the toppings, like ricotta and mozzarella, separate to maintain their texture. To reheat, use a pot over low heat. Stir often to avoid sticking. You can also use a microwave. Place the soup in a microwave-safe bowl. Heat it in short bursts, stirring in between. This ensures that the soup warms evenly without losing its creamy texture. Freezing is a great option for meal prep. Ladle the soup into freezer-safe bags or containers. Leave some space at the top, as soup expands when frozen. It can last in the freezer for up to three months. When you're ready to eat, thaw it overnight in the fridge before reheating. To make High Protein Lasagna Soup, gather your key ingredients first. You will need: - 1 pound lean ground turkey or chicken - 1 medium onion, finely chopped - 3 cloves garlic, minced - 1 carrot, diced - 2 celery stalks, diced - 1 can (28 oz) crushed tomatoes - 4 cups low-sodium chicken or vegetable broth - 2 teaspoons dried Italian herbs (oregano, basil, thyme) - 1 teaspoon red pepper flakes (optional) - 1 cup whole wheat or gluten-free pasta (like lasagna noodles broken into pieces) - 1 cup ricotta cheese - 1 cup shredded mozzarella cheese - Salt and black pepper to taste - Fresh basil or parsley for garnish Start by heating olive oil in a large pot. Add the chopped onion and sauté until it is soft. Then, stir in garlic, carrot, and celery. Cook for about five minutes. Next, add the ground turkey or chicken. Break it up with a spoon and cook until it is browned. After that, pour in crushed tomatoes and broth. Add the dried herbs and red pepper flakes if you like some heat. Bring it to a gentle simmer. Once it's simmering, add the broken pasta. Cook until the pasta is tender, about eight to ten minutes. In a bowl, mix ricotta cheese with salt and pepper. Serve the soup topped with a big spoon of ricotta and a sprinkle of mozzarella. This will melt nicely into the soup. Don’t forget to add fresh basil or parsley on top for a pretty finish. Yes, you can make this soup vegetarian! To do this, simply swap out the meat for plant-based protein. You can use lentils, mushrooms, or even a meat alternative like tempeh or tofu. Use vegetable broth instead of chicken broth for the liquid. Make sure to keep all the other ingredients the same. The rich flavors from the tomatoes and herbs will still shine through. You can enjoy a hearty and tasty vegetarian version of this lasagna soup! There are many ways to boost the protein in your High Protein Lasagna Soup. Here are some ideas: - Add extra beans, like cannellini or chickpeas. - Include more ricotta cheese or use cottage cheese. - Stir in protein powder if you want a smooth texture. - Use a high-protein pasta made from chickpeas or lentils. These additions will help you reach your protein goals while keeping the soup delicious. Enjoy experimenting with these options to find what you love best! This blog post shared a simple way to make high protein lasagna soup. You learned about key ingredients, like lean meats, rich cheeses, and fresh vegetables. I explained how to build the base, perfect the flavor, and serve it. Remember to try different proteins and pasta for variety. Proper storage and reheating keep your soup tasty for days. Enjoy this hearty meal that’s full of protein and flavor. Make it your own!](https://grilledflavors.com/wp-content/uploads/2025/06/9241de5b-55fc-4f8b-b4e9-308c11773ee8.webp)
High Protein Lasagna Soup Flavorful Comfort Meal
Craving comfort food packed with protein? You’re in the right place! I’m excited to share my High Protein Lasagna Soup recipe, a delicious twist on
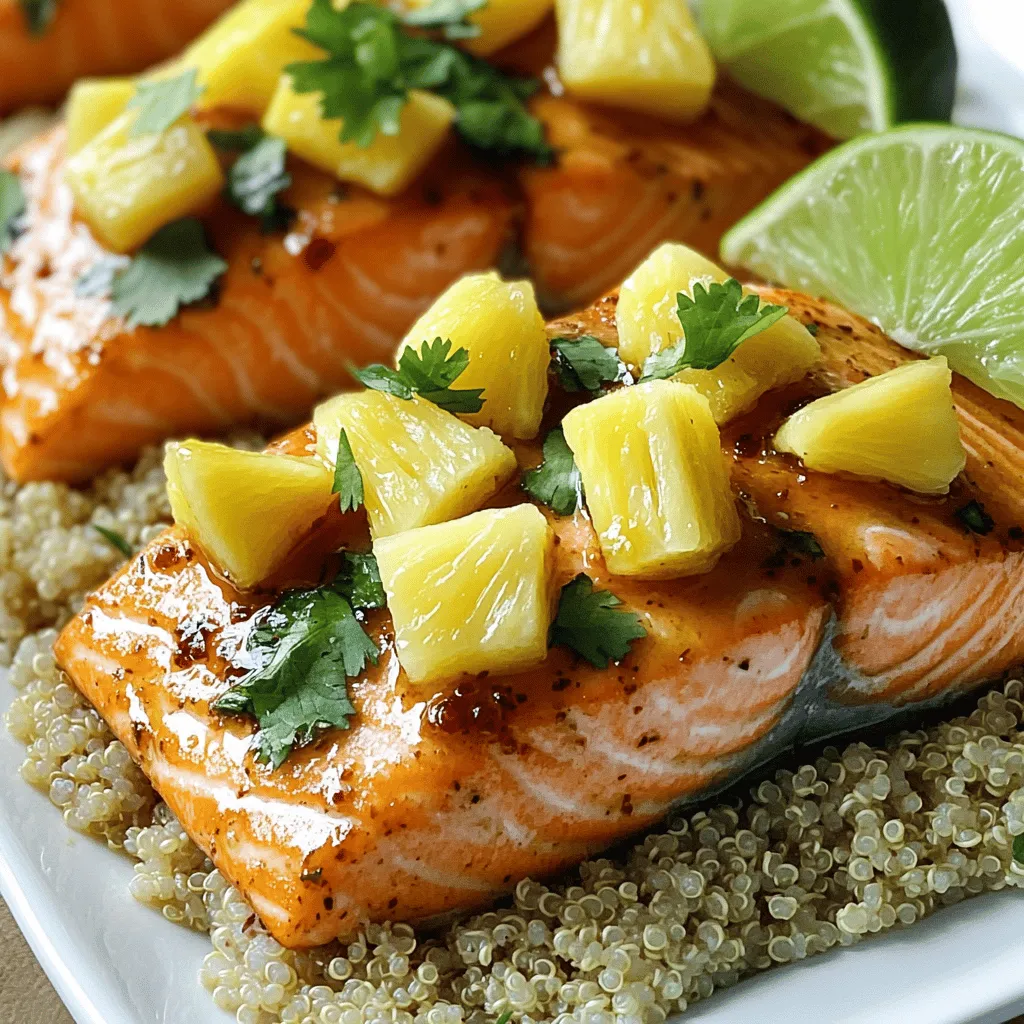
Honey Pineapple Salmon Flavorful and Easy Recipe
Looking for a delicious and easy dinner idea? Honey Pineapple Salmon is your answer! This dish combines sweet and savory flavors that you and your

Greek Chicken and Lemon Rice Flavorful One-Pan Meal
Looking for a quick and tasty meal? Greek Chicken and Lemon Rice is your answer! This one-pan dish brings together juicy chicken thighs, zesty lemon,
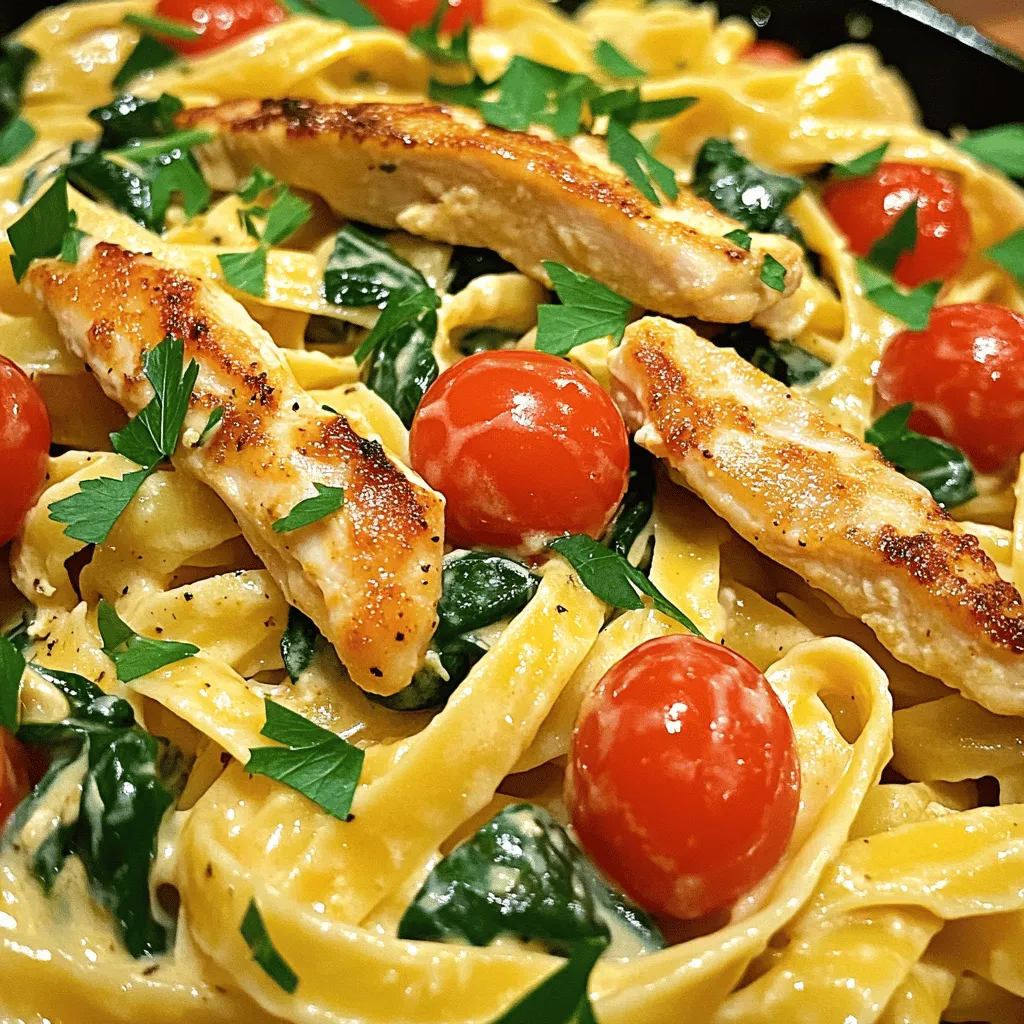
Creamy Cajun Chicken Pasta Delightful and Flavorful Dish
If you’re craving a dish that packs a punch, look no further than Creamy Cajun Chicken Pasta! This delightful meal combines tender chicken, zesty spices,
![- 1 can of tuna in water, drained - 2 tablespoons mayonnaise - 1 tablespoon Dijon mustard - 1/4 cup finely chopped red onion - 1/4 cup diced celery - 1/2 cup shredded cheddar cheese - 4 large flour tortillas - 1 cup fresh spinach leaves - Salt and pepper to taste - Sliced tomatoes for garnish - Olive oil for grilling Tuna is the star here. It gives the wrap protein and flavor. Mayonnaise and Dijon mustard add creaminess and a slight kick. The cheddar cheese melts beautifully, making each bite rich and satisfying. The onions and celery add crunch and freshness. Flour tortillas hold everything together, while spinach adds a healthy touch. Don’t forget the seasoning. A pinch of salt and pepper brings all the flavors to life. - Mixing bowl - Skillet for grilling - Measuring cups and spoons Use a mixing bowl to blend the tuna mix. A skillet works best for grilling the wraps. Measuring cups and spoons help get the right amounts. These tools make the process easy and fun. You'll be ready to enjoy a tasty Tuna Melt Wrap in no time. For a full recipe, check out the details provided above. To start, gather your ingredients. You need one can of drained tuna, two tablespoons of mayonnaise, and one tablespoon of Dijon mustard. Also, chop a quarter cup of red onion and a quarter cup of celery. 1. In a mixing bowl, combine the tuna, mayonnaise, and Dijon mustard. Mix until smooth. 2. Next, fold in the chopped red onion and celery. This adds crunch and flavor. 3. Finally, mix in half a cup of shredded cheddar cheese. Season with salt and pepper to your taste. Now it's time to put it all together. 1. Lay out your large flour tortillas on a clean surface. 2. At the center of each tortilla, add a handful of fresh spinach leaves. This gives a fresh taste. 3. Spoon a generous amount of the tuna mixture over the spinach. Make sure to cover it well. Now we will grill the wraps to get them nice and crispy. 1. Heat a drizzle of olive oil in a skillet over medium heat. 2. Place the wraps seam-side down in the skillet. Grill for about 3 to 4 minutes on each side. Look for a golden brown color and melted cheese. 3. Once done, remove them from the skillet. Let them cool slightly before slicing in half. For the complete recipe, check out the [Full Recipe]. Enjoy your delicious Tuna Melt Wrap! You can adjust the seasoning to fit your taste. If you like it spicy, add some hot sauce. If you prefer a milder flavor, skip it. You can also substitute canned chicken for tuna if you want a change. Try Greek yogurt instead of mayonnaise for a lighter version. Get creative with your mix-ins, like adding chopped pickles or capers for extra zing. To prevent spills, don’t overfill your wrap. Aim for a generous scoop but leave space at the edges. Start rolling from the bottom while tucking in the sides. This way, your filling stays inside. Make sure to roll tightly, but not so tight that it tears the tortilla. You want it snug and secure. Set your skillet to medium heat for the best results. Too hot, and the wrap burns; too low, and it won't crisp up. Grill each wrap for about 3-4 minutes on each side. Check for a golden color and melted cheese. If your wraps are thick, add a minute more to each side. This ensures a warm, gooey center without overcooking the outside. {{image_2}} If you need a gluten-free option, switch to gluten-free tortillas. These come in many flavors and styles. Just make sure they fit your taste and diet. You can also change up the filling. Use canned tuna, but swap out regular mayonnaise for a gluten-free brand. This small change makes a big difference. For a healthier twist, add sliced avocado or extra vegetables. Veggies like bell peppers or cucumbers work well. They add crunch and flavor. You can also use low-fat mayonnaise. It keeps the wrap creamy without too many calories. This way, you can enjoy your meal without feeling guilty. Want to spice things up? Try different cheeses. Instead of cheddar, use mozzarella or pepper jack. Each cheese brings its own taste. You can also experiment with spices. Adding a pinch of paprika or garlic powder gives your wrap a new kick. These little changes can make your tuna melt wrap exciting and fresh. To keep your Tuna Melt Wraps fresh, place them in the fridge. Use an airtight container to stop moisture. This helps keep the wraps tasty for up to three days. If you have extra filling, store it in a separate container. When you want to enjoy your wraps again, heat them up in a skillet. This keeps the outside crispy and the cheese melty. Warm each wrap over medium heat for about three minutes on each side. You can also use a microwave, but this may make them soft. To keep the texture, cover them lightly with a paper towel in the microwave. You can freeze Tuna Melt Wraps for later. Wrap each one in plastic wrap and then in foil. This keeps them fresh for up to three months. When you’re ready to eat, take them out and let them thaw in the fridge overnight. Reheat them in a skillet to bring back that crispy goodness. Yes, you can use canned tuna in oil. It will change the flavor and texture. Tuna in oil is richer and creamier. This can add a nice depth to your wrap. Just be aware that it can also make your filling a bit greasier. If you like a stronger taste, go for it! Tuna Melt Wraps taste great with many sides. You can serve them with a fresh salad. A crunchy side, like carrot sticks or chips, adds a nice touch. For drinks, try iced tea or lemonade. These drinks will balance the flavors well. If you want something warm, soup is a good choice. A light tomato soup pairs nicely. Tuna Melt Wraps last about three days in the fridge. Keep them in an airtight container. This keeps them fresh and safe to eat. If you notice any odd smells or changes in texture, toss them out. Always trust your senses when it comes to food safety. Enjoy your wraps while they are fresh! Tuna Melt Wraps are easy to make and tasty. We've explored the key ingredients, including tuna, cheese, and veggies. I shared simple steps to prepare and grill them. Remember to adjust the filling to your liking and try different flavors. Don’t forget how to store and reheat them for later. Enjoy experimenting with variations that suit your taste. With these tips, you can make the best Tuna Melt Wraps your way. Happy cooking!](https://grilledflavors.com/wp-content/uploads/2025/06/2627e316-a657-44af-acf6-60afb34afb21.webp)
Tuna Melt Wrap Savory and Satisfying Delight
If you love a quick and tasty meal, you’ll adore this Tuna Melt Wrap! Packed with rich flavors and satisfying ingredients, it’s a delight to
![For a great Creamy Basil Tomato Pasta, you need some key items: - 12 oz pasta of your choice (fettuccine or penne works well) - 1 tablespoon olive oil - 3 cloves garlic, minced - 1 can (14 oz) crushed tomatoes - 1 cup heavy cream - 1/2 cup grated Parmesan cheese - 1/2 cup fresh basil leaves, chopped (plus extra for garnish) - Salt and pepper to taste These ingredients come together to create a rich, creamy sauce that clings to your pasta perfectly. I love using fettuccine for its wide shape, but penne also holds the sauce well. You can make this dish your own by adding some optional ingredients: - Red pepper flakes for heat - Extra basil for garnish - More Parmesan cheese for flavor If you like a little spice, red pepper flakes add a nice kick. Extra basil and Parmesan on top make the dish look and taste even better. For the full recipe, check out the [Full Recipe]. Start by boiling water in a large pot. Use enough water to cover the pasta. Add a pinch of salt to the water for flavor. Once the water reaches a rolling boil, add 12 oz of pasta. Cook according to the package instructions. This usually takes about 8 to 12 minutes, depending on the type of pasta. After cooking, reserve 1/2 cup of pasta water before draining. This water is starchy and helps the sauce stick to the pasta. Drain the pasta and set it aside. Next, grab a large skillet and heat 1 tablespoon of olive oil over medium heat. Add 3 cloves of minced garlic. Sauté for about 1 minute until it smells great, but don’t let it burn! Now, pour in 1 can of crushed tomatoes. Bring the mixture to a simmer and let it cook for about 5 minutes. This thickens the sauce a bit. Lower the heat, then add 1 cup of heavy cream. Stir until the sauce is smooth. Add 1/2 cup of grated Parmesan cheese next. Mix until it melts into the sauce. Finally, toss in 1/2 cup of chopped fresh basil. Season with salt and pepper to taste. If you like heat, sprinkle in some red pepper flakes. Now, it’s time to combine everything. Toss the cooked pasta into the skillet with the sauce. Mix well so the pasta is coated. If the sauce is too thick, add a splash of the reserved pasta water. This will help you reach the desired consistency. Stir until the pasta looks creamy and delicious. Serve immediately, and feel free to garnish with extra basil and a sprinkle of Parmesan on top. Enjoy your meal! For the full recipe, refer to the earlier section. To make your creamy basil tomato pasta shine, start with fresh basil. Look for vibrant green leaves without brown spots. Fresh basil has a sweet, peppery taste that makes this dish pop. You can also try using Thai basil for a unique twist. For extra flavor, consider adding: - A pinch of sugar to balance acidity. - Italian seasoning for a herby boost. - Lemon zest for brightness. - A dash of balsamic vinegar for depth. Avoid overcooking your pasta. Cook it just until it’s al dente. This means the pasta should be firm but not hard. Taste it a minute before the package time ends. To keep your sauce from burning, stir it often. Lower the heat if it starts bubbling too much. Add a splash of pasta water if it gets too thick. This keeps it creamy and helps the sauce stick to the pasta nicely. {{image_2}} You can add protein to your Creamy Basil Tomato Pasta easily. If you like chicken, try diced, cooked chicken. It adds flavor and makes the dish more filling. Just cook the chicken in the skillet before adding garlic. Shrimp is another great option. Sauté shrimp until pink, then mix with the sauce. For a vegetarian twist, use tofu or chickpeas. Tofu absorbs flavors well. Cube it and pan-fry until golden. Chickpeas add a nice texture. Just drain and rinse them, then stir into the sauce. Both choices make this pasta dish hearty. Adding veggies boosts the nutrition of your dish. Spinach is perfect for this pasta. It wilts quickly, so add it just before serving. Bell peppers add color and sweetness. Slice them thin and sauté with garlic. Feel free to get creative with seasonal vegetables. Zucchini, cherry tomatoes, or peas work well too. Just chop them up and toss them into the sauce. This adds flavor and makes your meal more vibrant. You can mix and match to suit your taste. For more ideas, check the Full Recipe for details! To store your creamy basil tomato pasta, first let it cool. Place it in an airtight container. This prevents the pasta from drying out. Make sure to store it in the fridge. It will stay fresh for about 3 to 5 days. If you need to keep it longer, consider freezing it. When reheating pasta, keep it moist. You can use a microwave or stovetop. For the microwave, place pasta in a bowl with a splash of water. Cover it loosely, then heat for 1 to 2 minutes. Stir halfway to ensure even heating. On the stovetop, add pasta to a pan with a bit of water or sauce. Heat on low, stirring gently. This way, you keep the creamy texture. Avoid high heat to prevent drying out the sauce. Enjoy your leftovers just like the first time! To make this dish vegan, you can swap out the heavy cream and cheese. Use coconut cream or cashew cream in place of heavy cream. For a cheese substitute, try nutritional yeast or a vegan Parmesan style cheese. These swaps keep the dish creamy and tasty without dairy. Yes, you can freeze this pasta. To do this, cool the dish completely. Place it in an airtight container or freezer bag. It can stay in the freezer for up to three months. When ready to eat, thaw it in the fridge overnight. Reheat it gently on the stove, adding a splash of water to restore creaminess. A light red wine like Pinot Noir works well with the creamy sauce. It won’t overpower the flavors. If you prefer white wine, choose a Sauvignon Blanc. Its crispness matches the freshness of the basil and tomatoes. Enjoy your meal with a glass that complements your dish. For the full recipe, check the recipe section. This post covered how to make Creamy Basil Tomato Pasta from scratch. You learned about key ingredients, cooking steps, and tips. I shared ways to enhance flavor and offered protein and vegetable options for variety. Storing and reheating tips help you enjoy leftovers. Incorporating these ideas will make your pasta dish shine. Get creative with flavors and enjoy every bite. Happy cooking!](https://grilledflavors.com/wp-content/uploads/2025/06/ba1fda5b-dd41-4d82-9b91-863d7a920518.webp)
Creamy Basil Tomato Pasta Flavorful Dinner Delight
If you’re craving a meal that bursts with flavor and comfort, look no further! My Creamy Basil Tomato Pasta is a delightful mix of fresh
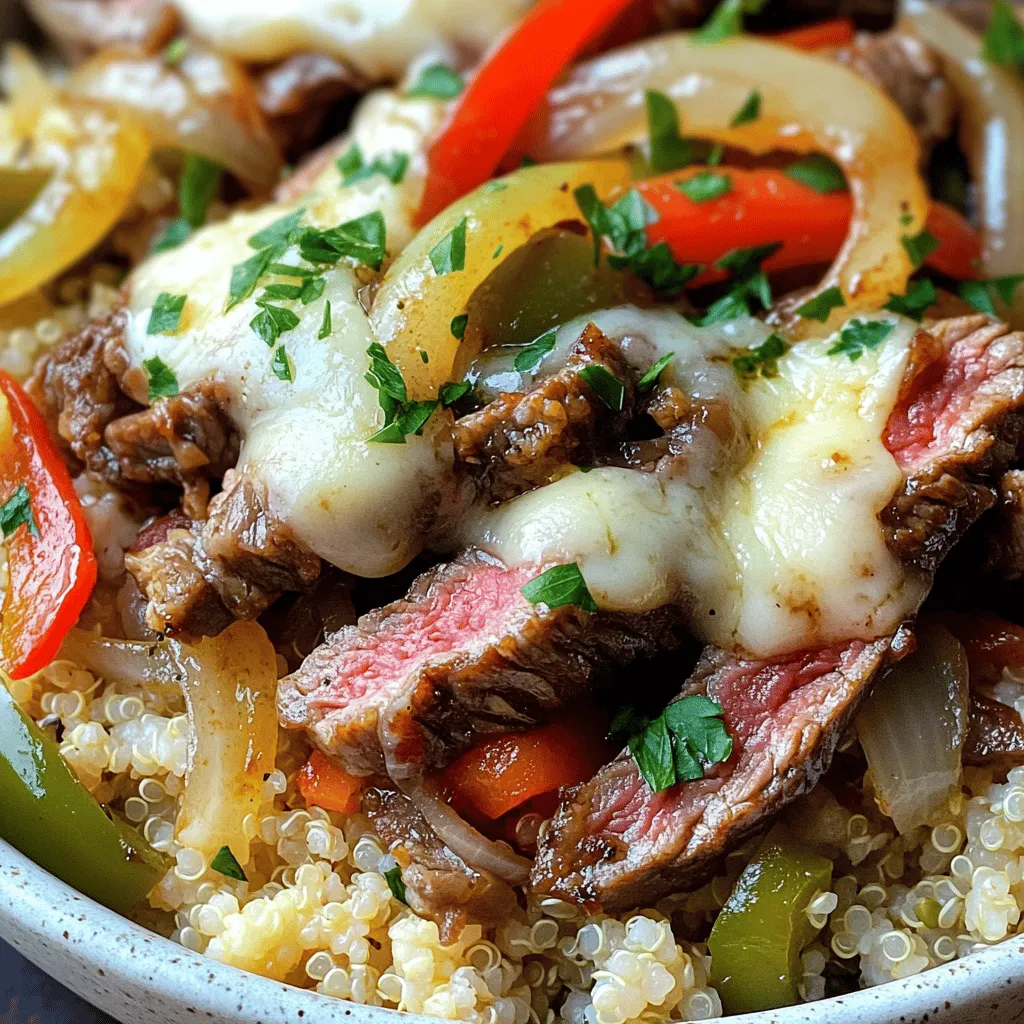
Philly Cheesesteak Bowls Flavorful and Satisfying Meal
If you’re craving a hearty meal that’s both flavorful and satisfying, look no further than Philly Cheesesteak Bowls. Packed with the taste of classic cheesesteaks,
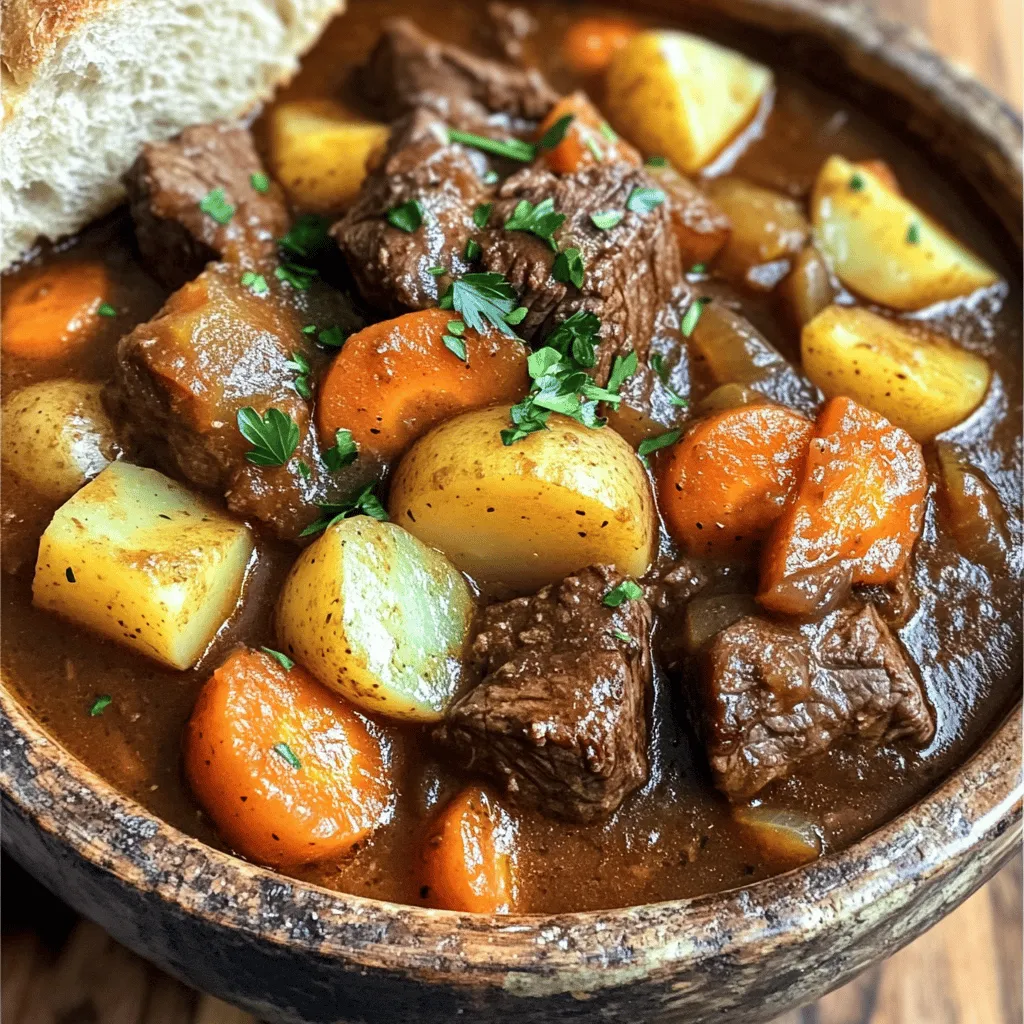
Slow Cooker Savory Beef Stew Delight Recipe Guide
Welcome to my ultimate guide for the Slow Cooker Savory Beef Stew Delight! If you crave a warm, hearty meal without the fuss, you’ve found

Crispy Fried Chicken Crunchy and Flavorful Delight
Are you ready to treat your taste buds? Let’s dive into the world of crispy fried chicken! This dish sings with crunchy goodness and bold