Dinner
![- 2 cups lentils, cooked - 1 large onion, chopped - 2 carrots, diced - 2 celery stalks, diced - 2 cloves garlic, minced - 1 bell pepper, diced (any color) - 1 cup frozen peas - 1 tablespoon tomato paste - 1 tablespoon soy sauce - 2 teaspoons fresh thyme (or 1 teaspoon dried thyme) - 1 teaspoon smoked paprika - Salt and pepper, to taste The main ingredients for Vegetarian Shepherd's Pie focus on healthy, hearty elements. Lentils are the star, offering protein and fiber. They’re easy to cook and absorb flavors well. The mix of vegetables adds color and nutrients. Onions and garlic give a rich taste. Carrots and celery bring sweetness and crunch. Bell peppers and peas add freshness. Seasonings like tomato paste and soy sauce deepen the flavor. Thyme and smoked paprika add warmth and aroma. - 4 large potatoes, peeled and diced - 1/4 cup milk (or plant-based milk) - 2 tablespoons butter (or vegan butter) For the potato mash, choose starchy potatoes like Russets or Yukon Golds. They create a creamy texture when mashed. Boil them until soft, then mix in milk and butter for richness. You can use plant-based milk and vegan butter for a fully vegan dish. This mash acts as a perfect topping, giving a comforting feel. - Fresh parsley Garnishing with fresh parsley adds a pop of color and a fresh taste. It also makes the dish look appealing. A sprinkle right before serving enhances the overall experience. You might even consider other herbs, like chives or thyme, for added flavor. This combination of ingredients makes Vegetarian Shepherd’s Pie a flavorful comfort meal. If you’re curious about how to bring these elements together, check out the full recipe. Start by bringing a large pot of salted water to a boil. This step is key to achieving that perfect potato mash. Once the water boils, add the diced potatoes. Cook them until they are tender, which takes about 15 to 20 minutes. You can check their readiness by piercing them with a fork. If the fork slides in easily, they are done. After cooking, drain the potatoes and return them to the pot for mashing. While your potatoes cook, grab a large skillet. Heat a splash of olive oil over medium heat. Add the chopped onion and minced garlic first. Sauté them for a minute or two, then add the diced carrots, celery, and bell pepper. Stir these vegetables well and let them cook for about 5 to 7 minutes. You want them softened but not mushy. The aroma will fill your kitchen, making it hard to resist! Now for the fun part! Stir in the cooked lentils, tomato paste, soy sauce, thyme, smoked paprika, salt, and pepper. Mix well and let this cook for an additional 5 minutes. This is where all those flavors come together. Finally, add the frozen peas and heat everything through for another 2 minutes. The mixture should be vibrant and aromatic, ready to fill your pie. For the complete recipe, check the [Full Recipe]. To make a creamy potato mash, choose starchy potatoes like Russets or Yukon Golds. These types break down well and give you a smooth texture. When boiling the potatoes, add a pinch of salt to the water. This helps infuse flavor right from the start. After cooking, drain the potatoes and return them to the pot. This step allows excess moisture to evaporate. For seasoning, mix in butter and milk to your mash. Start with a little, then add more to reach your desired creaminess. Don’t forget to taste! Add salt and pepper to make the flavors pop. You can easily boost the flavor of your Vegetarian Shepherd's Pie. Fresh herbs like thyme and parsley add brightness. If you want a kick, try adding a pinch of red pepper flakes or a dash of hot sauce. You can also use smoked paprika for a warm, smoky flavor. Adjust the seasoning to fit your taste. If you like it sweeter, add a splash of balsamic vinegar. If you prefer richer flavors, mix in some sautéed mushrooms. Don’t hesitate to experiment! To achieve a golden crust on top, bake your pie at 400°F (200°C). Keep an eye on it while it cooks. If the top isn’t browning enough, broil it for a few minutes at the end. To avoid a soggy bottom, make sure to drain the lentils well before mixing them with the veggies. You can also let the pie cool for a few minutes before serving. This helps it set and stay intact. Enjoy your flavorful comfort meal! {{image_2}} You can switch lentils for other legumes. Chickpeas or black beans work great. If you want a meat substitute, try plant-based ground meat. These options add texture and protein. Each choice gives a unique taste. Feel free to experiment and find what you like best! Using seasonal veggies can enhance your dish. In winter, add root vegetables like parsnips or turnips. In spring, you can use asparagus or zucchini. Choose your favorite veggies to make it yours. Mixing colors adds visual appeal too. Just chop them up and toss them in with the lentils. If you're gluten-free, use gluten-free soy sauce or tamari. This small change makes a big difference. For vegan options, replace butter with coconut oil and use plant-based milk. You can also skip the butter in the mash for a lighter version. These adjustments keep the flavors rich and satisfying. Explore the full recipe to see how these variations come together! To keep your Vegetarian Shepherd's Pie fresh, store it in the fridge. Place it in an airtight container. This helps to prevent it from drying out or absorbing other smells in your fridge. You can store it like this for about 3 to 4 days. If you want to enjoy it later, freezing is a great option. Freezing portions of Vegetarian Shepherd's Pie is simple. Cut it into individual servings. Wrap each piece in plastic wrap or foil. Then, place them in a freezer-safe bag. This way, you can grab a portion anytime. To reheat, thaw it in the fridge overnight. Then bake it at 350°F (175°C) until heated through. This keeps the flavors fresh and delicious. Vegetarian Shepherd's Pie is perfect for meal prep. You can make a big batch on the weekend. Portion it out for the week ahead. It pairs well with side dishes like steamed broccoli or a fresh salad. These sides add extra nutrients and color to your meal. Enjoy the comfort of this dish all week long! For the full recipe, check out the details above. If you don't have lentils, you can use beans. Black beans or chickpeas work well. You can also try quinoa for a gluten-free option. Each of these adds protein and flavor. Adjust cooking times as needed for each type. Yes, you can prepare this dish in advance. Make the filling and mash the potatoes. Store each in separate containers in the fridge. You can assemble the pie the next day. It saves time and still tastes great. Just reheat before baking. Vegetarian Shepherd's Pie offers many health benefits. It is rich in fiber from lentils and veggies. This dish has fewer calories than traditional versions. You can also control the fat content with your milk choice. Overall, it’s a hearty, wholesome meal. Enjoy it guilt-free while savoring delicious flavors! This blog post covers a tasty Vegetarian Shepherd's Pie recipe. It starts with essential ingredients like lentils, potatoes, and veggies. Then, I share step-by-step instructions for making creamy potato mash and sautéing fresh vegetables. You'll find tips for enhancing flavor and achieving a perfect texture. Plus, I include storage advice and variations for personal preferences. In closing, this dish is comforting and healthy. It meets various dietary needs. Enjoy making it your own and share it with family and friends!](https://grilledflavors.com/wp-content/uploads/2025/06/636337c0-54d5-442e-961d-9f876be253b8.webp)
Vegetarian Shepherd’s Pie Flavorful Comfort Meal
Are you ready for a warm, tasty hug in a bowl? This Vegetarian Shepherd’s Pie packs comfort and flavor into every bite. You can enjoy
![- 8 oz pasta (penne or fusilli) - 1 tablespoon olive oil - 1 medium onion, diced - 2 cloves garlic, minced - 1 bell pepper (any color), chopped - 1 can (15 oz) black beans, drained and rinsed - 1 can (15 oz) diced tomatoes with green chilies - 1 cup corn kernels (fresh or frozen) - 1 tablespoon chili powder - 1 teaspoon cumin - 1 teaspoon smoked paprika - Salt and pepper to taste - 1 cup shredded cheddar cheese - 1 cup sour cream - Fresh cilantro for garnish Enchilada pasta brings a fun twist to dinner. The ingredients are easy to find, and they blend well. You start with 8 ounces of pasta. Penne or fusilli works best to hold the sauce. You will also need some olive oil, a medium onion, garlic, and a bell pepper. Next, we add flavor. Black beans, diced tomatoes, and corn are key to this dish. They bring color and texture. Chili powder, cumin, and smoked paprika add warmth and depth. Salt and pepper finish it off. Finally, for toppings, I suggest shredded cheddar cheese and sour cream. They melt beautifully and add creaminess. Fresh cilantro gives a nice pop of flavor. You can find the Full Recipe to create this delightful dish. Enjoy every bite! - Cook pasta according to package instructions until al dente. - Drain and set aside to cool. Cooking pasta correctly is key. Al dente means the pasta is firm to the bite. This texture will hold up well with the sauce, making each bite enjoyable. Follow the timing on the package, and keep an eye on it. - Heat olive oil in a skillet over medium heat. - Add diced onion and sauté until translucent. - Stir in garlic and bell pepper, cooking for additional time. Start by heating the olive oil in a large skillet. This oil adds flavor and helps cook the veggies. Once the oil is hot, add the diced onion. Cook until it is soft and clear. This should take about three to four minutes. Then, add minced garlic and chopped bell pepper. Cook these for two to three more minutes until the bell pepper is soft. - Incorporate black beans, diced tomatoes, corn, spices, and seasonings. - Simmer to blend flavors before mixing in pasta. Now it’s time to make the dish pop with flavor. Add black beans, diced tomatoes, corn, chili powder, cumin, smoked paprika, salt, and pepper. Stir it all together. Let this mixture simmer for about five minutes. This helps the flavors blend well. After simmering, mix in the cooked pasta. Make sure the pasta is well-coated in the sauce. - Sprinkle shredded cheese, cover to melt. - Stir in sour cream before serving. For the final step, sprinkle shredded cheese over the top. Cover the skillet for two to three minutes. The cheese will melt beautifully. Once melted, remove the skillet from heat. Stir in half of the sour cream. This adds creaminess and richness to the dish. Serve in bowls, topping with a dollop of the remaining sour cream. Enjoy your Enchilada Pasta Delight! For the complete recipe, check [Full Recipe]. Cooking pasta al dente means it is firm to the bite. This gives your dish a nice texture. If your pasta is too soft, it can become mushy in the sauce. To cook pasta al dente, follow these steps: - Check the package for cooking time. - Start timing when the water reaches a boil. - Taste a piece a minute or two before the time is up. This helps keep the pasta from getting too soft when mixed with the sauce. Not everyone likes the same level of heat. You can adjust the spice in your enchilada pasta easily. Here’s how: - Start with less chili powder and add more as needed. - Consider using mild salsa instead of diced tomatoes for less heat. - You can add jalapeños or red pepper flakes for a kick. Feel free to experiment with spices like oregano or cayenne for a twist on the flavor. Cheese can make your enchilada pasta creamy and tasty. Here are some great options: - Cheddar is classic, but try Monterey Jack for a mild flavor. - Cream cheese can add a rich, creamy texture. - For a stronger taste, use Pepper Jack. To get a smooth sauce, mix the cheese in while the heat is low. This will melt it nicely without clumping. Try these tips to make your enchilada pasta even better! For the full recipe, check out Enchilada Pasta Delight. {{image_2}} You can easily make enchilada pasta vegetarian. Use more veggies like zucchini, mushrooms, or spinach. These add great color and taste. For protein, choose plant-based options like tofu or tempeh. You can also swap out the black beans for pinto, kidney, or chickpeas. Each option gives a unique twist to the dish. If you prefer meat, shredded chicken or ground beef work well. For chicken, cook it in the skillet first. Shred it after cooking, then mix it with the other ingredients. For ground beef, brown it in the skillet with the onions. Once it’s cooked, add the other items. Both options will add heartiness to your meal. For gluten-free enchilada pasta, choose gluten-free pasta. Many brands offer choices like rice or quinoa pasta. You can also check labels for gluten-free options. Adjust other ingredients too. Make sure your toppings and canned items are gluten-free. This way, everyone can enjoy the dish. To store leftovers, let the enchilada pasta cool first. Then, place it in an airtight container. I recommend glass or BPA-free plastic containers. These keep the pasta fresh longer. You can store it in the fridge for up to four days. If you want to freeze enchilada pasta, use a freezer-safe container. Make sure to leave some space at the top for expansion. You can freeze it for up to three months. When ready to eat, thaw it in the fridge overnight. Heat it in a skillet on low, stirring often. You can add a splash of water to help it heat evenly. In the fridge, enchilada pasta lasts about four days. In the freezer, it keeps well for three months. Look for signs of spoilage before eating. If you see mold or it smells off, throw it away. Always trust your senses when it comes to food safety. Enchilada pasta is a fun twist on classic enchiladas. It combines pasta with enchilada flavors. You get the taste of enchiladas in a new way. The dish is rich and savory. It includes spices like chili powder and cumin. Plus, it has black beans, corn, and diced tomatoes. Unlike traditional enchiladas, this recipe uses pasta instead of tortillas. This makes it easier and faster to prepare. You get all the delicious flavor without all the rolling! Yes, you can make enchilada pasta ahead of time. Prepare it and let it cool. Then, store it in the fridge. It stays good for about 3-4 days. To reheat, simply warm it on the stove or in the microwave. If you want to serve it later, you can also freeze it. To freeze, use airtight containers. When you're ready to eat, thaw it in the fridge overnight. Then, reheat it on the stove, adding a little water if it seems dry. If you need a substitute for sour cream, try Greek yogurt. It has a similar tangy taste. You can also use cottage cheese blended until smooth. For vegan options, use cashew cream or silken tofu. These alternatives work well in the recipe. They keep the dish creamy and tasty. You can also skip the cream altogether and add more cheese if you like! Enchilada pasta blends together tasty flavors and simple steps. You learned the key ingredients and cooking techniques to create this dish. I shared tips for making it perfect, including spice adjustments and cheese choices. Plus, options for meat lovers and vegetarians help you customize your meal. With the proper storage, this dish can stay fresh and delicious. Use this guide to impress your family with a fun twist on traditional flavors. Enjoy your cooking adventure while creating a dish everyone will love!](https://grilledflavors.com/wp-content/uploads/2025/06/2d69b9bc-1c14-4132-a4da-12c815cbc461.webp)
Enchilada Pasta Flavorful and Easy Dinner Idea
Are you ready to spice up your dinner routine? This Enchilada Pasta recipe combines rich flavors, hearty ingredients, and simple steps to create a dish

Ultimate Cheesy Ground Beef Roll Tasty Dinner Delight
Are you craving a savory, cheesy dinner that’s easy to make? Look no further! The Ultimate Cheesy Ground Beef Roll is your answer. Packed with
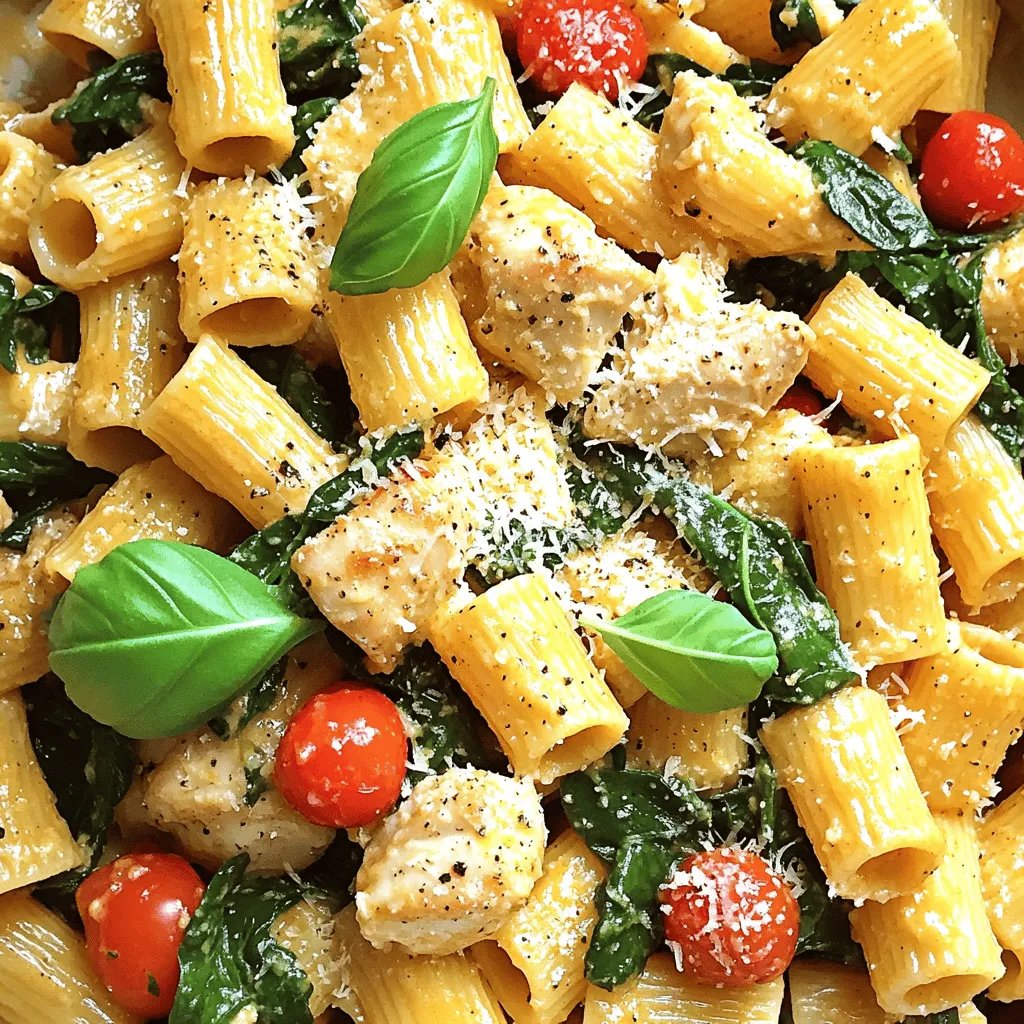
Garlic Butter Chicken with Rigatoni Delightful Meal
Looking for a quick and tasty dinner? Garlic Butter Chicken with Rigatoni is your answer! This dish combines juicy chicken and pasta, all wrapped in
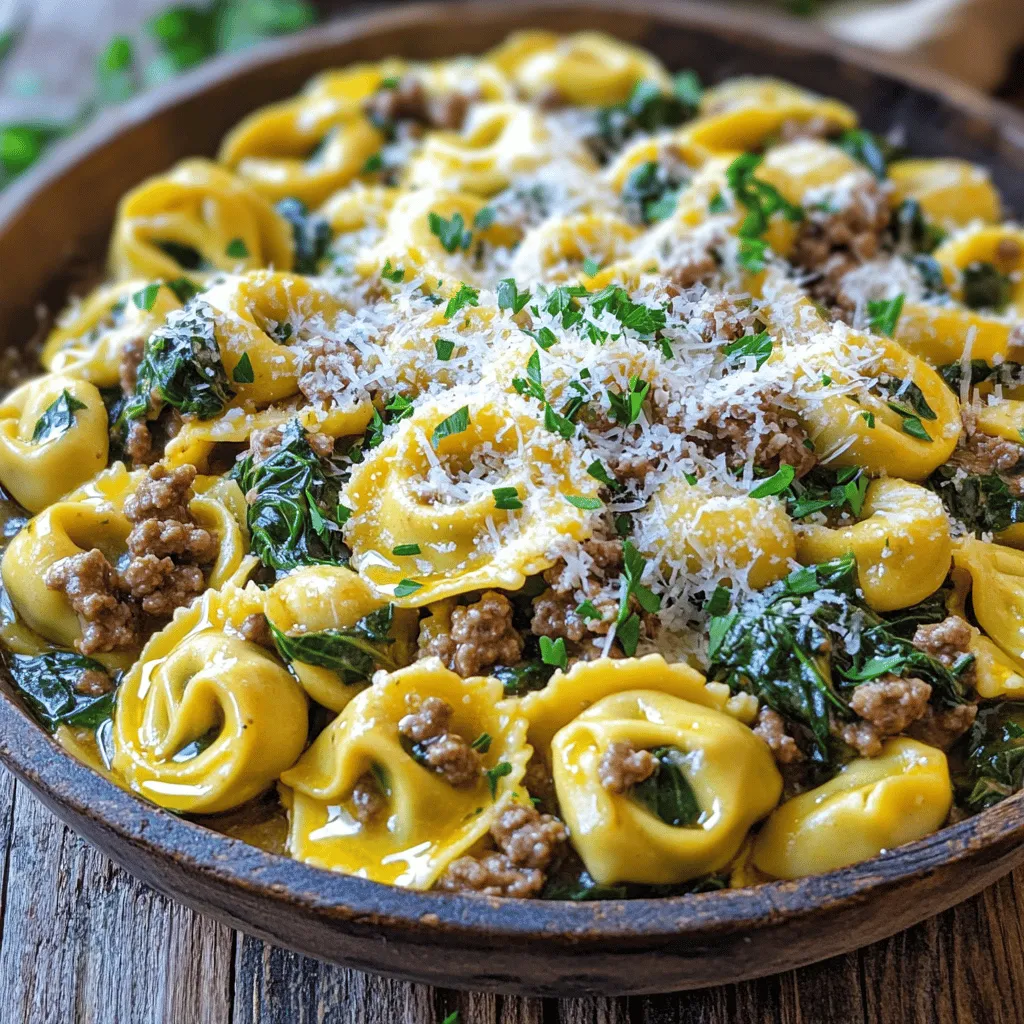
Garlic Butter Beef and Spinach Tortellini Delight
Indulge in the rich flavors of Garlic Butter Beef and Spinach Tortellini Delight! This easy recipe combines tender cheese tortellini with savory ground beef, fresh
![To make delicious ground beef enchiladas, gather these ingredients: - 1 lb ground beef - 1 small onion, finely chopped - 2 cloves garlic, minced - 1 teaspoon cumin - 1 teaspoon chili powder - 1 can (15 oz) black beans, drained and rinsed - 2 cups shredded cheddar cheese - 1 cup enchilada sauce (homemade or store-bought) - 8 small flour tortillas - 2 tablespoons olive oil - Salt and pepper to taste - Fresh cilantro and sour cream for garnish (optional) Using fresh ingredients can enhance flavor and texture in your enchiladas. Fresh garlic and onion provide a vibrant taste. However, canned ingredients save time. Canned black beans are a great option. They are quick and easy to use. If you have time, try using fresh beans. Soaking and cooking them adds a wonderful taste. Homemade enchilada sauce also gives a personal touch. Store-bought sauces work well for quick meals. Choose what fits your schedule. Toppings make enchiladas even better! Here are some tasty options: - Fresh cilantro - Sour cream - Sliced jalapeños - Avocado slices - Chopped green onions - Additional shredded cheese Feel free to mix and match toppings. They add flavor and color to your dish. Enjoy experimenting with your favorites! For the full recipe, check out the details above. Start by preheating your oven to 350°F (175°C). This step is key for even cooking. While the oven heats, gather your ingredients. You will need ground beef, onion, garlic, spices, black beans, cheese, and tortillas. In a large skillet, pour in 2 tablespoons of olive oil. Heat it over medium heat. Add 1 small chopped onion and 2 minced garlic cloves. Sauté for about 3-4 minutes. You want the onion to be soft and clear. Then, raise the heat to medium-high. Add 1 lb of ground beef to the skillet. Cook until it turns brown, breaking it apart with a spatula. This will take about 6-8 minutes. Once browned, mix in 1 teaspoon of cumin, 1 teaspoon of chili powder, salt, and pepper. Finally, stir in 1 can of black beans and cook for 2 more minutes. Next, warm 8 small flour tortillas on low heat. This helps them bend without breaking. On each tortilla, spread about 1/3 cup of the beef mixture. Add a small sprinkle of shredded cheese. Roll each tortilla tightly, placing them seam-side down in a greased 9x13 inch baking dish. Pour 1 cup of enchilada sauce over the rolled tortillas. Make sure they are well covered. Top with the remaining cheese. Now, place the dish in the preheated oven. Bake for 20-25 minutes. You'll know they’re ready when the cheese is bubbling and golden. Let them cool for a few minutes before serving. If you want, add fresh cilantro and sour cream for a tasty touch. For the full recipe, check out the earlier section. Seasoning is key to great enchiladas. Start with salt and pepper. Add cumin and chili powder. These spices give depth and warmth. Adjust the amounts based on your taste. If you like heat, add more chili powder. For a milder flavor, use less. Always taste as you go. This way, you ensure the mix is just right. Balance the flavors to make each bite delightful. Warming tortillas helps them stay soft. If they’re too cold, they might crack. Heat a pan on low and place a tortilla in it. Leave it for about 30 seconds on each side. This makes them more pliable. You can also cover them with a damp cloth while warming. This keeps them moist and easy to roll. Perfect tortillas make your enchiladas better. To get that perfect cheese melt, use shredded cheese. Shredded cheese melts faster and evenly. Mix different types for varied flavor. Cheddar works well, but Monterey Jack is great too. Sprinkle cheese inside and on top of the enchiladas. Cover the dish with foil for the first half of baking. This traps steam and helps the cheese melt quickly. Remove the foil for the last few minutes to brown the cheese. Enjoy that gooey, cheesy goodness! {{image_2}} You can swap ground beef for many other proteins. Chicken makes a light option. Use shredded rotisserie chicken for ease. Ground turkey is another lean choice. For a vegetarian twist, try black beans or lentils. Mix in some veggies like bell peppers or zucchini for flavor. Enchiladas can shine with different sauces. Red enchilada sauce has a rich, deep flavor. It’s made from red chilies, tomatoes, and spices. Green enchilada sauce is zesty and bright. It uses tomatillos and green chilies. Choose the sauce based on your taste preference. Both sauces can bring excitement to your dish. You can easily change some ingredients in this recipe. Instead of black beans, try pinto or refried beans. They add a creamy texture. For cheese, cheddar is classic, but you can use Monterey Jack or even pepper jack for heat. Feel free to mix different cheese types for a unique flavor. These swaps keep your enchiladas fresh and fun! You can find the full recipe here: [Full Recipe]. You can store leftover ground beef enchiladas in the fridge. Place them in an airtight container. They will stay fresh for up to three days. Make sure to cover them well to keep them from drying out. If you want to keep them longer, freeze them instead. To freeze your enchiladas, let them cool completely first. Wrap each enchilada in plastic wrap or foil. Place them in a freezer-safe bag or container. They can last up to three months in the freezer. When you're ready to eat them, just thaw them overnight in the fridge. Reheat enchiladas in the oven for best results. Preheat the oven to 350°F (175°C). Place the enchiladas in a baking dish. Cover them with foil to keep them moist. Heat for about 20 minutes. You can also microwave them. Just place them in a microwave-safe dish and cover. Heat for 1-2 minutes, checking until hot. Enjoy your meal! To add spice, use more chili powder or add diced jalapeños. You can also mix in hot sauce to the beef mixture before rolling. If you want even more heat, try adding crushed red pepper flakes. Each of these options will bring more warmth and flavor to your enchiladas. Yes, you can use corn tortillas. Corn tortillas are traditional and add a nice flavor. They may crack more easily, so warm them first. This makes them flexible and easier to roll. Just follow the same steps to fill and bake them. You can serve enchiladas with rice, beans, or a fresh salad. Guacamole and salsa are great sides too! A cool, creamy dip balances the spice well. Don't forget to add some chips for crunch! Leftovers last about three to four days in the fridge. Store them in an airtight container to keep them fresh. You can also freeze them for up to three months. Just reheat in the oven or microwave when you’re ready to enjoy them again. For the full recipe, check out [Full Recipe]. In this post, we explored key ingredients, step-by-step cooking, and storage tips for ground beef enchiladas. You learned how to pick fresh or canned ingredients and tried tasty toppings. Perfecting flavors and choosing the right sauces enhanced your dish. Remember, you can switch up proteins and sauces to fit your taste. With these tips, your enchiladas will shine. Now, it’s your turn to create and enjoy a delicious meal. Happy cooking!](https://grilledflavors.com/wp-content/uploads/2025/06/dfee5b45-bc62-42e2-bc93-e9ca35115c38.webp)
Ground Beef Enchiladas Savory and Easy Recipe
Are you ready to spice up your dinner routine? Today, I’m sharing a tasty recipe for Ground Beef Enchiladas. This dish is savory, simple, and
![When making Quick Chinese Ground Beef & Cabbage Stir Fry, you need a few key ingredients. Each one brings flavor and texture to the dish. Here’s what you will need: - Ground Beef: Use 1 pound of ground beef for a hearty base. - Green Cabbage and Other Vegetables: Shred 4 cups of green cabbage. You can also add a medium onion, thinly sliced, and 2 cloves of minced garlic. Fresh ginger, grated, adds a nice zing. - Seasonings and Sauces: Use 2 tablespoons of low-sodium soy sauce. A tablespoon of sesame oil gives a rich flavor. If you like, add 1 tablespoon of oyster sauce. Mix 1 teaspoon of cornstarch with 2 tablespoons of water to thicken the sauce. - Garnishes and Serving Suggestions: Top your stir fry with 2 chopped green onions and a sprinkle of sesame seeds. Serve it with cooked rice or noodles for a complete meal. These ingredients blend together to create a tasty and quick meal. For the full recipe, check the details provided earlier. Prepare the Ingredients Gather all your ingredients first. This makes cooking easier and faster. You need: - 1 pound ground beef - 4 cups green cabbage, shredded - 1 medium onion, thinly sliced - 2 cloves garlic, minced - 1 tablespoon fresh ginger, grated - 2 tablespoons soy sauce (low-sodium) - 1 tablespoon sesame oil - 1 tablespoon oyster sauce (optional) - 1 teaspoon cornstarch mixed with 2 tablespoons water - 2 green onions, chopped (for garnish) - Sesame seeds (for garnish) - Salt and pepper to taste - Cooked rice or noodles for serving Cooking the Beef Heat the sesame oil in a large skillet over medium-high heat. Add the sliced onion and cook for 2-3 minutes until it looks clear. Stir in the minced garlic and grated ginger for one more minute. Then, raise the heat to high and add the ground beef. Cook it until brown, stirring every few minutes, about 5-7 minutes. Combining with Cabbage Once the beef is cooked, add the shredded cabbage to the skillet. Mix well and cook for 3-4 minutes. You want the cabbage to soften but still stay crunchy. Adding Sauces Pour in the soy sauce and oyster sauce, if you are using it. Stir everything to coat the beef and cabbage well. Thickening the Mixture Now, add the cornstarch mixed with water to thicken the sauce. Stir well and let it cook for another minute. This will help everything stick together nicely. Season it with salt and pepper to taste. Garnishing the Dish Take the skillet off the heat. Sprinkle chopped green onions and sesame seeds on top. This adds a nice touch to your dish. Serve it over rice or noodles. You can find the full recipe [Full Recipe]. Best Stir-Fry Methods Stir-frying is fast and fun. Use a large skillet or wok. Heat the pan until it’s hot. This helps the food cook evenly. Add oil and let it shimmer before adding meat. This keeps the beef juicy. Move the meat around often for good browning. Tips for Even Cooking Cut all ingredients into similar sizes. This helps them cook at the same rate. Start with the onions and garlic, as they need time to soften. Add the ground beef next. Once it’s browned, add the cabbage. It cooks quickly and should stay slightly crunchy for great texture. Alternatives for Ground Beef You can swap ground beef for other meats. Ground turkey or chicken works well. If you want a plant-based option, use crumbled tofu or tempeh. These options provide similar texture and flavor. Using Different Vegetables Feel free to mix in other veggies. Carrots, bell peppers, or snap peas add color and crunch. Broccoli or mushrooms can also work great. Just make sure to adjust cooking time so all veggies are tender but still crisp. {{image_2}} For a tasty vegetarian version, consider using tofu or tempeh. You can substitute one pound of ground beef with: - 1 pound firm tofu, crumbled - 1 pound tempeh, crumbled Both options offer a great texture and soak up flavors well. Tofu has a mild taste that pairs nicely with the sauces. Tempeh has a richer flavor and adds a nutty crunch. To add more veggies, think about mixing in: - Bell peppers, sliced - Carrots, julienned - Snap peas These veggies not only boost nutrition but also add color to your dish. If you want to spice things up, consider adding some heat. You can include: - 1 teaspoon red pepper flakes - 1-2 teaspoons chili paste These will give your stir fry a nice kick without overpowering the dish. For a different flavor profile, try other sauce combinations. You can swap the soy sauce for: - Tamari for a gluten-free option - Hoisin sauce for sweetness Mixing these sauces will create unique tastes and keep the meal exciting. Don't hesitate to experiment; this dish is versatile! Check the Full Recipe for all the details. After making your quick Chinese ground beef and cabbage stir fry, store any leftovers safely. Use an airtight container to keep the dish fresh. This helps to avoid moisture loss and keeps flavors intact. It’s best to refrigerate leftovers within two hours of cooking. How long does it last in the fridge? Your stir fry will stay good for about 3 to 4 days. Before eating, check for any off smells or changes in color. Always reheat it to a safe temperature before serving again. If you want to store your stir fry for a longer time, freezing is a great option. First, let the stir fry cool completely. Then, pack it in freezer-safe bags or containers. Remove as much air as possible to avoid freezer burns. For meal prep, consider portioning out servings before freezing. This makes it easy to grab what you need. When you're ready to eat it, thaw the stir fry overnight in the fridge. If you’re in a hurry, you can also use the microwave. Reheat it on medium power until it’s hot throughout. Always stir the dish while reheating to ensure even warming. Enjoy your meal without any hassle! How do I make this stir fry gluten-free? To make this stir fry gluten-free, simply replace the soy sauce with a gluten-free version. There are many brands available. You can also use tamari, which is a great alternative. Check all sauces to ensure they are gluten-free. Can I add other ingredients to this recipe? Absolutely! You can add vegetables like bell peppers, carrots, or snap peas. You can also mix in mushrooms for extra flavor. Just make sure to cut them into small pieces for even cooking. How can I make this recipe spicier? To add spice, you can include red pepper flakes or chili paste. Mix these into the stir fry while cooking the beef. You can also serve it with hot sauce on the side for extra heat. For the full recipe, refer to the main section above. This blog post explored ingredients, preparation, and tips for a tasty stir-fry. We covered the key ingredients like ground beef, fresh vegetables, and savory sauces. You learned how to cook them perfectly and add delightful garnishes. We also shared smart cooking tricks and substitutions for varied diets. In conclusion, stir-fry is flexible and fun. You can try new ingredients or flavors. Enjoy personalizing it to suit your taste!](https://grilledflavors.com/wp-content/uploads/2025/06/2fb57fc0-3378-460c-847b-745399aa945a.webp)
Quick Chinese Ground Beef & Cabbage Stir Fry Recipe
Looking for a quick and easy weeknight meal? This Quick Chinese Ground Beef & Cabbage Stir Fry hits the spot! Packed with flavor and ready

Savory Hand Pies Mouthwatering and Easy Recipe
Craving a warm, flaky treat that’s packed with flavor? Savory hand pies are your answer! They are easy to make and perfect for a cozy
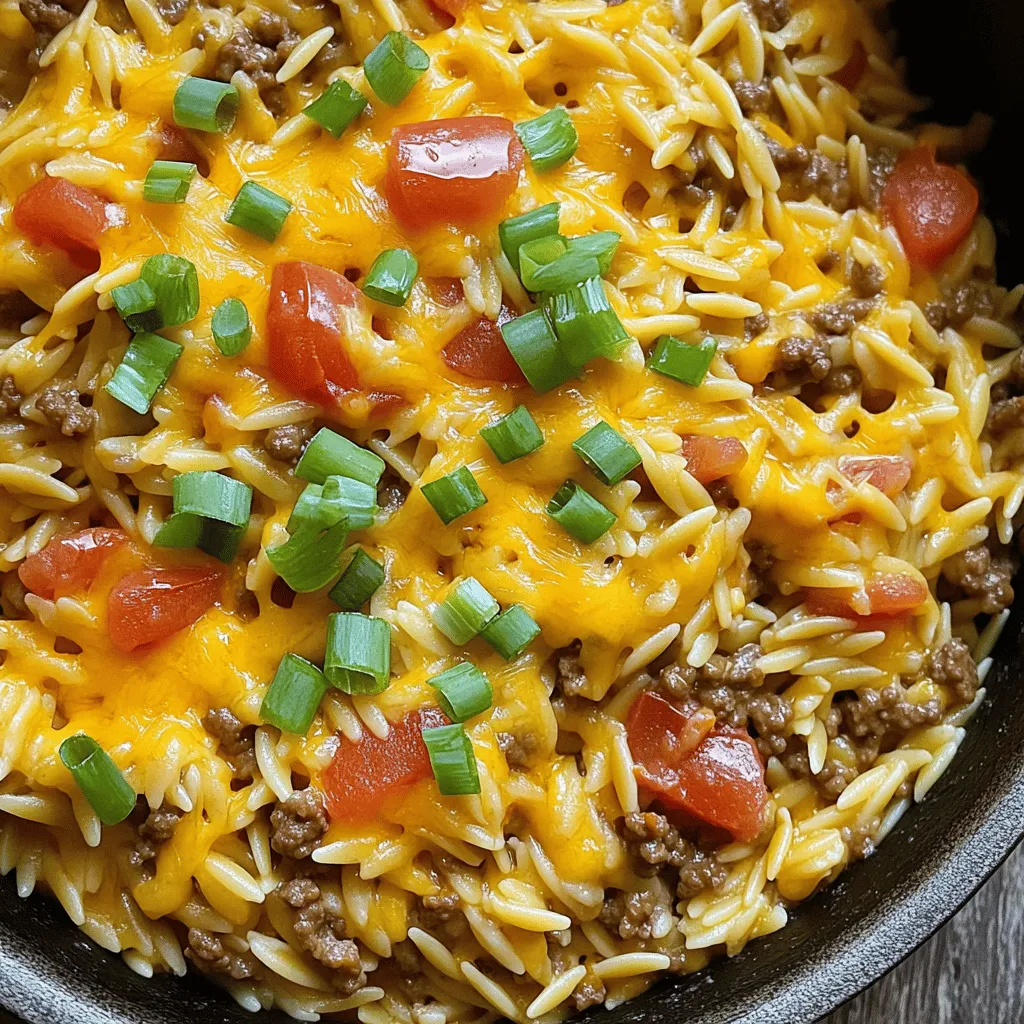
One-Pot Cheeseburger Orzo Skillet Easy Comfort Meal
Looking for an easy comfort meal that packs flavor and satisfaction? The One-Pot Cheeseburger Orzo Skillet is just what you need! This dish combines juicy
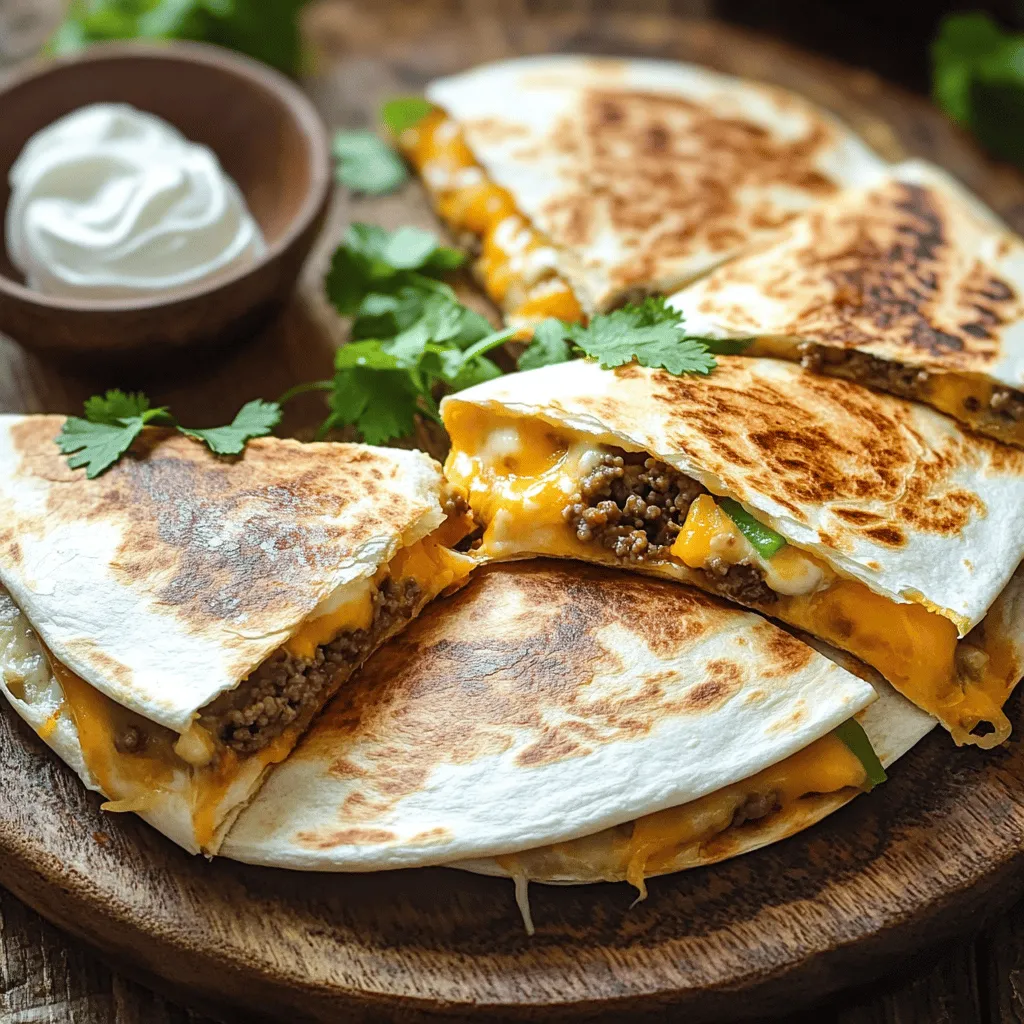
Cheesy Ground Beef Quesadillas Easy and Flavorful Meal
Craving a quick and tasty meal? These Cheesy Ground Beef Quesadillas are your answer! In just a few steps, you can enjoy a dish loaded