Dinner
![To make a tasty Mediterranean Spinach Grilled Cheese, you need: - 2 slices of whole-grain bread - 1 cup fresh spinach, chopped - 1/4 cup feta cheese, crumbled - 1/4 cup sun-dried tomatoes, chopped - 1 tablespoon black olives, chopped - 1 tablespoon olive oil - 1 tablespoon unsalted butter - Salt and pepper to taste You can add more flavor with these options: - 1/2 teaspoon dried oregano - 1/2 teaspoon dried basil These herbs give your sandwich a nice twist. If you want to change things up, consider these swaps: - Use sourdough or rye bread instead of whole-grain. - Swap feta cheese with goat cheese for a creamier taste. - Replace sun-dried tomatoes with roasted red peppers. These changes keep the dish fresh and exciting. For the full recipe, check out the instructions below! First, heat a small skillet on medium. Add olive oil to the pan. Once hot, toss in the chopped spinach. Cook it until it wilts, about 2-3 minutes. This step helps bring out the spinach's flavor. Next, take a bowl and mix the wilted spinach with crumbled feta cheese. Add in the sun-dried tomatoes and chopped olives. You can include optional herbs like oregano or basil for extra taste. Season this mixture with salt and pepper. Now, set it aside while you prepare the sandwich. Grab two slices of whole-grain bread. Spread butter on one side of each slice. This will help create a nice golden crust. Place one slice in a non-stick frying pan, buttered side down. Spoon the spinach and cheese mixture evenly over this slice. Then, take the second slice of bread and place it on top, buttered side up. This layering creates a delicious filling that melts beautifully. Cook the sandwich on medium heat. Keep an eye on it, as you want a golden brown crust. After about 3-4 minutes, gently flip the sandwich. Grill the other side for another 3-4 minutes. The cheese should melt and the bread should be crispy. If you want to check for doneness, gently press down on the sandwich. It should feel firm yet springy. Once done, remove it from the heat. Let it cool a bit before slicing in half. Enjoy your Mediterranean Spinach Grilled Cheese! For the full recipe, refer to the recipe section above. To get that perfect crunch, use whole-grain bread. It holds up well when grilled. Make sure to butter the outside of each slice. This helps create a golden crust. Heat your pan to medium heat. If it's too hot, the bread burns before the cheese melts. Flip the sandwich carefully to keep the filling inside. This grilled cheese is already a treat for vegetarians. To make it vegan, swap feta cheese for a plant-based version. Use vegan butter instead of regular butter. Check your bread, too; some contain dairy. You can also add more veggies like bell peppers or zucchini for extra flavor. To save time, prep the spinach and cheese mix ahead. You can store it in the fridge for up to two days. When ready to grill, just spread it on your bread. If you're short on time, use pre-chopped veggies or buy store-made feta. These small steps make this dish quick and easy. For the full recipe, click here. {{image_2}} You can boost your Mediterranean Spinach Grilled Cheese by adding protein. Grilled chicken or turkey works great. Simply slice cooked chicken or turkey and layer it on the spinach mix. This extra protein turns your dish into a hearty meal. It also adds flavor and texture that you will enjoy. If you prefer plant-based options, try adding grilled tofu or tempeh instead. This keeps it healthy and filling. Cheese is key to a great grilled cheese. While feta gives a nice tang, you can swap it for other cheeses. Try using mozzarella for a melty texture. You could also use goat cheese for a creamy taste. If you want a sharp flavor, aged cheddar is a good choice. Mixing different cheeses can add depth to your dish. This way, you can create a unique flavor that suits your taste. Enhance your grilled cheese with herbs and spices. Adding dried oregano or basil can brighten the taste. Fresh herbs, like parsley or mint, can add freshness. You could even sprinkle some red pepper flakes for a kick. Seasoning your spinach mixture well is key. This will ensure that every bite is full of flavor. Get creative and find your perfect blend. For the full recipe, check it out for more inspiration. To keep your Mediterranean Spinach Grilled Cheese tasty, store leftovers in an airtight container. Place the sandwich in the fridge. It lasts about 2 days. If you want to keep it longer, consider freezing it. For the best taste, reheat the sandwich in a skillet. Heat it on low to medium. This warms the sandwich and keeps it crispy. You can also use an oven. Heat it to 350°F (175°C) for about 10 minutes. You can freeze the sandwich if you want to save it for later. Wrap it tightly in plastic wrap. Then, place it in a freezer bag. It stays good for about a month. When ready to eat, let it thaw overnight in the fridge before reheating. Enjoy every bite from the [Full Recipe]. To make a gluten-free Mediterranean Spinach Grilled Cheese, use gluten-free bread. Many stores sell tasty options. Check the label to ensure it is safe for your needs. You can follow the same steps in the recipe. The flavors will still shine through the gluten-free bread. This sandwich pairs well with a simple salad. A side of mixed greens with olive oil and lemon juice adds brightness. You can also serve it with tomato soup for a classic touch. Cut the sandwich into triangles for easy dipping! Yes! You can use sourdough, rye, or whole-wheat bread. Each type adds a unique flavor and texture. Just keep the cooking time in mind. Thicker bread may need a little longer to toast. Choose what you love most for your sandwich. Absolutely! You can add bell peppers, artichokes, or zucchini. Just chop them small and sauté them with spinach. This way, they mix well with the cheese. More veggies mean more flavor and nutrition. For a creamier taste, add cream cheese or mozzarella. Spread cream cheese on the bread before adding the spinach mix. This gives a lovely rich texture. Mozzarella melts beautifully and adds a gooey touch. You can prep the spinach and cheese mix in advance. Store it in the fridge for up to one day. When you're ready, just assemble and cook the sandwich. This saves time during busy days. You can try goat cheese, provolone, or mozzarella. Each cheese brings its own flavor. Goat cheese adds a tangy touch, while mozzarella gives a mild flavor. Choose what you enjoy to make your grilled cheese special. In this blog post, we covered all you need for a great Mediterranean Spinach Grilled Cheese. We explored the ingredient list, optional flavors, and helpful substitutions to enhance your dish. You learned step-by-step instructions for making the perfect sandwich, along with tips for the ideal crispiness. We also shared fun variations and storage tips to keep leftovers fresh. Remember, you can make this recipe your own with different proteins and cheeses. Enjoy your cooking adventure and savor each bite!](https://grilledflavors.com/wp-content/uploads/2025/06/0eae439f-c49f-4552-b460-4519394630d7.webp)
Mediterranean Spinach Grilled Cheese Delightful Dish
If you’re craving a new twist on a classic, the Mediterranean Spinach Grilled Cheese is here to elevate your sandwich game. With bright flavors and
![- 1 pound ground beef (or ground turkey) - 1/2 cup breadcrumbs - 1/4 cup grated Parmesan cheese - 12 mini slider buns The main ingredients are the heart of your sliders. Ground beef adds rich flavor, while ground turkey offers a leaner option. Breadcrumbs help bind the meatballs, making them tender. Grated Parmesan cheese adds a salty, nutty taste that enhances every bite. Mini slider buns are perfect for holding all the goodness. - Fresh basil leaves for garnish - 2 cups marinara sauce (store-bought or homemade) - 2 cups shredded mozzarella cheese Optional ingredients can elevate your sliders. Fresh basil leaves add a pop of color and fresh flavor. Marinara sauce is essential for moisture and taste. Shredded mozzarella cheese melts beautifully, creating a gooey layer that everyone loves. - 2 cloves garlic, minced - 1 teaspoon Italian seasoning - 1 teaspoon salt - 1/2 teaspoon black pepper Seasoning is key to great taste. Garlic gives a strong aroma and flavor. Italian seasoning brings herbs like oregano and thyme into play. Salt and pepper enhance all the other flavors, ensuring a balanced taste. For the full recipe, you can find more details in the [Full Recipe]. Set your oven to 375°F (190°C). Preheating helps your sliders cook evenly. This step is key to getting a nice, golden finish. If you skip this, the sliders may not bake well. In a large bowl, mix 1 pound of ground beef with breadcrumbs, Parmesan cheese, and a large egg. Add minced garlic, Italian seasoning, salt, and black pepper. Make sure to blend everything well. The mixture should feel moist but not too wet. This balance gives your meatballs a great texture. Heat some olive oil in a large skillet over medium heat. Add the meatballs in batches, cooking them for about 4-5 minutes on each side. You want them browned but not fully cooked. They will finish baking in the oven later. Always check for a nice crust before removing them. In a greased 9x13-inch baking dish, lay down the bottom halves of the slider buns. Place the cooked meatballs over the buns. Pour marinara sauce over the meatballs, then sprinkle with shredded mozzarella cheese. This layering is crucial; it keeps the flavors together and adds richness. Cover the dish with aluminum foil. Bake for 15 minutes, then remove the foil. Bake for an additional 5-10 minutes until the cheese bubbles. The sliders should look golden and inviting. Keep an eye on them to avoid burning. For the full recipe, check the instructions above. To roll meatballs uniformly, use a small ice cream scoop. This helps keep each meatball the same size. Make sure to wet your hands with water before rolling. This step stops the meat from sticking. Place the meatballs on a tray before cooking. This allows you to cook them all at once. To ensure they cook evenly, cook the meatballs in batches. Avoid crowding the pan. Each meatball needs space to brown. Brown them for about 4-5 minutes on each side. They do not have to be fully cooked yet. For great flavor, mix spices into the meat mixture. I love adding garlic, Italian seasoning, and a pinch of red pepper flakes. You can also mix in chopped herbs like parsley or oregano. These will enhance the taste. Pair marinara sauce with cheese for a perfect match. I suggest using shredded mozzarella for that gooey texture. A sprinkle of grated Parmesan on top adds a nice touch. You can also try using ricotta for a creamy layer. For the best sides to pair with sliders, consider a fresh salad. A simple green salad with vinaigrette works well. You can also serve crispy fries or sweet potato wedges. They add crunch and balance the meal. To present the sliders, arrange them neatly on a platter. Garnish with fresh basil leaves for a colorful touch. You can also serve with small bowls of extra marinara for dipping. This makes it fun and interactive for guests. {{image_2}} You can switch up the meat in your sliders. Using ground turkey or chicken makes a lighter meal. Both options keep the flavor but reduce fat. If you want a veggie version, try plant-based meats. Brands like Beyond Meat or Impossible Burger work great. They mimic the taste and texture of beef. You can still add all your favorite spices and sauces. Cheese adds great flavor to your sliders. Mozzarella is classic, but you can try other types too. Provolone or cheddar can bring a new twist. For a fun kick, use flavored cheeses like pepper jack. It adds a spicy touch that many enjoy. Mix and match to find your favorite cheese combo. While marinara is a favorite, other sauces can shine here. Try barbecue sauce for a sweet and smoky flavor. Or use pesto for a fresh, herbal taste. You can also add unique toppings. Sautéed onions or jalapeños can spice things up. Each sauce and topping brings a new layer to your dish. Explore different flavors to keep it interesting! To keep your pull-apart meatball sliders fresh, store leftovers in the fridge. First, let the sliders cool to room temperature. Then, place them in an airtight container. You can also wrap them tightly in plastic wrap. This keeps the moisture in and the air out. I recommend using glass or plastic containers with lids. They are easy to stack and won't absorb odors. If you want to keep sliders longer, freezing works well. Wrap each slider in plastic wrap. Then, place them in a freezer-safe bag or container. Be sure to remove as much air as possible. This helps prevent freezer burn. When you're ready to eat, thaw them overnight in the fridge. To reheat, you can use the oven or microwave. If using the oven, preheat it to 350°F. Heat for about 15-20 minutes until warm. In the fridge, these sliders last about 3 to 4 days. If you freeze them, they can last up to 3 months. Always check for signs of spoilage. If you see mold or if they smell off, it's best to toss them. Keeping an eye on storage helps you enjoy these tasty treats longer. For the full recipe, check the earlier sections. Making Pull-Apart Meatball Sliders takes about 45 minutes total. You will spend 20 minutes on prep and 25 minutes cooking. The prep includes mixing and rolling the meatballs. Cooking is done on the stove and in the oven. Yes, you can use store-bought meatballs for convenience. They save time and effort. However, homemade meatballs taste fresher and allow you to control flavors. If you prefer ease, go for store-bought. If you want more flavor, make your own. These sliders pair well with tasty sides. Consider serving them with: - A crisp salad - Potato chips - Sweet potato fries - Garlic bread For drinks, try soda, iced tea, or a light beer. These options balance the rich flavors of the sliders. To make healthier sliders, consider these swaps: - Use ground turkey or chicken instead of beef. - Choose whole grain slider buns. - Add more veggies, like spinach or peppers, to the meat mixture. - Use low-fat cheese or skip it altogether. These changes reduce calories while keeping flavor. Yes, you can prepare these sliders in advance. Make the meatballs and assemble the sliders. Then, cover and refrigerate them. Bake them right before serving. This saves time and keeps them fresh. To reheat, place the sliders in the oven. Set the temperature to 350°F (175°C). Cover them with foil to keep moisture. Heat for about 10-15 minutes. This method keeps the sliders warm and soft without drying them out. For the full recipe, check out the detailed instructions above. Enjoy your cooking! These Pull-Apart Meatball Sliders are simple to make and full of flavor. You learned about key ingredients like ground beef and spices, along with tips for the perfect cook. We covered options for variations and storage methods to keep them fresh. Whether serving at a party or for a family meal, these sliders please everyone. Enjoy trying new flavors and presentations. Happy cooking!](https://grilledflavors.com/wp-content/uploads/2025/06/701c1f83-59f9-4da4-a3fe-21e637b8c65b.webp)
Pull-Apart Meatball Sliders Simple and Tasty Treat
If you’re craving a fun and delicious meal, look no further than Pull-Apart Meatball Sliders! These tasty treats are easy to make and will impress
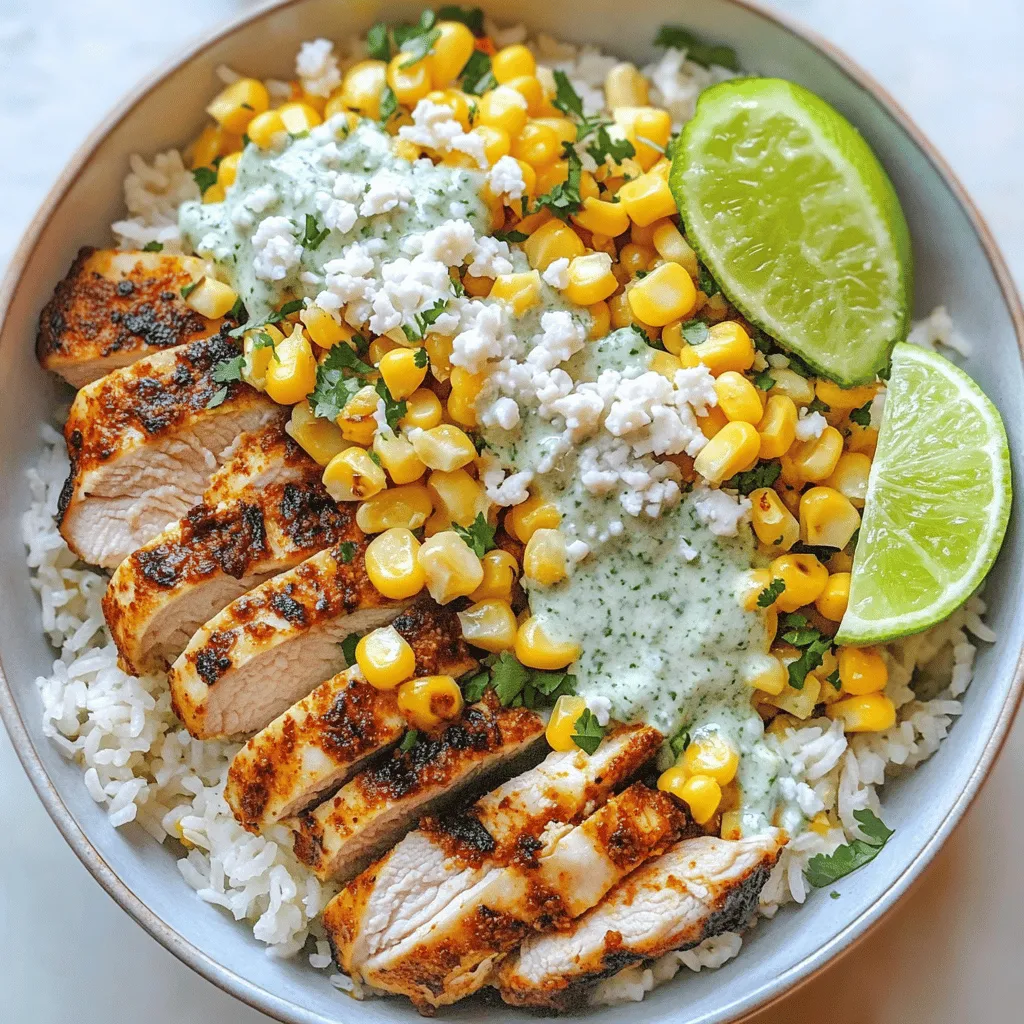
Mexican Street Corn Chicken Rice Bowl Flavor Boost
Are you ready to elevate your meal game? The Mexican Street Corn Chicken Rice Bowl is a delightful mix of flavors that will excite your
![- 1 lb ground beef - 2 tablespoons soy sauce - 1 tablespoon sesame oil - 2 tablespoons brown sugar - 3 cloves garlic, minced - 1-inch piece of ginger, grated - 1 teaspoon red pepper flakes (adjust to taste) - 8 small corn tortillas - 1 cup shredded purple cabbage - 1 cucumber, thinly sliced - 1 avocado, sliced - 2 green onions, chopped - Fresh cilantro for garnish - Lime wedges for serving When making Korean beef tacos, the right ingredients matter. The ground beef acts as the base. It brings rich flavor and a hearty texture. Soy sauce adds depth, while sesame oil gives a nice nutty taste. Brown sugar balances the saltiness and adds a hint of sweetness. For the additional ingredients, garlic and ginger boost the flavor. They give a warm, aromatic kick. Red pepper flakes add heat, but you can adjust this to your liking. The corn tortillas are soft and perfect for wrapping. They hold all the fillings without tearing. Now for toppings, shredded purple cabbage adds crunch and color. The cool cucumber slices enhance freshness. Avocado provides creaminess, while green onions and cilantro add brightness. Lime wedges give a zesty finish. Each ingredient plays a role in making these tacos delicious. For the complete recipe, you can check the Full Recipe. To start, gather your ingredients. In a medium bowl, you will mix the ground beef with soy sauce, sesame oil, brown sugar, minced garlic, grated ginger, and red pepper flakes. This blend will create a tasty flavor base. Make sure to combine everything well, so each bite is full of flavor. Next, heat a large skillet over medium-high heat. Once hot, add the seasoned ground beef mixture to the skillet. Cook the beef until it turns brown, which takes about 5-7 minutes. Use a spatula to break it apart as it cooks. You want it to be fully cooked and browned for the best taste. While the beef cooks, warm your corn tortillas. You can do this in another skillet or in the microwave. Once they are pliable, it’s time to assemble. Take a warm tortilla and add a good scoop of the Korean beef mixture. Then, add the toppings: a handful of shredded purple cabbage, slices of cucumber, and avocado. Finish with green onions and fresh cilantro. Serve with lime wedges on the side for a fresh kick. For the full recipe, check the link provided. For Korean beef tacos, I recommend using lean ground beef. It has less fat, which means less grease. This keeps your tacos from becoming soggy. Plus, lean beef cooks faster and tastes great. If you prefer, you can use ground turkey or chicken as a healthier option. When you build your tacos, layer your toppings. Start with beef, then add cabbage, cucumber, and avocado. This way, each bite bursts with flavor. Don't be shy with the toppings; they add texture and freshness. Try to balance flavors like sweet, salty, and crunchy for the best experience. Want more kick? Experiment with hot sauces or salsas. A drizzle of spicy sauce can elevate your tacos. You might also try kimchi for a tangy twist. Remember, cooking is about creativity. Don't hesitate to mix flavors that excite your taste buds. For the full recipe, check out the [Full Recipe]. {{image_2}} To change the flavor of your Korean beef tacos, try different marinades. You can use a mix of soy sauce, honey, and sesame oil for a sweet touch. A spicy marinade with gochujang adds heat. For a tangy twist, mix soy sauce with rice vinegar and garlic. Each marinade brings a unique taste that makes your tacos special. Taco toppings can transform your meal. Adding pickled vegetables gives a nice crunch and tang. Try pickled radishes or carrots for color and flavor. Spicy mayo is another fun option. Just mix mayo with sriracha for a creamy kick. Don't forget to use fresh herbs like cilantro for a burst of freshness. If you want to switch things up, try other proteins. Ground chicken or pork works well in these tacos. They soak up the marinade nicely. For a plant-based option, tofu is great too. Just press and cube the tofu, then marinate and cook. Each protein brings its own flavor and texture to your tacos. For the full recipe, check out the [Full Recipe]. You can store the leftover beef mixture in an airtight container. Keep it in the fridge for up to three days. Place any unused toppings, like cabbage and cucumber, in separate containers. This keeps them fresh and crunchy. If you want to save the tortillas, store them in a plastic bag. This helps prevent them from drying out. To freeze the beef, let it cool first. Then, place it in a freezer-safe bag. Try to remove as much air as possible. This helps prevent freezer burn. You can also freeze tortillas. Stack them with parchment paper between each one. This makes it easy to take out just what you need later. When you’re ready to eat, thaw the beef overnight in the fridge. You can reheat it in a skillet over medium heat. Stir it often until it's hot. For tortillas, warm them in a dry skillet for a few seconds on each side. This helps them stay soft and tasty. Enjoy your meal just like it was fresh! For the full recipe, check out the steps above. You can pair Korean beef tacos with many tasty sides. Here are some ideas: - Kimchi: This fermented side adds spice and crunch. - Rice: Serve white or brown rice for a filling meal. - Asian Slaw: A crunchy slaw with cabbage and carrots adds freshness. - Pickled Veggies: Quick-pickled cucumbers or radishes enhance flavor. - Corn Salad: A zesty corn salad brings sweetness to the plate. These sides balance the flavors of the tacos and add variety to your meal. Yes, you can prepare Korean beef tacos in advance. Here are some tips: - Beef Mixture: Cook the beef and store it in the fridge for up to three days. - Tortillas: Warm them just before serving to keep them soft. - Toppings: Slice toppings like avocado and cucumber right before serving to keep them fresh. - Meal Prep: You can assemble the tacos and wrap them tightly in foil. Just warm them up before serving. These steps save you time and make dinner easy. Corn tortillas are the best choice for Korean beef tacos. Here’s why: - Flavor: Corn tortillas add a subtle, sweet taste that pairs well with beef. - Texture: They stay soft and pliable when warmed, making them easy to fold. - Traditional: Corn tortillas are common in many taco recipes. Flour tortillas can also work, but they may not offer the same flavor balance. To find Korean beef tacos, check out these options: - Food Trucks: Many food trucks serve unique taco flavors, including Korean beef. - Korean Restaurants: Some places offer fusion dishes that include these tacos. - Local Markets: Look for pop-up stands at farmers' markets or festivals. - Online Reviews: Use apps like Yelp or Google Maps to find nearby spots. Exploring local eateries can lead you to some hidden gems! You can try making them at home with the full recipe too. Korean beef tacos combine rich flavors and simple steps. You mix beef with soy sauce, garlic, and ginger for a savory blend. Cooking is quick, and assembling is fun. Add fresh toppings like avocado and cabbage for crunch. Variations allow you to swap proteins and toppings, making each meal unique. Whether you store leftovers or enjoy them fresh, this dish is a winner. Try new flavors and share your journey! Your next meal adventure awaits with Korean beef tacos.](https://grilledflavors.com/wp-content/uploads/2025/06/05753a56-f8c9-487f-a53e-45340955c47e.webp)
Korean Beef Tacos Flavorful and Simple Delight
If you’re looking for a fun twist on tacos, I’ve got just the recipe for you! Korean Beef Tacos combine rich, savory flavors with fresh
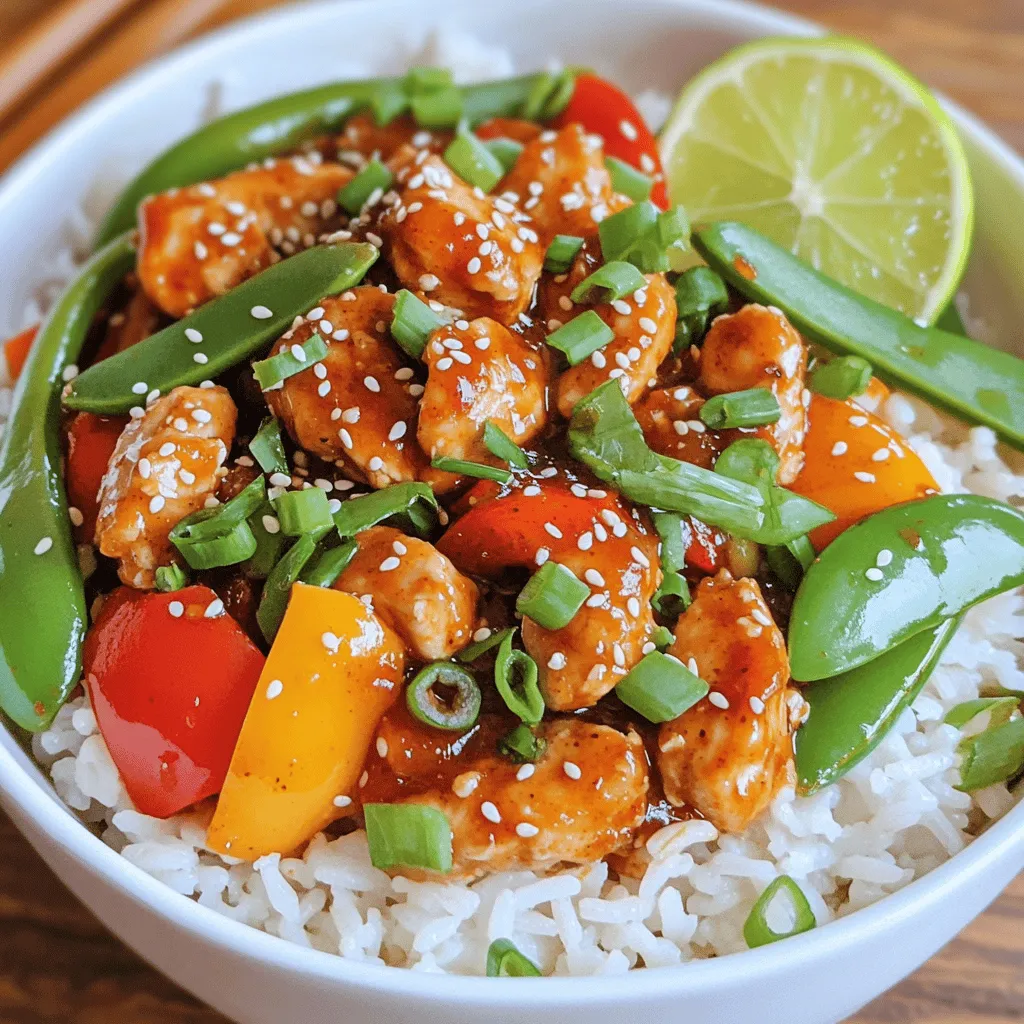
Sweet Chili Chicken Bowl Flavorful and Easy Meal Prep
If you’re looking for a tasty, easy meal prep idea, the Sweet Chili Chicken Bowl is it! This dish is packed with flavor and simple
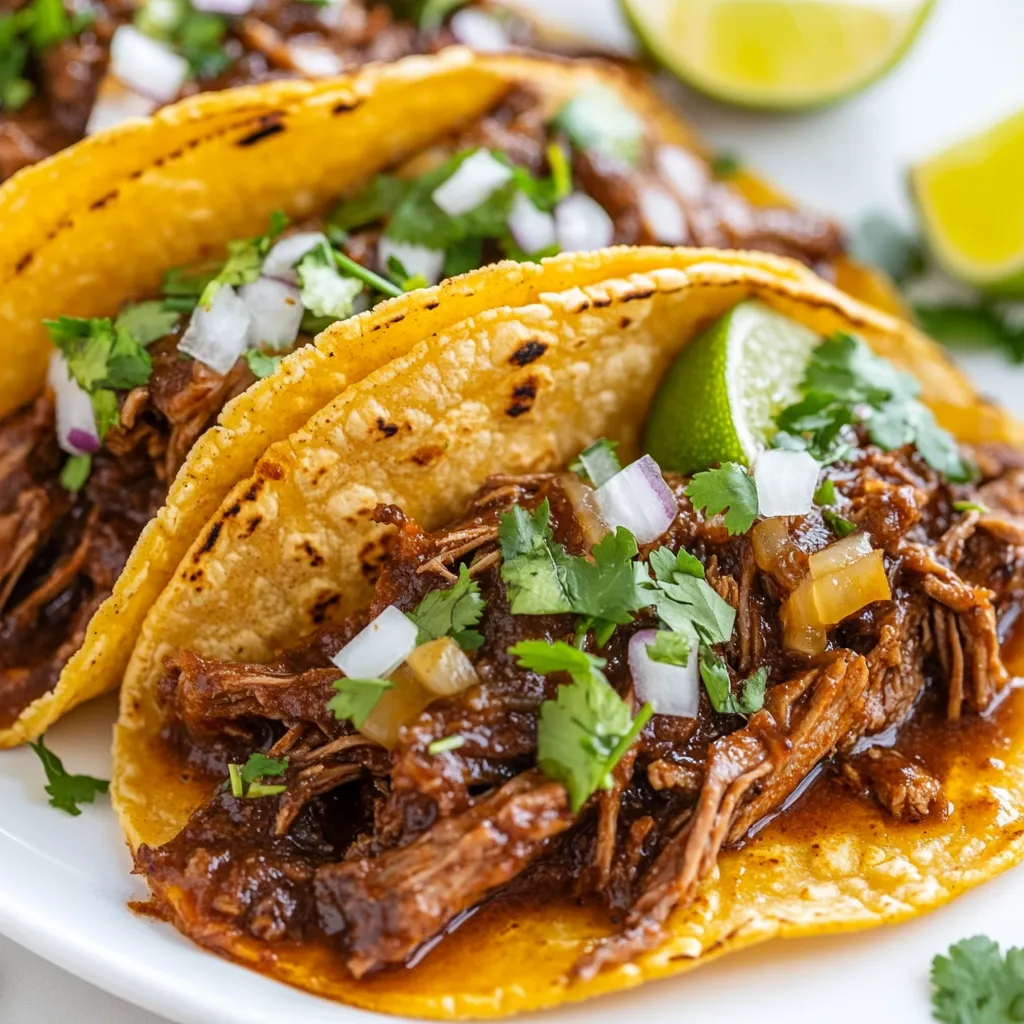
Crock Pot Birria Tacos Flavorful and Easy Recipe
Are you ready to elevate your taco game? Crock Pot Birria Tacos are not only flavorful but also super easy to make. With just a
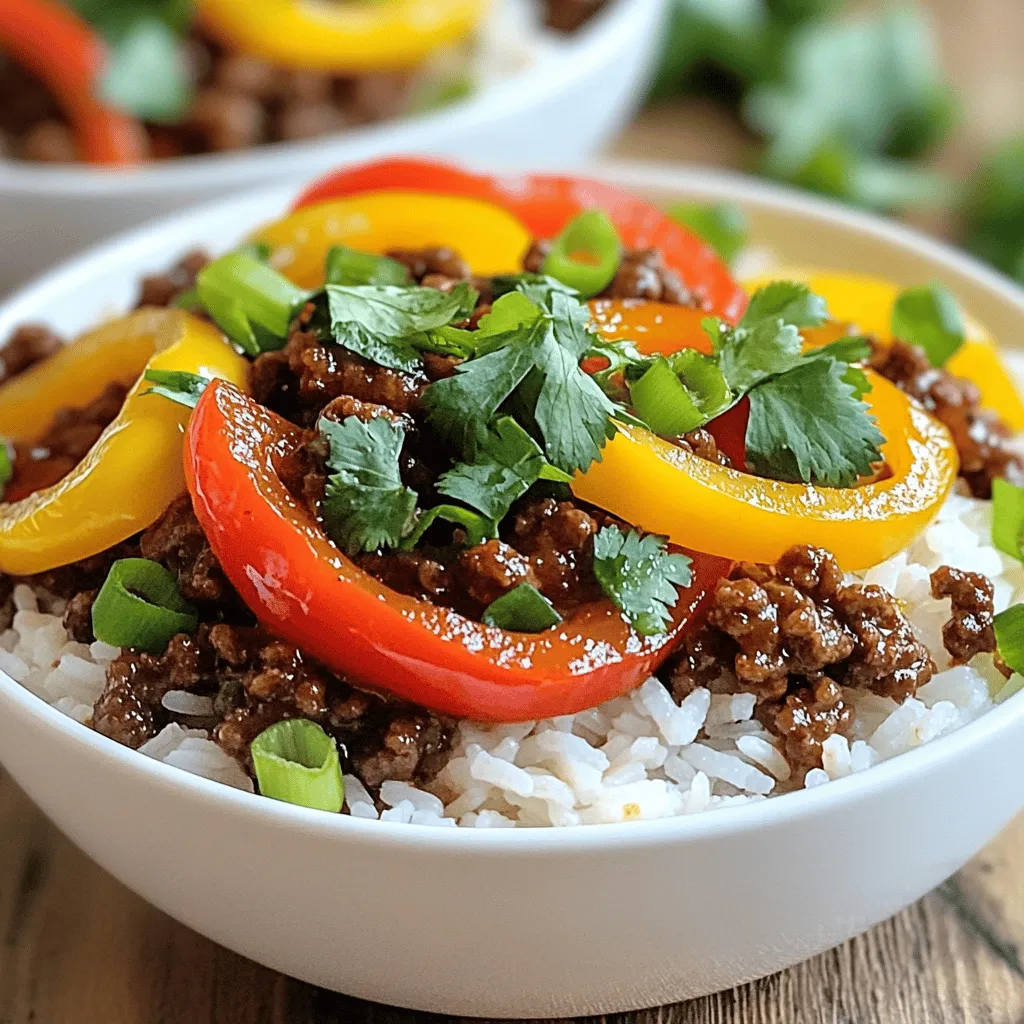
Beef and Pepper Rice Bowls Flavorful and Easy Meal
Are you ready to whip up a meal that’s both easy and packed with flavor? My Beef and Pepper Rice Bowls combine tender ground beef

Ground Beef Zucchini Casserole Flavorful and Easy Meal
Looking for a quick, tasty meal that packs a punch? Ground Beef Zucchini Casserole is the answer! This dish combines juicy ground beef with fresh

Cheesy Low Carb Philly Cheesesteak Casserole Recipe
Craving a delicious twist on a classic dish? My Cheesy Low Carb Philly Cheesesteak Casserole brings rich flavors right to your table without the guilt!
![- 1 lb large shrimp, peeled and deveined - 1 ripe avocado, diced - 1 cup fresh corn (or canned/frozen corn) - 2 tablespoons olive oil - 1 teaspoon smoked paprika - 1 teaspoon garlic powder - 1 teaspoon honey - Additional garnishes like cilantro or lime wedges This dish is all about balance. The shrimp brings a sweet and tender bite. The avocado adds creaminess, while the corn adds a pop of sweetness. Each ingredient plays its part. The spices enhance the shrimp, giving it a smoky flavor. Olive oil helps keep the shrimp moist on the grill. Smoked paprika adds depth, and garlic powder infuses a warm taste. You can add honey for a touch of sweetness. It complements the spicy notes of the shrimp. Extra garnishes like fresh cilantro or lime wedges can brighten the dish. For the full recipe, check out the recipe section. This bowl is a delight to make and eat. Enjoy the simple joy of fresh ingredients! To start, gather your ingredients for the shrimp marinade. You will need: - 1 lb large shrimp, peeled and deveined - 2 tablespoons olive oil - 1 teaspoon smoked paprika - 1 teaspoon garlic powder - Salt and pepper to taste In a bowl, mix the shrimp with olive oil, smoked paprika, garlic powder, salt, and pepper. This blend adds great flavor to your shrimp. Let the shrimp marinate for at least 15 minutes. This simple step makes a big difference in taste. Next, let’s make the corn salsa. For this, you will need: - 1 cup fresh corn (or canned/frozen corn) - 1 red bell pepper, diced - 1/4 red onion, finely chopped - 1/4 cup fresh cilantro, chopped - 1 lime, juiced - Salt and pepper to taste In a medium bowl, combine your corn, diced red bell pepper, chopped red onion, cilantro, and lime juice. Stir well to mix all the flavors. Taste the salsa and add salt and pepper as needed. This salsa adds a fresh crunch to your shrimp bowl. Now, let’s whip up the creamy sauce. For this sauce, gather: - 1/2 cup Greek yogurt - 1 tablespoon lime juice (for the creamy sauce) - 1 teaspoon honey (optional) - Salt and pepper to taste In a small bowl, whisk together the Greek yogurt, lime juice, and honey if you choose to use it. This sauce should be creamy and tangy. If it’s too thick, add a bit of water to thin it out. Taste it and adjust the salt and pepper as needed. This sauce ties all the flavors together nicely. It’s time to grill the shrimp. Here are the steps: - Preheat your grill or grill pan to medium-high heat. - Place the marinated shrimp on the grill. Grill the shrimp for about 2-3 minutes on each side. You will know they are done when they turn opaque and curl up. Remove them from the grill and set them aside. Perfectly grilled shrimp is key to a great bowl. Lastly, let’s put everything together. Start by layering the ingredients in each serving bowl. Here’s how: - Add a base of cooked rice or quinoa. - Layer with grilled shrimp. - Top with corn salsa and diced avocado. Drizzle the creamy sauce over the top for extra flavor. For a nice touch, garnish with extra cilantro or lime wedges. This colorful bowl is not only tasty but also looks beautiful on your table. For the full recipe, check out the complete guide. Enjoy your cooking! To make great grilled shrimp, watch out for a few common mistakes. First, don't over-marinate the shrimp. Fifteen minutes is enough time for flavor. If you marinate too long, the shrimp can become mushy. Second, use high heat to grill them. This helps to create that nice char and keeps them juicy. Cook the shrimp for just 2-3 minutes per side. You'll know they’re done when they turn opaque. For optimal flavor, season the shrimp well. Use smoked paprika and garlic powder in the marinade. These spices add depth and smokiness. A touch of salt and pepper brightens the taste. You can also add a squeeze of lime juice before grilling for an extra zing. To make your corn salsa even better, consider adding more ingredients. Try diced jalapeños for heat or chopped tomatoes for freshness. You can also add black beans for protein and texture. Fresh herbs like basil or mint can add a new twist. When serving, pair the salsa with tortilla chips for crunch. It also works great as a topping for tacos or as a fresh side dish. This salsa is versatile and can be enjoyed in many ways. If you want to switch up the creamy sauce, use different ingredients. Swap Greek yogurt for sour cream for a tangy taste. You can also try avocado instead of yogurt for a rich, creamy texture. Customization options are endless. Add hot sauce for heat or garlic for extra flavor. You can even mix in fresh herbs like dill or cilantro to complement the shrimp. Explore these variations to find your favorite twist on this sauce. For the full recipe, check out the detailed instructions above. {{image_2}} You can switch out the shrimp for chicken, tofu, or fish. Each choice brings its own flavor. For chicken, use boneless thighs or breasts, marinated the same way. Tofu works great too! Just press it to remove water and then cube it before marinating. Fish like salmon or tilapia also grill well. Adjust your cooking time to ensure everything is cooked perfectly. While this bowl shines with rice or quinoa, you can use leafy greens too. Spinach or mixed greens add a fresh crunch. If you prefer grains, try farro or barley for a nutty taste. Each base gives a different texture and flavor to the bowl. Feel free to experiment! Change the ingredients based on what's fresh. In summer, add tomatoes or cucumbers for extra crunch. In fall, roasted squash can add warmth. Pair your bowl with seasonal herbs like basil in summer or sage in fall. This keeps your dish exciting and new, no matter the time of year. To keep your grilled shrimp bowl fresh, store leftovers right away. Use airtight containers. This keeps moisture in and air out. The shrimp, salsa, and sauce can all be stored together. However, I suggest keeping the avocado separate to prevent browning. - Best Practices for Refrigeration - Cool the bowl to room temperature before placing it in the fridge. - Consume your leftovers within 2-3 days for best taste. - Freezing Tips - For longer storage, freeze the shrimp and salsa separately. - Use freezer-safe bags and remove as much air as possible. - The sauce can also freeze well in small portions. When you’re ready to enjoy your bowl again, you’ll want to reheat it correctly. This helps maintain the flavors and texture. - Methods to Maintain Quality - Use a microwave for quick warming, but avoid overheating. - Consider reheating on the stove for better texture. - Time and Temperature Recommendations - Heat in the microwave for about 1-2 minutes. - On the stove, warm over low heat for around 5-7 minutes. Knowing how long your ingredients last helps avoid waste. It’s important to check for signs of spoiling. - How Long Ingredients Last - Grilled shrimp lasts about 2-3 days in the fridge. - Corn salsa and creamy sauce can last up to 3-4 days. - Signs of Spoiling - Look for changes in color or smell. - If the shrimp feels slimy, it’s best to discard it. You can find the [Full Recipe] for this delightful grilled shrimp bowl earlier in the article. You can tell shrimp is done when it turns pink and opaque. The texture should be firm but not rubbery. If the shrimp curls tightly, it is overcooked. A good rule is to cook shrimp for about 2-3 minutes on each side. Always check to avoid a tough bite. Yes, frozen shrimp works great! Just make sure to thaw it before cooking. To defrost, place the shrimp in the fridge overnight or run it under cold water for a quick thaw. This keeps the shrimp juicy and tasty. Fresh shrimp has a slight edge in flavor, but frozen shrimp is still delicious. This shrimp bowl pairs well with rice or quinoa as a base. You can also add fresh greens for extra crunch. Consider serving with a side of black beans or a light salad. These options balance flavors and give you a full meal that’s satisfying. Yes, this recipe is gluten-free! All the ingredients used are safe for a gluten-free diet. Always double-check labels on sauces and seasonings. If you use packaged ingredients, ensure they are certified gluten-free to avoid any cross-contamination. You can prep some components ahead of time. Marinate the shrimp a few hours in advance for deeper flavor. You can also make the corn salsa and creamy sauce earlier in the day. However, I recommend grilling the shrimp fresh for the best taste. Enjoy the flavors when they are at their peak! This article covered how to make a delicious shrimp bowl. You learned about the main ingredients like shrimp, avocado, and corn, plus the spices that add flavor. We also discussed step-by-step instructions, from marinating to grilling. I shared tips for perfecting your shrimp and enhancing your corn salsa. In your kitchen, enjoy experimenting with different proteins and bases. Each variation can create a unique twist. Remember, fresh ingredients make a big difference. With practice, you can master this dish and impress your friends and family.](https://grilledflavors.com/wp-content/uploads/2025/06/59e57e28-2c86-4602-88e9-23cc105b79d1.webp)
Grilled Shrimp Bowl with Avocado, Corn Salsa Delight
If you’re craving a fresh and tasty dish, the Grilled Shrimp Bowl with Avocado and Corn Salsa is the perfect choice. This bowl unites juicy