Dinner

Amish Hamburger Steak Bake Comforting Family Meal
Looking for a warm, cozy meal that the whole family will love? The Amish Hamburger Steak Bake is the perfect dish. With its hearty blend
. First, I take my steak and cut it into bite-sized pieces. I heat a large skillet over medium-high heat. Then, I sear the steak pieces until they are browned on all sides. This usually takes about 5-7 minutes. Once they are nice and brown, I carefully transfer the steak to my slow cooker. This step adds great flavor to the dish. In the same skillet, I add the chopped onion and minced garlic. I cook them until they are softened, which takes about 3-4 minutes. This step makes the onion sweet and the garlic fragrant. After that, I add the onion and garlic mix to the slow cooker over the steak. This builds a tasty base for the casserole. Next, I layer the sliced potatoes evenly on top of the steak and onion mix. This helps the potatoes soak up all the great flavors. In a mixing bowl, I combine the beef broth, heavy cream, Worcestershire sauce, dried thyme, salt, and black pepper. I whisk them all together until well mixed. I then pour this mixture over the potatoes in the slow cooker. Finally, I cover the slow cooker and cook everything on low for 6-8 hours. This slow cooking makes the potatoes tender and the steak melt in your mouth. This is where the magic happens! For the full recipe, check out the details provided earlier. To make the best casserole, start by searing the steak. Searing adds a rich flavor. Heat a skillet on medium-high heat. Cook the steak pieces until they are browned on all sides. This takes about 5-7 minutes. Then, move the steak to the slow cooker. Timing is key. Cook the potatoes until they are tender. This usually takes 6-8 hours on low. Make sure the steak is cooked through. A slow cooker makes this easy. When choosing a slow cooker, look for one with a locking lid. A larger size holds more food. A programmable timer helps you set cooking times. If you don’t have a slow cooker, use a Dutch oven. It works well in the oven. Serve the casserole in bowls. Top it with fresh parsley for a pop of color. You can also put extra cheese on the side. This way, everyone can add more cheese if they want. Pair it with a simple green salad or steamed veggies. This will balance the rich flavors of the casserole. {{image_2}} You can switch up the steak in this recipe. Try using flank steak or ribeye for different flavors. Each type brings its own taste and texture. For cheese, sharp cheddar is great, but you can use mozzarella or gouda. These cheeses will melt well and add a unique twist. Adding vegetables can boost the flavor and nutrition. Bell peppers add sweetness and color. Carrots bring a nice crunch and earthiness. Chop them and toss them in with the potatoes. You can also sprinkle in spices and herbs. Try smoked paprika for depth or Italian seasoning for a fresh taste. Fresh herbs like rosemary or basil can add a lovely aroma. To make this dish gluten-free, use gluten-free broth and check your Worcestershire sauce. Many brands are gluten-free, but not all. For vegetarian options, replace the steak with mushrooms or lentils. You can also add more veggies, like zucchini or spinach. This keeps it hearty and flavorful while being meat-free. Explore these variations to make your slow cooker steak and cheddar potato casserole even more delightful. For the full recipe, check back on the details provided earlier. After you enjoy your slow cooker steak and cheddar potato casserole, store the leftovers right. Let it cool first. Then, place it in an airtight container. It will stay fresh in the fridge for about 3 to 4 days. To reheat, simply scoop out a portion and place it in a microwave-safe bowl. Cover it with a lid or microwave-safe wrap. Heat it in short bursts, stirring in between. This way, it warms evenly. If you prefer the oven, bake it at 350°F (175°C) until hot. You can freeze this casserole for later. First, make sure it is completely cool. Then, transfer it to a freezer-safe container. Leave some space at the top for expansion. It can last in the freezer for up to 3 months. When you want to enjoy it again, take it out of the freezer. Move it to the fridge for a night to thaw. For faster thawing, place it in cold water, but keep it sealed. Reheat as mentioned above, ensuring it reaches an internal temperature of 165°F (74°C) before serving. For the full recipe, check out the details above. Yes, you can use other cuts of beef. If you want tender meat, try using flank steak or ribeye. These cuts add flavor and stay juicy. You can also use round steak, which is leaner. Just remember to cut the meat into bite-sized pieces. The casserole is ready when the potatoes are tender. You can check this by poking a potato slice with a fork. If it goes in easily, it’s done. The steak should also be fork-tender. This means it breaks apart easily when you push it with a fork. This casserole pairs well with many sides. You can serve it with a simple green salad. Steamed broccoli or green beans also make great choices. If you want more carbs, try some crusty bread or garlic bread. These sides balance the dish's richness. To save time, you can skip searing the steak. Just add it straight to the slow cooker. You can also slice the potatoes thinner. This helps them cook faster. If you're in a real hurry, consider using pre-cooked steak or leftover beef. For the full recipe, check out the Slow Cooker Steak and Cheddar Potato Casserole. This blog post guided you through making a hearty casserole. You learned about key ingredients, step-by-step instructions, and helpful tips. We covered tasty variations and how to store leftovers. Each section aimed to enhance your confidence in cooking. Remember, you can adjust the recipe to suit your taste and dietary needs. Enjoy creating this dish and sharing it with loved ones. Cooking should bring joy, and this casserole can do just that.](https://grilledflavors.com/wp-content/uploads/2025/06/e0505646-2569-4143-ace7-8af3ab25debd.webp)
Slow Cooker Steak and Cheddar Potato Casserole Delight
If you’re hungry for a meal that warms you from the inside out, my Slow Cooker Steak and Cheddar Potato Casserole Delight is the answer.
Baja Chicken Bell Pepper Skillet Quick and Tasty Dish
Looking for a quick and tasty dish? The Baja Chicken Bell Pepper Skillet has your back! This vibrant meal combines tender chicken, colorful bell peppers,
One-Pot Creamy Tuscan Chicken Pasta Simple Dinner
Are you ready for a quick, delicious meal that will impress your friends? This One-Pot Creamy Tuscan Chicken Pasta is your answer! You’ll love how
Air Fryer Honey BBQ Explosion Chicken Delight Recipe
Get ready to savor the amazing flavors of my Air Fryer Honey BBQ Explosion Chicken! This dish combines tender chicken with a sweet and tangy

Crispy Chicken Parmesan Recipe for Flavorful Delight
Are you ready to elevate your dinner game? My Crispy Chicken Parmesan Recipe combines crunch, flavor, and ease. With simple steps and common ingredients, you’ll
Creamy Cajun Chicken Pasta Delightful Dinner Option
Looking for a quick and tasty dinner? Creamy Cajun Chicken Pasta is your solution! This dish combines smooth sauce with bold spices for mouth-watering flavor.
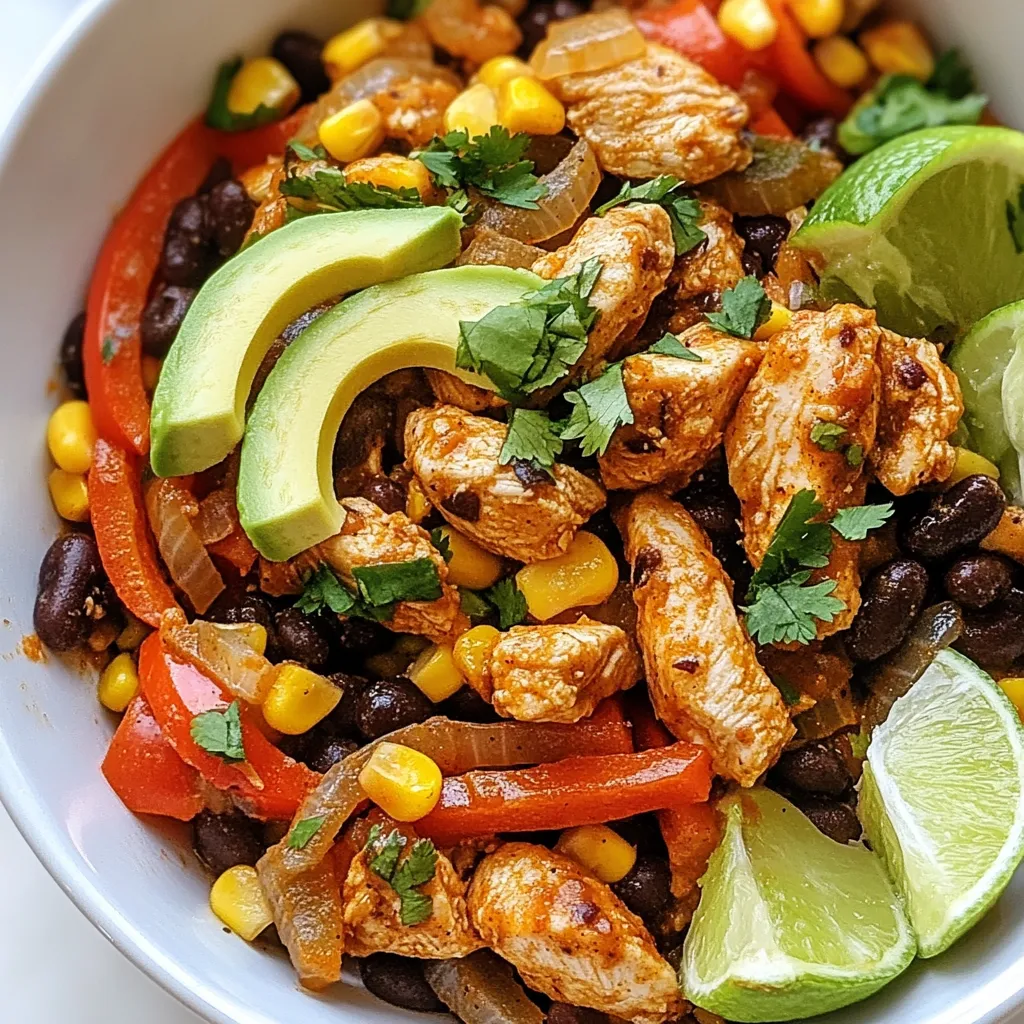
![- 2 boneless, skinless chicken breasts - 1 cup BBQ sauce - 2 medium sweet potatoes, peeled and diced - 2 tablespoons olive oil - 1 teaspoon paprika - 1 teaspoon garlic powder - Salt and pepper to taste - 1 cup corn - 1 avocado, sliced - 1 cup chopped fresh cilantro - Lime wedges for serving These ingredients come together to create a flavorful and satisfying dish. The chicken provides protein, while sweet potatoes add fiber and vitamins. Corn brings a touch of sweetness and texture. The avocado adds creaminess, and cilantro gives a fresh burst of flavor. Don't forget the lime; it brightens each bite! This recipe serves four and is packed with nutrients. Each serving contains about: - Calories: 450 - Protein: 30g - Carbs: 45g - Fats: 15g This meal is gluten-free and dairy-free, making it great for many diets. With a mix of protein, carbs, and healthy fats, it fuels your body well. Enjoy the balance of flavors while staying nourished! For the full recipe, check the section above. To start, preheat your oven to 425°F (220°C). This heat helps the sweet potatoes roast perfectly. Next, prepare your sweet potatoes. Peel and dice them into even pieces. In a mixing bowl, combine the diced sweet potatoes with olive oil, paprika, garlic powder, salt, and pepper. Toss them well to coat every piece evenly. Spread the seasoned sweet potatoes in a single layer on a baking sheet. Ensure they are not crowded, as this helps them roast well. Roast in the preheated oven for about 25-30 minutes. Halfway through, give them a toss. You want them to be tender and golden brown when done. While the sweet potatoes roast, heat a grill pan or skillet over medium heat. Season the chicken breasts with salt and pepper. Cook the chicken for 5-7 minutes on each side. Look for nice grill marks and ensure it cooks through. In the last few minutes, brush the chicken with BBQ sauce. This step adds a delicious glaze. Once everything is cooked, let the chicken rest for a few minutes. Then, shred the chicken into bite-sized pieces using two forks. Now, it’s time to assemble your bowls. Start with a layer of roasted sweet potatoes. Next, add the shredded BBQ chicken, followed by corn and sliced avocado. For the final touch, garnish with fresh cilantro and serve with lime wedges. Enjoy the burst of flavors in each bite! For the complete process, check the Full Recipe. For juicy chicken breasts, cook them over medium heat. This helps keep them tender. Season with salt and pepper before cooking for flavor. Use a meat thermometer to check doneness; the chicken should reach 165°F (75°C). To get sweet potatoes just right, cut them into even pieces. This helps them roast evenly. Toss them with olive oil and spices to add flavor. Roast them until they're golden and soft, about 25 to 30 minutes. You can speed up prep time by using pre-diced sweet potatoes. This cuts down on your chopping time. Also, gather all your ingredients before you start. This makes cooking smoother and more fun. For efficiency, use a sharp knife and a sturdy cutting board. A good peeler makes skinning sweet potatoes quick and easy. A timer helps you track cooking times, so nothing burns. For sides, I love mixing in a fresh salad or grilled veggies. They add color and crunch to your bowl. Consider serving with cornbread or a light coleslaw for extra flavor. To enhance the BBQ chicken bowls, try adding a drizzle of ranch or a squeeze of lime. A spicy sauce can also bring some heat. Fresh herbs like cilantro brighten the dish beautifully. For the full recipe, check out the detailed instructions above. Enjoy your BBQ Chicken & Roasted Sweet Potato Bowls! {{image_2}} You can change proteins in this dish. If you want a plant-based option, use tofu or tempeh instead of chicken. Both are great at soaking up flavor. You can also switch up the veggies. Bell peppers add crunch, while zucchini brings a mild taste. These swaps keep the dish fresh and exciting. BBQ sauce is key to this recipe. Try different kinds for a twist! A spicy sauce gives a kick, while a fruity sauce adds sweetness. You can also mix in herbs or spices. For example, adding cumin or rosemary can make a big difference. Experiment with flavors to find what you love. If you need gluten-free options, make sure your BBQ sauce is gluten-free. Many brands offer safe choices. For a vegan version, simply skip the chicken and use grilled veggies or beans. This keeps the dish hearty and delicious while catering to different diets. Check the [Full Recipe] for more details. To store leftovers correctly, place them in airtight containers. This keeps the flavors fresh. Let the food cool before sealing. You can store BBQ chicken and roasted sweet potatoes together. The shelf life in the refrigerator is about three to four days. After that, the flavors may fade. For freezing, you can pack cooked chicken and sweet potatoes in separate bags. This helps maintain texture. Make sure to remove as much air as possible from the bags. When you want to eat them, thaw in the fridge overnight. Reheat in the oven or microwave for best results. This keeps the chicken juicy and the sweet potatoes soft. You can prepare BBQ chicken and roasted sweet potato bowls in advance. Cook a larger batch and store in individual portions. This makes for quick meals during the week. Just grab a bowl, heat it, and enjoy! Add fresh toppings like avocado and cilantro before serving. It’s a great way to eat healthy without much hassle. BBQ chicken lasts about 3 to 4 days in the fridge. Always store it in an airtight container. Make sure to cool it first before putting it in the fridge. If you want to keep it longer, you can freeze it. When frozen, it can last up to 3 months. Just remember to label the date on the container. This way, you know when to use it. Yes, you can use skin-on chicken for this recipe. It adds extra flavor and keeps the meat moist. However, it may take a bit longer to cook. Skin-on chicken needs about 6 to 8 minutes on each side. Always check if it is cooked through before serving. The skin will also get crispy, adding a nice texture to your dish. If you want to substitute sweet potatoes, you can use regular potatoes or butternut squash. Both will work well, but cooking times might change. Regular potatoes may need more time to roast, about 30 to 35 minutes. If you choose butternut squash, it cooks faster, so check it at 20 minutes. Adjust the seasonings to match your choice for the best flavor. You know chicken is fully cooked when it reaches 165°F (74°C) internally. You can use a meat thermometer to check this. If you don’t have one, look for clear juices when you cut into it. The meat should not be pink. Always let it rest for a few minutes before shredding. This helps keep the juices inside. This blog post covered a delicious BBQ Chicken and Roasted Sweet Potato Bowl. We discussed the key ingredients, including chicken, sweet potatoes, and flavorful spices. I provided step-by-step instructions for preparation, cooking, and assembly. You also learned valuable tips for cooking and serving, plus variations to customize your bowl. Remember, you can adapt this recipe to fit your diet or taste. Enjoy making it your own!](https://grilledflavors.com/wp-content/uploads/2025/06/dffbd445-3609-49e0-9eb8-af37fd049f48.webp)
BBQ Chicken & Roasted Sweet Potato Bowls Delight
Looking for a delicious dinner idea? BBQ Chicken & Roasted Sweet Potato Bowls are packed with flavor and are easy to make. You’ll enjoy juicy
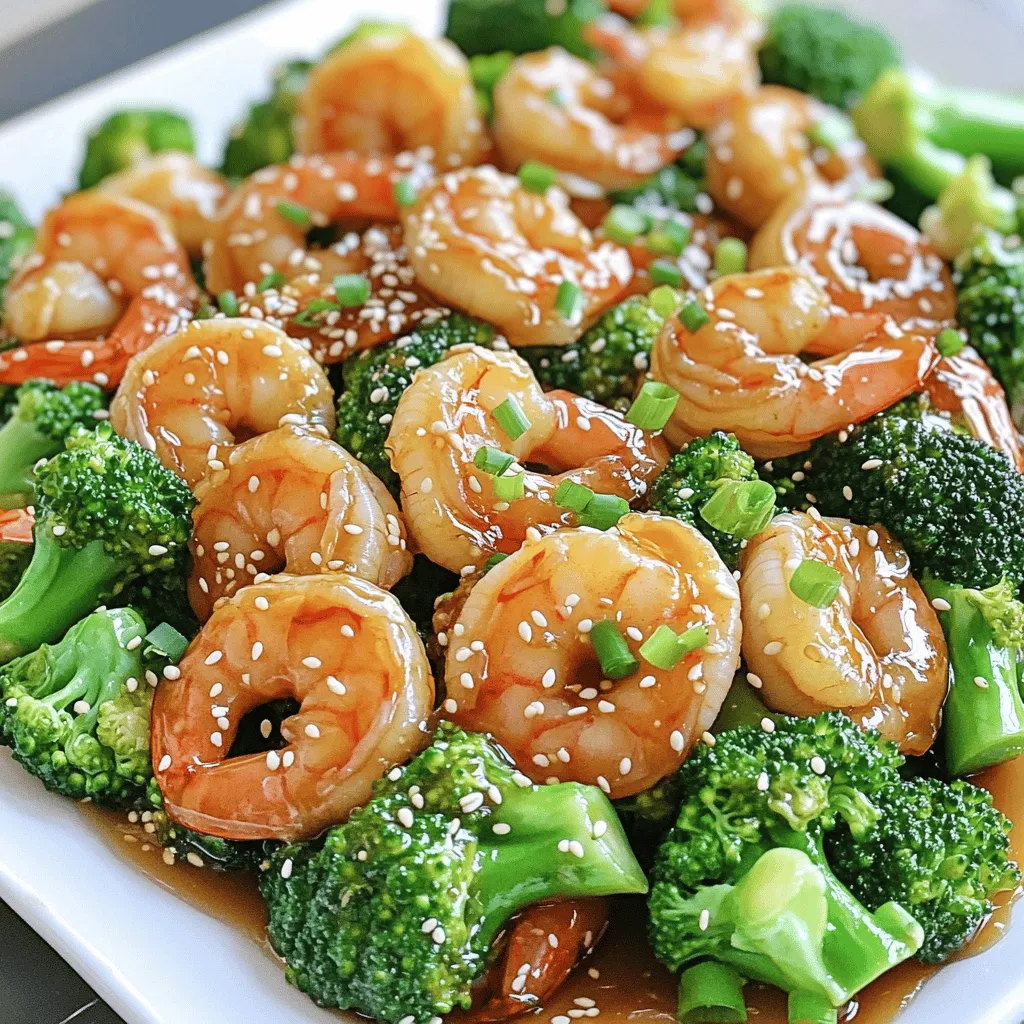
Honey Garlic Shrimp & Broccoli Flavorful Quick Meal
Looking for a quick and tasty dinner idea? Honey Garlic Shrimp & Broccoli is a perfect choice! This dish combines juicy shrimp, fresh broccoli, and
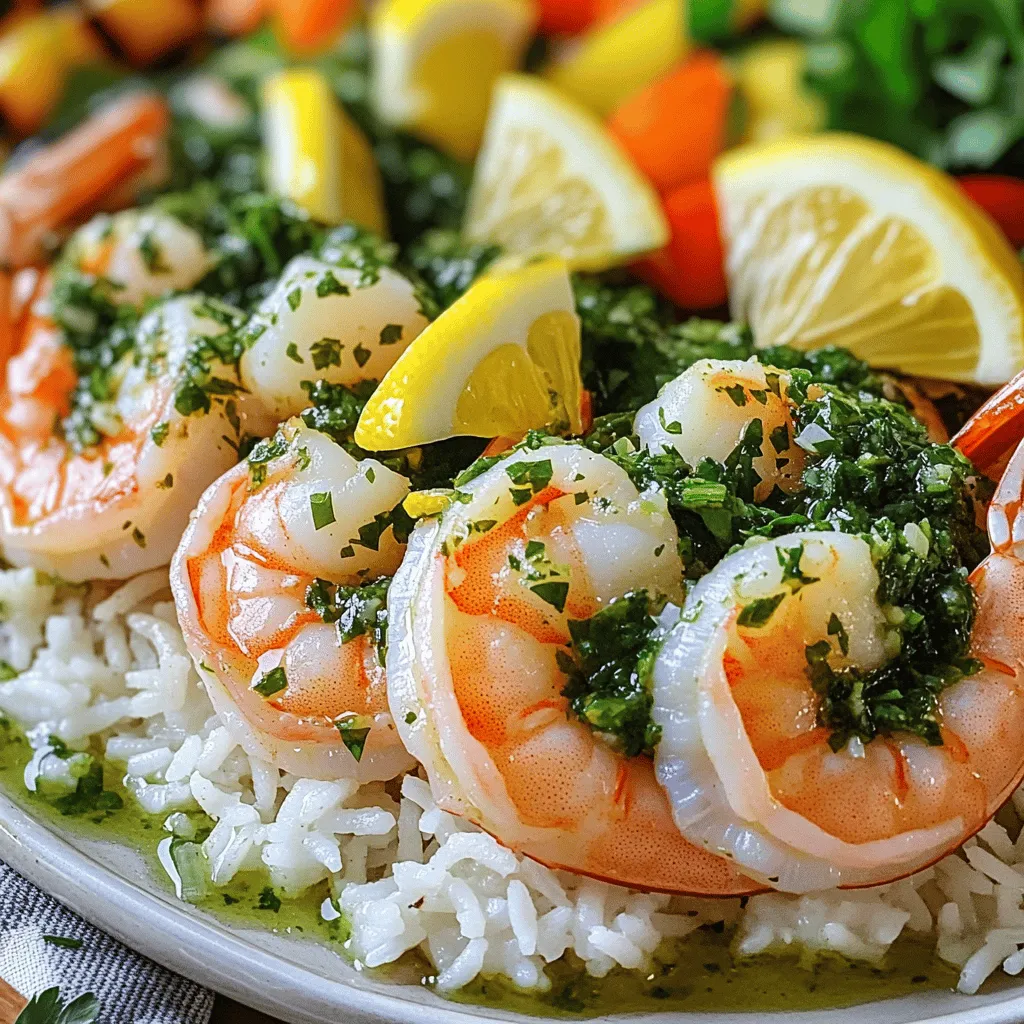
Pan Seared Chimichurri Shrimp Flavorful and Simple Meal
Looking for a quick and tasty dinner idea? My Pan Seared Chimichurri Shrimp is a perfect choice! This dish packs bold flavors in just a