Dinner

Here are the ingredients you need to make pistachio compound butter. - 1 cup unsalted butter, softened - 1/2 cup shelled pistachios, finely chopped - 2 tablespoons honey - 1 teaspoon vanilla extract - 1/4 teaspoon sea salt - Zest of 1 lemon (optional for brightness) This simple list turns into a rich treat. You need unsalted butter for the best flavor. Softened butter mixes well and helps create a smooth texture. Shelled pistachios add a nice crunch and nutty taste. Honey gives a hint of sweetness, while vanilla boosts the flavor. Don't skip the sea salt; it brings all the tastes together. The lemon zest is optional but adds a bright zing. You can find the full recipe for pistachio delight compound butter in this section. Each ingredient plays an important role. Together, they create a unique spread that enhances many dishes. Start with one cup of softened butter. Place it in a medium bowl. Use a fork or spatula to cream the butter until it is smooth and fluffy. This step is key for making the butter easy to mix. You want it to be light and airy. Next, take half a cup of finely chopped pistachios. Sprinkle them into the bowl with the creamed butter. Mix them in well to ensure even distribution. You want every bite to have that nutty flavor. The pistachios add a nice crunch and taste. Now, pour in two tablespoons of honey, one teaspoon of vanilla extract, and a quarter teaspoon of sea salt. Stir the mixture until all the flavors blend together. If you choose, fold in the zest of one lemon for extra brightness. This adds a fresh twist to your butter. Once mixed, transfer the butter onto a sheet of parchment paper. Roll it into a log shape, twisting the ends to seal it tight. Refrigerate for at least two hours, or freeze for longer storage. When ready, slice the butter into rounds. Enjoy it on bread, vegetables, or in your favorite dishes. You can find the full recipe for more details! To get the right texture, start with room-temperature butter. Soft butter mixes better. Use a fork or spatula to cream it well. Aim for a smooth and fluffy mix. If the butter feels too hard, let it sit out longer. You want it to blend easily with the other ingredients. If you want a pop of flavor, consider adding lemon zest. It gives a bright note. You can also explore sweetness with spices. A touch of cinnamon or cardamom can add warmth. For a savory twist, try fresh herbs like rosemary or thyme. Each adds a unique flair to your pistachio delight. You don't need fancy tools for this recipe. A medium mixing bowl works well. A fork or spatula helps mix your ingredients. You’ll also need parchment paper to shape the butter. A knife will help you slice it once it’s set. Keep it simple and enjoy the process! {{image_2}} You can get creative with pistachio compound butter. Try different flavors to suit your taste. Here are some great ideas. To make your butter sweet, add spices like cinnamon or cardamom. A dash of cinnamon brings warmth. Cardamom adds a floral note. Mix one teaspoon of your chosen spice into the butter before chilling. This twist adds depth and a unique flavor. For a savory twist, infuse your butter with herbs like rosemary or thyme. These herbs bring an earthy taste. Just chop two teaspoons of fresh herbs and mix them in. This pairs well with meats or vegetables. It’s a great way to elevate simple dishes. You can also try mixing in chocolate or other nuts. Chopped dark chocolate gives a rich taste. Or, blend different nuts for a crunchy texture. A mix of almonds and pistachios can surprise your palate. Just remember to keep the total nut amount the same as in the full recipe. This will keep the butter’s texture just right. Use these variations to make your pistachio compound butter a hit! Once you make pistachio compound butter, store it in the fridge. Wrap it tightly in parchment paper or plastic wrap. This keeps it fresh for about one week. If you use a container, choose one with a tight lid. This prevents odors from other foods in the fridge from mixing in. For longer storage, freeze the compound butter. Cut it into smaller pieces or keep it in the log shape. Wrap it well in plastic wrap, then place it in a freezer bag. This way, it can last for up to three months. When you're ready to use it, just thaw it in the fridge overnight. To keep your compound butter fresh, avoid leaving it out too long. Always seal it tight after using. You can also label the container with the date. This helps you track its freshness. If you notice any change in color or smell, it’s best to toss it out. Enjoy your pistachio delight compound butter, knowing you stored it right! You can use salted butter if you like. Just remember, it will change the taste. The saltiness may overpower the sweet notes. If you want a balanced flavor, stick with unsalted butter. This way, you control the salt level in your recipe. Homemade pistachio compound butter lasts about two weeks in the fridge. If you freeze it, it can last for up to six months. Just make sure to wrap it tightly to prevent freezer burn. Always check for any off smells or changes in color before use. Pistachio compound butter is very versatile. It tastes great on warm bread or rolls. You can also use it on pancakes or waffles for breakfast. Try it on grilled meats or veggies for dinner. It even adds flavor to popcorn for a tasty snack. Explore different uses to find your favorite! This article covered how to make tasty pistachio compound butter. We discussed the key ingredients, including the soft butter and chopped nuts. You learned the step-by-step method for making it easy to follow. Don’t forget about the tips for the right texture and flavor. You can also explore variations, storage tips, and answers to common questions. Making compound butter is fun and simple. Enjoy trying new flavors and sharing your creations!
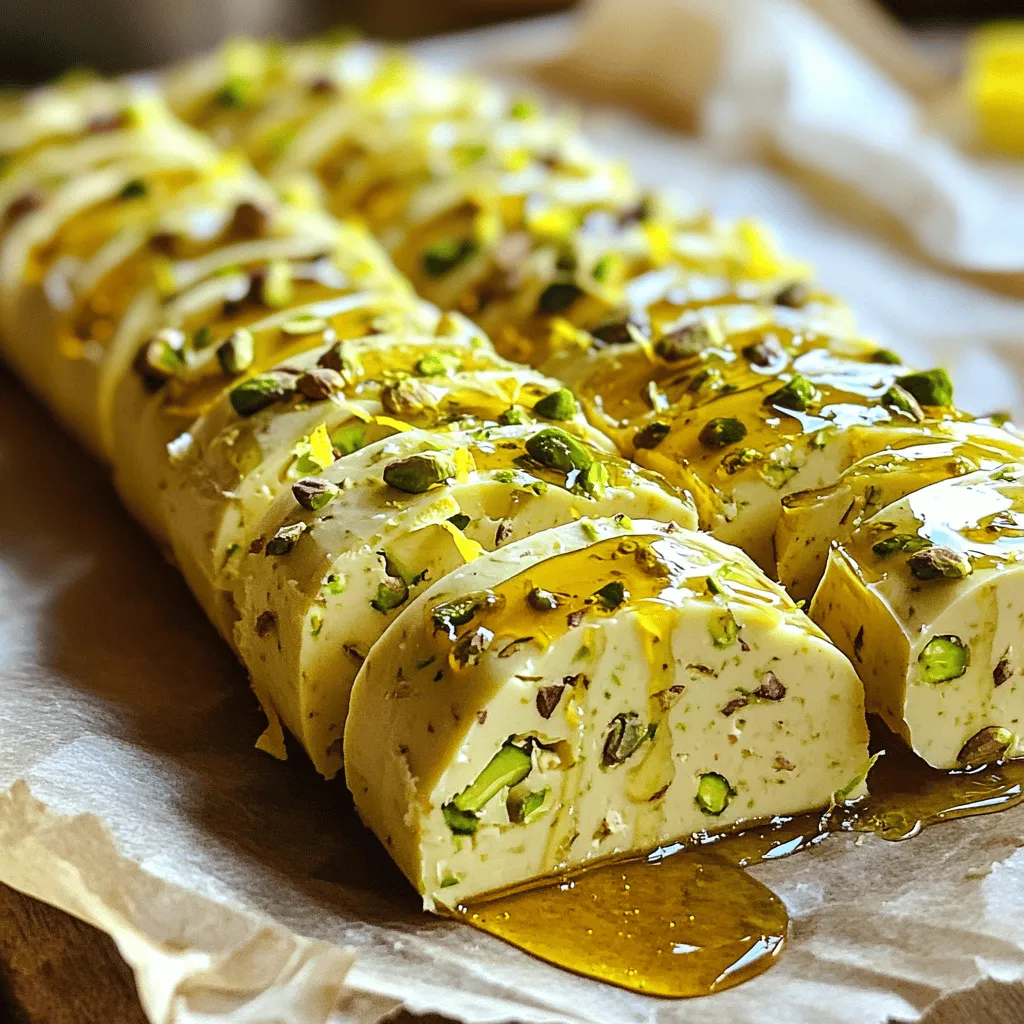
How to Make Pistachio Compound Butter Rich and Easy
Are you ready to elevate your meals? Making pistachio compound butter is rich, easy, and fun. With just a few simple ingredients, you can create
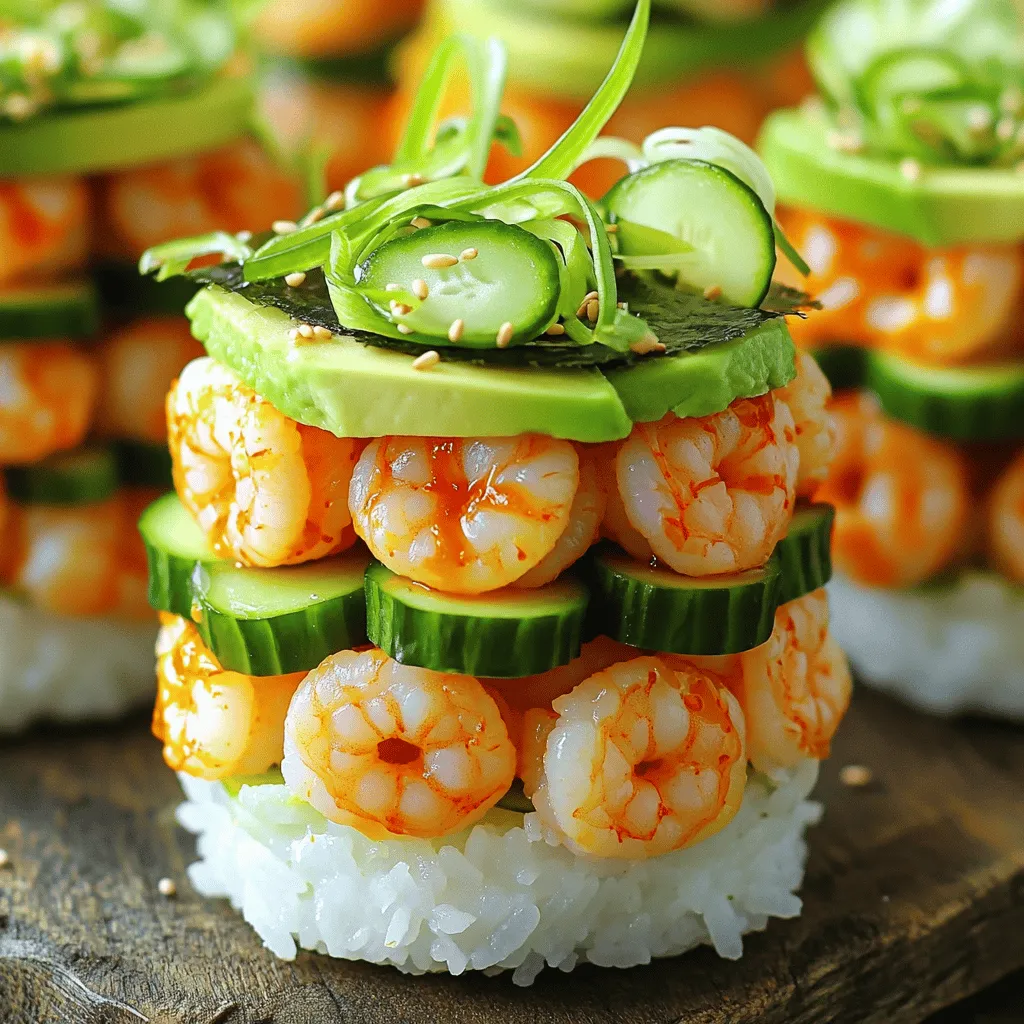
To create a delicious Traeger shrimp boil, you need a simple list of ingredients. Here’s what you’ll need: - 2 lbs large shrimp, peeled and deveined - 1 lb baby red potatoes, halved - 2 ears of corn, cut into thirds - 1 lb smoked sausage, sliced - 1/4 cup Old Bay seasoning - 2 tablespoons olive oil - 6 cloves garlic, minced - 1 lemon, cut into wedges - 1 tablespoon smoked paprika - Fresh parsley, chopped for garnish - Salt and pepper to taste - Water Gathering these ingredients sets the stage for an effortless and flavorful feast. Each item plays a key role in building layers of taste. The shrimp brings a sweet, briny flavor, while the sausage adds a smoky depth. Potatoes and corn provide texture and heartiness. Old Bay seasoning ties everything together with its classic blend of spices. With the right ingredients, you can enjoy a meal that feels special yet easy to make. For the full recipe, check out the details provided earlier. 1. Preheating the Traeger grill: Start by turning on your Traeger grill. Set it to 350°F (175°C). This temperature gives a nice smoky flavor to your dish. 2. Boiling the potatoes: In a pot, fill it with water and bring it to a boil. Add the halved baby red potatoes, a pinch of salt, and half of the Old Bay seasoning. Boil them for about 10-15 minutes until they feel tender when pierced with a fork. 3. Adding corn and sausage: Once your potatoes are ready, add the cut corn and sliced smoked sausage. Boil this for another 5-7 minutes. The corn should be bright yellow, and the sausage will heat through. 4. Incorporating shrimp and other seasonings: Next, reduce the heat and carefully add the shrimp and the rest of the Old Bay seasoning. Stir gently for about 3-5 minutes. The shrimp will turn pink and opaque, showing they are cooked. 5. Transferring to a grill-safe pan: After boiling, take the mixture and drizzle olive oil over it. Add minced garlic and smoked paprika, then mix it well. Transfer this to a grill-safe pan or foil tray. 6. Grilling technique and timing: Place the pan on the preheated Traeger grill. Grill for about 10-15 minutes. Stir halfway through to ensure everything gets that great smoky flavor. Enjoy the process and your tasty Traeger shrimp boil! For more details, check the Full Recipe. Set your Traeger grill to 350°F (175°C). This is the sweet spot for cooking shrimp boil. The even heat cooks everything just right. Make sure to preheat the grill before adding your dish. It helps lock in flavors and gives your food a nice smoky taste. Use Old Bay seasoning generously. It brings out great flavors in shrimp and sausage. For added zing, marinate shrimp in olive oil and garlic before cooking. Let it sit for at least 30 minutes. This step boosts taste and makes your shrimp tender. Squeeze fresh lemon juice on top before serving for a bright finish. Stir the mixture halfway through grilling. This keeps everything cooking evenly and helps the shrimp soak up the smoky flavor. Keep an eye on your dish to avoid overcooking. Shrimp cooks quickly, turning pink and opaque in just a few minutes. Don't let it go too long! Follow the Full Recipe for more details. {{image_2}} You can switch up the shrimp and sausage in your boil. For shrimp, try scallops or crab. They add a nice twist. If you want more sausage options, consider chicken sausage or even tofu for a lighter choice. For a meatless version, load up on veggies! Use mushrooms for a hearty bite. Add bell peppers and zucchini for fresh crunch. You can also toss in chickpeas for protein. To spice things up, play with different seasonings. Besides Old Bay, try Cajun or lemon herb blends. These add depth and heat to your dish. Don’t stop at the basics. Add more vegetables for rich flavors. Broccoli, asparagus, or even artichokes can work well. They bring new textures and bright colors to your boil. Using a Traeger grill gives your shrimp boil a lovely smoky flavor. It’s easier than boiling on the stove. Plus, the grill keeps the shrimp juicy and tender. If you want to try other grilling methods, consider using a stovetop grill pan. It can give a nice sear too. You can even make packets with foil and grill them. Each method brings its own unique taste. For the full recipe details, check the [Full Recipe]. To keep your Traeger shrimp boil fresh, store leftovers in an airtight container. Place the shrimp, potatoes, corn, and sausage together. Do not mix in the lemon or parsley. Store them in the fridge for up to three days. This keeps the flavors bright and tasty. When you want to enjoy leftovers, heat them gently. You can use the microwave or a skillet on low heat. If using the microwave, place them in a bowl and cover it with a damp paper towel. This helps keep the shrimp moist. Stir every minute until heated through. If using a skillet, add a splash of water to keep it juicy. If you want to save some shrimp boil for later, freezing works well. First, let the dish cool completely. Then, portion it into freezer-safe bags. Squeeze out the air before sealing. You can freeze it for up to three months. When you're ready to eat, thaw it overnight in the fridge. Reheat it gently to enjoy that smoky flavor again. It takes about 50 minutes to cook a shrimp boil on a Traeger. This includes prep and grilling time. You want to start by boiling the potatoes for about 10-15 minutes. Then, the corn and sausage need about 5-7 minutes. Finally, the shrimp only takes 3-5 minutes until they are pink and opaque. After that, you grill the mixture for another 10-15 minutes. This gives you a perfect smoky flavor. Yes, you can use frozen shrimp for this recipe. Just make sure to thaw them first. You can do this by placing them in the fridge overnight or running cold water over them for about 10 minutes. Once thawed, you can follow the recipe as usual. The cooking time may be slightly longer, but watch for the shrimp to turn pink and opaque. You can add many proteins to a shrimp boil. Here are some tasty options: - Crab legs - Lobster tails - Clams - Mussels - Chicken wings These proteins can enhance the flavor and make your boil even more exciting. Just adjust the cooking times to ensure everything is cooked through. This shrimp boil is a fun dish that combines great flavors and textures. We covered the ingredients, from shrimp to smoked sausage, and the step-by-step process for grilling. I shared tips to enhance your meal and even some tasty variations. Remember, you can store leftovers or freeze them for later. Enjoy experimenting with your shrimp boil! Try different ingredients and cooking methods to make it your own. Your next gathering will surely be a hit with this recipe.
Traeger Shrimp Boil Effortless and Flavorful Feast
Get ready for a feast that marries ease with amazing flavor! In this blog post, I’ll guide you through a mouth-watering Traeger Shrimp Boil that’s
- 1 pound shrimp, peeled and deveined - 1 cup sushi rice - 1 avocado, sliced - ½ cucumber, julienned - 2 green onions, thinly sliced - 1 tablespoon sriracha sauce - 2 teaspoons sesame oil - 1 teaspoon soy sauce - 2 tablespoons rice vinegar - 1 tablespoon sugar - ½ teaspoon salt - Nori sheets, cut into strips (for garnish) - Sesame seeds (for garnish) - Ring mold - Skillet - Measuring cups - Medium saucepan - Fork These ingredients and tools make the Spicy Shrimp Sushi Stacks easy to prepare. Each item plays a key role in building layers of taste and texture. The shrimp gives a delightful protein base, while sushi rice adds a satisfying bite. The avocado and cucumber lend creaminess and crunch. Seasoning with sriracha and sesame oil gives it that spicy kick. Use a ring mold for neat stacks, making your dish look as good as it tastes. Happy cooking! Start by rinsing the sushi rice. Place it in a bowl and cover it with cold water. Swirl the rice gently. Drain the water and repeat until it runs clear. This step removes excess starch. Next, combine the rinsed rice with 1 ½ cups of water in a medium saucepan. Bring it to a boil. Once boiling, lower the heat, cover, and let it simmer for about 18-20 minutes. The rice should be tender when done. After cooking, fluff the rice with a fork. Now it’s time to season the rice. In a separate bowl, mix 2 tablespoons of rice vinegar, 1 tablespoon of sugar, and ½ teaspoon of salt. Stir until everything dissolves. Gently fold this mixture into the cooked rice. This adds a nice flavor. Let the rice cool to room temperature. For the shrimp, start by marinating. In a bowl, mix 1 pound of shrimp with 1 tablespoon of sriracha, 2 teaspoons of sesame oil, and 1 teaspoon of soy sauce. Make sure the shrimp is well-coated. Let it marinate for 15-20 minutes. This time helps the shrimp soak up the flavors. Now, let’s cook the shrimp. Heat a skillet over medium heat. Add the marinated shrimp and cook for about 3-4 minutes on each side. The shrimp should turn pink and be fully cooked. Once done, remove them from the heat and set aside. Now comes the fun part—assembling your sushi stacks! Grab a ring mold or a small cup. Start layering the ingredients. Begin with a layer of sushi rice in the bottom. Press it down gently. Next, add a layer of cooked shrimp, followed by a layer of sliced avocado and a layer of julienned cucumber. Repeat these layers until you reach 2-3 stacks per serving. For the final touch, it’s time to garnish. Carefully lift the ring mold off the stack. Top your sushi stacks with sliced green onions and a sprinkle of sesame seeds. Lastly, add a strip of nori on top for that extra flair. For the full recipe, check the details above. Enjoy crafting this simple and flavorful dish! To make great sushi rice, start with rinsing. Rinse the rice under cold water. Keep rinsing until the water runs clear. This step removes excess starch. It helps the rice cook evenly. After rinsing, cook the rice. In a medium pot, combine the rice and water. Bring it to a boil, then lower the heat. Cover the pot and let it simmer for 18-20 minutes. This method makes the rice tender and fluffy. Cooking shrimp may seem tricky, but it’s simple. First, marinate the shrimp with sriracha, sesame oil, and soy sauce. Let it sit for 15-20 minutes. This gives the shrimp great flavor. Next, heat a skillet over medium heat. Add the marinated shrimp and cook for 3-4 minutes on each side. Look for a pink color; it means they are done. Avoid overcooking the shrimp. Overcooked shrimp can turn rubbery. Presentation makes your dish shine. Use a ring mold or cup to stack the sushi. Start with a layer of sushi rice. Then, add a layer of shrimp, followed by avocado and cucumber. Repeat the layers for height and color. When you lift the mold, it creates a beautiful stack. Top the sushi stacks with sliced green onions and sesame seeds. Add a strip of nori for a finishing touch. This makes your sushi stacks look gourmet and appetizing. {{image_2}} You can easily swap ingredients in your sushi stacks. If you want a different protein, try crab or tofu. Both work well and add unique flavors. For a veggie option, use roasted sweet potatoes or grilled zucchini. They give a nice texture and taste. Want to kick up the flavor? Add spicy mayo on top of your stacks. It brings creaminess and heat. Pickled ginger is another great choice. It adds a sweet and tangy twist that pairs well with shrimp. You can even mix in some sesame seeds for extra crunch. If you need a gluten-free version, use tamari instead of soy sauce. It tastes just as good and keeps the flavors intact. For a vegan option, substitute shrimp with marinated mushrooms or chickpeas. Both provide a hearty base and soak up flavors well. To store leftover sushi stacks, place them in an airtight container. Keep the container in the fridge. It’s best to eat the stacks within two days for the best taste. The shrimp and rice can dry out if stored too long. You can freeze sushi stacks if you want to keep them longer. Wrap each stack tightly in plastic wrap. Then, place them in a freezer bag. When ready to eat, thaw them in the fridge overnight. Reheat gently in a pan on low heat, so they do not get tough. To keep ingredients fresh before assembly, store shrimp and vegetables separately. Put shrimp in the coldest part of the fridge. Keep avocado and cucumber in a cool place. Slice them just before use. This way, everything stays crisp and tasty. The best rice for sushi is sushi rice, also known as short-grain rice. This rice is sticky and helps the sushi hold its shape. It absorbs flavors well and creates a great texture. Always rinse the rice until the water runs clear. This step removes excess starch and makes the rice fluffy. Yes, you can make sushi stacks ahead of time. However, it’s best to assemble them just before serving. If you prepare the rice and shrimp in advance, store them separately in the fridge. This keeps them fresh. Also, slice the vegetables just before you stack them to maintain their crispness. To add more spice, use extra sriracha in the marinade. You can also mix sriracha with mayonnaise for a spicy mayo drizzle. If you like heat, include sliced jalapeños or a sprinkle of chili flakes on top. Each addition will boost the flavor and heat of your spicy shrimp sushi stacks. Yes, you can substitute shrimp with other proteins. Cooked crab, scallops, or even tofu work well. Each option will change the taste but keep the dish delicious. Choose a protein that you enjoy and adjust the marinade to match your flavor preference. If you don’t have sushi mats, don’t worry! You can use a ring mold or a small cup to shape your sushi stacks. Simply layer the ingredients inside and press down gently. This method works well and still gives you beautiful stacks. Absolutely! To make it vegetarian, skip the shrimp and add more veggies. Consider using marinated tofu, avocado, and pickled vegetables. These ingredients will give the dish a fresh flavor and keep it satisfying. You learned how to make tasty shrimp sushi stacks. We covered key ingredients like shrimp, rice, and avocado. I shared how to prepare sushi rice and cook the shrimp. Assembling and presenting beautifully layered stacks can impress anyone. Remember, you can tweak this recipe with different toppings or flavors. Store any leftovers correctly for freshness. Enjoy making this fun dish and share your creations. Making sushi at home is a rewarding way to explore new flavors and skills.
Spicy Shrimp Sushi Stacks Simple and Flavorful Dish
Are you ready to impress your friends with a fun, tasty twist on sushi? In this post, I’ll show you how to make spicy shrimp
- 1 pound large shrimp, peeled and deveined - 2 cups broccoli florets - 4 tablespoons unsalted butter - 4 cloves garlic, minced - 1 teaspoon red pepper flakes (adjust to taste) - 1 tablespoon lemon juice - Salt and black pepper to taste - 2 tablespoons fresh parsley, chopped (for garnish) - 1 cup cooked quinoa or rice (optional, for serving) When measuring the ingredients, use a kitchen scale for the shrimp. A pound is about 16-20 large shrimp. For the broccoli, use a measuring cup to get two cups of florets. The butter should be measured in tablespoons. Fresh garlic is best, so chop four cloves finely. The red pepper flakes can be adjusted based on your spice level. Use a tablespoon for the lemon juice to add brightness. Season with salt and black pepper to taste. For garnish, chop two tablespoons of parsley. If you want to serve it with grains, one cup of cooked quinoa or rice works well. You can add other veggies too. Bell peppers, snap peas, or carrots can mix well. If you like a richer sauce, try adding a splash of white wine while cooking. For a creamier texture, consider adding a splash of heavy cream or coconut milk. You can also try different herbs like basil or cilantro for a fresh twist. These changes can make the dish feel new and exciting. Start by gathering your ingredients. You need: - 1 pound large shrimp, peeled and deveined - 2 cups broccoli florets - 4 tablespoons unsalted butter - 4 cloves garlic, minced - 1 teaspoon red pepper flakes - 1 tablespoon lemon juice - Salt and black pepper to taste - 2 tablespoons fresh parsley, chopped - 1 cup cooked quinoa or rice (optional) Next, blanch the broccoli. Boil water in a pot and add salt. Place the broccoli in the water for 2-3 minutes. The broccoli should look bright green and be tender but still crisp. Drain it and set it aside. This step helps keep the broccoli vibrant. Now, heat a large skillet over medium heat. Add 2 tablespoons of butter. Once it melts, add minced garlic and red pepper flakes. Sauté for about one minute. You want the garlic to smell nice but not brown. Then, add the shrimp. Spread them in a single layer. Cook for 2-3 minutes on each side. The shrimp should turn pink and opaque. This shows they are done. Season with salt and black pepper to your taste. After the shrimp are cooked, stir in the blanched broccoli. Add the remaining 2 tablespoons of butter and lemon juice. Toss everything gently until the butter melts and coats the shrimp and broccoli well. Make sure not to overcrowd the skillet. This helps the shrimp cook evenly. If you have a lot of shrimp, cook them in batches. Use fresh ingredients for the best flavor. Fresh garlic and shrimp will make a big difference. Don't skip the lemon juice. It brightens the dish and balances the flavors. If you want some heat, adjust the red pepper flakes to your liking. You can add more if you enjoy spicy food. For a nice finish, sprinkle the chopped parsley on top before serving. This adds color and freshness. For the full recipe, you can check the earlier section in this article. To make your garlic butter shrimp and broccoli pop, use fresh ingredients. Fresh garlic gives a strong taste. You can also add lemon zest for extra brightness. Want a kick? Try more red pepper flakes. A splash of soy sauce can deepen the flavor too. Cook shrimp fast to keep them juicy. Heat your skillet on medium. Add butter and let it melt. Then, toss in the garlic. When the garlic smells good, add the shrimp. Cook them just until pink. Overcooking makes shrimp rubbery. Flip them once for even cooking. Serve your dish over cooked quinoa or rice. This adds a nice base. You can also garnish with fresh parsley. It makes the dish look great. For a complete meal, pair it with a simple salad. Enjoy your meal with a slice of crusty bread to soak up the sauce. For the full recipe, check out the detailed steps provided. {{image_2}} You can change the veggies in this dish. Try snap peas, bell peppers, or asparagus. These options add color and crunch. You can also use spinach for a softer texture. The key is to pick veggies you enjoy. They all work well with the garlic butter sauce. If you like heat, add more red pepper flakes. For less spice, use just a pinch. You can also replace red pepper flakes with mild paprika. This keeps the flavor but reduces heat. Taste as you cook to find the right balance. You can switch up the sauce for a new taste. Soy sauce or teriyaki sauce gives it an Asian flair. Adding a splash of white wine can enhance the flavor too. For creaminess, mix in some heavy cream or sour cream. These changes keep the dish exciting and fun. For the full recipe, check the earlier section. Store your Garlic Butter Shrimp and Broccoli in an airtight container. This helps keep the dish fresh. It can stay in the fridge for up to three days. Before you eat it again, check for any signs of spoilage. If it smells off or looks strange, toss it out. You can freeze Garlic Butter Shrimp and Broccoli, but it's best to do it right after cooking. Place it in a freezer-safe container or bag. Make sure to remove as much air as possible. This dish can last in the freezer for about one month. When ready to eat, thaw in the fridge overnight before reheating. To reheat, use a skillet over medium heat. Add a splash of water or broth to prevent drying out. Stir gently until heated through. You can also use a microwave. Heat in short bursts, stirring between intervals. This helps ensure even heating without overcooking the shrimp. Enjoy your flavorful delight from the Full Recipe! Garlic Butter Shrimp and Broccoli lasts up to three days in the fridge. Store it in an airtight container. This keeps it fresh and tasty. If you notice any off smell or color, it’s best to discard it. Yes, you can make this dish ahead of time. Cook the shrimp and broccoli, then cool them. Store them in the fridge. When ready to eat, reheat in a pan or microwave until warm. This makes meal prep easy and fun! You can serve this dish with several sides. Here are some great options: - Cooked quinoa - Steamed rice - Garlic bread - A fresh salad These sides add variety and make a complete meal. Yes, this dish is healthy. Shrimp is high in protein and low in calories. Broccoli adds vitamins, minerals, and fiber. Use less butter to reduce calories. This way, you can enjoy a tasty meal without guilt. Absolutely! Frozen shrimp works well. Just thaw them before cooking. You can do this overnight in the fridge or quickly in cold water. This saves time and makes cooking easier. You can try many variations for this dish. Swap broccoli for other veggies like: - Asparagus - Bell peppers - Snap peas This adds new flavors and colors. You can also adjust the spice level by adding more or less red pepper flakes. Yes, cheese can add a creamy touch. Sprinkle some parmesan cheese on top before serving. It melts beautifully and adds flavor. Just remember, cheese adds extra calories. Enjoy in moderation! The best way is to reheat in a skillet. This keeps the shrimp tender and broccoli crisp. Heat over medium-low heat until warm. Stir gently to avoid overcooking. You can also use a microwave, but be careful not to overcook it. For the complete recipe, check the Full Recipe. This blog post outlines all you need for Garlic Butter Shrimp and Broccoli. We covered key ingredients, measurement guidelines, and optional items to enhance your dish. The step-by-step instructions ensure you prepare and cook with confidence. I shared tips to boost flavor and serving ideas that impress. Remember to store any leftovers properly to keep them fresh. With the right techniques and variations, you can customize this dish to your taste. Enjoy your cooking adventure!
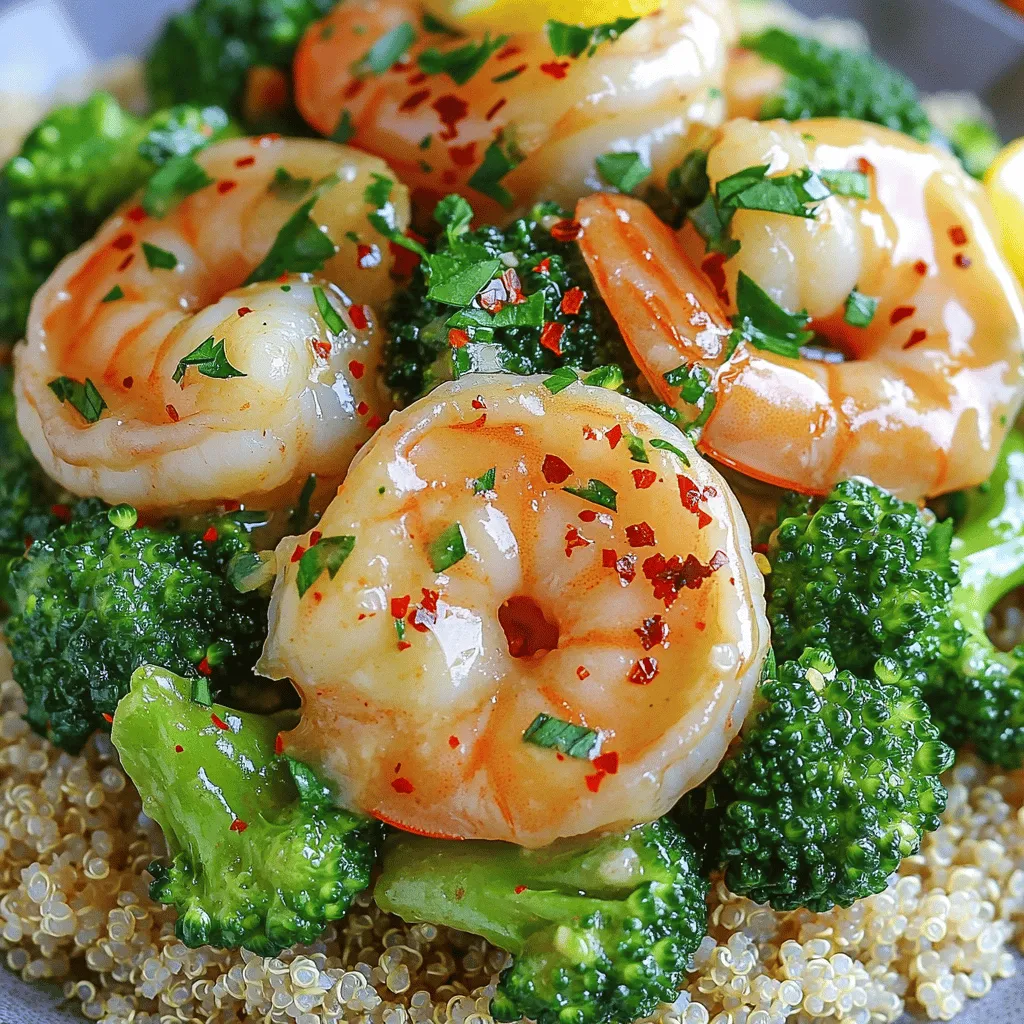
Garlic Butter Shrimp and Broccoli Flavorful Delight
Are you ready for a quick and tasty dinner? Garlic Butter Shrimp and Broccoli is packed with flavor and easy to make. In this post,
- Chicken and Vegetables - 2 boneless, skinless chicken breasts - 1 cup cooked jasmine rice - 1 cup broccoli florets - 1 carrot, julienned - 1 red bell pepper, sliced - 2 green onions, chopped - Sauce Components - 1 tablespoon cornstarch - 2 tablespoons vegetable oil - 1/4 cup mayonnaise - 2 tablespoons sweet chili sauce - 1 tablespoon sriracha (adjust for spice) - Salt and pepper to taste - Optional Toppings - Sesame seeds for garnish Gather these ingredients to create a tasty Bang Bang Chicken Bowl. Fresh veggies and juicy chicken bring flavor and color. The sauce adds a sweet and spicy kick that makes this dish shine. You can find the Full Recipe above for more details on making this delightful meal. First, cut the chicken breasts into bite-sized pieces. Use a sharp knife for clean cuts. Next, season the chicken with salt and pepper. This adds base flavor. Then, sprinkle cornstarch over the chicken. Toss it well to coat every piece. The cornstarch gives a nice crunch when cooked. Heat the vegetable oil in a large skillet over medium heat. Wait for the oil to shimmer before adding the chicken. This step ensures a good sear. Cook the chicken pieces for about 6-8 minutes. Stir occasionally to avoid burning. You want them golden brown and fully cooked. Check that the inside is no longer pink. In the same skillet, add more oil if needed. Toss in the broccoli, carrot, and red bell pepper. Sauté them for about 3-4 minutes. The goal is tender-crisp texture. You want them bright and vibrant. Remove from heat and set aside. In a small bowl, mix the mayonnaise, sweet chili sauce, and sriracha. Use a whisk or fork to blend well. Taste the sauce and adjust the spice level. If you like it spicier, add more sriracha. For a milder flavor, reduce the amount. Start by layering the cooked jasmine rice in serving bowls. It acts as the base. Next, add the sautéed vegetables on top. Then, place the cooked chicken pieces. Finally, drizzle the Bang Bang sauce over everything. This step ties all the flavors together. Sprinkle chopped green onions and sesame seeds on top. These add flavor and a nice crunch. For presentation, serve in colorful bowls. This makes your meal more inviting. Enjoy your Bang Bang Chicken Bowl! For the complete recipe, refer to the Full Recipe. To keep your chicken juicy, start with boneless, skinless chicken breasts. Cut them into small pieces, then season with salt, pepper, and cornstarch. The cornstarch helps lock in moisture. When cooking, heat your oil over medium heat. Add the chicken to the hot oil. Cook until it turns golden brown, about 6-8 minutes. This ensures a tasty crust while keeping the inside tender. For perfect sautéed vegetables, use fresh broccoli, carrots, and red bell peppers. After cooking the chicken, add a bit more oil if needed. Sauté the veggies for 3-4 minutes. This helps them stay crisp and bright. Remove them from heat as soon as they are tender. You can adjust the spice and sweetness of your Bang Bang sauce. Start with the base of mayonnaise and sweet chili sauce. Add sriracha slowly to find your preferred heat level. For extra flavor, try mixing in a dash of lime juice or garlic powder. These additions can elevate the taste and make it more exciting. Pair your Bang Bang Chicken Bowl with side dishes like a simple salad or steamed edamame. These sides can balance the meal and add freshness. Serve the bowl warm for the best taste. The rice and chicken should be hot, while the veggies are still crisp. Enjoy your meal right after assembling for maximum flavor. {{image_2}} You can easily switch the chicken for shrimp or tofu. Shrimp cooks fast and adds a nice flavor. Just sauté it until it turns pink. Tofu offers a great plant-based option. Use firm tofu, press it to remove water, and cut it into cubes. This way, it absorbs all the flavors well. You can also swap out chicken for beef or pork. Just adjust cooking times to keep the meat juicy. Jasmine rice is great, but you can try other types too. Brown rice adds fiber and a nutty taste. Quinoa is another healthy choice, full of protein. If you want a low-carb option, use cauliflower rice. It cooks quickly and still gives a nice texture. Just sauté it for a few minutes until tender. Feel free to mix up the veggies in your bowl. Snow peas, bell peppers, or snap peas work well. You can also use frozen vegetables for convenience. Seasonal veggies are great too. In summer, try zucchini or asparagus. In fall, butternut squash or Brussels sprouts are delicious. Each option adds a unique twist to your Bang Bang Chicken Bowl. For the complete recipe, check out the [Full Recipe]. Store your Bang Bang Chicken Bowl in the fridge. It stays fresh for about 3 days. Keep it in an airtight container to lock in flavor. This helps prevent any moisture loss. If you notice any odd smells, it’s best to toss it out. Yes, you can freeze this dish. Just place it in a freezer-safe container. Make sure to separate the sauce from the chicken and veggies. This helps keep the texture nice. To thaw, leave it in the fridge overnight. Reheat it gently to keep it juicy. For the best taste, use the stove or microwave. If using a stove, warm it slowly over low heat. Add a splash of water to help steam it. In the microwave, heat in short bursts, stirring in between. This keeps it from overcooking. Enjoy your meal just as delicious as the first time! To make the Bang Bang Chicken Bowl gluten-free, you can swap a few ingredients. Use gluten-free soy sauce instead of regular soy sauce if you choose to add it. For the sauce, make sure the sweet chili sauce is gluten-free. Also, check the mayonnaise for gluten-free labeling. Cornstarch is naturally gluten-free, so you can keep that in your recipe. These swaps ensure you enjoy the same great taste without gluten. You can serve many sides with the Bang Bang Chicken Bowl. Try a simple cucumber salad for a fresh crunch. Steamed edamame is another great choice, adding protein and fiber. If you want something warm, serve miso soup. For drinks, pair it with iced green tea or a light lemonade to balance the flavors. These options will enhance your meal and make it even more enjoyable. Yes, you can meal prep the Bang Bang Chicken Bowl. Cook the chicken and vegetables in advance. Store them in separate containers in the fridge. You can also prepare the sauce ahead of time. Keep everything fresh by storing the sauce separately. When you're ready to eat, just reheat the chicken and veggies. Assemble your bowl with rice and sauce, and you have a quick, tasty meal ready to go. This blog post shared how to create a Bang Bang Chicken Bowl from scratch. We covered ingredients, preparation steps, and cooking tips. You learned how to ensure juicy chicken and crisp veggies, along with sauce customization. Remember, you can switch proteins, rice, and veggies for variety. Store leftovers properly, and enjoy this meal any time. With these tips, you can make a tasty dish that satisfies your cravings.
Bang Bang Chicken Bowl Recipe Easy Flavorful Delight
Are you ready to spice up your dinner routine? The Bang Bang Chicken Bowl is an easy, flavorful delight that will impress your taste buds.
- 12 small dinner rolls (Hawaiian rolls work well) - 1 pound ground beef - 1/4 cup breadcrumbs - 1/4 cup grated Parmesan cheese - 1/4 cup chopped fresh parsley - 1 egg, beaten - 2 teaspoons garlic powder - 1 teaspoon onion powder - Salt and pepper to taste - 1 jar marinara sauce (about 24 oz) - 1/2 cup shredded mozzarella cheese - 1/2 cup unsalted butter, melted - 4 cloves garlic, minced - 1/4 cup grated Parmesan cheese (for topping) - Fresh parsley, chopped (for garnishing) The base of these sliders comes from a great meatball mix. Use ground beef for a juicy texture. The breadcrumbs help bind the meatballs, keeping them tender. The cheese and garlic add a rich flavor. Using a good marinara sauce makes all the difference in taste. I recommend using the following brands: - Ground Beef: Choose a high-quality brand, like Certified Angus Beef. - Breadcrumbs: Panko breadcrumbs work great for crunch. - Marinara Sauce: Look for Rao's or Classico for rich flavors. - Gluten-Free Option: Use gluten-free breadcrumbs and rolls. - Vegetarian Option: Substitute ground beef with lentils or a veggie mix. Switching to gluten-free or vegetarian options does not mean losing flavor. The sliders can remain delicious and satisfying with the right ingredients. To make these sliders, you will need: - A baking dish (9x13 inches is perfect) - A mixing bowl for the meatball mix - An oven set to 350°F (175°C) - Measuring tools for accuracy - Utensils like a spoon and knife Having the right tools makes cooking easier and helps you create a great dish. Make sure to gather everything before you start cooking. That way, you'll enjoy the process and the final result. Don't forget to check the [Full Recipe] for more details! Start by preheating your oven to 350°F (175°C). This step is key for even cooking. In a large bowl, mix the following ingredients: - 1 pound ground beef - 1/4 cup breadcrumbs - 1/4 cup grated Parmesan cheese - 1/4 cup chopped fresh parsley - 1 beaten egg - 2 teaspoons garlic powder - 1 teaspoon onion powder - Salt and pepper to taste Mix everything well until it is all combined. Now shape this mixture into small meatballs, about 1 inch in size. Place them on a baking sheet. Bake these meatballs for 18-20 minutes or until they are fully cooked. While the meatballs bake, prepare the garlic Parmesan butter. In a small bowl, combine: - 1/2 cup melted unsalted butter - 4 minced garlic cloves - 1/4 cup grated Parmesan cheese Set this mix aside. Once the meatballs are ready, carefully slice your dinner rolls in half, keeping them attached like a book. Next, place the bottom halves of the rolls in a greased 9x13 inch baking dish. Spoon some marinara sauce over the bottoms, then add the baked meatballs evenly. Drizzle more marinara sauce over the top and sprinkle shredded mozzarella cheese on next. Now, place the top halves of the rolls back on. Brush the garlic Parmesan butter generously over these tops. Cover the dish with aluminum foil to keep it moist. Bake for 15 minutes with the foil on. Then, uncover and bake for another 10 minutes. This step melts the cheese and browns the tops nicely. Once finished, remove from the oven, garnish with fresh parsley, and serve warm. For a fun touch, serve with a side of marinara sauce for dipping. For the full recipe, check the section above. To make great meatballs, start with the right texture. Use ground beef with some fat. This fat keeps the meatballs moist and tasty. Mix the meat with breadcrumbs, egg, and seasonings well. Shape the meatballs into even spheres about one inch wide. This size cooks evenly. Bake them for 18 to 20 minutes at 350°F. If you prefer a crispy outside, broil them for the last two minutes. For more flavor, think about adding spices. Italian seasoning, red pepper flakes, or dried basil work well. Fresh herbs like thyme or oregano can also add a nice touch. When it comes to cheese, mozzarella is classic, but you can try sharp cheddar or pepper jack. These cheeses give extra flavor and melt beautifully. Pair your sliders with simple sides. A salad or crispy fries are great choices. For dips, try extra marinara sauce or ranch dressing. Presentation matters too! Serve directly from the baking dish. A small bowl of marinara for dipping makes it fun. Add toothpicks to each slider for easy eating. For a fun twist, garnish with chopped parsley for a pop of color. For the complete recipe, check the Full Recipe. {{image_2}} You can switch up the proteins in your sliders. Try turkey, chicken, or even a vegan meat alternative. Each option brings a unique taste and texture. For cheese, consider mozzarella, cheddar, or provolone. Different sauces can change the flavor too. A spicy marinara or pesto adds a new twist. The type of roll you use can change your sliders. Hawaiian rolls are sweet, while ciabatta adds a nice crunch. You can even use mini baguettes or soft dinner rolls. Just remember to adjust the baking time. Thicker rolls may need a bit longer to bake, while thinner ones will cook faster. You can take these sliders global! Add Italian herbs for a classic touch. For a Mexican twist, try adding jalapeños or taco seasoning. Use salsa instead of marinara for a fresh flavor. Seasonal ingredients like pumpkin spice or cranberries can make these sliders fun for holidays. With so many options, every bite can be a new adventure. To keep your Pull-Apart Meatball Sliders fresh, store leftovers in an airtight container. Place them in the fridge. They stay good for up to three days. When you reheat, use the oven. Preheat to 350°F (175°C) and cover with foil. This keeps the sliders moist while heating. You can freeze these sliders for later. Wrap them tightly in plastic wrap. Then, place them in a freezer bag. They can last up to three months in the freezer. When ready to eat, thaw in the fridge overnight. Reheat in the oven at 350°F (175°C) for best results. This helps keep the flavor and texture intact. Making meatballs ahead of time is a great idea. You can cook a big batch and store them in the fridge. This saves time on busy weeknights. For quick assembly, keep dinner rolls and marinara sauce handy. Just layer everything when you're ready to eat. This makes dinner easy and tasty! Check out the Full Recipe for more details. Can I make the meatballs ahead of time? Yes, you can make the meatballs ahead. Just follow the recipe and bake them. Let them cool, then store in the fridge for up to two days. You can also freeze them. Just place cooked meatballs in an airtight bag. They last for about three months in the freezer. To use, thaw overnight in the fridge and warm them. What can I use as a substitute for actual garlic? If you need a garlic substitute, garlic powder works well. Use about one teaspoon for every clove you need. You can also try shallots, onion powder, or garlic oil for flavor. Keep in mind that these may change the taste slightly but will still be delicious. What to do if the sliders are too soggy? If your sliders are soggy, try using less sauce next time. Also, make sure the meatballs are not too wet. Drain excess sauce before adding to the rolls. You can also toast the rolls lightly before assembling to help absorb moisture. How can I make the meatballs more tender? For tender meatballs, use a mix of beef and pork. The pork adds fat, which keeps them juicy. Another tip is to avoid over-mixing the meat. This can make them tough. Also, let them cool before adding to the sliders. Nutrition facts for Pull-Apart Meatball Sliders Each slider has about 300 calories. This includes protein, carbs, and fats. If you want lower calories, use lean ground beef or turkey. Using whole-grain rolls can also add fiber. Tips for a healthier version of the recipe To make these sliders healthier, try these tips: - Use whole wheat dinner rolls. - Substitute ground turkey for beef. - Add more vegetables like spinach or mushrooms to the meat mixture. - Use less cheese and sauce, or switch to low-fat versions. For the full recipe, check out the provided link. Pull-apart meatball sliders offer a fun and tasty way to enjoy meals. We covered key ingredients, from ground beef to tasty garlic butter. You learned the step-by-step method for great flavor and perfect texture. Tips on ingredient swaps and serving suggestions help customize your dish. Remember, proper storage keeps leftovers fresh, and meal prep saves time. With these insights, you can create sliders that wow everyone at your table. Enjoy making these sliders and impress your friends and family!
Pull-Apart Meatball Sliders with Garlic Parmesan Butter
Get ready for a game-changing snack: Pull-Apart Meatball Sliders with Garlic Parmesan Butter! These bite-sized treats pack big flavors into soft dinner rolls, making them
To make these tasty stuffed shells, gather the following main ingredients: - 20 large pasta shells - 2 cups fresh spinach, chopped - 1 cup ricotta cheese - 1 cup shredded mozzarella cheese - 1/2 cup grated Parmesan cheese - 1 large egg - 2 cloves garlic, minced - 1 teaspoon dried oregano - Salt and pepper to taste - 3 cups marinara sauce These ingredients create a rich and creamy filling that pairs perfectly with marinara sauce. You can add a few optional ingredients for extra flavor: - A pinch of red pepper flakes for heat - Fresh herbs like parsley or thyme - A squeeze of lemon juice for brightness - Chopped sun-dried tomatoes for sweetness These options let you customize the dish to your taste. You’ll need some basic cooking tools to prepare the dish: - A large pot for boiling pasta - A skillet for sautéing spinach and garlic - A mixing bowl for combining ingredients - A 9x13 inch baking dish for assembling and baking - Aluminum foil to cover the dish while baking Having the right equipment makes the cooking process smooth and enjoyable. You can find the full recipe on my site for more details on preparation. To start, cook your pasta shells. Boil water in a large pot. Add salt to it. Follow the package instructions for cooking time. You want them al dente, which means firm but tender. Once cooked, drain the shells gently. Rinse them with cold water to stop the cooking. Set them aside on a clean towel. This way, they won’t stick together. Next, let’s make the filling. Heat a tablespoon of olive oil in a large skillet. Add minced garlic and cook for one minute. You want it fragrant but not burnt. Then, add chopped spinach. Stir and cook until it wilts, which takes about two to three minutes. Remove it from heat and let it cool a bit. In a mixing bowl, combine ricotta cheese, half of the mozzarella, and grated Parmesan. Add the cooked spinach, egg, dried oregano, salt, and pepper. Mix everything well until it’s blended. Now, let’s put it all together. First, spread a cup of marinara sauce evenly in a 9x13 inch baking dish. Take each pasta shell and stuff it with the ricotta mixture. Place the shells open side up in the dish. Pour the remaining marinara sauce over the stuffed shells. Ensure each shell is covered well. Sprinkle the rest of the mozzarella on top. Cover it with aluminum foil and bake for 25 minutes at 375°F (190°C). Then, remove the foil and bake for another 10 to 15 minutes. You want the cheese to be bubbly and golden. Let it cool for a few minutes before serving. Garnish with fresh basil for a nice touch. For the full recipe, visit [Full Recipe]. To cook pasta shells, start with a large pot of water. Add salt to the water; this helps flavor the shells. Bring the water to a boil before adding the shells. Cook them until they are al dente, which means they still have a bit of firmness. This usually takes about 8-10 minutes, but check your package for exact times. Once done, drain the shells and rinse them with cold water to stop the cooking. This step keeps them from getting too soft while you stuff them. When it comes to stuffing, make sure your filling is cool. If it's hot, it will soften the shells and make them hard to handle. Use a spoon or a small spatula to fill each shell, packing it well but not too tight. A pastry bag can also work well for this. Place the stuffed shells open side up in the baking dish. This helps them stay filled and makes for a nice presentation. To get that golden, bubbly cheese topping, use a mix of mozzarella and Parmesan. The mozzarella melts nicely, while the Parmesan adds flavor. After you pour the marinara over the shells, sprinkle the remaining mozzarella on top. Cover the dish with foil for the first part of baking. This keeps the moisture in. Remove the foil for the last 10-15 minutes to allow the cheese to brown. This gives you that perfect cheesy crust that everyone loves. For the complete recipe, check out the Full Recipe. {{image_2}} You can change the cheeses for unique flavors. Instead of ricotta, try cottage cheese. It gives a similar taste with less fat. For a creamier texture, use mascarpone. You can also mix in goat cheese. This will add a tangy taste. Experiment with different cheeses to find your favorite blend! Feel free to add more veggies to your stuffing. Chopped mushrooms or bell peppers work well. You can also add cooked chicken or sausage for extra protein. Just make sure to cook them first. These additions enhance the dish and boost its nutrition. The more colorful your filling, the more appealing it looks! If you need a gluten-free option, use gluten-free pasta shells. Many brands offer tasty alternatives. You can also make your own shells using chickpea or rice flour. Just follow the package instructions for cooking times. This way, everyone can enjoy this dish without worry. After enjoying your Easy Spinach and Ricotta Stuffed Shells, store leftovers in an airtight container. Make sure to let the dish cool completely first. This helps keep the shells fresh. You can keep them in the fridge for up to three days. If you want to enjoy them later, consider freezing. For the best taste, reheat your stuffed shells in the oven. Set your oven to 350°F (175°C). Place the shells in a baking dish and cover with foil. Bake for about 20 minutes. This keeps the shells moist. You can also reheat them in the microwave. Just cover the dish with a microwave-safe lid and heat for 2-3 minutes. Check that they are hot throughout before serving. To freeze your stuffed shells, place them in a single layer on a baking sheet. Freeze them for about 1-2 hours until solid. Then, transfer them to a freezer-safe container or bag. This way, they won’t stick together. Your frozen stuffed shells can last for up to three months. When you’re ready to eat, cook from frozen, adding extra baking time as needed. You’ll still have that delicious flavor! For the full recipe, check out the Easy Spinach and Ricotta Stuffed Shells. Yes, you can prepare stuffed shells in advance. Cooked shells can be filled and covered with sauce. Store them in the fridge for up to 24 hours. This makes dinner easy. Just bake when you are ready. If you freeze them, thaw overnight before baking. Stuffed shells pair well with many sides. Here are a few ideas: - Garlic bread - Green salad with vinaigrette - Roasted vegetables - Steamed broccoli - A simple tomato salad These sides add color and flavor to your meal. Your stuffed shells are done when the cheese is bubbly and golden. Bake them covered for 25 minutes, then uncovered for 10-15 more minutes. You can also use a food thermometer. The center should reach 165°F (74°C). If the shells look a bit crisp, they are ready. Dried spinach can work, but it needs some prep. Rehydrate it in hot water for 10-15 minutes. Squeeze out excess water before mixing it into the filling. Fresh spinach gives a better flavor and texture, making it the best choice for this recipe. For more details, check the Full Recipe. You learned how to make delicious spinach and ricotta stuffed shells. We explored key ingredients and cooking tips. Each step guides you to perfect your dish. Remember, you can tweak flavors with different cheeses or veggies. Storing leftovers is easy, and reheating keeps them tasty. Enjoy your stuffed shells with confidence, knowing your meal is both tasty and simple. Now, get in the kitchen and create this comforting dish!
Easy Spinach and Ricotta Stuffed Shells Flavorful Meal
Welcome to a delicious journey! Today, I’m excited to share my recipe for Easy Spinach and Ricotta Stuffed Shells. This tasty meal is packed with
- 1 lb ground beef (80/20 for juiciness) - 1 teaspoon garlic powder - 1 teaspoon onion powder - 1 teaspoon smoked paprika - Salt and pepper to taste - 4 slices of cheddar cheese - Lettuce leaves - 1 large tomato, sliced - Pickles, for topping - 4 hamburger buns - Ketchup and mustard for serving When you choose your ground beef, aim for an 80/20 mix. This blend gives your burgers a juicy bite. The seasonings are simple yet effective. Garlic powder, onion powder, and smoked paprika add depth. Adjust salt and pepper to suit your taste. For toppings, I love using crisp lettuce, fresh tomato slices, and tangy pickles. They add freshness and crunch. Don't forget the cheese! Cheddar melts beautifully and adds rich flavor. Now for the buns, pick ones that you enjoy the most! Soft, toasted buns complete the meal. Finally, have ketchup and mustard ready. These classic condiments are a must for a great burger. If you want the full recipe, check out the detailed steps to create these delicious air fryer hamburgers. To start, gather your ingredients. In a large bowl, mix the ground beef with garlic powder, onion powder, smoked paprika, salt, and pepper. Use your hands to combine the mixture gently. Make sure not to overwork the meat. This keeps the burgers juicy. Next, divide the beef mixture into four equal parts. Shape each part into a patty. Make sure they are slightly larger than your hamburger buns. Use your thumb to press a small indent in each patty. This helps them cook evenly and prevents bulging. Now it’s time to preheat your air fryer. Set it to 350°F (175°C) and let it heat for about 5 minutes. This step is crucial for even cooking. Once your air fryer is ready, place the patties in the basket. Ensure they have space around them. Overcrowding can lead to uneven cooking. Cook the patties for 10 minutes. After 10 minutes, flip each patty over. Now, place a slice of cheddar cheese on top of each burger. This adds a nice melty finish. Cook for an additional 3 to 5 minutes. Check that the patties reach your desired doneness. While the patties cook, you can prepare the buns. Lightly toast them in a toaster or pan. This adds a nice crunch. To assemble, start with a lettuce leaf on the bottom half of each bun. Then, place the cooked patty with melted cheese on top. Add a slice of tomato and some pickles for crunch. Drizzle with ketchup and mustard. Finally, place the top half of the bun on each burger. For a great presentation, serve your burgers on a wooden board or a stylish plate. Pair them with sweet potato fries or a fresh salad for a complete meal. Enjoy your gourmet hamburgers fresh and hot! - Choosing the right meat ratio: Use ground beef with an 80/20 fat ratio. This mix gives you juicy and flavorful burgers. The fat keeps the burger moist while cooking. Too lean, and you get a dry patty. - Importance of not overworking the beef: When mixing the ground beef, use your hands gently. Overworking makes the meat tough. You want a soft texture. Mix just enough to combine the seasonings. - Tips on adjusting cooking time for different air fryers: Air fryer models vary. Check your model’s manual for exact cooking times. For thicker patties, add a few extra minutes. Always check the burgers for doneness. - How to avoid overcrowding in the air fryer basket: Cook in batches. Place 2 to 3 patties in the basket, leaving space between them. This helps them cook evenly. If they are too close, they won't brown well. {{image_2}} You can easily mix up the flavor of your burgers by using different seasonings. For a spicy kick, add chili powder. This will give your burgers an exciting heat. If you prefer herbs, try Italian seasoning. This mix of herbs adds a nice, fresh taste. Cheese can change the taste and texture of your burger. Swap out cheddar for provolone for a creamier flavor. Blue cheese brings a bold taste if you want something different. If you're following a plant-based diet, vegan cheese works well too. It melts nicely and keeps the burger tasty. Get creative with your burger toppings! Avocado adds creaminess and healthy fats. Sautéed mushrooms bring a deep, earthy flavor. You can also try fun condiments like spicy mayo or tangy BBQ sauce. These toppings can make your burger even more special. For the full recipe, check out the Air Fryer Juicy Gourmet Hamburgers guide. After enjoying your air fryer hamburgers, you may have leftovers. To store cooked patties, let them cool first. Place them in an airtight container. They will stay fresh in the fridge for up to three days. If you plan to keep them longer, freezing is a good option. For freezing uncooked patties, make sure to wrap each one tightly in plastic wrap. Then, place them in a freezer bag. This will help prevent freezer burn. These uncooked patties can last in the freezer for about three months. When you're ready to cook, just thaw them in the fridge overnight. To reheat your burgers, the best method is to use the air fryer again. Preheat the air fryer to 350°F (175°C). Place the leftover patties in the basket and heat for about 5-7 minutes. This keeps them juicy and flavorful. If you want to refresh the texture of previously cooked burgers, try adding a slice of cheese on top while reheating. This not only adds flavor but also helps keep the meat moist. Enjoy your burgers as if they were just made! How long to cook hamburgers in an air fryer? Cook the hamburgers for about 10 minutes at 350°F (175°C). Flip them halfway through. This gives them a nice, juicy texture. What temperature should I set for air frying hamburgers? Set your air fryer to 350°F (175°C). This temperature cooks the patties evenly and keeps them moist. Can I use turkey or chicken instead of beef? Yes, you can. Ground turkey and chicken work well. Just keep an eye on the cooking time, as they may cook faster than beef. What are good vegetarian alternatives for burgers? Try black bean patties, lentil burgers, or store-bought veggie burgers. They are tasty options and cook well in the air fryer. What goes well with air fryer hamburgers? Air fryer hamburgers pair well with crispy fries, onion rings, or a fresh salad. You can also add some grilled vegetables for extra flavor. Ideas for side dishes to complement the meal Consider serving sweet potato fries or coleslaw. Both add a nice crunch and balance the meal. For a lighter touch, serve with a simple green salad. You can create delicious air fryer hamburgers easily. We covered key ingredients, preparation steps, and cooking tips to ensure juiciness. Remember to choose your meat wisely and adjust your cooking time based on your air fryer. Don't be afraid to experiment with toppings and seasonings. Enjoy your burger creations with fun sides and sauces. With these tips, you can make fantastic meals that everyone will love. Bring your burger game to the next level!
Air Fryer Hamburgers Juicy and Flavorful Recipe
Looking for a quick way to make juicy, flavorful hamburgers? Look no further! In this guide, I’ll show you how to use your air fryer
- 2 ribeye steaks (1-inch thick) - 4 tablespoons unsalted butter, softened - 3 cloves garlic, minced - 1 teaspoon dried Italian herbs (oregano, basil, thyme) - 1 cup shredded mozzarella cheese - Salt and pepper to taste - Fresh parsley, chopped (for garnish) When choosing ribeye steaks, look for bright red color and good marbling. Marbling is the fat within the meat. It makes the steak juicy and tasty. Fresh herbs add a burst of flavor. High-quality cheese melts beautifully, making your dish even better. Always use fresh mozzarella for the best taste. If you can’t find ribeye, try sirloin or flank steak. Both are great choices. For a dairy-free option, use plant-based cheese. Many brands offer tasty alternatives that melt well. First, we need to mix the garlic butter. In a small bowl, combine the softened butter, minced garlic, and dried Italian herbs. Stir until the mix is smooth. This garlic butter adds so much flavor to the steak. Next, pat the steaks dry with paper towels. This step helps the seasoning stick better. Season both sides of the steaks with salt and pepper. Use a generous amount to really enhance the taste. After seasoning, spread the garlic butter mixture evenly over both sides of the steaks. Make sure each one is well-coated. This will give you that rich, garlicky flavor you want. Now it’s time to cook the steaks. Preheat your air fryer to 400°F (200°C) for about 5 minutes. This helps get the steaks a nice sear. Place the seasoned steaks in the air fryer basket in a single layer. Cook them for 8-10 minutes for medium-rare. Flip them halfway through cooking. If you like your steak more done, adjust the time as needed. In the last 2 minutes of cooking, sprinkle the shredded mozzarella cheese over the steaks. This will melt beautifully on top. Close the air fryer and let the cheese melt. Once the steaks are done, carefully remove them from the air fryer. Let them rest for 5 minutes before slicing. This resting time allows the juices to settle. Finally, garnish the steaks with freshly chopped parsley. This adds a nice pop of color and flavor. For the full recipe, refer to the earlier section. Enjoy your tasty air fryer cheesy garlic steaks! To get the best steak, know the internal temperatures. Here are the key doneness levels: - Rare: 125°F - Medium Rare: 135°F - Medium: 145°F - Medium Well: 150°F - Well Done: 160°F For flipping steaks in the air fryer, use tongs. Be gentle. This avoids tearing the meat. Flip halfway through cooking for even results. To amp up the taste, consider using more herbs. Try adding rosemary or thyme. They pair well with steak. Fresh garlic adds a bright taste. It beats powdered garlic every time. If you must use powder, go light. Fresh garlic gives a strong punch. Overcooking the steaks is a big no-no. Use a meat thermometer to check doneness. If you skip this, you risk a dry steak. Always let your steaks rest for five minutes after cooking. This keeps the juices inside. Slicing too soon will lose all that flavor. {{image_2}} You can make your Air Fryer Cheesy Garlic Steaks even tastier. Try adding different cheeses. Cheddar adds a sharp, rich flavor. Blue cheese gives a tangy kick. Both cheeses melt well and complement the garlic perfectly. Another great idea is to infuse the butter with herbs or spices. You can mix in fresh rosemary or thyme for a fragrant touch. A pinch of red pepper flakes adds a nice heat. Experiment with what you love for a unique twist. Pair your cheesy garlic steaks with delicious side dishes. Creamy mashed potatoes work great. A fresh salad brightens up the meal. Roasted vegetables add color and flavor, too. You might also consider great sauces or dips. A simple chimichurri sauce adds freshness. A rich garlic aioli can enhance the garlic flavor. Choose what excites your taste buds for a complete dining experience. If you want to try something different, consider alternatives to air frying. Broiling in the oven gives a nice char. Place the steaks on a broiler pan, and cook them under high heat. Flip them halfway through for even cooking. You can also grill the steaks outdoors if the weather permits. Grilling adds a smoky flavor that pairs well with cheese. Each method brings out different tastes in your steaks. Enjoy experimenting to find your favorite way to cook! For the full recipe, check out the Air Fryer Cheesy Garlic Steaks section above! Store leftover cheesy garlic steaks in airtight containers. Use glass or plastic containers. Make sure they cool down first. Place them in the fridge. You can keep them fresh for up to three days. For longer storage, freeze the steaks. Wrap them tightly in plastic wrap, then place in a freezer bag. This helps prevent freezer burn. To reheat, use the air fryer for best results. Set it to 350°F (175°C). Heat for about 5 minutes. This keeps the steak juicy and warm. Avoid using the microwave if you can. Microwaving can dry out the meat. If you must use a microwave, heat in short bursts. Check often to avoid overcooking. Cooked cheesy garlic steaks last about three days in the fridge. Look for signs of spoilage. If the steak smells off or has a slimy texture, it’s time to toss it. When frozen, the steaks can last up to three months. Always label your bags with the date. This way, you know when to use them. The best way to season air fryer steaks is with salt and pepper. I recommend using about one teaspoon of salt and half a teaspoon of pepper for each steak. You can also add garlic powder or fresh herbs for more flavor. A tasty garlic butter mix adds a nice touch to your steaks. Yes, you can cook frozen steaks in the air fryer! Just remember to increase the cooking time. For a frozen ribeye, cook for about 10-12 minutes at 400°F. Flip the steak halfway through for even cooking. Use a meat thermometer to check the doneness. To know when your steak is done cooking, use a meat thermometer. Here are the target temperatures: - Rare: 125°F - Medium-rare: 135°F - Medium: 145°F - Medium-well: 150°F - Well done: 160°F Check the thickest part of the steak for accuracy. Yes, you can use other cooking oils instead of butter. Olive oil or avocado oil works well. They add flavor, but won’t give you that rich, buttery taste. If you want a similar taste, consider using a garlic-infused oil. If you don’t have an air fryer, you can still make this recipe using a grill or an oven. For the grill, preheat it to medium-high and cook the steaks for about 6-8 minutes per side. For the oven, preheat to 400°F and bake for 10-15 minutes, flipping halfway. The texture will be different, but the flavors will still shine. Check the full recipe for more details! In this article, we explored how to make delicious cheesy garlic ribeye steaks in an air fryer. We discussed key ingredients, cooking steps, and tips for perfect results. Remember, choosing quality ingredients matters. Also, avoid common mistakes to ensure juicy steaks. Experiment with flavors and side dishes for variety. Store leftovers properly to enjoy them later. Follow these steps, and you'll succeed in creating a tasty dish that impresses anyone. Enjoy your cooking adventure!
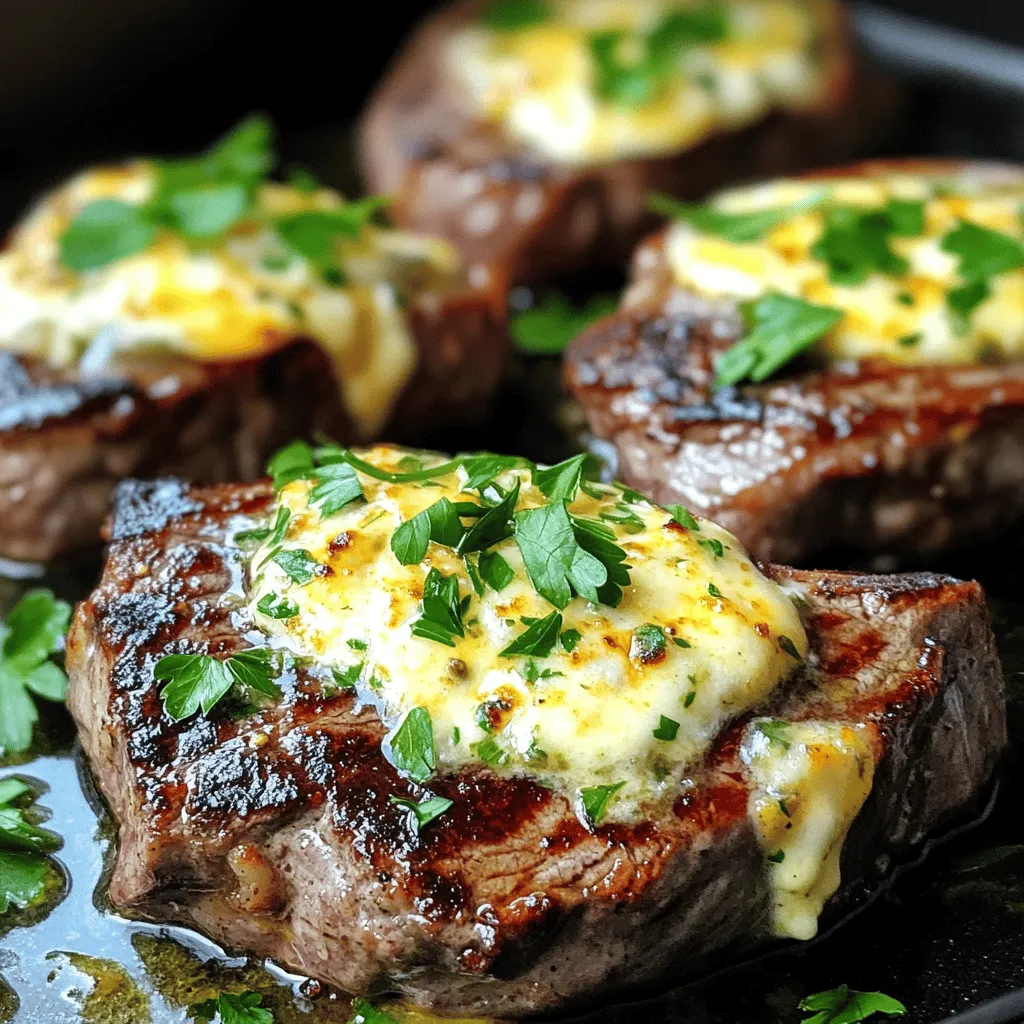
Air Fryer Cheesy Garlic Steaks Flavorful Easy Recipe
Are you ready to take your steak game to the next level? In this article, I’m sharing my easy Air Fryer Cheesy Garlic Steaks recipe
- 4 cups fresh corn kernels (or frozen, thawed) - 1 cup white cheddar cheese, shredded - 1/2 cup cream cheese, softened - 1/2 cup sour cream - 1/2 cup milk For this dish, corn is the star. You can use fresh corn or frozen corn. Both options work well. I love the sweet crunch of fresh corn, but frozen corn is super easy and still tasty. White cheddar cheese brings a rich flavor. It melts beautifully and gives that creamy texture. Cream cheese adds depth. It makes the dish smooth and indulgent. Sour cream gives a slight tang. It balances the flavors perfectly. Milk ensures the mixture is creamy, not dry. - 1 teaspoon garlic powder - 1/2 teaspoon smoked paprika - 1/4 cup scallions, finely chopped - Salt and pepper to taste Seasoning is key. Garlic powder adds warmth. Smoked paprika gives a hint of smokiness. The scallions add a fresh crunch. Don’t forget salt and pepper to enhance all the flavors. You can adjust these to your taste. - 1/2 cup breadcrumbs - 2 tablespoons parsley, chopped (for garnish) Breadcrumbs create a crispy topping. It adds texture and contrast to the creamy corn. You can use plain or seasoned breadcrumbs. Lastly, parsley makes a great garnish. It adds color and a fresh pop to your dish. For the full recipe, check out the details above. Now let's get cooking! 1. Preheat the oven to 375°F (190°C). This step is crucial. A hot oven helps the dish bake evenly. 2. Grease a 9x13 inch baking dish. Use butter or cooking spray. This keeps the corn from sticking. 3. Mix the corn and cheese ingredients. In a large bowl, combine: - 4 cups fresh corn kernels (or frozen, thawed) - 1 cup white cheddar cheese, shredded - 1/2 cup cream cheese, softened - 1/2 cup sour cream - 1/2 cup milk - 1/4 cup scallions, finely chopped - 1 teaspoon garlic powder - 1/2 teaspoon smoked paprika - Salt and pepper to taste Stir until everything blends well. 1. Pour and spread the corn mixture into the dish. Make sure it’s even. This helps it cook uniformly. 2. Add the breadcrumb topping. In a small bowl, mix: - 1/2 cup breadcrumbs - A drizzle of olive oil (optional) - A pinch of salt and pepper Sprinkle this mix evenly over the corn. 1. Bake for 25-30 minutes. Watch for the cheese to melt and bubble. The top should turn golden brown. 2. Let it cool for a few minutes before serving. This helps the dish set. You can garnish with chopped parsley for a fresh touch. For the complete recipe, refer to the Full Recipe section. You can switch up the cheese if you need. Try using gouda or mozzarella for a milder taste. For a dairy-free option, use cashew cream or almond milk. You can also replace sour cream with coconut yogurt. When it comes to herbs and spices, fresh herbs add a burst of flavor. Swap parsley for cilantro or chives. If you want some heat, add a pinch of cayenne pepper or chili powder. Mix your ingredients well for the best flavor. Start by blending the corn, cheeses, and cream until smooth. Use a spatula to fold in the scallions and spices gently. This keeps the mixture fluffy. Baking evenly is key. Spread your corn mix in the dish evenly. Use a spatula to smooth the top. This helps it cook properly and get that nice golden finish. White cheddar baked corn pairs well with grilled chicken or steak. It also goes great with a fresh salad. For special events, serve it in individual ramekins. This not only looks nice but makes serving easier. Garnishing with extra parsley or a sprinkle of cheese adds a nice touch. You can also drizzle some hot sauce for a spicy kick. {{image_2}} You can boost flavor by adding jalapeños or bell peppers. These add a nice kick. The heat from jalapeños brightens the dish. Bell peppers give it a sweet crunch. You can also mix in crispy bacon or your favorite meat. Bacon adds a smoky depth that pairs well with cheese. If you want a vegetarian or vegan option, swap out dairy. Use plant-based cream cheese and sour cream. Nutritional yeast can give a cheesy flavor. For gluten-free needs, you can use gluten-free breadcrumbs. Look for options made from almond or rice flour. These substitutions keep the dish delicious for everyone. Seasonal veggies can enhance your baked corn. Try adding zucchini or bell peppers in summer. In fall, mix in roasted squash or pumpkin. Adjust flavors based on holidays too. For Thanksgiving, add sage and thyme for warmth. This way, you keep the dish fresh and exciting all year round. After enjoying White Cheddar Baked Corn, store leftovers in an airtight container. This keeps the dish fresh and tasty. Place the corn in the fridge within two hours of serving. It lasts about 3 to 4 days in the fridge. Always check for off smells or changes before eating leftovers. To freeze, let the dish cool completely. Then, portion it into freezer-safe bags. Remove as much air as possible to avoid freezer burn. When you want to eat it, thaw the corn in the fridge overnight. Reheat in the oven at 350°F (175°C) until hot. This usually takes about 20 to 25 minutes. Use glass or plastic containers for short-term storage. They help maintain flavor and texture. For long-term storage, use heavy-duty freezer bags. This keeps the dish safe from freezer burn. Label the bags with a date to track freshness. How long does White Cheddar Baked Corn take to cook? White Cheddar Baked Corn takes about 45 minutes to cook. It includes 15 minutes for prep and 30 minutes of baking time. You want to see the cheese melt and bubble. The top should be a nice golden brown before you take it out. Can I make this dish ahead of time? Yes, you can make this dish ahead of time. Prepare it and store it in the fridge for up to 24 hours. Just cover it tightly with plastic wrap. When ready, bake it right from the fridge. You may need to add a few extra minutes to the baking time. What are the calories in White Cheddar Baked Corn? One serving of White Cheddar Baked Corn has about 300 calories. This can change based on the type of cheese and sour cream you use. Check the labels for exact numbers. Is White Cheddar Baked Corn healthy? White Cheddar Baked Corn can be part of a balanced diet. It has corn, which is a good source of fiber. The cheese adds some protein and calcium. However, it does have fat and calories, so enjoy it in moderation. Can I use a different type of cheese? Yes, you can use a different type of cheese. Try sharp cheddar or even pepper jack for a spicy kick. Just keep the same amount as the recipe calls for. What can I replace sour cream with in this recipe? You can replace sour cream with plain Greek yogurt. It will add creaminess and a bit of tang. You could also use cream cheese for a richer taste. Just make sure it’s softened to mix well. You now have a clear guide to making White Cheddar Baked Corn. We covered the main ingredients, seasoning, and topping options. The step-by-step instructions guide you through preparing and baking the dish perfectly. We also shared tips for ingredient substitutions and cooking techniques. Finally, you can enjoy variations and know how to store leftovers. This dish is versatile and can be adapted for any occasion. With a little creativity, you can make it your own and impress everyone at the table. Get cooking!
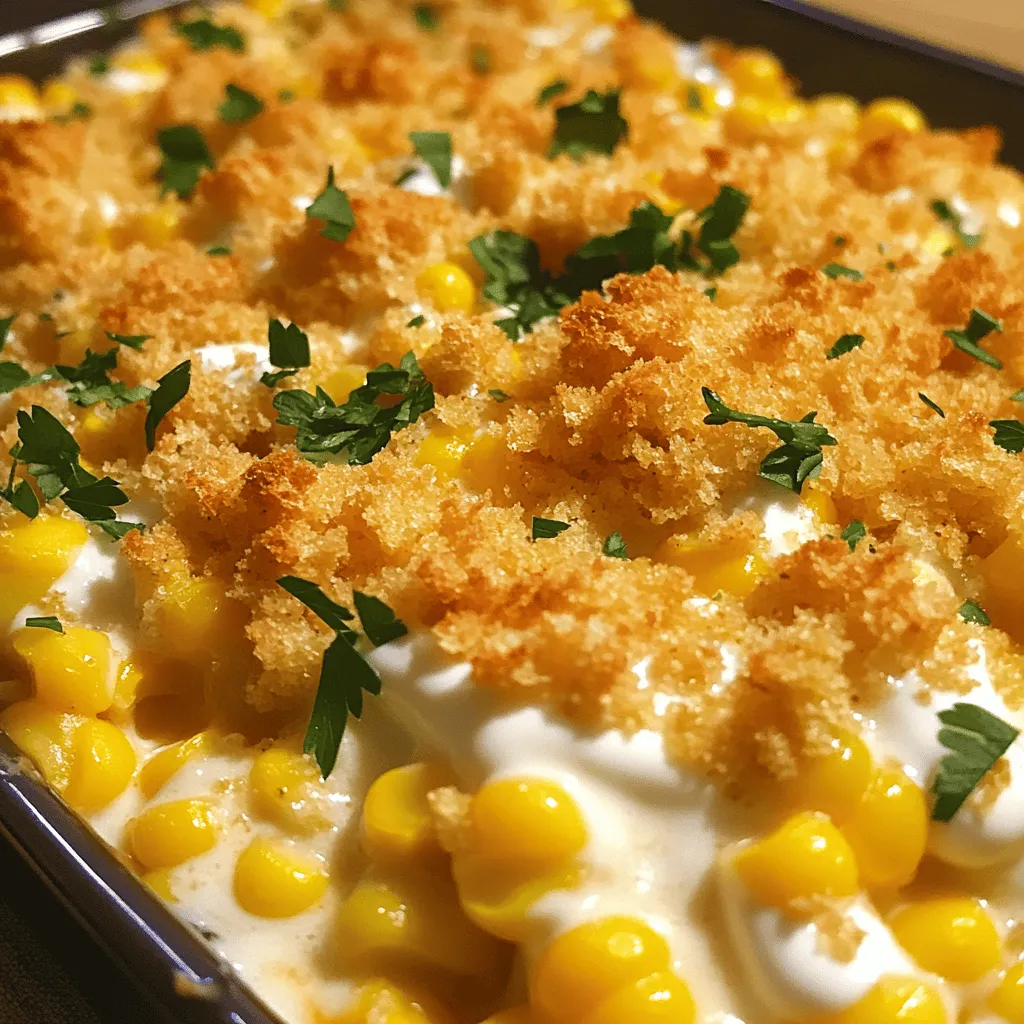
White Cheddar Baked Corn Flavorful Comfort Food Dish
Are you ready to upgrade your comfort food game? White Cheddar Baked Corn is not only simple to make, but it’s also bursting with flavor.