Dinner
![- 1 lb ground chicken - 1/2 cup breadcrumbs - 1/4 cup grated Parmesan cheese - 1 tablespoon Italian seasoning To make tasty chicken Parmesan sliders, you need simple ingredients. Ground chicken is the base. It keeps the sliders juicy and tender. Breadcrumbs help bind the patties, giving them a nice texture. Parmesan cheese adds a salty, savory flavor. Italian seasoning brings a burst of herbs to each bite. - 1 teaspoon garlic powder - 1 cup marinara sauce - 1 1/2 cups shredded mozzarella cheese - Fresh basil leaves For extra flavor, we add garlic powder. It gives a nice kick without being too strong. Marinara sauce is a must. It adds moisture and a rich taste. Shredded mozzarella cheese melts beautifully and creates a gooey layer on top. Fresh basil leaves not only look pretty but also add a fresh touch. - 12 slider buns - Olive oil spray The slider buns are the final component. They hold everything together and add a soft bite. Olive oil spray helps prevent sticking when baking. It also helps the tops of the sliders get a lovely golden color. For the full recipe, follow along and enjoy making these sliders! 1. Preheating the oven: Start by preheating your oven to 375°F (190°C). This step is crucial for even baking. While the oven heats, lightly grease a baking tray with olive oil spray. 2. Mixing the chicken mixture: In a large bowl, combine the ground chicken, breadcrumbs, grated Parmesan cheese, Italian seasoning, garlic powder, salt, and black pepper. Mix well until everything blends together smoothly. This mixture forms the base of your sliders. 1. Pan-frying instructions: Heat a non-stick skillet over medium heat. Add a drizzle of olive oil to the pan. Shape the chicken mixture into small patties, about the size of your palm. Cook the patties for about 5 minutes on each side. Look for a golden brown color. 2. Checking internal temperatures: Use a meat thermometer to check the internal temperature. It should reach 165°F (75°C) to ensure the chicken is safe to eat. 1. Layering marinara and cheese: Once the patties are cooked, place them on the bottom halves of the slider buns. Spoon warm marinara sauce over each patty. Top each with shredded mozzarella cheese. 2. Baking times and tips: Cover the tray with aluminum foil and place it in the preheated oven. Bake for 10-12 minutes, or until the cheese is melted and bubbly. For a crispy top, remove the foil and bake for an additional 5 minutes. Enjoy your sliders with fresh basil leaves on top for a delightful finish. To make tasty chicken sliders, focus on texture and flavor. Ground chicken needs some help to be juicy. Mix in breadcrumbs, Parmesan, and Italian seasoning for great taste. These ingredients keep the chicken moist and full of flavor. Cook the patties until they are golden brown. This will give you a nice crunch on the outside. For cooking methods, pan-frying is best for a crispy surface. You can also bake them for a healthier option. Just make sure to watch the time so they don’t dry out. If you bake them, cover with foil at first to keep the moisture in. When it’s time to serve your sliders, make them look great! Stack them high on a big platter for a fun display. You can also add a small bowl of warm marinara on the side. This gives your guests a chance to dip their sliders. It’s a fun and interactive way to enjoy them. For side dishes, think about fresh salads or baked fries. A light salad pairs well with the rich flavors of the sliders. You could even offer some potato chips for a crunchy option. Get creative with your sliders! You can add veggies like spinach or roasted peppers. Different cheeses like provolone or gouda can also change the flavor. If you want to make them gluten-free, use gluten-free breadcrumbs. For low-carb options, you can skip the buns. Instead, serve the patties on lettuce leaves. This keeps the flavor but cuts down on carbs. The Full Recipe has many ways to make these sliders your own! {{image_2}} You can switch the ground chicken for turkey or beef in this recipe. Turkey gives a lighter taste and is a great choice. Beef adds a richer flavor and goes well with the marinara. If you want a veggie option, try using black beans or chickpeas. Mash them and add breadcrumbs for texture. This makes a hearty slider that everyone can enjoy. To kick up the heat, add some hot sauce to the chicken mix. A few drops can give your sliders a spicy twist. You can also play with Italian herbs, like oregano or thyme. These spices can enhance the slider's taste. Try adding a sprinkle of crushed red pepper for extra flavor. If you want to make low-fat sliders, use lean ground chicken or turkey. This keeps the taste without the extra calories. For a dairy-free option, swap the mozzarella with a plant-based cheese. Many brands offer great flavors that melt well. You can enjoy delicious sliders while meeting your dietary needs. For the full recipe, check out the [Full Recipe]. To keep your leftover sliders fresh, store them in the fridge. Use an airtight container to avoid drying out. They can last in the fridge for about three days. If you want to save them longer, freezing is a good option. Wrap the sliders tightly in plastic wrap and then place them in a freezer bag. This way, they can stay fresh for up to three months. When it comes to reheating, you want to keep the sliders moist. The best method is to use an oven. Preheat it to 350°F (175°C) and place the sliders on a baking sheet. Cover them with foil to keep them from drying out. Heat for about 10-15 minutes. If you prefer, a microwave works too. Just heat them for about 30 seconds, but this might make them a bit soggy. How long can sliders last? In the fridge, they last about three days. In the freezer, they can last three months. Always check for signs of spoilage. If you see mold or smell something off, it’s best to throw them away. Always trust your nose and eyes! Enjoy your tasty Chicken Parmesan Sliders by keeping them fresh and safe. For the Full Recipe, refer back to the earlier section! Chicken Parmesan sliders are mini sandwiches filled with tasty chicken patties. I make these patties with ground chicken, breadcrumbs, and Parmesan cheese. I add Italian seasoning and spices for flavor. Then, I cook them until golden brown. I top each slider with marinara sauce and melted mozzarella cheese. These sliders are perfect for parties or game day. Yes, you can prepare Chicken Parmesan sliders ahead of time. Make the chicken patties and store them in the fridge. You can also mix the sauce and cheese in advance. When you're ready, just assemble and bake them. This saves time when you have guests or a busy week ahead. To add heat to your sliders, mix some crushed red pepper flakes into the chicken mixture. You can also add hot sauce to the marinara sauce. For a flavorful twist, try using pepper jack cheese instead of mozzarella. These tips will give your sliders a nice kick. Chicken Parmesan sliders pair well with many sides. Try serving them with a fresh salad or crispy fries. You can also add some roasted veggies for a colorful plate. For drinks, consider iced tea or a light Italian soda. These pairings make for a fun meal. To keep your chicken sliders juicy, do not overcook the patties. Aim for an internal temperature of 165°F (75°C). Adding breadcrumbs helps retain moisture. You can also use a bit of olive oil when cooking. This keeps the patties tender and flavorful. In this post, we explored how to craft delicious Chicken Parmesan Sliders. We covered essential ingredients, cooking methods, and tasty variations. You learned the steps to prepare, assemble, and serve these sliders. Plus, I shared tips for storing leftovers and keeping them fresh. These sliders are not just a meal; they are fun to eat. Experiment with flavors and ingredients to make them your own. Try different meats or spice levels, and enjoy every bite. Happy cooking!](https://grilledflavors.com/wp-content/uploads/2025/05/de4b1dad-6e26-4365-9574-b88b0a335af8.webp)
Tasty Chicken Parmesan Sliders Simple and Savory Treat
Chicken Parmesan Sliders bring together all the best flavors in one tasty bite. If you love cheesy, savory treats, this simple recipe will delight your
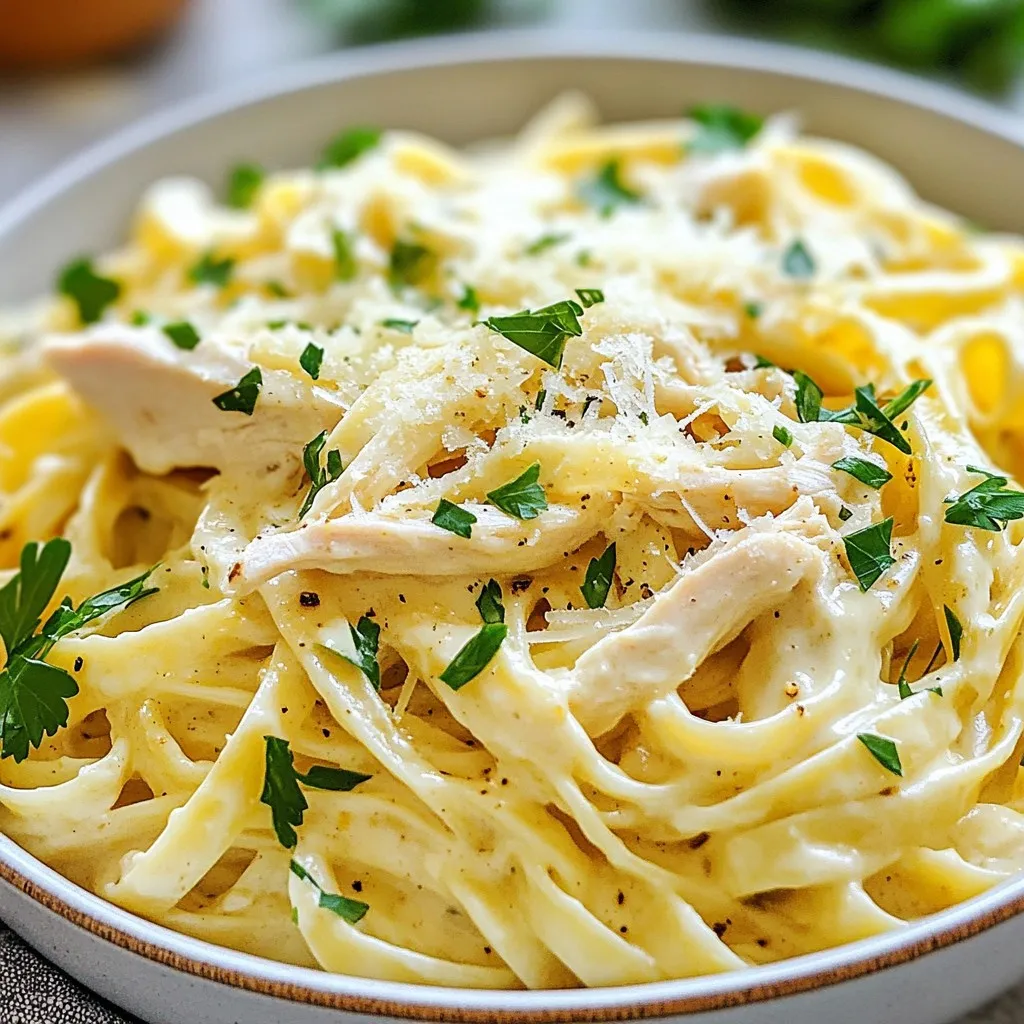
Instant Pot Chicken Alfredo Creamy Dinner Delight
Want a creamy, dreamy dinner without all the fuss? My Instant Pot Chicken Alfredo is the perfect solution. With tender chicken, rich sauce, and al
![- 1 pound shrimp, peeled and deveined - 1 cup buttermilk (or dairy-free alternative) - 1 cup all-purpose flour - 1/2 cup cornstarch - 2 teaspoons paprika - 1 teaspoon garlic powder - 1 teaspoon cayenne pepper (adjust to taste) - Salt and pepper to taste - Oil for frying The main star of this dish is the shrimp. I love using fresh shrimp for the best flavor. Buttermilk helps make the shrimp tender. It also adds a nice tang. The flour and cornstarch mix gives the shrimp that crispy texture. The spices like paprika and cayenne give a bit of heat. You can adjust the cayenne to your taste. Salt and pepper are essential for seasoning. - 1/2 cup mayonnaise - 2 tablespoons sweet chili sauce - 1 tablespoon sriracha (adjust to taste) - 1 teaspoon honey (or agave syrup for vegan option) - Juice of 1 lime The Bang Bang sauce is what makes these tacos special. It has a creamy base from the mayonnaise. Sweet chili sauce adds sweetness and a hint of spice. Sriracha brings some heat, and you can adjust it if you want it spicier. Honey adds a touch of sweetness, but you can swap it with agave for a vegan option. Fresh lime juice brightens the sauce and makes it tangy. - 8 small corn tortillas - 1 cup shredded cabbage - 1/2 cup diced tomatoes - 1/4 cup chopped fresh cilantro - Lime wedges for serving For the tacos, I use small corn tortillas. They hold the filling perfectly. Shredded cabbage adds crunch and freshness. Diced tomatoes add color and sweetness. Fresh cilantro gives a nice herbal flavor. Don’t forget lime wedges for squeezing over the tacos. They add a zesty kick. For the full recipe, check out the sections below. To make the Bang Bang sauce, start with a small bowl. Add the mayonnaise, sweet chili sauce, sriracha, honey, and lime juice. Whisk everything together until smooth. This sauce gives the tacos their signature flavor. Once mixed, set the sauce aside. It can stay at room temperature while you prepare the shrimp. Next, take the shrimp and place them in a medium bowl. Pour the buttermilk over the shrimp. This step helps the shrimp stay juicy. Let them marinate for at least 15 minutes. While the shrimp soak, prepare the dry mixture. In another bowl, mix the flour, cornstarch, paprika, garlic powder, cayenne, salt, and pepper. This mix will create a crunchy coating for the shrimp. Now it’s time to cook the shrimp. In a large skillet, heat about 1/2 inch of oil over medium-high heat. You want the oil to be hot, but not smoking. Carefully add the coated shrimp in batches. Fry them for 2-3 minutes on each side. Look for a golden brown color and a crispy texture. Once done, remove the shrimp and let them drain on a paper towel. To assemble the tacos, start by warming the corn tortillas. You can do this in a dry skillet or microwave. Place a handful of shredded cabbage on each tortilla. Next, add 2-3 pieces of crispy shrimp on top. Then, sprinkle diced tomatoes over the shrimp. Finally, drizzle the Bang Bang sauce on top and add fresh cilantro. Your tacos are now ready to enjoy. For a zesty touch, serve with lime wedges on the side. For the complete recipe, check out the [Full Recipe]. To get the best shrimp texture, marinating is key. I suggest marinating the shrimp for at least 15 minutes. This step helps the shrimp absorb the buttermilk. It also makes them tender and flavorful. If you have time, marinate for 30 minutes for even better results. Next, pay attention to the frying temperature. Heat the oil to medium-high. The oil should shimmer but not smoke. If the oil is too hot, your shrimp may burn. If it’s too cool, they will soak up oil and become greasy. Aim for around 350°F (175°C) for perfect frying. Adjusting spice levels can make a big difference. Start with the cayenne pepper in the flour mix. You can add more if you like heat. If you want a milder flavor, reduce the amount. You can also try adding some smoked paprika for a deeper taste. For extra flavor, consider toppings and garnishes. Shredded cabbage gives crunch. Diced tomatoes add freshness. Fresh cilantro is a must for brightness. You can also add sliced jalapeños for some zing or avocado for creaminess. Pairing drinks with your tacos can elevate the meal. A light beer or crisp white wine works well. If you prefer non-alcoholic options, try a fresh limeade or sparkling water with lime. For creative plating, stack the tacos in a row on a large platter. This makes a striking display. You can also serve lime wedges in a small bowl for easy access. Add a few sprigs of cilantro around the tacos for color. This makes the dish look even more appealing. For the full recipe, visit the Bang Bang Shrimp Tacos section. {{image_2}} Baking Bang Bang Shrimp Baking is a healthier choice. Preheat your oven to 400°F. Coat the shrimp with oil and seasonings. Spread them on a baking sheet. Bake for about 15 minutes. This method keeps the shrimp juicy and crisp. Grilling options Grilling adds a smoky flavor. Skewer the shrimp for easy handling. Preheat your grill to medium-high heat. Grill the shrimp for 2-3 minutes on each side. This method gives a nice char and enhances the taste. Using different tortillas You can switch up the tortillas. Try flour, whole wheat, or even lettuce wraps. Each option changes the texture and flavor. Corn tortillas are traditional, but feel free to explore. Alternative fillings Get creative with fillings! Add avocado, black beans, or even grilled veggies. These add nutrition and different tastes. You can also use other proteins, like chicken or tofu, for a twist. Vegan sauce adaptation To make a vegan sauce, swap mayonnaise for a plant-based option. Use silken tofu or vegan mayo. Keep the sweet chili sauce and lime juice. This way, you still get that creamy, tangy flavor. Spiciness adjustments Adjust the heat to your liking. Use less cayenne for mild flavors. You can add more sriracha for extra kick. Always taste as you mix. This keeps the sauce balanced and tasty. For the full recipe, check out the Bang Bang Shrimp Tacos section above. To keep your Bang Bang Shrimp Tacos fresh, use airtight containers. Glass containers work well, but any plastic container with a lid will do. Layer the shrimp and toppings separately to avoid sogginess. Place a piece of wax paper between layers. This helps the tacos stay crisp longer. You can freeze leftover shrimp and sauce for later use. First, let the shrimp cool. Then, place them in a freezer-safe bag. For the sauce, pour it into a small container. Seal both bags tightly, removing as much air as possible. When ready to eat, thaw the shrimp in the fridge overnight. Reheat them in a skillet over low heat until warm. In the fridge, your leftover tacos last about three days. If they smell funny or look off, it’s best to toss them. Always check for signs of spoilage. If the shrimp feels slimy or has a strange color, do not eat it. Stay safe and enjoy your Bang Bang Shrimp Tacos fresh from the kitchen! For the full recipe, click here [Full Recipe]. For Bang Bang Shrimp Tacos, you can use either fresh or frozen shrimp. Fresh shrimp offer a sweet taste and firm texture. However, frozen shrimp are convenient and often just as tasty. If you choose frozen shrimp, thaw them in the fridge overnight for the best results. Look for shrimp that are peeled and deveined to save prep time. Yes, you can make Bang Bang Sauce ahead of time. Store it in an airtight container in the fridge. It will stay fresh for about a week. This sauce gets better as it sits, allowing the flavors to meld. Just give it a quick stir before using. To make these tacos gluten-free, you can swap regular flour for a gluten-free blend. Cornstarch is already gluten-free, making it a great option for the coating. Choose gluten-free corn tortillas for a complete gluten-free meal. You can find Bang Bang Shrimp Tacos at many seafood or Asian-inspired restaurants. Popular chains like Bonefish Grill serve a well-known version. For local options, use apps like Yelp or Google Maps. Search for “Bang Bang Shrimp Tacos” to find nearby spots. Bang Bang Shrimp Tacos combine tasty shrimp, rich sauce, and fresh veggies. This recipe guides you through making the perfect dish with easy steps and helpful tips. Remember, you can try different cooking methods and modify ingredients to suit your taste. Whether you fry, bake, or grill, customizing your tacos brings fun to your meals. Keep the leftovers fresh, and enjoy them later! Now, gather your ingredients and start cooking these delicious tacos today. You’ll impress your family and friends with your skills.](https://grilledflavors.com/wp-content/uploads/2025/05/1b764d74-413b-4cf0-bb32-3ffe751bce03.webp)
Bang Bang Shrimp Tacos Flavorful and Easy Recipe
Are you ready to spice up your taco night? Bang Bang Shrimp Tacos are a game-changer. They combine crispy shrimp, a rich sauce, and fresh

Southern Crab Pie Flavorful Comfort Food Delight
If you’re craving a warm, rich dish, Southern Crab Pie is your answer. This flavorful comfort food delight combines fresh crab, creamy filling, and a
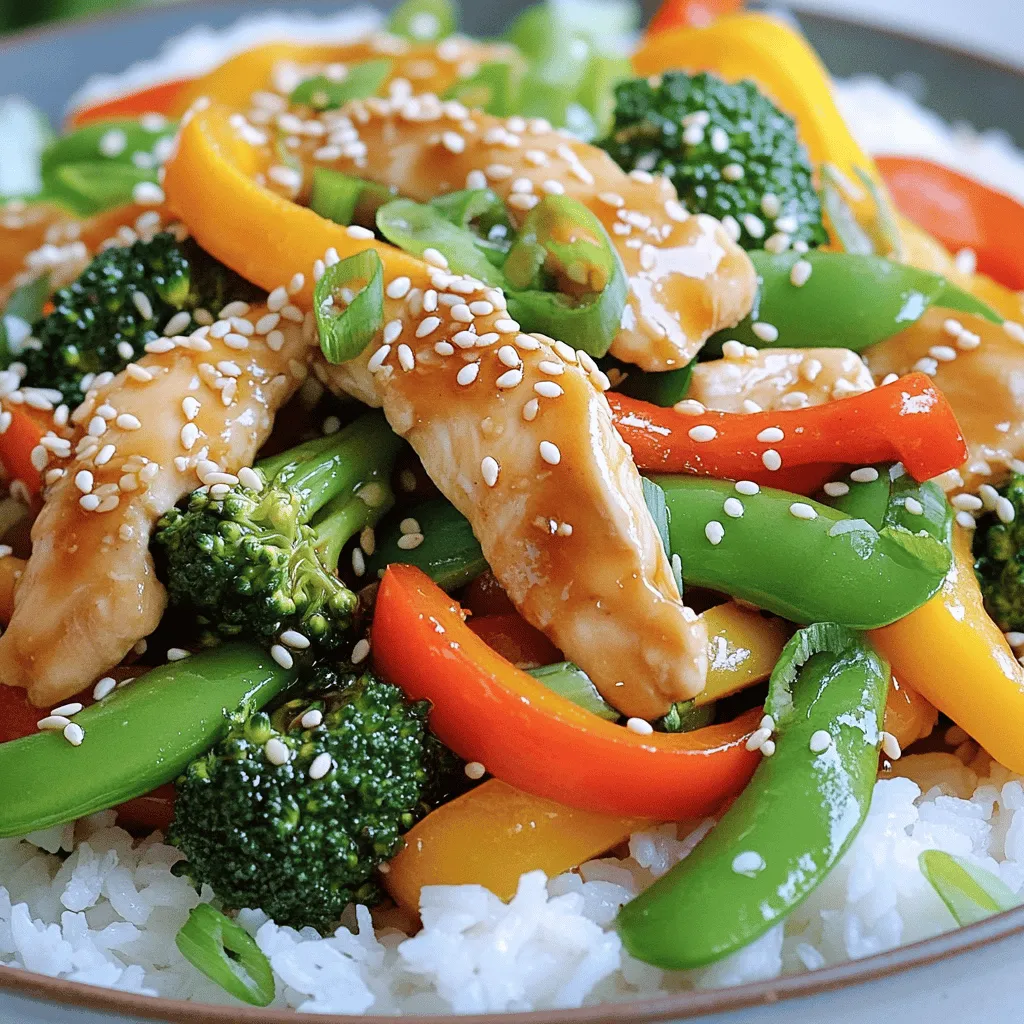
Teriyaki Chicken Stir-Fry Easy and Flavorful Recipe
Craving a quick and tasty meal? My Teriyaki Chicken Stir-Fry recipe is here to satisfy you! This dish features tender chicken, fresh veggies, and a
![- 1 lb ground beef - 4 medium potatoes (peeled and thinly sliced) - 1 cup shredded cheddar cheese - 1 small onion (chopped) - 2 cloves garlic (minced) - 1 teaspoon paprika - 1 cup beef broth - 1 cup sour cream - 1 tablespoon olive oil The heart of any great Hamburger Potato Casserole lies in its ingredients. Start with 1 lb of ground beef. This gives your dish a rich, meaty base. Next, grab 4 medium potatoes, peeled and sliced thin. The potatoes soak up all the flavors. Then, you need 1 cup of shredded cheddar cheese. This cheese forms a gooey, delicious top layer. For added flavor, we have 1 small onion, chopped finely. It gives the dish a sweet, aromatic touch. Also, don’t forget 2 cloves of garlic, minced to perfection. Garlic adds a punch of flavor. You’ll also use 1 teaspoon of paprika. This spice brings warmth and depth to the casserole. Next, we have the liquid ingredients. You’ll need 1 cup of beef broth to keep everything moist. It also adds extra beefy flavor. Then, add 1 cup of sour cream. This makes the casserole creamy and rich. Lastly, use 1 tablespoon of olive oil. This helps to sauté the onions and garlic, bringing out their best qualities. With these ingredients, you are well on your way to making a satisfying meal. For the full recipe, check the details above! - Preheat oven to 375°F (190°C). - In a large skillet, heat 1 tablespoon of olive oil over medium heat. - Add 1 small chopped onion and 2 minced garlic cloves. Sauté until soft, about 3-4 minutes. - Add 1 pound of ground beef to the skillet. Cook until browned. - Drain excess grease from the beef. - In a bowl, mix the beef with 1 cup of sour cream, 1 cup of beef broth, 1 teaspoon of paprika, 1 teaspoon of salt, and 1/2 teaspoon of black pepper. Stir until well combined. - Grease a 9x13 inch baking dish. - Layer half of the sliced potatoes evenly on the bottom. - Pour half of the beef mixture over the potatoes. Spread it evenly. - Repeat with the remaining potatoes and beef mixture, finishing with a layer of potatoes on top. - Cover the dish with aluminum foil and bake for 45 minutes. - Remove the foil and sprinkle 1 cup of shredded cheddar cheese on top. - Bake for an additional 15-20 minutes, until potatoes are tender and cheese is bubbly. - Allow the casserole to cool for about 5 minutes before serving. - For a fresh touch, garnish with chopped parsley if you like. This hearty Hamburger Potato Casserole is simple and tasty. You can find the full recipe above. To get the best texture, use russet or Yukon Gold potatoes. These types hold their shape well and cook evenly. After baking, let the casserole rest for about five minutes. This helps it set and makes slicing easier. Always double-check your seasoning. Each palate is different, so adjust salt and spices to fit your taste. Keep an eye on cooking times to avoid overcooking. You want the potatoes to be tender but not mushy. I love serving this dish with a fresh side salad or warm garlic bread. Both add a nice contrast to the hearty casserole. Pair your meal with a light beverage, like iced tea or sparkling water, to balance the flavors. For the full recipe, check out the details above! {{image_2}} When you make Hamburger Potato Casserole, you can easily switch things up. First, let’s talk about ingredient substitutions. - Use ground turkey or chicken instead of beef. This makes it lighter. - Swap Greek yogurt for sour cream. It adds creaminess with less fat. Next, you can enhance your casserole with some tasty add-ins. - Try adding veggies like bell peppers or corn. They bring color and nutrition. - Top your casserole with different cheese, like Monterey Jack. This adds a fun twist. Lastly, let’s boost those flavors. - Add a splash of hot sauce or Worcestershire sauce for some heat. It makes every bite exciting. - Toss in herbs like thyme or rosemary. They add depth and aroma to the dish. For the full recipe, check out the [Full Recipe]. Enjoy making your casserole unique! After enjoying your Hamburger Potato Casserole, store leftovers in an airtight container. This keeps the flavors fresh. It’s best to eat the casserole within 3-4 days. If you wait too long, the taste may change. To freeze the casserole, let it cool completely first. Cut it into portions and wrap each piece tightly in plastic wrap. Place the wrapped portions in a freezer bag or container. This keeps them safe from freezer burn. When you want to eat it, take a portion out and let it thaw in the fridge overnight. The best way to reheat is in the oven. Preheat your oven to 350°F (175°C). Place the casserole in a baking dish and cover it with foil. Bake for about 20-30 minutes, or until heated through. This method keeps the texture from getting soggy. If you use a microwave, heat on medium power in short bursts. Stir between heats for even warming. This way, you get the best texture and taste. Yes, you can prep and assemble this dish ahead of time. Just store it in the fridge until you are ready to bake. This makes it easy for busy days. You can serve it with a side salad or some warm bread. These sides add freshness and balance to the meal. You can check for tender potatoes and bubbly cheese as signs. This means your casserole is cooked perfectly. Yes, you can skip the cheese if you want a dairy-free version. You can also use dairy alternatives if you prefer. To make it gluten-free, check all ingredients for gluten content. This includes the beef broth you use. You can use sausage, ground chicken, or meat substitutes. This gives you options to fit your taste or diet. This Hamburger Potato Casserole is a simple, hearty dish with rich flavors. We covered the key ingredients like ground beef, potatoes, and cheddar cheese. I shared step-by-step instructions to ensure your casserole turns out perfect every time. You can customize it with various add-ins and substitutions. Remember to let it sit before slicing for better results. Enjoy this meal with a salad or garlic bread for a complete dinner. With these tips, you’ll impress everyone at your table. Cooking should be fun and tasty, and this dish makes it easy!](https://grilledflavors.com/wp-content/uploads/2025/05/8d2be93a-0f61-4631-8261-1ec25f6964b3.webp)
Hamburger Potato Casserole Simple and Tasty Dish
Craving a warm, filling meal that’s perfect for busy nights? Hamburger Potato Casserole is the answer. You’ll love how simple it is to prepare this
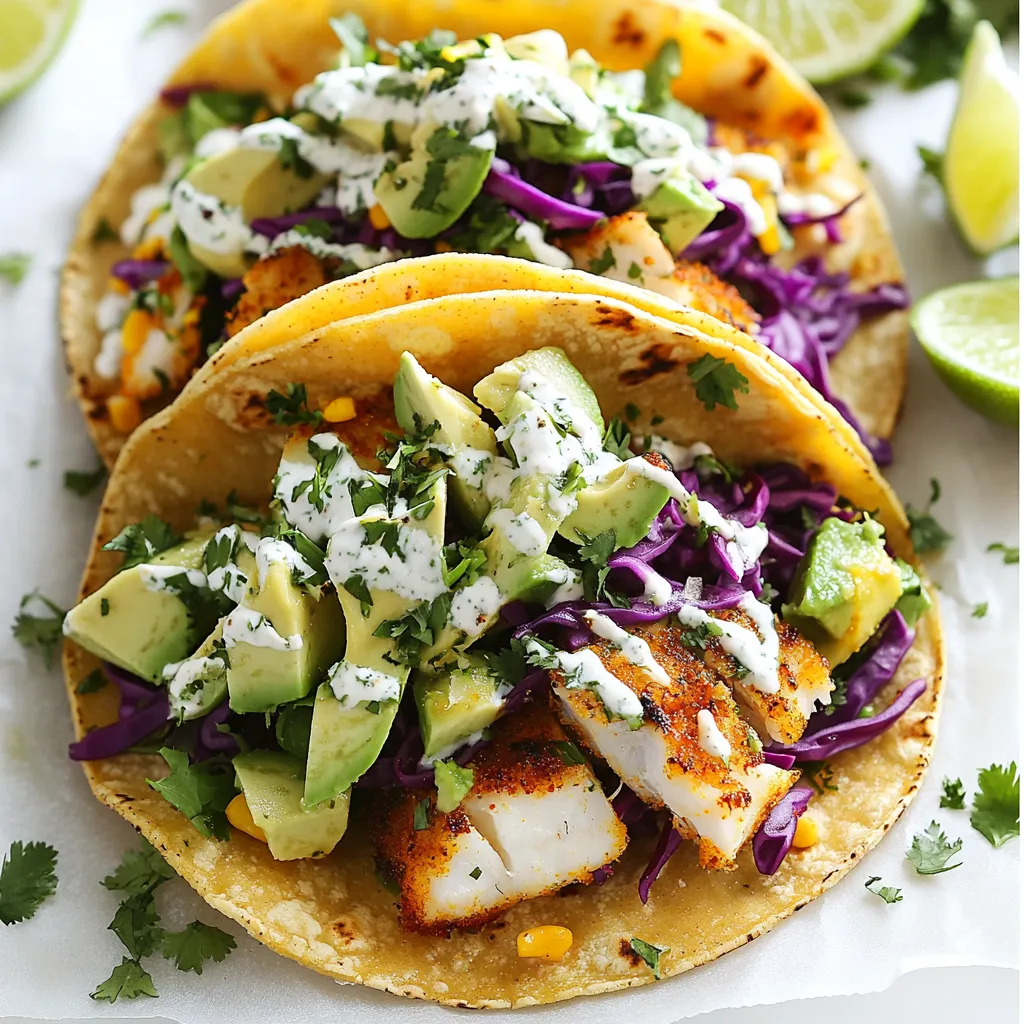
Savory Fish Tacos with Lime Crema Recipe Delight
Ready to dive into a flavor-packed adventure? My Savory Fish Tacos with Lime Crema Recipe will transform your weeknight dinners. With fresh ingredients and easy
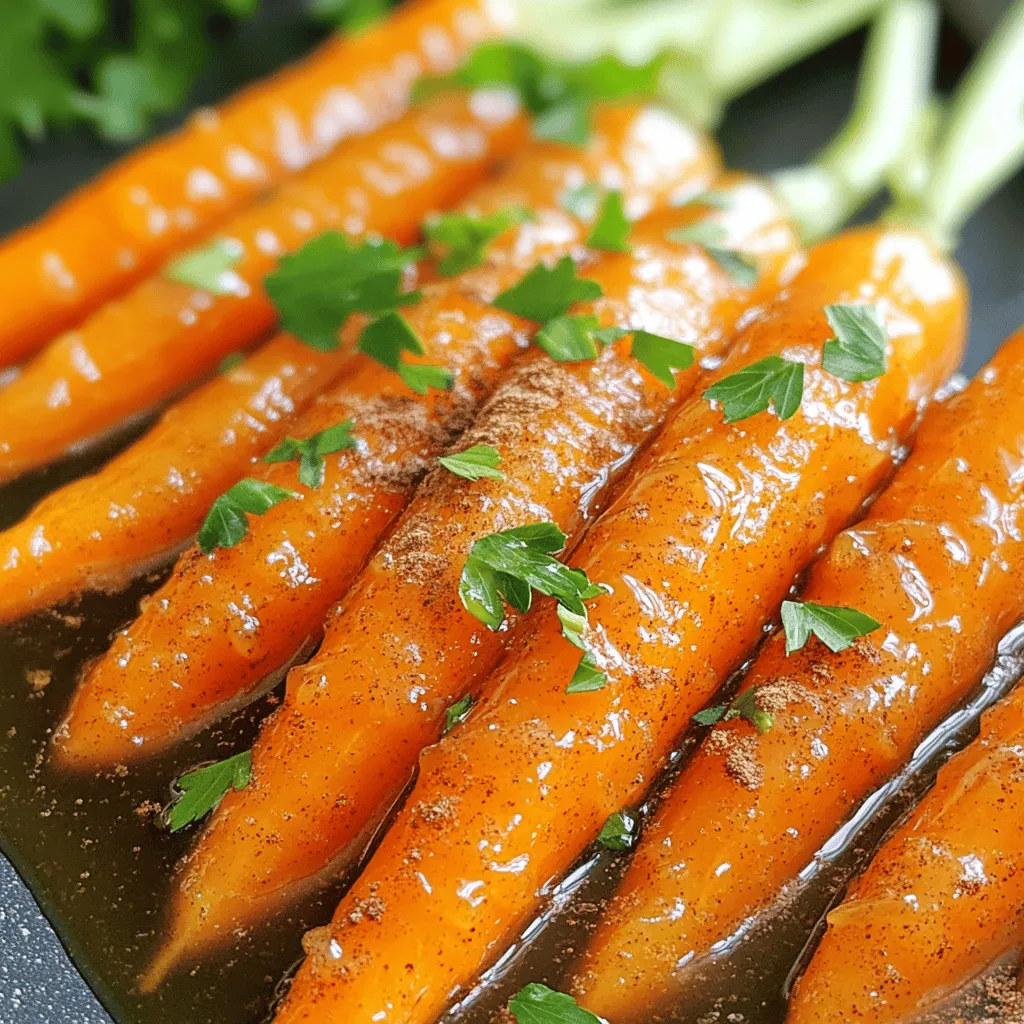
Maple Glazed Carrots Flavorful and Easy Side Dish
Looking for a side dish that’s simple, tasty, and sure to impress? Maple glazed carrots fit the bill perfectly! In this blog, I’ll guide you
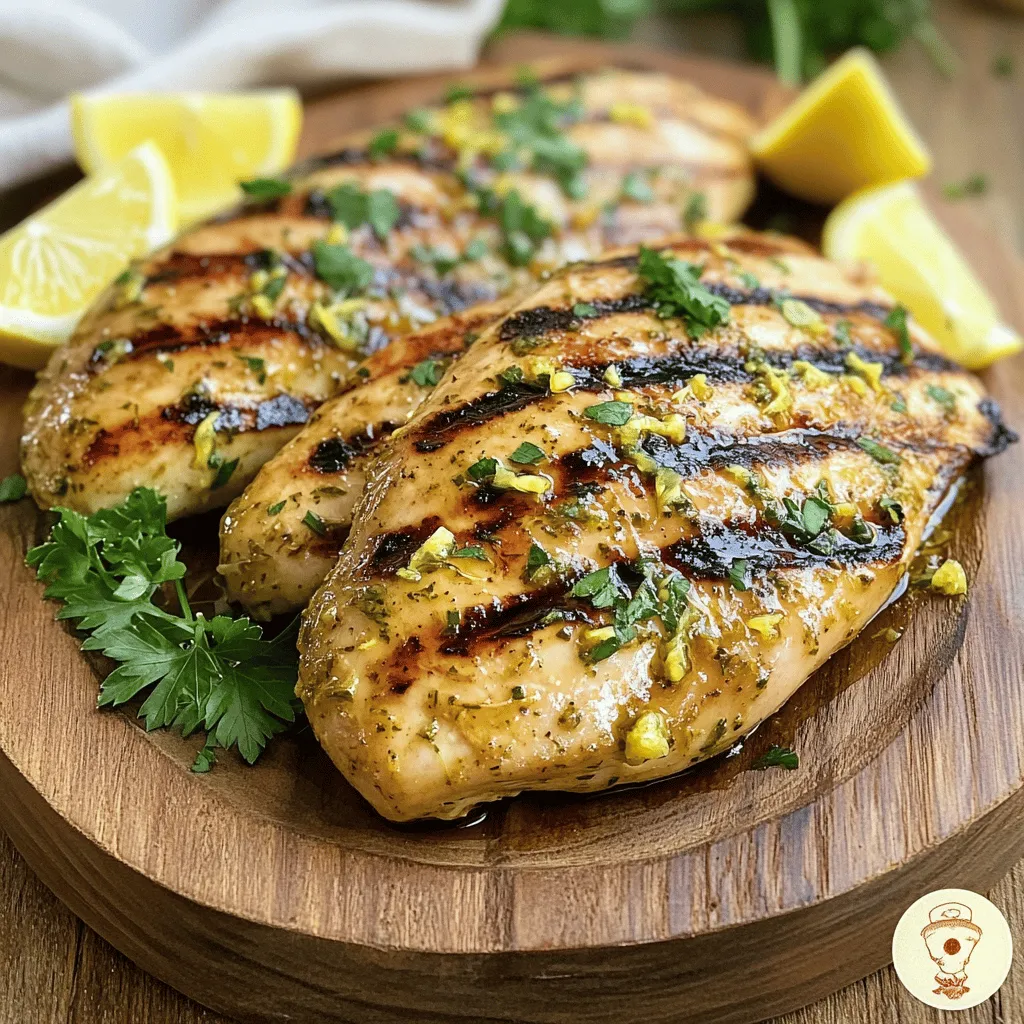
Zesty Lemon Garlic Grilled Chicken Tasty and Juicy Dish
Looking for a dish that bursts with flavor? You’ve found it! My Zesty Lemon Garlic Grilled Chicken is the perfect mix of tangy and savory.
![- 1 can (15 oz) chickpeas - 2 tablespoons olive oil - 1 teaspoon cumin - 1 teaspoon smoked paprika - 1/2 teaspoon chili powder - 1/4 teaspoon cayenne pepper (adjust to taste) - Salt and pepper, to taste - 8 small corn tortillas - 1 avocado, sliced - 1 cup red cabbage, shredded - 1/4 cup fresh cilantro, chopped - 1 lime, cut into wedges The main ingredients for spicy chickpea tacos are simple yet packed with flavor. Chickpeas provide a hearty base. I use canned chickpeas for convenience, but you can cook dried ones if you prefer. Olive oil coats the chickpeas, helping spices stick and adding richness. The spices bring the heat and depth. Cumin and smoked paprika create warmth, while chili powder and cayenne add a kick. Salt and pepper balance the dish. Corn tortillas are the perfect vessel for these toppings. They are soft and slightly sweet, enhancing the overall taste. Fresh toppings like avocado and red cabbage give crunch and creaminess. Cilantro adds brightness, and lime juice ties everything together with zest. - Cheese, sour cream, or yogurt - Hot sauce and other condiments You can make these tacos your own with optional add-ons. Cheese adds a creamy layer. Sour cream or yogurt can cool the spice. Hot sauce can boost heat if you love a fiery flavor. Other condiments like salsa or guacamole can be fun as well. - Calories, protein, and fiber content - Health benefits of chickpeas Chickpeas are not just delicious; they are also healthy. A serving of these tacos has about 300 calories, depending on the toppings. They are high in protein and fiber. This makes them filling and good for digestion. Chickpeas are a great plant-based protein source. They help keep you full longer. They also provide essential vitamins and minerals, like iron and magnesium. Eating chickpeas can support heart health, weight management, and blood sugar control. For the full recipe, check out the complete guide to making spicy chickpea tacos. To start, heat 2 tablespoons of olive oil in a medium skillet over medium heat. This oil helps the spices stick to the chickpeas. Add 1 can of drained and rinsed chickpeas to the skillet. Then, sprinkle in 1 teaspoon of cumin, 1 teaspoon of smoked paprika, 1/2 teaspoon of chili powder, and 1/4 teaspoon of cayenne pepper. Add salt and pepper to taste. Mix everything well, and let it cook for about 5 to 7 minutes. Stir occasionally. You want the chickpeas to become slightly crispy and warm. While the chickpeas cook, it’s time to warm your tortillas. You can do this in a separate pan or microwave. If using a pan, warm them for about 30 seconds on each side. If using a microwave, place them on a plate and cover them with a damp paper towel. Heat for about 20 seconds. This keeps them soft and pliable, so they won’t break when you fill them. Once the chickpeas are ready, it’s time to assemble your tacos. Take a warm tortilla and place a generous spoonful of the spicy chickpeas in the center. Next, add slices of avocado, shredded red cabbage, and chopped cilantro on top. Don't forget to squeeze fresh lime juice over the tacos for a zesty kick. Serve them warm for the best taste. Enjoy your delicious spicy chickpea tacos! For a full recipe, follow the detailed steps above. To make your spicy chickpea tacos even tastier, consider adding more spices. A pinch of cayenne pepper can boost the heat. Try adding some ground coriander or a sprinkle of smoked paprika if you want deeper flavors. You can also marinate your chickpeas. Let them sit in olive oil, lime juice, and spices for about 30 minutes before cooking. This step adds great depth to your dish. For the best texture, use a heavy skillet with a non-stick surface. Cast iron works well, but any good skillet will do. If you prefer, try baking your chickpeas. Spread them on a baking sheet and roast at 400°F for about 20 minutes. This method gives a nice crunch. Just toss them halfway through to ensure even cooking. Pair your tacos with a refreshing side. A simple salad of mixed greens is great. You can also serve them with a cold drink like homemade lemonade. For gatherings, set up a taco bar. Let guests build their own tacos with fun toppings like cheese, sour cream, or hot sauce. This way, everyone can customize their meal. Check out the full recipe for more ideas! {{image_2}} You can easily make spicy chickpea tacos for everyone. For vegan or vegetarian diets, this dish already fits perfectly. Use corn tortillas, as they are naturally gluten-free. If you need a gluten-free option, check labels on tortillas. Not all brands are equal, so be careful when choosing. If you want to mix things up, try using different beans. Black beans or pinto beans work great too. You can also try lentils for a unique twist. For toppings, think outside the box! You can add diced tomatoes, jalapeños, or even pickled onions. Each swap can change the taco's flavor, making it fun to experiment. You can take these tacos on an adventure! Add curry powder for an Indian twist. Or mix in soy sauce and sesame oil for an Asian flair. You can also swap in roasted sweet potatoes or zucchini instead of chickpeas. These variations can lead to exciting new flavors, making every meal fresh and different. For the [Full Recipe], follow the steps outlined, and enjoy your culinary journey! To keep your spicy chickpea tacos fresh, store them in separate containers. Place the chickpeas in an airtight container. This helps them stay tasty. If you have leftover tortillas, wrap them in foil or plastic wrap. Keep them at the top of the fridge for easy access. When reheating, you have two main options: microwaving or pan frying. If you use a microwave, heat the chickpeas in short bursts. Stir often to avoid hot spots. For pan frying, use a medium skillet. This method keeps them crispy. Warm tortillas in the microwave for 15-20 seconds. This keeps them soft and pliable. Can you freeze assembled tacos? I do not recommend freezing them once they are put together. The tortillas may get soggy when thawed. Instead, freeze the cooked chickpeas in a freezer-safe bag. This way, you can enjoy them later. Just thaw and reheat when ready to make more tacos. To make spicy chickpea tacos, follow these steps: 1. Heat the oil: Start by heating olive oil in a skillet over medium heat. 2. Add chickpeas and spices: Add the drained chickpeas, cumin, smoked paprika, chili powder, cayenne pepper, salt, and pepper. Cook for 5-7 minutes, stirring occasionally. 3. Warm tortillas: While the chickpeas cook, warm the corn tortillas in another pan or microwave. 4. Assemble tacos: Place a spoonful of chickpeas on each tortilla. 5. Add toppings: Top with avocado, red cabbage, and cilantro. 6. Finish with lime: Squeeze fresh lime juice over the tacos. 7. Serve warm: Enjoy your spicy chickpea tacos! Yes, you can use canned chickpeas. Canned chickpeas save time since they are already cooked. They are ready to use after draining and rinsing. Dried chickpeas require soaking and cooking, which takes longer. Canned chickpeas also have a softer texture, making them easy to mash if desired. Chickpeas are very healthy. They are high in protein and fiber. This helps keep you full and satisfied. They also contain vitamins and minerals, like iron and folate. Eating chickpeas can support heart health and help manage blood sugar levels. They are a great choice for a balanced diet. Yes, you can prepare some parts ahead of time. Cook the chickpeas and store them in the fridge. Warm the tortillas just before serving. You can also chop your toppings in advance. Keep them in separate containers for freshness. This way, you can easily assemble your tacos when ready to eat. For the full recipe, check the earlier sections! In this post, we explored tasty chickpea tacos. You learned about key ingredients, cooking steps, and even storage tips. Chickpeas bring nutrition, plus they are fun to prepare. Remember to be creative with flavors and try different toppings. Use our serving ideas for your next gathering. These tacos are easy to make, healthy, and full of flavor. Enjoy your cooking and share these delicious tacos with others!](https://grilledflavors.com/wp-content/uploads/2025/05/34fc2791-f7ec-4970-8cb0-53836809217e.webp)
Spicy Chickpea Tacos Flavorful and Easy Recipe
Are you craving a quick and tasty meal that packs a punch? Spicy chickpea tacos are your answer! In this easy recipe, I’ll guide you