Dinner
![To make Garlic Parmesan Roasted Potatoes, you need a few simple ingredients. Each one adds flavor and texture. Here’s what you will need: - 1.5 pounds baby potatoes, halved - 4 tablespoons olive oil - 4 cloves garlic, minced - 1 cup grated Parmesan cheese - 1 teaspoon dried oregano - 1 teaspoon dried thyme - Salt and pepper to taste - Fresh parsley, chopped for garnish These ingredients come together to create a delicious side dish. The baby potatoes offer a tender bite. Olive oil helps them roast to a golden brown. Garlic brings a warm, savory taste. Parmesan cheese adds richness and depth. Dried herbs like oregano and thyme enhance the flavors. Don't forget salt and pepper for seasoning. The fresh parsley on top adds a nice color and freshness. If you want to make this dish, check out the Full Recipe for all the details. Each ingredient plays a role in making this dish special. Enjoy the process of cooking and the delightful smell that fills your kitchen! - Preheat the oven to 425°F (220°C). - In a large mixing bowl, combine the halved baby potatoes, olive oil, minced garlic, dried oregano, and dried thyme. Toss until the potatoes are well-coated. Getting the oven hot is key for crispiness. The hot air will help brown the potatoes nicely. Mixing the olive oil and garlic with the potatoes adds great flavor. Tossing ensures every piece gets coated. This simple step makes a big difference. - Roast potatoes and add Parmesan. - Bake until golden brown and bubbly. Spread the potatoes on a baking sheet in a single layer. This helps them cook evenly. Roast them for about 25 minutes. Halfway through, turn the potatoes so they brown on all sides. After they are golden and tender, take them out. Sprinkle the grated Parmesan cheese on top. Return the baking sheet to the oven for another 5-7 minutes. This melts the cheese and creates a delicious crust. Once you see it bubbling, take them out. Garnish with fresh parsley to add color and flavor. You can find the full recipe [Full Recipe]. To make Garlic Parmesan Roasted Potatoes stand out, choose fresh herbs if you can. Fresh oregano and thyme add a bright taste that dried herbs cannot match. However, dried herbs work well if fresh isn't available. Dried herbs are easy to store and last longer. For the potatoes, baby potatoes are perfect for this recipe. They are small, tender, and cook evenly. If you use larger potatoes, cut them into smaller pieces. This helps them cook at the same rate as the smaller ones. Red or yellow potatoes also add a nice flavor and texture. Spacing the potatoes on the baking sheet is key. If they are too close together, they will steam instead of roast. This makes them soggy instead of crispy. Spread them out in a single layer for best results. The cooking time for these potatoes is about 25 minutes at 425°F (220°C). Halfway through, turn them so they brown evenly. If your oven runs hot, check them a bit earlier. Once they are golden brown and tender, they are ready for that delicious sprinkle of Parmesan. {{image_2}} You can switch up the cheese. Try using Asiago or Cheddar for a new taste. Each cheese brings its own flavor to the dish. You can also add vegetables. Carrots and bell peppers work well. They add color and nutrition to your meal. Just chop them up and toss them in with the potatoes. To make the dish even better, add spices. Paprika gives a nice smoky flavor. Red pepper flakes add a bit of heat. You can also marinate the potatoes. Let them sit in olive oil and spices for an hour before cooking. This step enhances the flavor deeply. For the full recipe, check the details above. Store any leftover Garlic Parmesan Roasted Potatoes in an airtight container. They last for up to three days in the fridge. Make sure the potatoes cool down before sealing them. This step helps keep them fresh. To reheat, use an oven or an air fryer. Preheat your oven to 350°F (175°C). Spread the potatoes out on a baking sheet. Heat for about 10-15 minutes until they are warm and crispy again. Avoid using the microwave, as it can make them soggy. To freeze Garlic Parmesan Roasted Potatoes, let them cool completely first. Place them in a single layer on a baking sheet. Freeze them for about an hour. This step stops them from sticking together. After freezing, transfer the potatoes to a freezer-safe bag or container. They can last for up to three months in the freezer. When you want to enjoy them, take them out and thaw overnight in the fridge. Reheat them in the oven or air fryer at 350°F (175°C) until hot. Enjoy the same tasty flavors as before! For the full recipe, check the section above. Can I use regular potatoes instead of baby potatoes? Yes, you can use regular potatoes. Just cut them into smaller pieces. Baby potatoes cook faster and stay tender. Regular potatoes may need extra time in the oven. How do I prevent the potatoes from getting soggy? To keep the potatoes crisp, avoid overcrowding the baking sheet. Spread them out in one layer. This helps hot air circulate. Additionally, make sure to roast them at a high temperature. Can I make Garlic Parmesan Roasted Potatoes ahead of time? Yes, you can prepare these potatoes ahead. Cook them fully, then cool and store them in the fridge. Reheat them in the oven for a quick meal. This keeps them crunchy and tasty. Approximate calories and macros per serving Each serving has about 250 calories. You get 12 grams of fat and 30 grams of carbs. Protein comes in at 8 grams. Dietary considerations (gluten-free, vegetarian) These potatoes are gluten-free and vegetarian-friendly. They make a great side for many meals. Enjoy them with your favorite protein or as a snack. Check the [Full Recipe] for more details. This post covered how to make delicious garlic Parmesan roasted potatoes. We discussed key ingredients, preparation steps, and cooking methods. I shared tips for perfect flavors and variations to try. Don't forget to store your leftovers properly and consider our FAQs for common concerns. Cooking can be fun and tasty. With these steps, you can impress everyone at the table. Enjoy your flavorful creation!](https://grilledflavors.com/wp-content/uploads/2025/05/2bcc2411-9013-4f82-ad5a-6d7a19d0e525.webp)
Garlic Parmesan Roasted Potatoes Irresistible Side Dish
Looking for a side dish that steals the show? Meet Garlic Parmesan Roasted Potatoes! These small bites pack a massive flavor punch. Crispy on the
![The main ingredients for stuffed potato cakes are simple and tasty. You need: - 2 large russet potatoes, peeled and cubed - 1/2 cup shredded cheddar cheese - 1/4 cup cream cheese, softened - 1/4 cup green onions, finely chopped - 1/2 teaspoon garlic powder - 1/4 teaspoon cayenne pepper (optional) - Salt and pepper to taste - 1 cup breadcrumbs (for coating) - 2 eggs, beaten - Oil for frying These ingredients create a creamy, cheesy filling that blends well with the crispy outside. You can customize your stuffed potato cakes with fun add-ins. Consider adding: - Cooked bacon bits for a smoky flavor - Diced bell peppers for a fresh crunch - Spinach or kale for a healthy twist - Different cheeses like mozzarella or feta for variety Feel free to mix and match to suit your taste! Spices can elevate your potato cakes. Here are some I recommend: - Paprika for a smoky touch - Onion powder for extra flavor - Fresh herbs like parsley or chives for brightness - Italian seasoning for a more complex taste Use these spices to add depth to your filling. They will make your stuffed potato cakes stand out! For the full recipe, check out the [Full Recipe]. Start by boiling the cubed russet potatoes. Place them in a large pot of water. Bring the water to a boil and cook for 15-20 minutes. You want the potatoes to be fork-tender. Once done, drain the water and return the potatoes to the pot. Now, mash the potatoes until they are smooth. Let them cool for a bit. This cooling step helps the filling blend better. In a mixing bowl, combine the smooth mashed potatoes with the tasty filling. Add in shredded cheddar cheese, softened cream cheese, and finely chopped green onions. Sprinkle in garlic powder, cayenne pepper for a kick, and add salt and pepper to taste. Mix everything well until it becomes creamy. The filling should be packed with flavor and smooth enough to form into cakes. Now it's time to shape the cakes. Take a small handful of the filling and form it into a patty about 1/2 inch thick. Repeat this process until you have about 8-10 patties. Next, set up a coating station. Place beaten eggs in one bowl and breadcrumbs in another. Dip each cake into the egg, making sure it’s fully coated. Then, roll it in breadcrumbs until it is evenly covered. Heat oil in a large skillet over medium heat. Carefully place a few cakes in the hot oil but avoid overcrowding. Fry each side for 3-4 minutes, until they turn golden brown and crispy. Once done, transfer the cakes to a paper towel-lined plate to drain excess oil. Serve warm, and feel free to add extra chopped green onions on top for garnish. Enjoy your crispy cheesy stuffed potato cakes! For the full recipe, refer to the recipe section above. To get the perfect texture, use starchy potatoes, like russet. They provide a smooth and fluffy base. After boiling, mash them well. Lumps can lead to uneven cakes. Let the mashed potatoes cool a bit before mixing in the filling. This way, the cheese will melt nicely. One common mistake is over-mixing the filling. Mix just enough to combine the ingredients. If you mix too much, the cakes can be tough. Also, ensure your oil is hot before frying. If it’s not hot enough, the cakes will absorb too much oil. This can make them greasy instead of crispy. Serve these cakes hot and crispy. I love to pair them with sour cream or a spicy dipping sauce. A side of fresh salad adds a nice crunch. You can also sprinkle some fresh herbs on top for color and flavor. For a fun twist, try serving them as a slider. Just add your favorite toppings! For more details, check the Full Recipe. {{image_2}} You can easily make these cakes vegetarian or vegan. For vegetarian options, use cheese made from milk or plant-based cheese. If you want a vegan version, replace dairy cheese with vegan cheese. Use a flaxseed mixture or applesauce instead of eggs for binding. The taste stays great, and you keep it plant-based! You can boost the flavor of your potato cakes. Add spices like cumin or paprika for heat. Try fresh herbs like parsley, dill, or cilantro for freshness. If you love it spicy, add more cayenne pepper. Mix in cooked broccoli or spinach for extra nutrition. Each flavor twist makes the cakes unique and fun! You don't have to fry these cakes to enjoy them! Baking is a healthier choice. Preheat your oven to 400°F (200°C). Place cakes on a baking sheet lined with parchment paper. Bake for 20-25 minutes, flipping halfway through, until golden. You can also use an air fryer! Set it to 375°F (190°C) and cook for about 15 minutes. Both methods yield crispy, tasty cakes without all the oil. For the full recipe, check out the details above! After making stuffed potato cakes, let them cool first. Place them in an airtight container. Use parchment paper to separate layers if stacking. Store in the fridge for up to three days. This keeps them fresh and tasty. To reheat your potato cakes, use a skillet. Heat a small amount of oil over medium heat. Place the cakes in the skillet. Cook for about 3-4 minutes on each side. This method keeps them crispy. You can also use an oven to reheat. Set it to 350°F (175°C) and bake for around 10-15 minutes. This works well if you want to reheat many cakes at once. Freezing is a great way to save leftover cakes. First, let them cool completely. Place them in a single layer on a baking sheet. Freeze until solid, about 1-2 hours. Then, transfer the cakes to a freezer-safe bag. They can last up to three months in the freezer. To cook, thaw them in the fridge overnight. Reheat them as mentioned before for best results. Enjoy your crispy cheesy stuffed potato cakes anytime! For the full recipe, check the earlier sections. Yes, you can make Stuffed Potato Cakes ahead of time. Prepare the cakes and store them in the fridge for up to two days. You can also freeze them for up to three months. Just be sure to wrap them well in plastic wrap or use a freezer bag. When you are ready to cook, thaw them in the fridge overnight. This makes dinner easy! Potato Cakes pair well with many sauces. Here are some great options: - Sour cream adds a nice, creamy touch. - Applesauce gives a sweet twist. - Spicy ketchup adds a kick. - Ranch dressing is always a favorite. - Garlic aioli brings in rich flavor. Feel free to mix and match to find your favorite! You can bake or air fry the cakes for a crispy result without frying. To bake, preheat your oven to 400°F (200°C). Place the coated cakes on a lined baking sheet. Spray them lightly with oil for a golden finish. Bake for about 25-30 minutes, flipping halfway through. For air frying, cook at 375°F (190°C) for around 12-15 minutes, shaking the basket halfway. This method keeps them crispy and delicious! Stuffed potato cakes are easy and fun to make. We covered the main ingredients, step-by-step instructions, and useful tips. You learned about variations, storage, and common questions. Whether you like them spicy or mild, you have many ways to enjoy these cakes. Remember these tips for great texture and flavor. Now, gather your ingredients and start cooking. Enjoy your delicious creations!](https://grilledflavors.com/wp-content/uploads/2025/05/fedfe58b-5aba-4025-addd-f101d5d829f3.webp)
Stuffed Potato Cakes Flavorful and Easy Recipe Guide
Are you ready to make delicious stuffed potato cakes? This simple guide will help you create flavorful treats that everyone will love. I’ll share easy
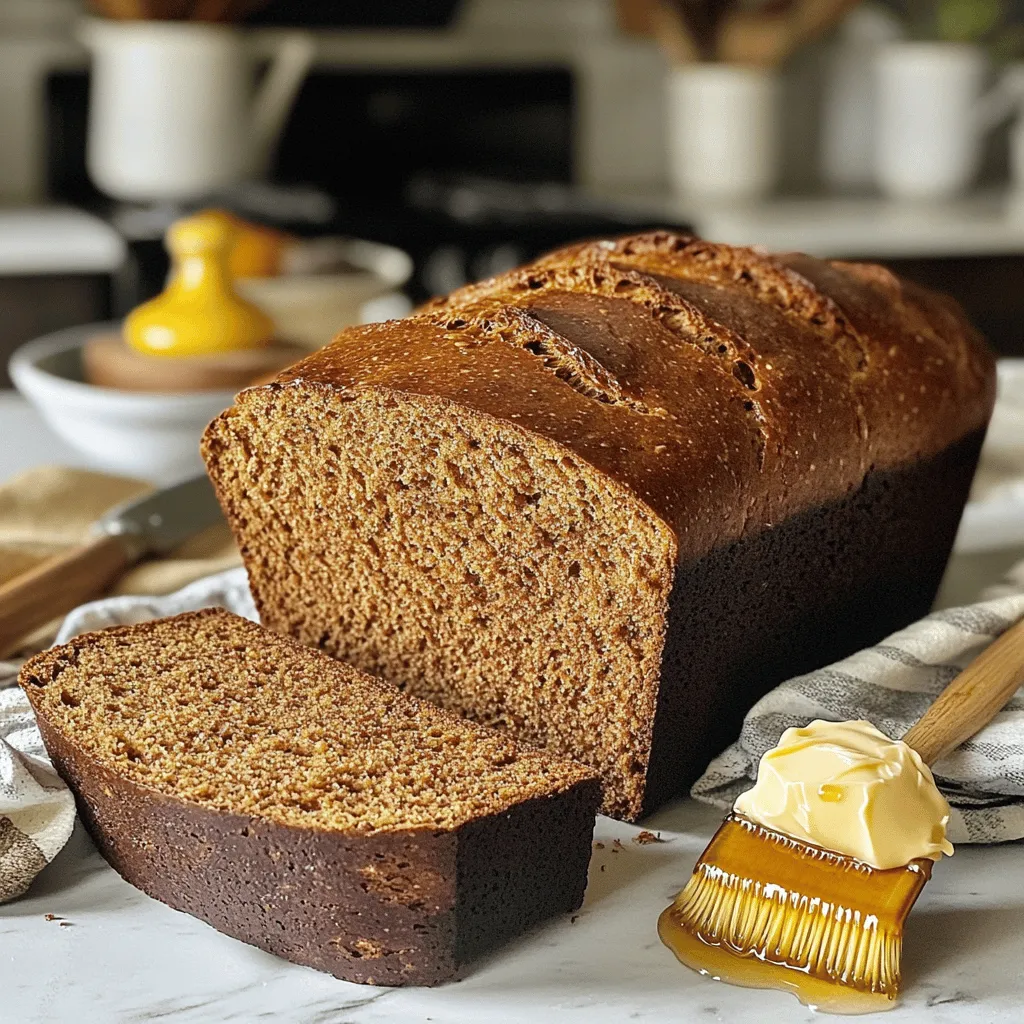
Outback Steakhouse Honey Wheat Bushman Bread Delight
If you love Outback Steakhouse’s famous Honey Wheat Bushman Bread, you’re in for a treat! This delightful bread is not just a side; it’s a
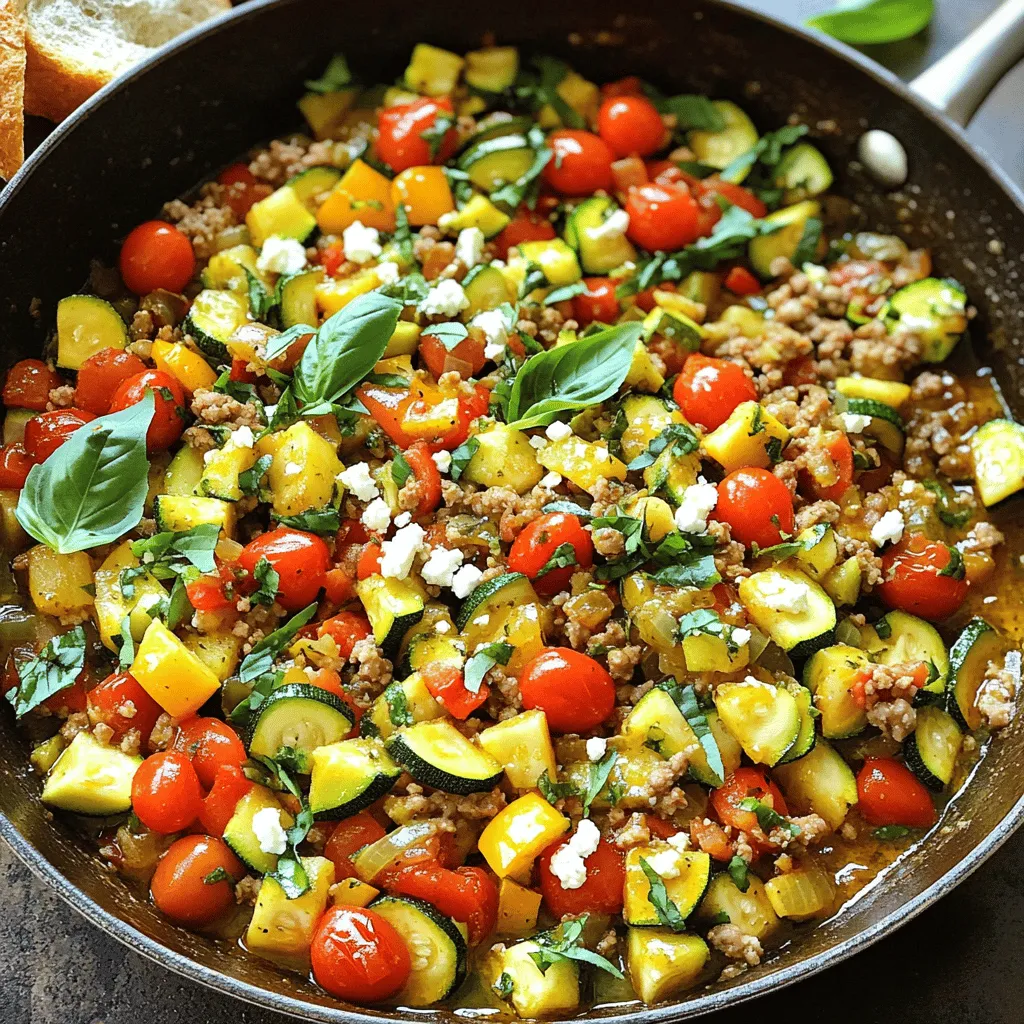
Ground Turkey and Zucchini Skillet Healthy Dinner Option
Looking for a quick, healthy dinner? You’re in luck! This Ground Turkey and Zucchini Skillet is packed with flavor and easy to make. With just
![- 2 boneless, skinless chicken breasts - 3 cups whole wheat penne pasta - 1 tablespoon olive oil - 2 cloves garlic, minced - 1 ½ cups low-fat Greek yogurt - 1 cup grated parmesan cheese - 1 cup broccoli florets - ½ teaspoon Italian seasoning - Salt and pepper to taste - Fresh parsley for garnish This dish is not only tasty but also healthy. Each serving offers a good balance of protein and carbs. The chicken provides lean protein, while the whole wheat pasta adds fiber. Greek yogurt gives a creamy texture and extra protein. Here's a quick breakdown for one serving: - Calories: 400 - Protein: 36g - Carbohydrates: 50g - Fat: 10g - Fiber: 6g High protein foods help build and repair muscles. They keep you full, which can aid in weight management. Chicken is a great source of lean protein. Greek yogurt offers probiotics for gut health. Whole wheat pasta gives you energy without a sugar spike. Combining these ingredients makes a delicious meal that supports a healthy lifestyle. You can enjoy this meal guilt-free, knowing it fuels your body well. For the full recipe, check out the earlier section. To start, marinate the chicken breasts. Mix olive oil, minced garlic, salt, pepper, and Italian seasoning in a bowl. Add the chicken breasts and coat them well. Let the chicken sit for at least 30 minutes. This helps the flavors soak in. Next, heat your grill or grill pan to medium-high. Place the marinated chicken on the grill. Cook for 6-7 minutes on each side. The chicken should no longer be pink in the center. Once done, take it off the grill and let it rest for 5 minutes. Then, slice it into strips. While the chicken grills, bring a pot of water to a boil. Add the whole wheat penne pasta and cook it according to the package instructions, usually about 10-12 minutes. With 3 minutes left, toss in the broccoli florets. This gives them a quick steam. Once cooked, drain the pasta and broccoli together. In a large mixing bowl, combine the low-fat Greek yogurt, half of the grated parmesan cheese, and about ¼ cup of pasta water. Stir well until you get a creamy sauce. The yogurt adds protein and keeps it light. Now, add the drained pasta and broccoli to the sauce. Toss everything together until it's well-coated. Slice the grilled chicken and place it on top of the pasta. Finish by sprinkling the remaining parmesan cheese over the dish. Garnish with fresh parsley and serve hot. Enjoy the creamy goodness packed with protein! Find the [Full Recipe] for all the details on this delicious meal. To grill chicken just right, start with the right heat. Medium-high heat works best. Marinate your chicken for at least 30 minutes. This adds flavor and keeps it moist. Use a meat thermometer. The chicken should reach 165°F to be safe. Let the chicken rest after grilling. This helps keep the juices inside. Slice it just before serving for the best taste. For a creamy Alfredo, Greek yogurt is a game changer. It gives you that rich taste while keeping it healthy. Mix Greek yogurt with parmesan cheese in a bowl. Add a bit of pasta water to thin it out. Stir until smooth. This sauce coats the pasta nicely without being too heavy. You can also add garlic for extra flavor. Add some veggies for color and nutrition. Broccoli florets are a great choice. They cook quickly with the pasta. You can also toss in spinach or peas. For a kick, try adding crushed red pepper flakes. Fresh herbs like parsley elevate the dish’s look and taste, too. A squeeze of lemon juice can brighten it up. Enjoy experimenting with flavors! For the complete dish, check out the Full Recipe. {{image_2}} If you want to skip the chicken, you can use veggies. Try adding mushrooms or zucchini. These give a nice texture. You can also use tofu for protein. Just marinate it like the chicken and grill it. This makes a tasty vegetarian dish. You can switch up the protein in this dish. Try shrimp or turkey for a different taste. Even salmon works well. Each adds unique flavors to your pasta. If you like beans, chickpeas are a great option too. They add protein and fiber. Not a fan of whole wheat penne? You can use other pasta types. Try gluten-free pasta if you need it. Zucchini noodles are a fun choice too. They are low in carbs but still satisfy. You can even use spaghetti or fettuccine for a classic feel. To keep your High Protein Grilled Chicken Alfredo Pasta fresh, store it in an airtight container. Make sure to cool the dish to room temperature before sealing. Place it in the fridge and use it within 3-4 days for the best taste. When you're ready to enjoy your leftovers, heat them gently. You can use a microwave or a stove. If using a microwave, cover the dish to keep moisture. Heat in short bursts, stirring in between. If you're using the stove, add a splash of water to keep it creamy. Stir until it's warm throughout. If you want to save some for later, freezing is a great option. Portion the pasta into small containers, leaving space for expansion. Seal tightly and label with the date. It can last in the freezer for up to 3 months. To thaw, move it to the fridge overnight, then reheat as mentioned above. Enjoy your meal even on busy days! Yes, you can use different types. Whole wheat penne works well, but feel free to try gluten-free pasta or even zoodles (zucchini noodles). Each pasta type brings its own flavor and texture. Just make sure to adjust the cooking time according to the package instructions. To cut calories, use less cheese or switch to low-fat cheese. You can also replace Greek yogurt with low-fat sour cream or skip it altogether. Use less oil when marinating the chicken and serve smaller portions. Adding more veggies can also help fill you up without adding too many calories. This dish pairs great with a fresh salad or steamed vegetables. A light Caesar salad or roasted zucchini can complement the creamy pasta well. Garlic bread is another popular choice if you want something a bit indulgent. Your High Protein Grilled Chicken Alfredo Pasta will last about 3 to 5 days in the fridge. Make sure to store it in an airtight container to keep it fresh. Reheat gently in the microwave or on the stovetop to avoid drying it out. You can easily swap the chicken for shrimp, turkey, or tofu for a veggie option. Each protein brings a different taste and texture. Just adjust the cooking time based on what you choose to ensure it's cooked through. For the full recipe, check out the complete cooking instructions. This blog shared a great recipe for High Protein Grilled Chicken Alfredo Pasta. You learned about the key ingredients, step-by-step cooking, and helpful tips. We also explored tasty variations and storage info. This dish is healthy and satisfying! It’s easy to make and offers room for your own twists. Enjoy creating your version, and don’t forget to share it with family and friends!](https://grilledflavors.com/wp-content/uploads/2025/05/8420953c-4e20-4e03-b034-951804560607.webp)
High Protein Grilled Chicken Alfredo Pasta Recipe
Looking for a delicious meal packed with protein? This High Protein Grilled Chicken Alfredo Pasta recipe is your answer! With tender grilled chicken, creamy Alfredo

Fiery Chicken Ramen with Creamy Garlic Sauce Magic
If you crave a spicy kick and creamy goodness in one bowl, you’ve found the right recipe! My Fiery Chicken Ramen with Creamy Garlic Sauce
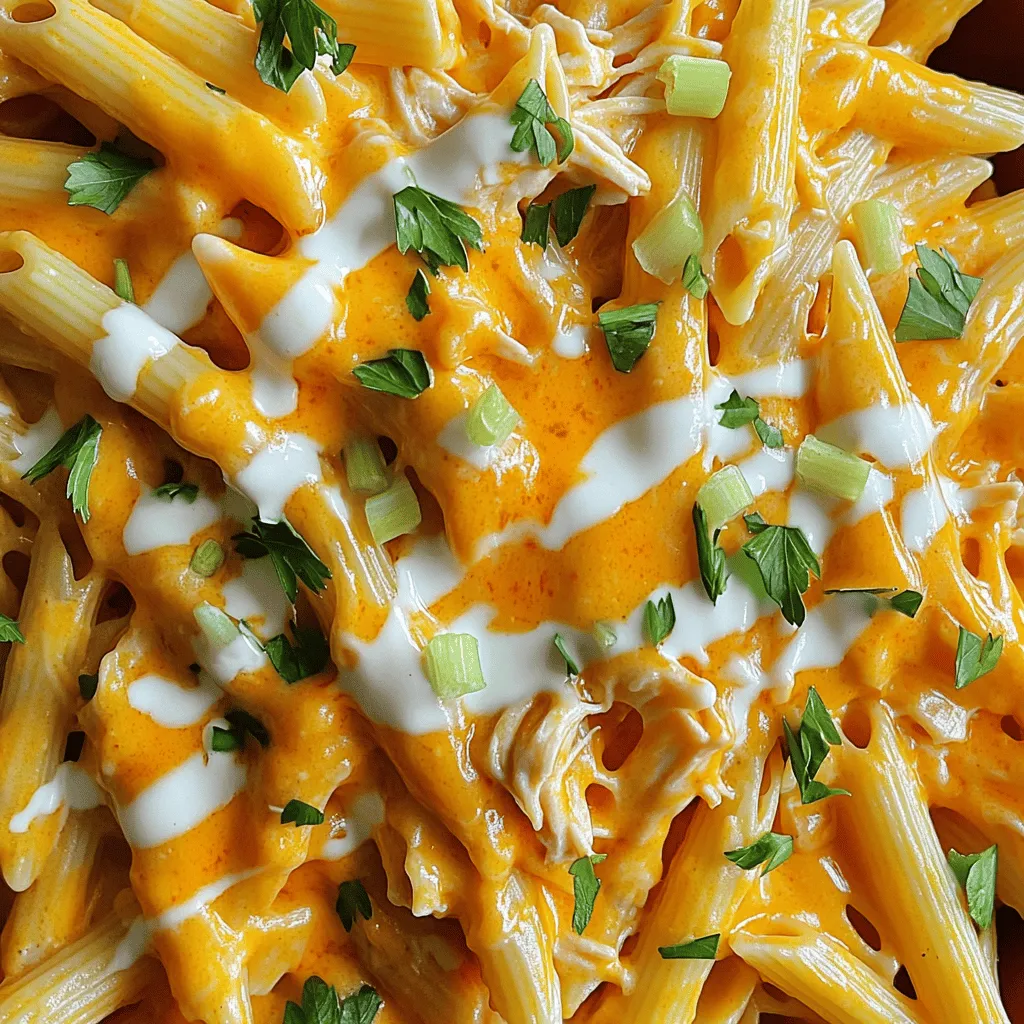
Buffalo Chicken Pasta Flavorful and Easy Recipe
Are you ready to spice up your dinner routine? Buffalo Chicken Pasta is a fun and tasty dish that combines the kick of buffalo sauce

Taco Bell Chicken Quesadilla Recipe Simple and Tasty
Craving the bold flavor of Taco Bell’s chicken quesadilla? You’re in the right place! I’ll show you how to make a simple and tasty version
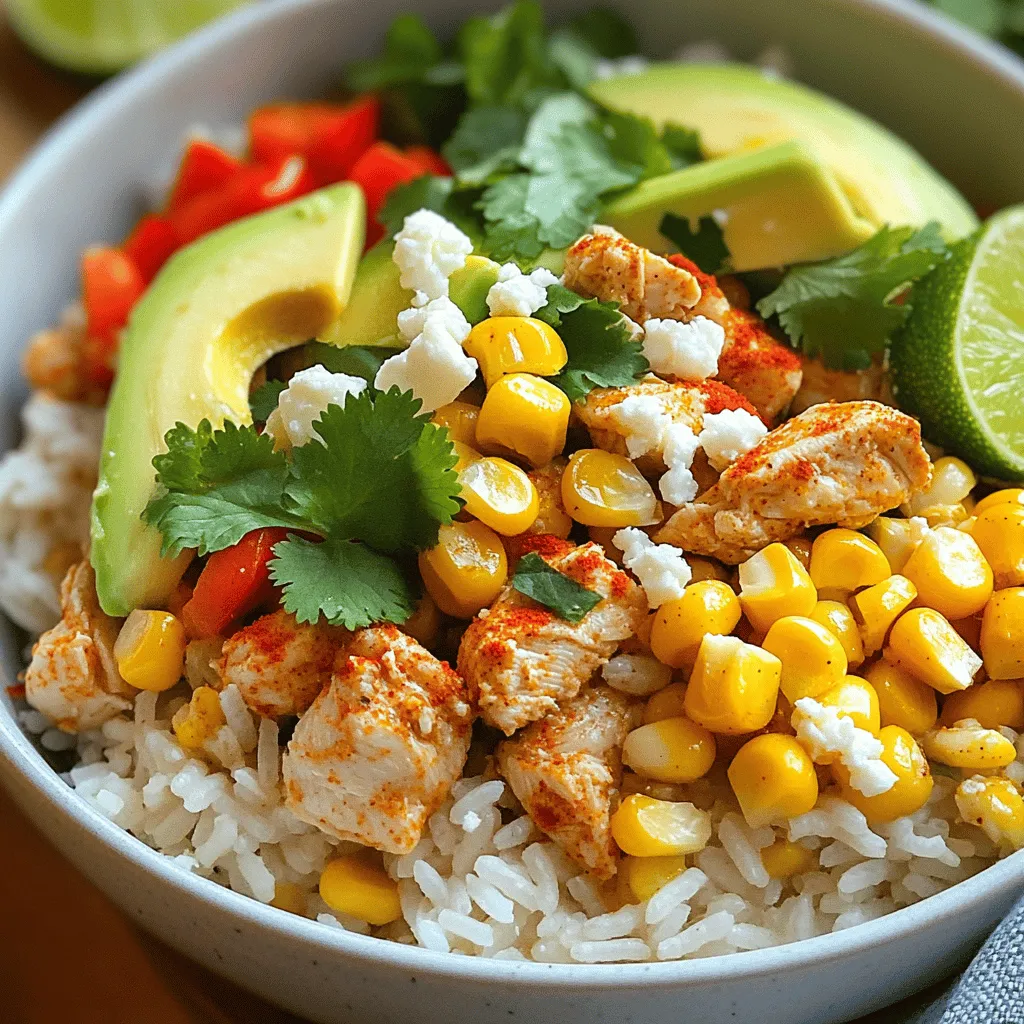
Easy Street Corn Chicken Rice Bowl Flavorful Recipe
Are you ready to whip up a meal that’s packed with flavor and super easy to make? My Easy Street Corn Chicken Rice Bowl is

Korean Ground Beef Bowl Flavorful and Simple Recipe
Are you ready for a delicious meal that’s quick and easy? This Korean Ground Beef Bowl packs a punch of flavor and is made in