Dinner

- 4 chicken thighs, skin-on and bone-in - 1/4 cup soy sauce (low-sodium preferred) - 1/4 cup honey - 2 tablespoons rice vinegar - 1 tablespoon sesame oil - 2 cloves garlic, minced - 1 teaspoon ginger, freshly grated - 1 tablespoon cornstarch mixed with 2 tablespoons water (for thickening) - 1/2 teaspoon black pepper To create a tasty baked teriyaki chicken, you need simple yet flavorful ingredients. The chicken thighs provide a juicy base. Using low-sodium soy sauce helps control salt levels. Honey adds sweetness, balancing the savory flavors. Rice vinegar gives a slight tang that brightens the dish. Sesame oil adds a rich, nutty taste that works well with the chicken. Fresh garlic and ginger enhance the overall flavor. Cornstarch helps thicken the sauce for a glossy finish. Black pepper adds a hint of spice. - Chopped green onions - Sesame seeds For a pop of color and texture, consider garnishing with chopped green onions and sesame seeds. These toppings not only look good but also add fresh, crunchy notes. You can sprinkle them on just before serving for maximum flavor. - Rice - Steamed vegetables Baked teriyaki chicken pairs well with rice. The rice absorbs the delicious sauce, making each bite satisfying. Steamed vegetables are a great addition, providing nutrients and a fresh taste. You can use broccoli, carrots, or snap peas for a balanced meal. These sides complement the rich flavors of the chicken and make your plate appealing. {{ingredient_image_1}} 1. First, preheat your oven to 400°F (200°C). This step is key for even cooking. 2. Line a baking dish with aluminum foil. This makes cleanup quick and easy. 3. In a medium bowl, mix the teriyaki sauce. Combine soy sauce, honey, rice vinegar, sesame oil, minced garlic, grated ginger, and black pepper. Whisk it well until smooth. 1. Place the chicken thighs in the baking dish, skin-side up. 2. Pour the teriyaki sauce over the chicken. Make sure to coat each piece well. 3. Bake the chicken in the oven for 30 minutes. This helps the flavors meld into the meat. 1. After 30 minutes, take the baking dish out. Move the chicken to a plate carefully. 2. Pour the remaining sauce into a saucepan. Bring it to a boil over medium heat. 3. Add the cornstarch mixture to the boiling sauce. Stir continuously until it thickens, which takes about 2-3 minutes. 4. Return the chicken thighs to the baking dish. Coat them with the thickened sauce. 5. Bake for an additional 10-15 minutes. Check the internal temperature; it should reach 165°F (75°C). 6. Let the chicken rest for 5 minutes before serving. This helps keep it juicy. To cook chicken thighs just right, use a meat thermometer. Insert it into the thickest part of the thigh. The chicken should reach 165°F (75°C) to be safe. This ensures it is juicy and cooked through. When choosing chicken, go for skin-on and bone-in thighs. They have more flavor and moisture than breasts. The bone also helps the chicken cook evenly. If you want a spicy kick, add red pepper flakes to the teriyaki sauce. Just a pinch can make a big difference. You can also add sriracha for more heat. Adding vegetables makes this dish even better. Try carrots or bell peppers. They roast well and soak up the teriyaki flavor. You can toss them in the baking dish with the chicken. To make cleanup easy, line your baking dish with foil. After cooking, you can simply toss the foil away. This saves time and effort. If you have leftover sauce, store it in an airtight container. It keeps in the fridge for about a week. You can use it for other meals or as a dip. Pro Tips Use Fresh Ingredients: Fresh garlic and ginger will significantly enhance the flavor of your teriyaki sauce compared to dried or jarred alternatives. Marinate for Better Flavor: For an even richer taste, marinate the chicken thighs in the teriyaki sauce for at least 30 minutes or up to overnight in the refrigerator before baking. Check Temperature: Always use a meat thermometer to ensure the chicken reaches an internal temperature of 165°F (75°C) for safe consumption. Serve with Sides: Pair your baked teriyaki chicken with steamed rice or sautéed vegetables to create a balanced and flavorful meal. {{image_2}} You can switch things up with different proteins. If you want a leaner dish, use chicken breast. Chicken thighs are great for juicy flavor. If you want a meat-free option, try tofu. Tofu soaks up teriyaki sauce well. Pork is another tasty choice. Use pork tenderloin for a sweet and savory twist. Get creative with flavors! Adding citrus can brighten your dish. Try orange or lime juice for a fresh taste. You can also mix in herbs or spices. Chili flakes can add a nice kick. This way, you can tailor the dish to your mood or season. For gluten-free diets, make simple swaps. Use gluten-free soy sauce instead of regular. It tastes just as good! If you need to thicken your sauce, cornstarch works well. You can also use arrowroot powder or potato starch as alternatives. Enjoy your teriyaki chicken without worry! To keep your baked teriyaki chicken thighs fresh, store them properly. First, let the chicken cool down to room temperature. Then, place the chicken in airtight containers. Glass or plastic containers work well. Make sure to seal them tight. You can keep the chicken in the fridge for up to four days. If you want to eat it later, freezing is a good option. When you are ready to eat the leftovers, reheating is key. The best way to reheat chicken is in the oven. Preheat your oven to 350°F (175°C). Place the chicken in an oven-safe dish, cover it with foil, and heat for about 20 minutes. This method keeps the chicken juicy. You can also use a microwave, but be careful. Heat in short bursts of one minute, checking often to avoid drying it out. Freezing your teriyaki chicken thighs is easy. Wrap each thigh in plastic wrap tightly. Then, put them in a freezer bag. Remove as much air as you can. This helps prevent freezer burn. You can freeze the chicken for up to three months. When you want to eat it, thaw the chicken in the fridge overnight. This keeps it safe and tasty. Bake chicken thighs for about 30 to 45 minutes at 400°F. The exact time depends on the thickness of the thighs. Thicker pieces may need more time. Always check the internal temperature. It should reach 165°F for safety. Use a meat thermometer for best results. This ensures juicy, safe chicken. Yes, making teriyaki sauce from scratch is easy and fun! Here’s a simple recipe: - 1/4 cup soy sauce (low-sodium is best) - 1/4 cup honey - 2 tablespoons rice vinegar - 1 tablespoon sesame oil - 2 cloves garlic, minced - 1 teaspoon fresh ginger, grated Mix these ingredients in a bowl. Whisk until smooth. This sauce is perfect for your chicken. You can adjust sweetness or add spice, too! Baked teriyaki chicken thighs can be healthy. Chicken thighs provide protein and essential nutrients. The sauce has soy sauce and honey, which adds flavor but also sugar. - One chicken thigh has about 250-300 calories. - It also brings protein and healthy fats. Pair it with brown rice and veggies for a balanced meal. Use low-sodium soy sauce for less salt. Enjoy your healthy, tasty dish! This blog post covered making delicious chicken teriyaki with ease. We explored key ingredients like chicken thighs and teriyaki sauce components. You learned the best prep steps, baking times, and cooking tips for perfect results. We also discussed tasty variations and storage methods. Cooking can be fun and rewarding. Enjoy your meal and get creative in the kitchen. Happy cooking!
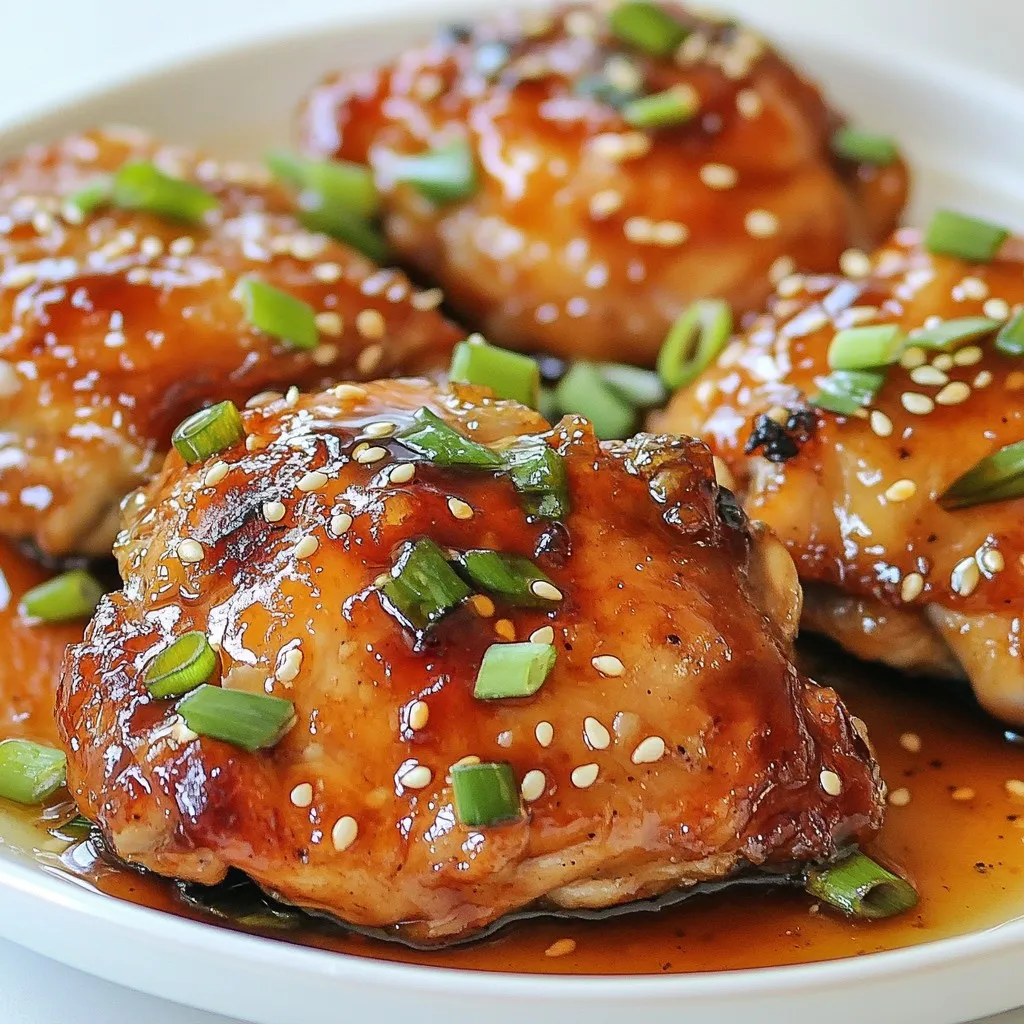
Baked Teriyaki Chicken Thighs Juicy and Flavorful Dish
Are you ready to dive into a dish that’s both juicy and packed with flavor? Baked teriyaki chicken thighs are your answer! I’ll show you
- 1 tablespoon olive oil - 1 onion, chopped - 3 cloves garlic, minced - 2 carrots, diced - 1 red bell pepper, chopped - 1 yellow bell pepper, chopped - 1 zucchini, diced - 1 cup green beans, trimmed and cut into 1-inch pieces - 1 cup frozen peas - 6 cups vegetable broth - 1 teaspoon dried thyme - 1 teaspoon smoked paprika - Salt and pepper to taste - Fresh parsley for garnish For this colorful vegetable soup, I start with some olive oil. It adds a rich flavor and helps to cook the veggies. Next, I chop one onion and mince three cloves of garlic. These two are key for a great base. Then, I choose an array of colorful vegetables. I use two diced carrots, one red bell pepper, and one yellow bell pepper. Each one adds color and taste. I also add one diced zucchini for extra crunch. Don’t forget about the green beans. I cut one cup into one-inch pieces. Frozen peas also go in. They’re sweet and bright. For the broth, I use six cups of vegetable broth. It gives the soup depth and warmth. To season, I add one teaspoon of dried thyme and one teaspoon of smoked paprika. A pinch of salt and pepper finishes it off. Finally, I like to garnish with fresh parsley. It adds a pop of color and freshness. This mix of ingredients makes the soup not just colorful, but also full of flavor. {{ingredient_image_1}} Start by heating olive oil in a large pot. Use medium heat for this step. Add the chopped onion and cook it for about five minutes. You want the onion to turn soft and clear. Next, stir in the minced garlic. Cook it for one more minute. This will make your kitchen smell wonderful! Now, it's time to add the colorful vegetables. Toss in the diced carrots, red and yellow bell peppers, and zucchini. Sauté these veggies for five to seven minutes. Stir them often. You want them to soften but still keep some crunch. After the base is ready, it's time to stir in more ingredients. Add the green beans and frozen peas to the pot. Mix them well with the sautéed veggies. Then, pour in six cups of vegetable broth. This gives your soup a rich flavor. Season the soup with dried thyme, smoked paprika, salt, and pepper. Stir everything together nicely. Bring the soup to a boil, then reduce the heat. Let it simmer for 20 to 25 minutes. This helps all the flavors blend and the veggies to become tender. Once the time is up, taste the soup. Adjust the seasoning if needed. Serve it hot, and don’t forget to add fresh parsley on top for a nice look! To make your soup pop with color, choose a mix of veggies. I love using: - Carrots for orange - Red and yellow bell peppers for sweetness - Zucchini for a fresh taste - Green beans and peas for a bright green touch These choices create a rainbow of colors. Each veggie adds its own charm. Cooking times matter for texture. For soft veggies, simmer them for 20–25 minutes. If you want a bit of crunch, add green beans later in the cooking. This keeps them tender yet crisp. Seasoning brings your soup to life. Start with salt and pepper. Use about 1 teaspoon of each. Taste as you go. If it lacks flavor, add more. I recommend adding dried thyme and smoked paprika. They give depth and warmth. You can also experiment with other herbs. Try fresh basil or dill for a fun twist. Adding herbs at the end keeps their flavors bright. Just sprinkle them on top before serving. This simple step makes a big difference. Pro Tips Fresh Vegetables: Use seasonal vegetables for the best flavor and nutritional value. Fresh produce can elevate the taste of your soup. Adjusting Consistency: If you prefer a creamier soup, blend a portion of the soup and stir it back in for a smoother texture. Herb Variations: Experiment with different herbs like basil or cilantro for a unique flavor profile that complements the vegetables. Make Ahead: This soup can be made in advance and stored in the fridge for up to 3 days, allowing the flavors to develop even more. {{image_2}} You can change the veggies in this soup based on the season. In spring, try fresh peas or asparagus. In fall, add butternut squash or pumpkin. You can also use whatever you have on hand. This makes the soup fun and fresh each time. Leafy greens are a great addition, too. Spinach, kale, or Swiss chard work well. Add them at the end of cooking. This keeps them bright and tender. Want to boost the protein? You can add beans or legumes. Chickpeas or black beans fit well into this soup. They add creaminess and a hearty feel. For meat lovers, diced chicken or turkey is a great choice. Cook the meat first, then add it to the soup. This way, it soaks up all the yummy flavors. You can also use sausage for a spicier kick. To keep your colorful vegetable soup fresh, use airtight containers. Glass or plastic containers work well. Make sure the soup cools down before sealing it. This helps keep the flavors intact. Store it in the fridge for up to five days. When you want to eat it again, just reheat on the stove or in the microwave. Freezing soup is easy and great for later meals. First, let the soup cool completely. Then, pour it into freezer-safe bags or containers. Leave some space at the top for expansion. Label each bag with the date. You can freeze the soup for up to three months. When you're ready to eat, take it out and thaw in the fridge overnight. For quick thawing, use the microwave. After thawing, heat it on the stove until hot. Enjoy your soup packed with flavor! This colorful vegetable soup can last in your fridge for about 3 to 5 days. Store it in a sealed container to keep it fresh. Always check for any signs of spoilage before eating. If you want to enjoy it later, freezing is a great option. Yes, you can easily customize the vegetables in this soup. Use any fresh or frozen veggies you enjoy. If you have broccoli, spinach, or corn, feel free to toss them in. The key is to keep a balance of colors and textures for a tasty result. Absolutely! This vegetable soup is vegan-friendly since it uses only plant-based ingredients. The vegetable broth and all the vegetables make it healthy and satisfying. You can enjoy this soup without any animal products. This blog post covered how to make a delicious vegetable soup. You learned about key ingredients like olive oil, onions, garlic, and colorful veggies. I explained step-by-step instructions for sautéing and boiling. You also found tips for vibrant colors and flavor improvements. There were variations for seasonal options, proteins, and how to store leftovers. Experiment with the recipes and trust your taste. Your vegetable soup will be unique! Enjoy your cooking adventure!
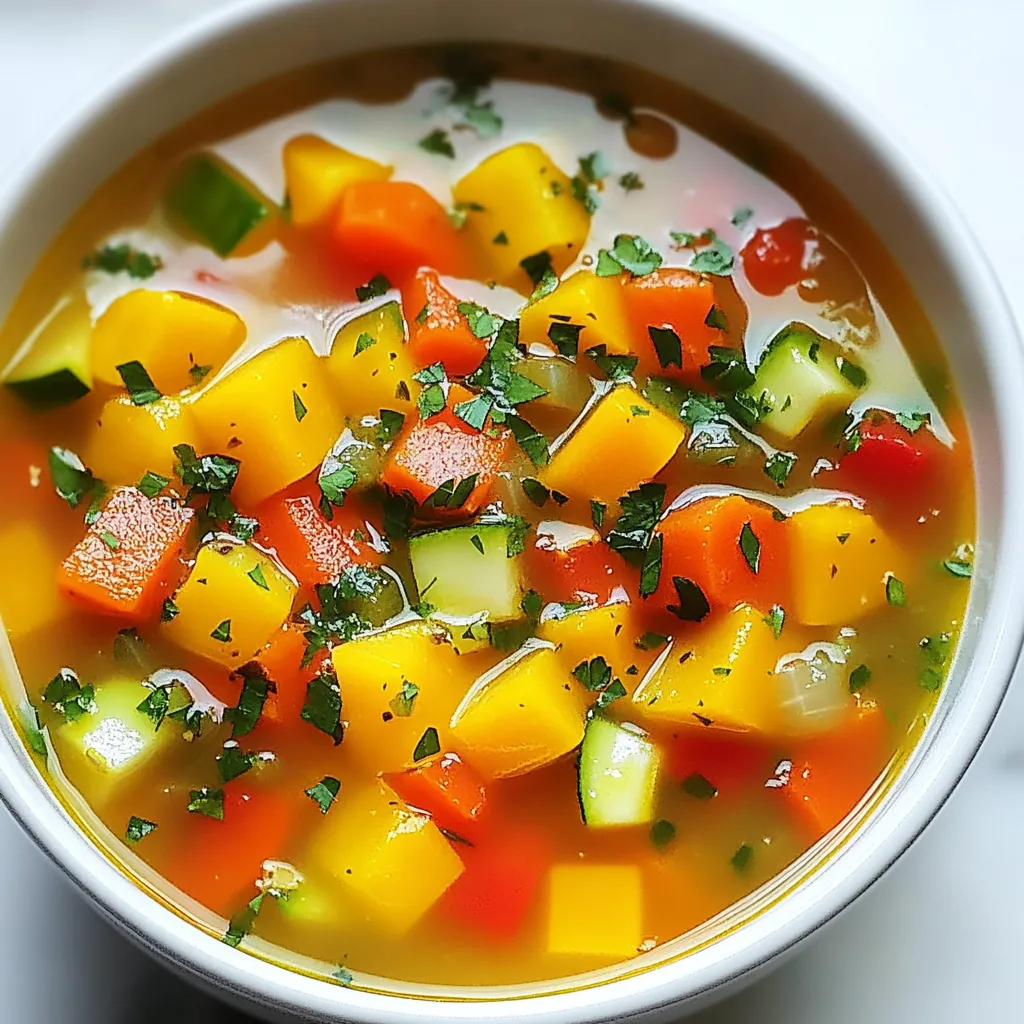
Colorful Vegetable Soup Packed with Flavorful Goodness
Are you ready to whip up a delicious bowl of Colorful Vegetable Soup? This dish is more than just a feast for the eyes; it’s
To make these tasty street-style chicken tacos, you need simple, fresh ingredients: - 2 chicken breasts, diced - 1 tablespoon olive oil - 1 teaspoon cumin - 1 teaspoon smoked paprika - 1 teaspoon garlic powder - 1/2 teaspoon salt - 1/2 teaspoon black pepper - 1/2 cup diced onion - 1/2 cup chopped fresh cilantro - 1 jalapeño, finely chopped (optional for heat) - 8 small corn tortillas Adding a few extra ingredients can boost the flavor: - Extra spices like chili powder or oregano - Fresh lime juice for a zesty kick - A pinch of cayenne for heat Toppings and sides make your tacos even better: - 1 cup shredded lettuce - 1 avocado, sliced - Salsa of choice for topping - Lime wedges for squeezing over tacos {{ingredient_image_1}} To prepare the chicken, start by dicing the two chicken breasts into small pieces. This helps them cook evenly. Next, take a medium bowl and add the diced chicken. Pour in one tablespoon of olive oil. Then, sprinkle in one teaspoon each of cumin, smoked paprika, and garlic powder. Add half a teaspoon of salt and black pepper as well. Mix everything well. Coating the chicken with spices makes it flavorful. Heat a skillet over medium-high heat. Once hot, add the seasoned chicken from the bowl. Cook for about 7-10 minutes. Stir occasionally to ensure even cooking. The chicken should be cooked through and have a slight char. After that, add half a cup of diced onion and the jalapeño if you like heat. Stir for another 2 minutes until the onions become soft and clear. Now it's time to assemble the tacos! First, warm the corn tortillas in a dry skillet for about 30 seconds on each side. You can also use a damp cloth and microwave them for 20-30 seconds. Once warm, place a portion of the chicken mixture on each tortilla. Top with shredded lettuce, avocado slices, and chopped cilantro. Finally, serve the tacos with lime wedges and your favorite salsa on the side. Enjoy your tasty creation! To get that true street food taste, use fresh ingredients. Fresh cilantro adds a bright note. Use fresh lime juice for zing. The spices are key too. Cumin and smoked paprika give warmth and depth. Mix these spices well with the chicken. Let the chicken marinate for at least 15 minutes for deeper flavor. One common mistake is overcooking the chicken. This makes it dry. Cook chicken until golden brown and juicy. Don't skip the onion and jalapeño. They add great flavor and texture. Lastly, avoid cold tortillas. Warm tortillas make a big difference in taste and texture. To warm your tortillas, use a dry skillet. Heat each tortilla for about 30 seconds. Flip and repeat. This makes them soft and easy to fold. You can also wrap them in a damp cloth and microwave. Just 20-30 seconds works wonders. Keep them warm in a towel while you finish cooking the chicken. Pro Tips Marinate for Flavor: For even more flavor, marinate the chicken in the spice mixture for at least 30 minutes before cooking. This allows the spices to penetrate the meat better. Use Fresh Ingredients: Fresh cilantro and lime juice will elevate the taste of your tacos significantly. Always opt for fresh produce when possible. Keep Tortillas Warm: To keep your tortillas warm while assembling, wrap them in a clean kitchen towel. This will prevent them from drying out and becoming brittle. Customize Your Toppings: Feel free to customize your toppings based on preference! Add cheese, sour cream, or other veggies for a unique twist on classic chicken tacos. {{image_2}} You can try different proteins for your tacos. Ground beef or pork works great. Shredded chicken also adds a nice touch. If you want something unique, try using shrimp or fish. These options bring different flavors to your meal. Each protein can use the same spices as the chicken. Just adjust your cooking time based on the meat you choose. You can easily make vegetarian or vegan tacos. Use black beans, lentils, or chickpeas for protein. Dice up some bell peppers or zucchini for extra crunch. You can also roast vegetables like sweet potatoes or corn. These add flavor and nutrition. For a vegan option, skip the cheese and sour cream. Instead, use avocado or a cashew cream for a creamy touch. Get creative with your toppings to make your tacos special. Instead of just lettuce, add shredded cabbage for crunch. You can use pickled onions or radishes for a tangy bite. Try different salsas like mango or pineapple for sweetness. A yogurt sauce can also add a nice twist. Experiment with different herbs like mint or dill for fresh flavors. Each topping can change the whole taco experience! After enjoying your street style chicken tacos, you may have some leftovers. To store them, place the chicken and toppings in separate airtight containers. This keeps everything fresh. Store the chicken in the fridge for up to three days. Keep the tortillas wrapped in foil or plastic wrap to avoid drying out. When you're ready to eat your leftovers, reheating is easy. For the chicken, heat a skillet over medium heat. Add the chicken and stir until warm. This keeps the chicken juicy. For the tortillas, warm them in the skillet for about 30 seconds on each side. This makes them soft and ready to fold. If you want to make street style chicken tacos ahead of time, freezing is a great option. Cook the chicken as directed and let it cool. Place the chicken in a freezer-safe bag. Remove air to prevent freezer burn. You can freeze the chicken for up to three months. When you're ready to eat, thaw it in the fridge overnight. Reheat as mentioned before. Enjoy your tasty meal any day! I recommend using boneless, skinless chicken breasts. They cook quickly and stay juicy. You can also use thighs for more flavor. Both options work well in tacos. Just make sure to cut the chicken into small, even pieces. This helps the spices coat the meat evenly. Yes, you can prepare the chicken in advance. Cook it and store it in a container. Keep it in the fridge for up to three days. When ready to serve, just warm the chicken in a skillet. You can also reheat it in the microwave if needed. For these tacos, a fresh pico de gallo is a great choice. It's bright and refreshing. You can also try a spicy salsa verde. This adds a nice kick. If you love heat, go for a mango salsa for sweetness. Each option enhances the flavors of the chicken perfectly. We explored how to make delicious street-style chicken tacos. First, we covered the key ingredients, cooking steps, and helpful tips. Then, we looked at tasty variations and storage methods. For your next taco night, use these ideas to impress family and friends. Remember, less is often more. Stick to fresh flavors and enjoy the process. With practice, you’ll master the art of street tacos. Happy cooking!
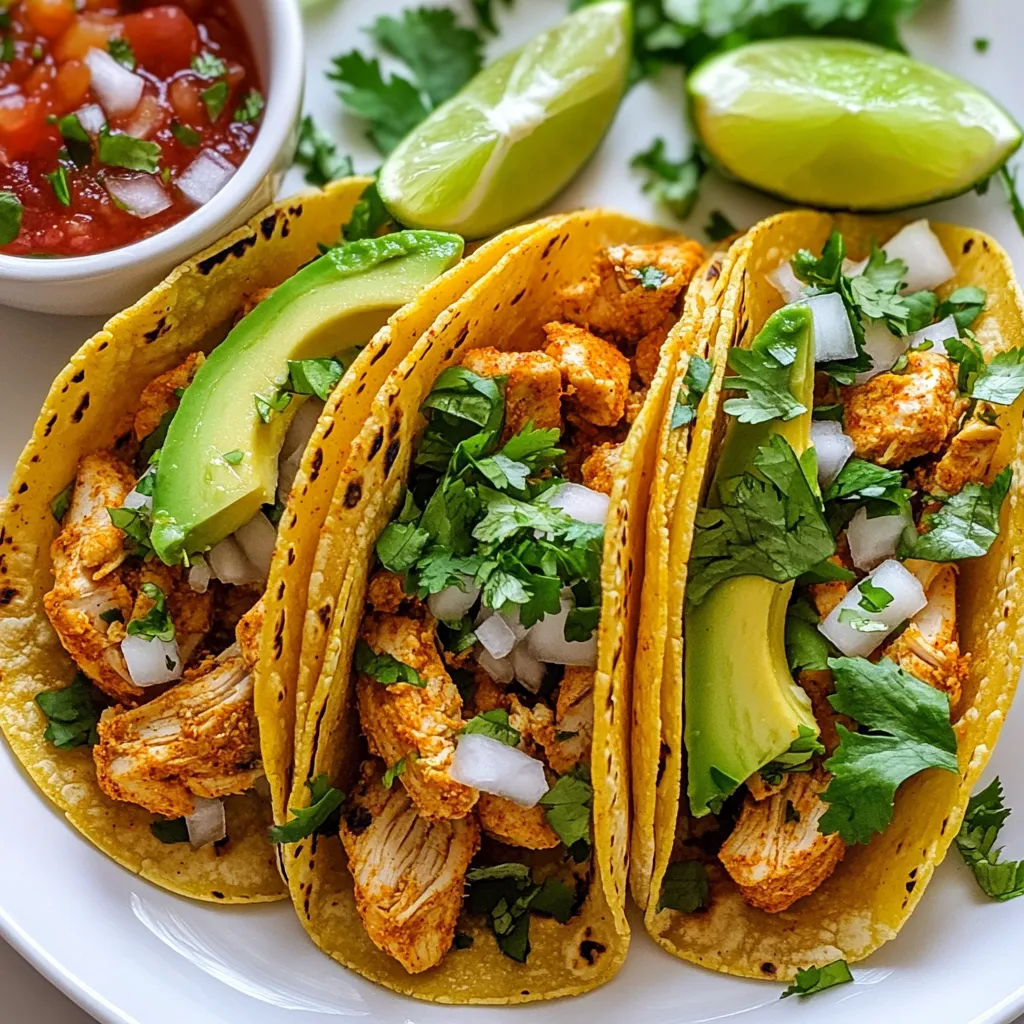
Street Style Chicken Tacos Flavorful and Simple Meal
Craving a quick, tasty meal? Street style chicken tacos are your answer! In this post, I’ll share my simple recipe for these flavorful tacos. You’ll
To make a tasty bowl of Yaki Udon, you'll need: - 300g udon noodles - 2 tablespoons vegetable oil - 1 medium onion, thinly sliced - 2 cloves garlic, minced - 1 medium carrot, julienned - 1 red bell pepper, sliced - 100g snap peas, trimmed - 4 green onions, chopped - 3 tablespoons soy sauce - 1 tablespoon sesame oil - 1 tablespoon mirin (optional) - 1 teaspoon grated ginger - Salt and pepper to taste - Sesame seeds for garnish These ingredients come together to create a warm, savory dish that bursts with flavor. Feel free to get creative with your Yaki Udon. You can add: - Mushrooms for an earthy taste - Broccoli for extra crunch - Spinach for added nutrients - Bean sprouts for a fresh bite These options can change the texture and flavor, making each dish unique. To make your Yaki Udon more filling, consider adding protein. Here are some great choices: - Sliced grilled chicken - Tofu (great for a vegetarian option) - Shrimp for a seafood twist - Beef strips for a heartier meal Adding protein not only enhances the taste but also makes it a more balanced meal. Enjoy crafting your perfect Yaki Udon! {{ingredient_image_1}} First, boil a large pot of water. Add 300g of udon noodles. Cook them as the package says. This usually takes about 8-10 minutes. Once done, drain the noodles. Rinse them under cold water to stop the cooking. Set the noodles aside for later. Grab a large skillet or wok. Heat 2 tablespoons of vegetable oil over medium-high heat. Add the sliced onion and minced garlic. Stir them for about 2-3 minutes. The onion should turn soft and clear. Next, toss in the julienned carrot, sliced red bell pepper, and trimmed snap peas. Stir-fry these for around 4-5 minutes. You want them to be tender but still crunchy. Now it’s time for the noodles. Add the cooked udon noodles to your skillet. Use tongs to mix them with the veggies. Make sure everything is well combined. Pour in 3 tablespoons of soy sauce, 1 tablespoon of sesame oil, and 1 tablespoon of mirin if you want. Add in the grated ginger next. Season your dish with salt and pepper to taste. Stir-fry everything for another 3-4 minutes until it is all hot. Take the skillet off the heat. Stir in the chopped green onions for freshness. Sprinkle sesame seeds on top for a nice finish. Serve your Yaki Udon hot. If you like, you can add sliced grilled chicken or tofu for extra protein. Enjoy your meal! To cook udon noodles just right, start with a large pot of boiling water. Make sure to use enough water so the noodles do not stick. Cook the noodles according to the package's directions. Usually, this takes about 5 to 10 minutes. After cooking, drain them well and rinse them under cold water. This stops the cooking process and keeps them chewy. Set them aside until you need them. To make your yaki udon really pop, use fresh ingredients. Fresh garlic and ginger give a strong flavor. Sauté the onions until they are soft and fragrant. This takes about 2 to 3 minutes. Add a mix of colorful veggies like carrots, bell peppers, and snap peas. Stir-fry them until they are tender but still crunchy. Then, mix in the cooked udon noodles. Pour in soy sauce, sesame oil, and mirin for a rich taste. Adjust the seasoning with salt and pepper for balance. One common mistake is overcooking the udon noodles. This can make them mushy. Always rinse them in cold water after boiling. Another mistake is not using enough oil in the pan. This helps prevent sticking and gives a nice finish. Don’t skip the ginger or garlic; they add a lot of flavor. Finally, avoid cooking the noodles and veggies together for too long. You want them to keep their vibrant colors and crunch. Pro Tips Perfectly Cooked Noodles: Make sure to cook the udon noodles just until al dente, as they'll continue to cook slightly when stir-frying with the vegetables. Vegetable Variations: Feel free to add or substitute any seasonal vegetables you have on hand, such as broccoli, zucchini, or mushrooms for added flavor and nutrition. Protein Boost: For a heartier meal, add sliced grilled chicken, shrimp, or tofu. Just cook the protein separately and toss it in at the end to heat through. Garnish for Extra Flavor: Finish your dish with a sprinkle of sesame seeds, chopped cilantro, or a squeeze of lime juice for an extra burst of flavor. {{image_2}} You can easily make Yaki Udon vegetarian or vegan. Just skip the meat and use tofu instead. Tofu adds protein and absorbs all the delicious flavors. You can also replace the mirin with a splash of rice vinegar. This keeps it vegan but still tasty. Feel free to mix up your veggies. Try broccoli, mushrooms, or bok choy for new flavors. You can also add zucchini or bean sprouts for extra crunch. The key is to use fresh and colorful vegetables. This makes your dish not just tasty but also beautiful. Different regions have their own styles of Yaki Udon. In Osaka, they might add seafood like shrimp or squid. In Tokyo, you'll find a spicier version with chili oil. Each region puts its spin on the dish. Explore these variations to find your favorite! To keep your Yaki Udon fresh, first let it cool. Place the noodles in an airtight container. You can keep leftovers in the fridge for up to three days. If you want to store them for longer, freeze them in a freezer-safe bag. They will last for about a month in the freezer. When you’re ready to enjoy your Yaki Udon again, there are a few good ways to reheat it. You can use the microwave for quick warming. Put the noodles in a bowl, add a splash of water, and cover it. Heat for about one to two minutes. Stir halfway through to heat evenly. If you prefer the stove, heat a skillet over medium heat. Add a little oil, then toss in the noodles. Stir until they are hot. I suggest using glass containers for storage. They keep your food fresh and don’t stain. If you prefer plastic, make sure they are BPA-free. Look for containers with tight lids to prevent leaks. Small containers are great for snacks, while larger ones work well for meals. Yaki Udon is a Japanese stir-fried noodle dish. It features thick udon noodles tossed with fresh vegetables. You can use soy sauce for a savory flavor. It’s quick to make and very tasty. The dish is often topped with green onions and sesame seeds. You can add protein like chicken or tofu for a heartier meal. Yes, you can make Yaki Udon in advance. Cook the noodles and store them in the fridge. You can also prepare the vegetables ahead of time. Just keep them separate to stay fresh. When ready to eat, just stir-fry everything together. This saves time on busy days. You can find Yaki Udon noodles in most grocery stores. Look in the Asian food aisle. You can also find them in Asian markets. Fresh or frozen noodles work well. If you can’t find them, look for other udon noodles. They will still taste great in this dish. If you need a soy sauce substitute, try tamari or coconut aminos. Both provide a similar flavor. You can also mix water with miso paste for a unique taste. If you want a gluten-free option, tamari is a great choice. Always taste and adjust to your liking. Yaki Udon is a tasty dish you can easily make at home. We covered key ingredients, cooking steps, and helpful tips. You can customize this meal based on your taste and diet. Whether you're a meat lover or prefer veggies, there’s an option for everyone. Storing and reheating leftovers is simple, making Yaki Udon a great choice for meal prep. Enjoy creating your own version of this classic dish! You'll find it fun and rewarding to make your Yaki Udon just right.
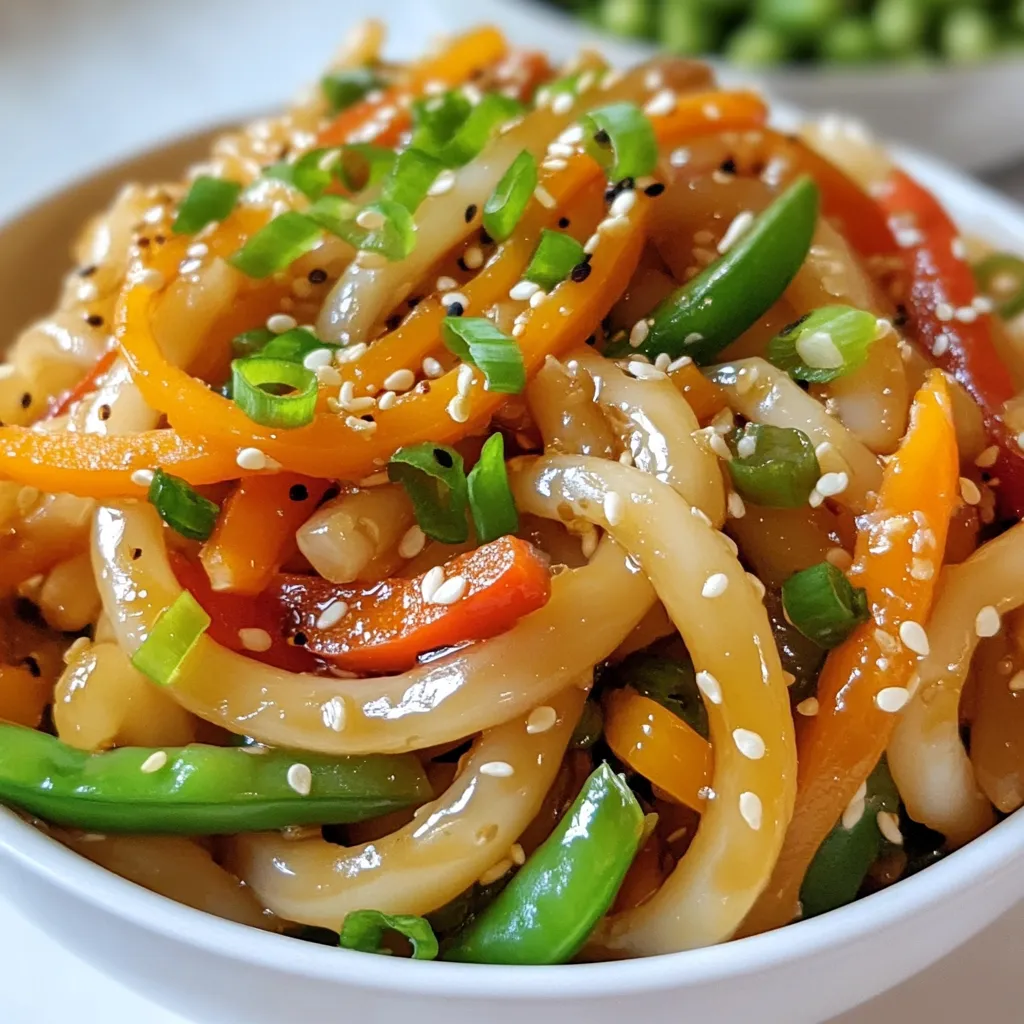
Yaki Udon Noodles Flavorful and Simple Recipe Guide
Yaki Udon noodles offer a tasty and easy meal perfect for any night. In this guide, I’ll share my simple recipe to help you make
- 4 boneless, skinless chicken thighs - 1/2 cup grated Parmesan cheese - 1/4 cup almond flour - 4 cloves garlic, minced - 1/4 cup unsalted butter, melted - 1 teaspoon dried oregano - 1 teaspoon paprika - Salt and pepper to taste - Fresh parsley, chopped (for garnish) Each serving of Keto Garlic Parmesan Chicken has about 350 calories. It has 23 grams of fat and 30 grams of protein. You also get 4 grams of carbs per serving. This dish fits well into a keto diet, allowing you to enjoy flavor without the carbs. - Chicken Thighs: You can use chicken breasts for a leaner option. - Almond Flour: If you want, swap it with coconut flour. It will change the taste a bit. - Parmesan Cheese: Grated Pecorino Romano works well if you want a stronger flavor. - Unsalted Butter: Use olive oil or ghee if you prefer a dairy-free choice. - Garlic: If you don’t have fresh garlic, garlic powder can work, but use less. {{ingredient_image_1}} First, gather your chicken thighs. I prefer boneless and skinless thighs for this dish. They cook evenly and stay juicy. Rinse the chicken under cold water and pat it dry with paper towels. This step helps the coating stick better. Set the chicken aside, so it is ready for coating. In a mixing bowl, combine the grated Parmesan cheese, almond flour, minced garlic, dried oregano, paprika, salt, and pepper. Stir them together until they blend well. This mixture is key to getting that crunchy, tasty coating. It gives the chicken a lovely flavor. Next, melt the unsalted butter in a small bowl. Dip each chicken thigh into the melted butter. Make sure each piece is well-coated. After that, roll the butter-coated chicken in the Parmesan-almond mixture. Press lightly as you coat to ensure it sticks well. Now, it's time to bake! Preheat your oven to 375°F (190°C). Line a baking sheet with parchment paper. Place the coated chicken thighs on the sheet. Drizzle any leftover melted butter over the chicken. This adds extra flavor and helps crisp up the coating. Bake the chicken for 25 to 30 minutes. It’s done when the outside is golden and crispy. Use a meat thermometer to check. The chicken should reach at least 165°F (74°C) inside. Once baked, let it rest for a few minutes. Garnish with fresh parsley before serving. Enjoy your tasty Keto Garlic Parmesan Chicken! To achieve a crispy coating, use both Parmesan cheese and almond flour. The cheese gives a rich flavor, while the almond flour adds crunch. After mixing these, make sure to press the coating onto the chicken. This way, the coating sticks well. For juicy chicken, start with boneless, skinless thighs. They stay moist during cooking. Always coat the chicken in melted butter first. This step is key. It helps the coating stick and keeps the meat juicy. Bake the chicken at 375°F for 25-30 minutes. Check the internal temperature. It should reach at least 165°F for safety. Garnish your Keto Garlic Parmesan Chicken with fresh parsley. It adds color and a fresh taste. Serve the chicken right out of the oven for the best flavor. Pair it with a side salad or steamed veggies. This makes for a balanced meal. Enjoy the crispy bites and the rich, savory taste with every bite! Pro Tips Choose the Right Chicken: Opt for thighs instead of breasts for juicier and more flavorful results. Coating Technique: Press the coating onto the chicken firmly to ensure it adheres well during baking. Butter Benefits: Drizzling remaining melted butter on top before baking enhances the flavor and ensures a crispy texture. Resting Time: Let the chicken rest for a few minutes after baking to allow juices to redistribute for maximum tenderness. {{image_2}} You can add spinach to your Keto Garlic Parmesan Chicken. Spinach gives a fresh taste and boosts nutrition. Start by sautéing 2 cups of fresh spinach in a pan until it wilts. This takes about 2-3 minutes. After you coat the chicken, place the wilted spinach on top of each piece. Then, bake as usual. The spinach adds color and flavor. Plus, it makes the dish more filling. If you want to switch up the cheese, try using mozzarella or cheddar. Mozzarella melts great and gives a nice stretch. Cheddar adds a sharp flavor. You can mix two cheeses together for a rich taste. Just remember to keep the amount the same as Parmesan. This keeps the texture right. Experimenting with cheese can change the whole dish! For a spicy kick, add red pepper flakes to the coating mix. Start with 1 teaspoon and adjust to your taste. You can also marinate the chicken in a spicy sauce before coating it. Try hot sauce or sriracha for a zesty flavor. This version is perfect if you love heat. The mix of garlic, cheese, and spice will make each bite exciting! To keep your Keto Garlic Parmesan Chicken fresh, let it cool first. Once cooled, place the chicken in an airtight container. You can store it in the fridge for up to three days. Make sure to cover it well. This helps keep the chicken moist and tasty. When it's time to eat the leftovers, you can reheat the chicken easily. Preheat your oven to 350°F (175°C). Place the chicken on a baking sheet. Cover it with foil to keep it moist. Heat for about 15-20 minutes, or until it's warmed through. You can also use the microwave, but the oven keeps the coating crispy. If you want to save some for later, freezing works great. Wrap each piece of chicken tightly in plastic wrap. Then, place them in a freezer bag. Squeeze out as much air as possible. You can freeze the chicken for up to three months. When you're ready to eat it, thaw it in the fridge overnight before reheating. Yes, you can use chicken breasts. Chicken breasts are leaner than thighs. They will still taste great with this recipe. Just remember, they may cook faster than thighs. Check the internal temperature to ensure they reach 165°F (74°C). Yes, this recipe is gluten-free. Almond flour replaces regular flour. Almond flour keeps your meal tasty and keto-friendly. Just make sure to avoid any gluten in your other ingredients. To make this dish dairy-free, swap the butter and cheese. You can use coconut oil in place of butter. For cheese, try a dairy-free cheese alternative. These swaps will still give you a great flavor without the dairy. This article covered all you need for Keto Garlic Parmesan Chicken. We listed ingredients, their nutrition, and substitutes. You learned how to prep, coat, and bake the chicken perfectly. I shared tips for a crispy coating and juicy meat. Variations let you try new flavors, and storage info helps keep leftovers fresh. Cooking can be fun and rewarding. Enjoy making this dish your own!
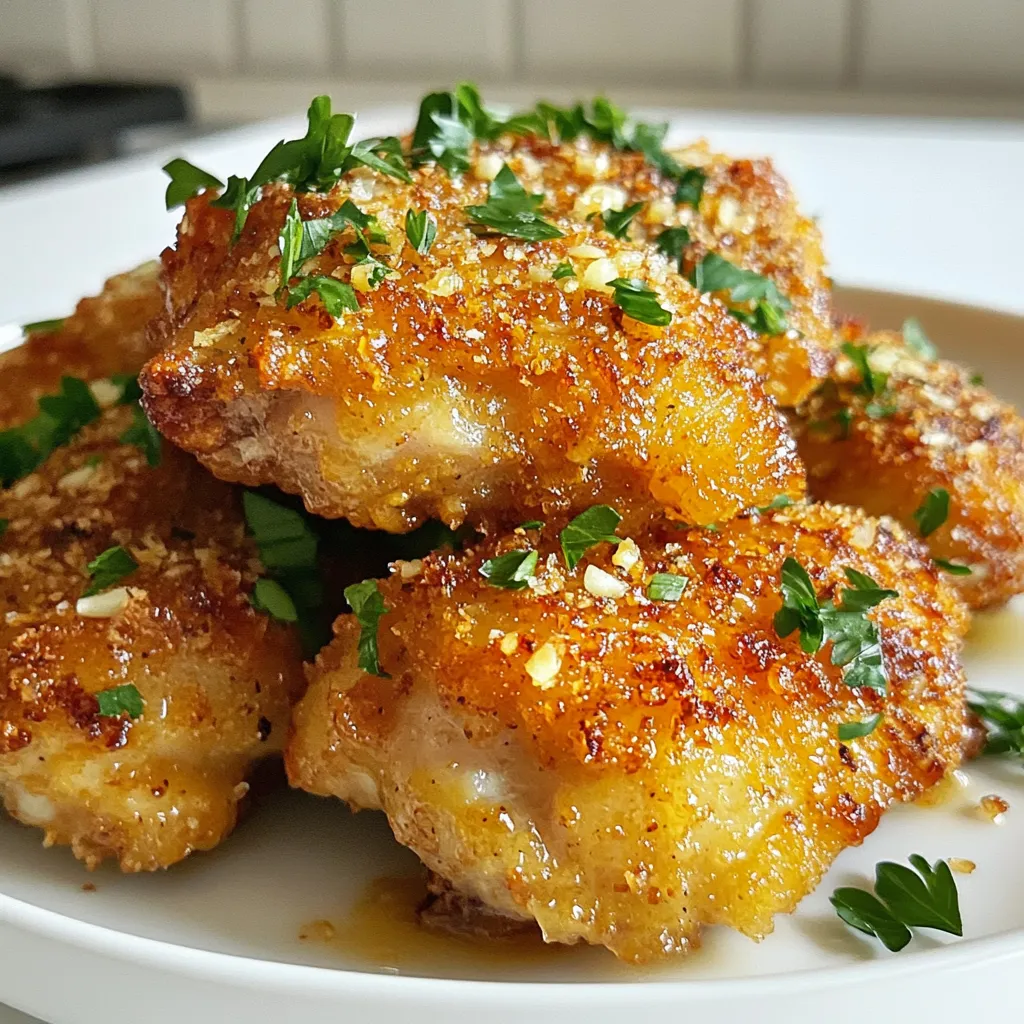
Keto Garlic Parmesan Chicken Flavorful and Easy Recipe
Are you ready to impress your family with a simple yet delicious dish? This Keto Garlic Parmesan Chicken is not only full of flavor, but
- 4 bone-in chicken thighs, skin-on - 1 cup long-grain rice - 2 cups chicken broth The main ingredients in this dish create a hearty base. Bone-in chicken thighs give the meal rich flavor and moisture. I prefer long-grain rice for its fluffy texture. Chicken broth adds depth and helps the rice cook perfectly. - 1/2 cup honey - 1/2 cup BBQ sauce (your choice) - 1 medium onion, diced - 2 cloves garlic, minced Honey and BBQ sauce bring sweetness and tang. They coat the chicken and rice, enhancing every bite. Diced onion and minced garlic add great aroma and flavor. These ingredients work together to make the dish feel special. - 1 tablespoon olive oil - 1 teaspoon smoked paprika - 1 teaspoon garlic powder - 1/2 teaspoon black pepper - Salt to taste Olive oil helps to brown the chicken and keep it moist. Smoked paprika gives a lovely, warm flavor. Garlic powder and black pepper add layers of taste. Salt ties everything together, so don’t skip it! {{ingredient_image_1}} First, let's sear the chicken thighs. Heat 1 tablespoon of olive oil in a large skillet over medium heat. Season the chicken thighs with smoked paprika, garlic powder, salt, and black pepper for great flavor. Place the chicken skin-side down in the hot pan. Sear for 5-7 minutes until the skin is crispy and golden brown. Flip the chicken and cook for another 3-4 minutes. This step locks in the flavor and gives a nice texture. Remove the chicken from the pan and set it aside. Next, it’s time to cook the aromatics. In the same pan, add the diced onion. Cook for about 3-4 minutes until it turns translucent. This step adds sweetness to the dish. Then, add the minced garlic and cook for another minute. Garlic adds a wonderful aroma and depth to your meal. Timing here is key; if you cook it too long, it can burn and taste bitter. Now, let's combine the ingredients. Stir in 1 cup of long-grain rice. Make sure the rice is well coated with the onion and garlic mixture. This helps the rice soak up all the flavors later. Pour in 2 cups of chicken broth, adding a pinch of salt if you like. This broth is essential; it infuses the rice with flavor as it cooks. In a small bowl, mix 1/2 cup of honey and 1/2 cup of your favorite BBQ sauce. Pour this mix over the rice. Finally, place the seared chicken thighs on top, skin-side up. This layering ensures that the chicken steams while the rice cooks, keeping it juicy. Bring the dish to a gentle boil, then lower the heat. Cover the pan with a lid and let it simmer for 25-30 minutes. This step allows the rice to absorb the liquid and flavors. Check the rice for doneness around the 25-minute mark. You want it tender but not mushy. Once done, remove the lid and let it sit for 5 minutes. This resting time helps the flavors meld together. Fluff the rice with a fork before serving. Enjoy your delicious one-pan meal! To get that perfect crispy skin, start with bone-in, skin-on chicken thighs. Sear them skin-side down in a hot pan. This locks in moisture and creates a nice golden crust. Flip them after 5-7 minutes to get both sides crispy. If you want to mix it up, try using chicken drumsticks or wings. They also work well with this recipe and stay juicy. To avoid mushy rice, rinse it under cold water before cooking. This removes excess starch. Use long-grain rice for the best results. It cooks up light and fluffy. You can also try jasmine rice for a fragrant twist. Just make sure to follow the right water-to-rice ratio for great texture. You can add more to this dish by including vegetables like bell peppers or peas. Toss them in with the onions and garlic for a colorful touch. If you like a bit of spice, add some cayenne or crushed red pepper. Adjust the sweetness by using less honey or adding more BBQ sauce for tang. Don't be afraid to experiment! Pro Tips Let It Rest: After cooking, allow the dish to rest for a few minutes. This helps the flavors meld and the rice to finish absorbing any remaining moisture. Choose Quality BBQ Sauce: The flavor of your BBQ sauce can significantly impact the dish. Opt for a high-quality sauce that complements the sweetness of the honey. Customize the Rice: Feel free to add vegetables like bell peppers or corn to the rice for added nutrition and flavor. Just be sure to adjust the cooking time accordingly. Use Bone-In Chicken: Bone-in chicken thighs provide more flavor and moisture during cooking compared to boneless cuts, making for a juicier final dish. {{image_2}} You can switch up the chicken cuts for this dish. Boneless thighs work well since they stay juicy. Chicken breasts are another option, but they can dry out. If you choose breasts, cook them carefully. Keep an eye on the time. You want them tender and not overcooked. If you want to mix things up, try different rice options. Brown rice adds a nutty flavor, while quinoa boosts protein. Both take longer to cook, so adjust the broth amount. You can also experiment with sauces. Teriyaki sauce gives a sweet twist. Homemade BBQ sauce lets you control the flavor. For a vegetarian take, use plant-based proteins like tofu or tempeh. These add great texture and protein. Replace chicken broth with vegetable broth for flavor. You can add lots of veggies too, like bell peppers or peas. This way, you keep the dish hearty and satisfying. To keep your One-Pan Honey BBQ Chicken and Rice fresh, use airtight containers. Glass containers work best as they do not stain and are easy to clean. You can also use plastic containers, but ensure they are BPA-free. Before sealing, let the dish cool down. This step helps prevent moisture buildup inside the container. To enjoy leftovers, the best method is reheating on the stove. Place the chicken and rice in a skillet over low heat. Add a splash of chicken broth to keep it moist. Stir gently to avoid sticking. You can also use a microwave, covering the dish with a damp paper towel. This keeps the moisture in while heating. If you want to save some for later, freezing is a great choice. Allow the dish to cool completely. Then, transfer it to freezer-safe containers or bags. Remove as much air as possible to prevent freezer burn. For best results, eat within three months. When you're ready to eat, thaw overnight in the fridge. Reheat on the stove or in the microwave until hot. You can use other rice types. Brown rice is a great choice. It takes longer to cook, so add about 10-15 extra minutes. Jasmine or basmati rice work too. They cook faster, so check for doneness at 20 minutes. Adjust the liquid to 2 1/4 cups for brown rice or 1 3/4 cups for the others. Want more heat? Add red pepper flakes or cayenne pepper. Start with a pinch and taste as you go. You can also use spicy BBQ sauce. Mix in hot sauce for an extra kick. A dash of sriracha can spice it up too! Yes, you can bake it! Preheat your oven to 375°F (190°C). Sear the chicken in a pan then transfer it to a baking dish. Add the rice, broth, and sauce like in the stovetop method. Cover with foil and bake for about 30-35 minutes. Check that the rice is tender before serving. This blog post walked you through creating a tasty chicken and rice dish. We covered the key ingredients like chicken thighs, rice, and broth, alongside flavor enhancers and essential seasonings. I detailed step-by-step instructions, tips for crispiness, and variations to suit your taste. You can easily store and reheat leftovers. Experiment and make it your own! Enjoy sharing this dish with friends and family.
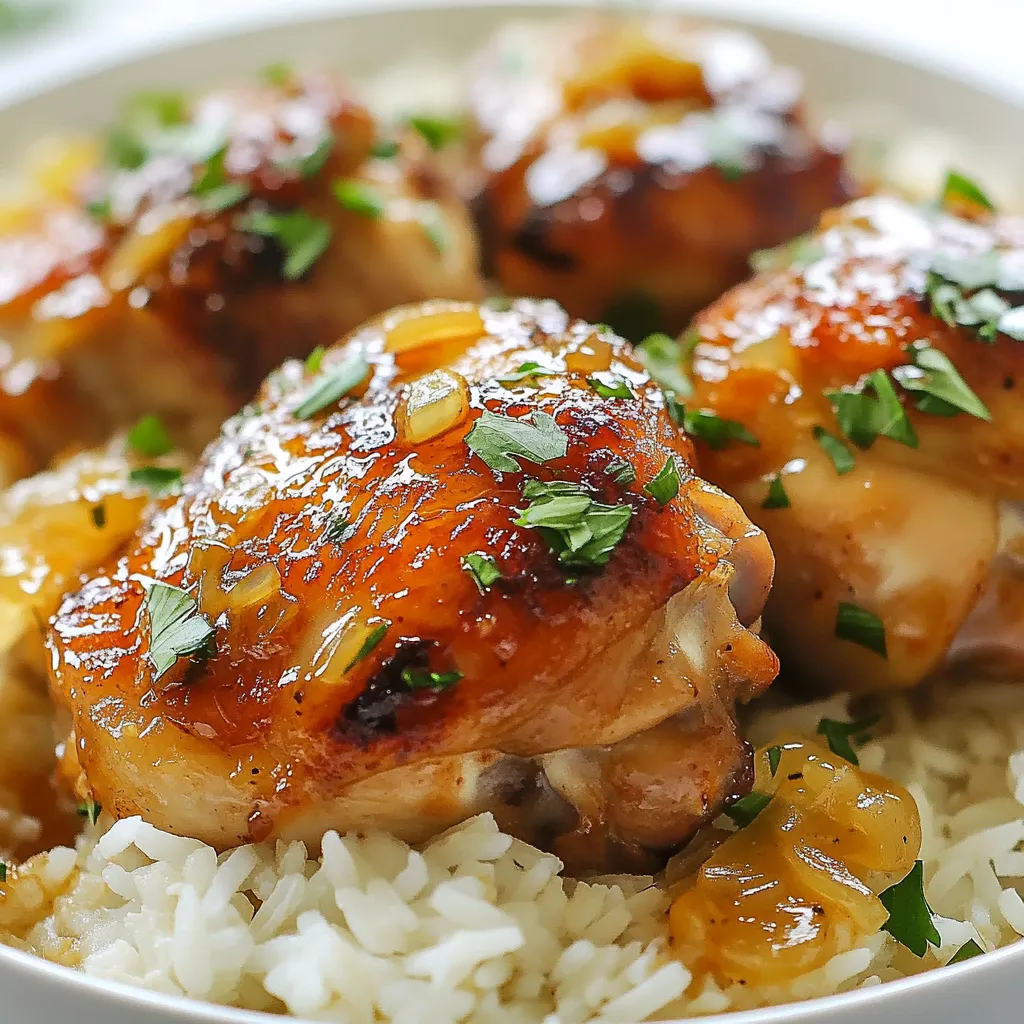
One-Pan Honey BBQ Chicken and Rice Delightful Meal
Are you ready to savor a delicious meal made easy? One-Pan Honey BBQ Chicken and Rice combines rich flavors with simple steps. You’ll enjoy crispy
To make creamy roasted garlic tomato soup, you need simple, fresh ingredients. Here’s what you’ll need: - 3 large tomatoes, halved - 1 whole bulb of garlic - 1 medium onion, chopped - 2 tablespoons olive oil - 2 cups vegetable broth - 1 cup heavy cream (or coconut cream for a dairy-free version) - 1 teaspoon dried basil - 1 teaspoon dried oregano - Salt and pepper to taste - Fresh basil leaves for garnish These ingredients create a rich, smooth soup. The tomatoes bring sweetness, while roasted garlic adds depth. Olive oil gives a nice flavor and helps with cooking. You can easily adapt this recipe for different diets. For a dairy-free option, use coconut cream instead of heavy cream. It still gives a creamy texture but is plant-based. For a gluten-free version, check your vegetable broth. Most brands are gluten-free, but it's good to confirm. This soup is naturally gluten-free, so you can enjoy it without worry. Garnishing enhances the soup's look and taste. Try these ideas: - Fresh basil leaves for a pop of color - A drizzle of extra heavy cream on top - Crusty bread or grilled cheese for dipping These additions make your meal more enjoyable and satisfying. They also add texture and flavor, which elevate the whole experience. Enjoy creating your creamy roasted garlic tomato soup! {{ingredient_image_1}} Start by preheating your oven to 400°F (200°C). Take three large tomatoes and cut them in half. Place them cut side up on a baking sheet. Grab a whole bulb of garlic, cut off the top, and add it to the sheet. Drizzle one tablespoon of olive oil over the tomatoes and garlic. Sprinkle a pinch of salt over everything. Roast them in the oven for 25 to 30 minutes. Look for caramelized tomatoes and soft, golden garlic. In a large pot, heat one tablespoon of olive oil over medium heat. Chop one medium onion and add it to the pot. Sauté the onion for about five minutes. You want it to be soft and translucent. Once your garlic has cooled, squeeze the soft cloves into the pot. Add the roasted tomatoes next. Now, pour in two cups of vegetable broth. Bring the mixture to a simmer and add one teaspoon each of dried basil and oregano. Season with salt and pepper. Let it simmer for ten minutes to blend the flavors. Remove the pot from heat. Use an immersion blender to blend the soup until smooth. If you don’t have an immersion blender, carefully pour the soup into a countertop blender. Blend it in batches until smooth. Stir in one cup of heavy cream or coconut cream for a dairy-free option. Gently heat the soup over low heat for three to five minutes. Taste and adjust the seasoning as needed. Enjoy this creamy roasted garlic tomato soup! To make the best creamy roasted garlic tomato soup, roasting is key. Here are my tips: - Choose ripe tomatoes. They add more flavor. - Use fresh garlic. A whole bulb will give a rich taste. - Drizzle olive oil. It helps caramelize the tomatoes and garlic. - Add salt. This enhances the natural sweetness of the tomatoes. - Watch the time. Roast for about 25-30 minutes, until soft and golden. Blending makes your soup smooth and creamy. Here’s how to do it right: - Use an immersion blender. This tool is easy and less messy. - If using a countertop blender, let the soup cool first. Blend in small batches to avoid spills. - Blend until smooth. This gives you that creamy texture you want. To make your soup even better, try these flavor tips: - Add herbs. Fresh basil or parsley can brighten the taste. - Experiment with spices. A pinch of red pepper flakes adds a nice kick. - Adjust creaminess. Use coconut cream for a dairy-free version. - Balance flavors. Taste and adjust salt and pepper as needed. With these tips, you can make a rich, tasty soup that everyone will love! Pro Tips Use Ripe Tomatoes: For the best flavor, choose ripe, in-season tomatoes. They will provide natural sweetness and richness to your soup. Adjust Creaminess: If you prefer a lighter soup, use half-and-half or milk instead of heavy cream. For a vegan option, coconut cream adds richness without dairy. Enhance Flavor with Fresh Herbs: While dried herbs are great, adding fresh basil or oregano right before serving can elevate the dish with bright, fresh flavors. Garnish Creatively: In addition to fresh basil, try adding a sprinkle of Parmesan cheese or a drizzle of balsamic reduction for extra flavor and visual appeal. {{image_2}} You can make this soup vegan with a few easy swaps. Use coconut cream instead of heavy cream. It adds a rich taste without dairy. You can also use vegetable broth for extra flavor. This way, everyone can enjoy creamy roasted garlic tomato soup! Feel free to add more flavors to your soup. Try spices like smoked paprika or red pepper flakes for heat. You can also mix in vegetables like bell peppers or carrots. They add more texture and taste. Experimenting with flavors makes your soup unique! Serve this soup with a slice of crusty bread. It soaks up the delicious broth. A simple side salad adds freshness. You can also top the soup with croutons for a nice crunch. These pairings make your meal even better! After you enjoy your creamy roasted garlic tomato soup, store any leftovers in an airtight container. Let the soup cool to room temperature before sealing it. This step helps keep it fresh. Place the container in the fridge. Your soup will stay good for about 3 to 4 days. If you add cream, it may not last as long. Always check for any signs of spoilage before eating. You can freeze this soup to enjoy later. First, let the soup cool completely. Then, pour it into freezer-safe bags or containers. Leave some space at the top for expansion. Label the bags with the date. The soup will last in the freezer for up to 3 months. When you’re ready to eat, thaw it in the fridge overnight. To reheat the soup, place it in a pot over low heat. Stir it gently to ensure even warming. If the soup seems thick, add a splash of vegetable broth or water. You can also microwave it in a bowl. Heat it in short bursts, stirring in between. This way, you keep the flavors fresh and tasty. To make this soup healthier, swap heavy cream for coconut cream or almond milk. You can also add more veggies, like carrots or spinach, for extra nutrients. Using low-sodium vegetable broth helps cut back on salt. If you want more fiber, consider adding lentils or beans. These changes keep the flavor rich while boosting health benefits. Yes, you can use canned tomatoes. Look for whole or diced tomatoes in juice or puree. Canned tomatoes save time and can be just as tasty. Use about 28 ounces of canned tomatoes for this recipe. Drain excess liquid if you want a thicker soup. The flavors may differ slightly, but it will still be delicious. Serve the soup hot in bowls. Drizzle a bit of heavy cream on top for a nice touch. Fresh basil leaves make a great garnish, adding color and flavor. Pair the soup with rustic bread or a grilled cheese sandwich. This combo makes for a cozy meal that everyone will enjoy. This blog showed you how to make creamy roasted garlic tomato soup. We covered key ingredients and helpful substitutions for different diets. The step-by-step instructions guided you from roasting to blending. You learned tips for perfect flavor and texture. We even explored tasty variations and storage tips. Now you can enjoy a warm bowl of soup anytime. Remember, this dish is not just comforting; it’s also easy to make. Enjoy experimenting with flavors and ingredients that match your taste!
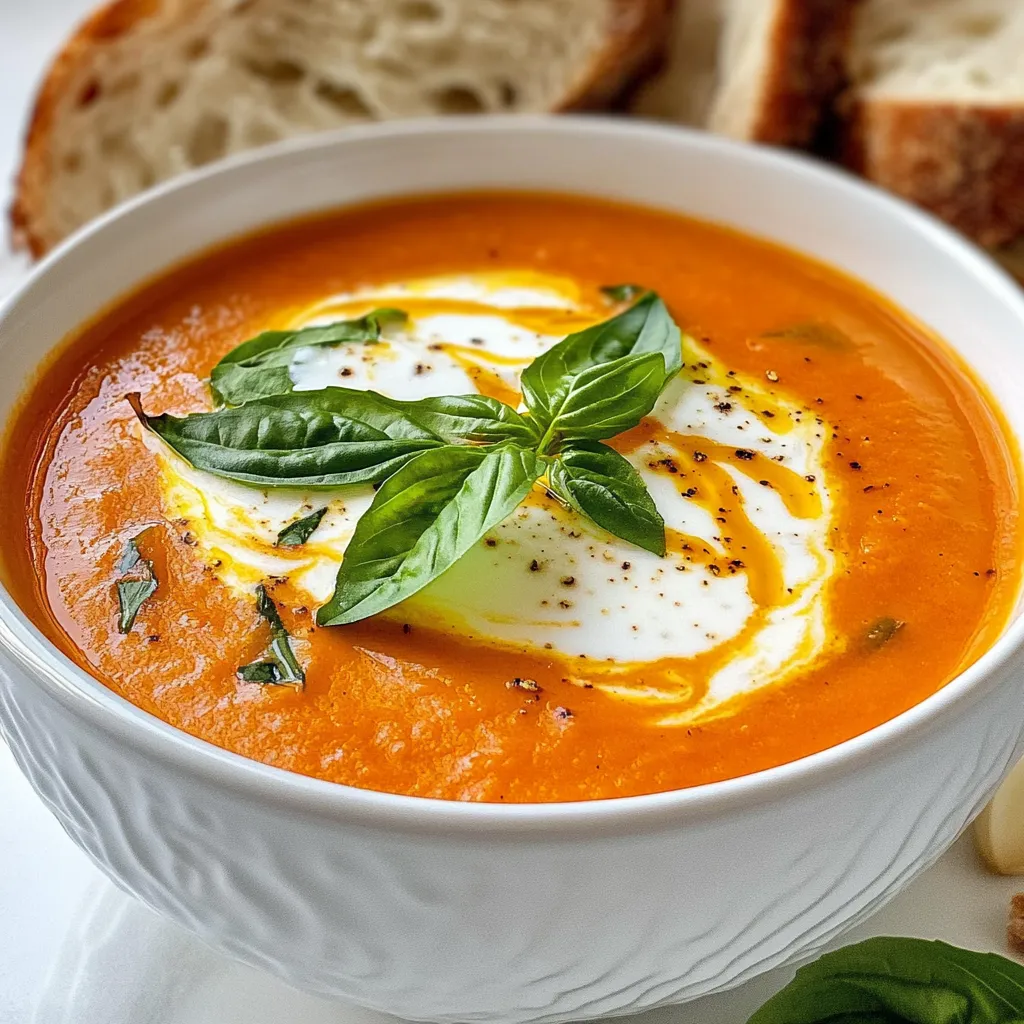
Creamy Roasted Garlic Tomato Soup Flavorful and Easy
If you’re ready to delight your taste buds, this Creamy Roasted Garlic Tomato Soup is a must-try! I’ll guide you through simple steps to create
Here is what you need for Autumn Sausage Pasta Squash: - 1 medium spaghetti squash - 2 tablespoons olive oil - 1 pound Italian chicken sausage, casings removed - 1 small onion, diced - 2 cloves garlic, minced - 1 red bell pepper, diced - 2 cups kale (or spinach), chopped - 1 cup cherry tomatoes, halved - 1 teaspoon dried oregano - 1 teaspoon red pepper flakes (optional) - Salt and pepper to taste - 1 cup Parmesan cheese, grated - Fresh basil leaves for garnish These ingredients create a warm, hearty dish. The spaghetti squash acts as the base, giving a great texture. The Italian chicken sausage adds savory depth. Fresh vegetables bring color and nutrients. The cheese adds creaminess, while basil gives a fresh touch. Each ingredient plays an important role in the dish's flavor. {{ingredient_image_1}} Roasting the squash First, preheat your oven to 400°F (200°C). Cut the spaghetti squash in half lengthwise. Scoop out the seeds and discard them. Drizzle the inside with olive oil. Sprinkle salt and pepper on it. Place the squash cut-side down on a baking sheet lined with parchment paper. Roast it for 25-30 minutes. The flesh should be tender and easy to shred. Shredding the flesh Once the squash is done, take it out of the oven. Let it cool for a few minutes. Then, use a fork to shred the flesh. You will get long strands that look like spaghetti. Set this aside while you cook the sausage and veggies. Browning the sausage In a large skillet, heat over medium heat. Add the Italian chicken sausage, breaking it into small pieces with a spatula. Cook this for about 5-7 minutes. You want it browned and cooked through. Sautéing the onion, garlic, and bell pepper Now, add the diced onion to the skillet. Sauté for 3-4 minutes until it turns translucent. Next, stir in the minced garlic and red bell pepper. Cook this mix for another 3 minutes until the peppers soften. Adding greens and tomatoes Once the peppers are soft, toss in the chopped kale or spinach. Cook it until it wilts, which takes about 2 minutes. Then, add the halved cherry tomatoes, dried oregano, and red pepper flakes, if you like heat. Cook everything together for another 2-3 minutes. Season with salt and pepper to your taste. Tossing everything together Now, you can bring it all together. Add the shredded spaghetti squash to the skillet with the sausage and veggies. Toss everything well to mix all the flavors. Melting in the Parmesan cheese Finally, remove the skillet from the heat. Stir in half of the grated Parmesan cheese. This will melt and mix evenly throughout your dish. Serve hot, adding the rest of the cheese on top, and finish with fresh basil leaves for a tasty touch. To roast spaghetti squash, set your oven to 400°F (200°C). Cut the squash in half and scoop out the seeds. Drizzle olive oil on the flesh and add salt and pepper. Place it cut-side down on a baking sheet lined with parchment paper. Roast for 25-30 minutes. To check if it’s done, poke it with a fork. If it shreds easily, it’s ready! To add more depth, try these seasonings: - Fresh herbs like thyme or rosemary. - A squeeze of lemon juice for brightness. - Nuts or seeds for crunch. If you like spice, add more red pepper flakes or even some chili powder. Adjust to match your taste! Serve this dish with a fresh side salad. A light vinaigrette pairs well. You can also serve crusty bread on the side for a hearty touch. For presentation, serve in bowls garnished with fresh basil and extra Parmesan. It looks stunning and invites everyone to dig in! Pro Tips Choose the Right Squash: Look for a spaghetti squash that feels heavy for its size, indicating it's ripe and full of flavor. Perfectly Browned Sausage: Allow the sausage to cook undisturbed for a few minutes to achieve a nice brown crust, enhancing the flavor. Add Fresh Herbs: Incorporate fresh herbs like thyme or parsley for an extra layer of flavor and freshness in the dish. Customize Your Greens: Feel free to substitute kale with other leafy greens like Swiss chard or arugula for a different taste and texture. {{image_2}} You can switch the sausage in this dish. Turkey sausage works great and is leaner. If you prefer plant-based options, try using veggie sausage. It adds flavor and helps keep the meal light. For a vegetarian version, add lentils or chickpeas. These legumes give protein and make the dish hearty. Feel free to mix in other vegetables. Seasonal changes bring fresh options. You can use butternut squash or zucchini instead of spaghetti squash. This keeps the dish exciting and colorful. Adding root vegetables like carrots or parsnips adds sweetness and depth. Experiment with what you have on hand. Not a fan of Parmesan? You have options here too! Try dairy-free cheese for a vegan twist. Nutritional yeast adds a cheesy flavor without dairy. If you want to use a different cheese, consider mozzarella or goat cheese. These alternatives bring unique tastes and textures to your meal. To keep your Autumn Sausage Pasta Squash fresh, follow these steps: - Let the dish cool down to room temperature. - Place leftovers in an airtight container. - Store in the fridge for up to 3 days. - Use clear labels to mark the date. Keeping the dish sealed helps maintain flavor and texture. To enjoy your leftovers, reheat them simply. Here’s how to do it: - Use a microwave-safe dish. - Cover with a damp paper towel. This helps keep moisture. - Heat on medium for 1-2 minutes, stirring halfway through. To avoid sogginess, don’t overheat. If using a skillet, add a splash of olive oil. This adds flavor and prevents sticking. Is it freeze-friendly? Yes! You can freeze this dish. Here’s how: - Cool the pasta squash completely. - Place it in a freezer-safe container or bag. - Make sure to remove as much air as possible. To thaw, move it to the fridge overnight. Reheat it gently on the stove or in the microwave. This keeps the texture nice. Cooking spaghetti squash takes about 25-30 minutes in the oven at 400°F (200°C). You can also cook it in the microwave. To microwave, place it cut-side down in a dish with water. Cook for about 10-12 minutes. Check for tenderness with a fork. Yes, you can use different types of sausage. Try pork, turkey, or even plant-based sausage. Each will add a unique flavor. Just make sure to cook the sausage thoroughly. This will keep your dish delicious and safe to eat. You can pair this dish with a simple green salad or some crusty bread. A light vinaigrette goes well with the meal. You might also serve a side of roasted vegetables. This makes for a balanced and tasty dinner. This recipe brings together spaghetti squash and tasty chicken sausage for a nutritious meal. We covered ingredients, preparation steps, and helpful tips to enhance flavor. You can also try different proteins and veggies for a fun twist. This dish is great for leftovers and easy to store. Experiment with your own flavors and find what you enjoy most. Enjoy creating a healthy and delicious meal that satisfies your cravings.
Autumn Sausage Pasta Squash Tasty and Easy Dinner
Looking for a warm, cozy dinner idea this autumn? This Autumn Sausage Pasta Squash dish is packed with flavor and ease, making it perfect for
- 2 large white fish fillets (cod or tilapia work best) - 1 cup fresh mango, diced - ½ cup red onion, finely chopped - ½ cup bell pepper (any color), diced - 1 jalapeño, seeded and minced Fresh ingredients make these tacos shine. The white fish fillets serve as a tender base. Choose cod or tilapia for a mild flavor. Mango adds sweetness, while red onion and bell pepper provide crunch. A jalapeño brings a spicy kick. Together, they create a vibrant and fresh taste. - 1 teaspoon cumin - 1 teaspoon paprika - 1 tablespoon olive oil - Salt and black pepper to taste - 2 tablespoons lime juice - ¼ cup fresh cilantro, chopped Seasoning enhances the fish's flavor. Cumin and paprika add warmth and depth. Olive oil helps the spices stick, while salt and pepper balance everything. For the salsa, lime juice gives a zesty twist. Fresh cilantro brings brightness and aroma, tying all the flavors together. - 1 avocado, sliced (for serving) - Lime wedges (for serving) - 8 small corn tortillas Toppings make these tacos special. Sliced avocado adds creaminess. Lime wedges allow you to squeeze fresh juice right before eating. Corn tortillas provide a soft, warm wrap for all the delicious fillings. These extras elevate your meal and create a complete dining experience. {{ingredient_image_1}} First, preheat your grill or stovetop pan over medium-high heat. This step is key for getting a nice sear on the fish. Next, grab a small bowl. In it, mix one teaspoon of cumin, one teaspoon of paprika, one tablespoon of olive oil, salt, and black pepper. This spice mix adds great flavor! Rub this mixture evenly over both sides of the two large fish fillets. Now it's time to cook. Place the seasoned fish on the grill or in the pan. Cook for about 4 to 5 minutes on each side. You want the fish to flake easily with a fork when it’s done. This means it is perfectly cooked! After cooking, remove the fish from heat and let it rest for a couple of minutes. While the fish rests, let’s make the mango salsa. In a medium bowl, combine one cup of diced mango, half a cup of finely chopped red onion, half a cup of diced bell pepper, and one minced jalapeño. Add two tablespoons of lime juice and a quarter cup of chopped cilantro. Stir it all together well. Taste and sprinkle a pinch of salt if needed. This salsa is fresh and bursting with flavor! Now, the fun part: assembling the tacos! First, break the cooked fish into large pieces. Take eight small corn tortillas and warm them up. You can do this on the grill for about 30 seconds per side or in a skillet over medium heat. Place the fish pieces in the center of each tortilla. Top with a generous spoonful of the mango salsa and a few slices of avocado. Serve right away with lime wedges on the side for squeezing over the top. Enjoy your fresh and flavorful delight! To make the best fish tacos, choose the right fish. I recommend white fish like cod or tilapia. These fish have mild flavors and flaky textures. Avoid overcooking your fish. Cook it for about 4-5 minutes on each side. When the fish flakes easily with a fork, it’s done. Overcooked fish can taste dry and tough. You can customize your mango salsa based on what's in season. Swap mango for pineapple or peaches for a fun twist. If you love heat, add more jalapeño or even a dash of hot sauce. Try adding fresh herbs like mint or basil for extra flavor. These changes can brighten your dish and keep it fresh. Warm your corn tortillas just right for the best taste. You can grill them for about 30 seconds on each side. Alternatively, heat them in a skillet for a few moments until warm. Choose soft corn tortillas for a classic taco feel. These tortillas hold up well with the fish and salsa, making every bite a delight. Pro Tips Fresh Ingredients: Always use the freshest mangoes and herbs for the best flavor in your salsa. Fish Selection: Opt for firm white fish like cod or tilapia to hold up well in tacos. Grilling Technique: Ensure your grill or pan is preheated to avoid sticking and to achieve a nice sear on the fish. Customize Your Salsa: Feel free to add other ingredients to your mango salsa, such as diced cucumber or pineapple, for an extra twist. {{image_2}} You can swap the fish for shrimp or chicken. Shrimp cooks quickly and adds a nice texture. Just season it like the fish. Chicken also works well. Use boneless, skinless thighs for a juicy bite. For a vegetarian option, try grilled portobello mushrooms. They have a meaty feel and soak up flavor well. Salsa can be fun to mix up! Try adding pineapple or peach for a sweet twist. You can also use strawberries for a fresh taste. Want more texture? Add black beans or corn. They give crunch and fiber. Adjust the lime juice to keep it bright. Pair your tacos with simple sides. A fresh salad or chips and guacamole are great. For drinks, serve with a light beer or a fruity margarita. You could also enjoy a sparkling water with lime. These options will balance the flavors and enhance your meal. To keep your fish tacos fresh, store leftovers right away. First, separate the fish and mango salsa. This way, the fish stays firm and the salsa keeps its flavor. Use airtight containers for each. Glass containers work well, but plastic ones are fine too. Make sure to label the containers with the date. This helps you know when to use them. When you want to enjoy your tacos again, reheat them carefully. You can use a microwave, but I prefer the oven. Preheat the oven to 350°F (175°C). Place the fish on a baking sheet and warm for about 10 minutes. This keeps the fish from drying out. For the salsa, just add it fresh on top after reheating. If using the microwave, heat fish in short bursts. Check often to keep it moist. Can you freeze assembled tacos? It’s best not to freeze them as a whole. The tortillas can become soggy. Instead, freeze the fish and salsa separately. Wrap fish tightly in plastic wrap and then in foil. Store salsa in a freezer-safe container. Label with the date. When you’re ready to use them, thaw in the fridge overnight before reheating. You can use several fish alternatives. Here’s a list: - Salmon - Mahi-mahi - Snapper If you want non-seafood options, consider these: - Grilled chicken - Tofu, pressed and seasoned - Portobello mushrooms Each option brings its own flavor and texture. These choices make the tacos tasty for everyone. To make the salsa spicier, try these ideas: - Add more jalapeño or use a hotter pepper. - Mix in diced serrano or habanero peppers. - Sprinkle in cayenne pepper for a kick. Start with a little, then taste. You can always add more heat. Yes, you can make mango salsa ahead of time. Here are some tips: - Chop the ingredients and mix them a few hours before serving. - Store the salsa in an airtight container in the fridge. To keep it fresh, add lime juice right before serving. This helps keep the colors bright and flavors fresh. You can make delicious fish tacos using fresh fish, vibrant salsa, and warm tortillas. We explored the best ingredients, from mango salsa to perfect toppings. I shared simple steps for grilling fish and crafting tasty salsa. Remember to try different proteins and salsas to suit your taste. Store your leftovers wisely, and enjoy these tacos later. This dish brings joy and flavor to your table. Dive into this recipe and create something special!
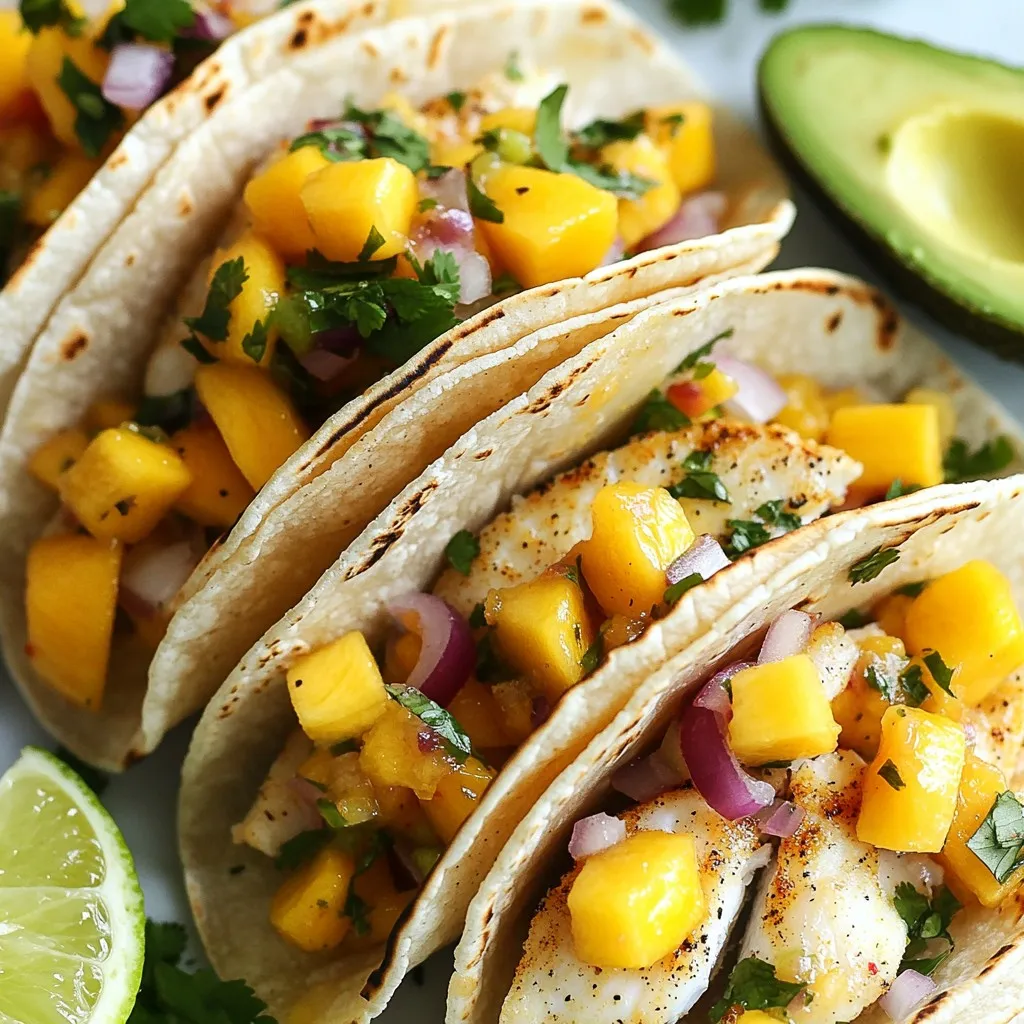
Mango Salsa Fish Tacos Fresh and Flavorful Delight
Get ready to impress your taste buds with Mango Salsa Fish Tacos! This fresh and flavorful delight combines juicy white fish with a vibrant mango
- 4 strips bacon, diced (optional for extra flavor) - 1 medium onion, chopped - 2 celery stalks, diced - 2 medium potatoes, peeled and diced - 3 cups clam juice - 1 can (10 oz) diced clams, drained (reserve juice) - 1 cup heavy cream - 2 tablespoons all-purpose flour - 2 tablespoons butter - 1 teaspoon dried thyme - Salt and pepper to taste - Fresh parsley, chopped (for garnish) The main ingredients in clam chowder create a rich and creamy dish. The clams provide that ocean flavor, while the clam juice adds depth. Onions and celery bring freshness and texture. Potatoes make the chowder hearty. Thyme gives it a warm aroma. - Bacon and its role in flavor enhancement - Replacement options for cream (e.g., alternatives for a lighter chowder) Bacon adds a savory touch. It brings a nice crunch and a smoky flavor. If you want a lighter chowder, you can skip the cream. You can use milk or a plant-based cream instead. These options keep the chowder tasty but less heavy. - Gluten-free flour alternatives - Dairy-free options for cream If you need a gluten-free chowder, use rice flour or almond flour. Both work well to thicken the soup. For a dairy-free version, try coconut milk or cashew cream. These options will keep your chowder creamy without dairy. {{ingredient_image_1}} 1. If you use bacon, cook it in a large pot over medium heat. Wait until it is crispy. 2. Remove the bacon and set it aside. Keep the drippings in the pot. 3. Add butter to the drippings. Let it melt, then add the chopped onion and celery. 4. Sauté the onion and celery for about five minutes. Wait until the onions turn translucent. 5. Sprinkle flour over the sautéed veggies. Stir it for two minutes to make a roux. 1. Gradually add clam juice to the pot while stirring. Bring it to a boil. 2. When the mixture boils, add the diced potatoes and thyme. 3. Reduce the heat to a simmer. Cook for about 15 minutes or until the potatoes are tender. 4. Stir in the reserved clam juice and diced clams. Add heavy cream and heat for five more minutes. 1. Taste the chowder and adjust the salt and pepper as needed. 2. Let the chowder sit for a few minutes to thicken. 3. For serving, use warm bowls. Garnish with fresh parsley and black pepper. 4. Add oyster crackers or soft bread on the side for a rustic touch. Bacon drippings add depth to your chowder. The fat carries flavor and richness. If you skip the bacon, use butter. You can always adjust the seasonings too. Taste as you cook. You might prefer more salt or pepper. Fresh herbs can also brighten the dish. To thicken chowder naturally, let it simmer longer. The potatoes break down and create a creamy base. You can mash a few potatoes with a fork for extra thickness. To avoid lumps, stir the flour in slowly. Mix it well with the vegetables before adding liquid. This creates a smooth texture. Prepare clams by rinsing them well. If using fresh clams, steam them open and add them last. Timing is key when cooking. Add potatoes early to ensure they cook through. Stir in the clams and cream at the end. This keeps everything tender and juicy. Pro Tips Use Fresh Clams: For an authentic flavor, consider using fresh clams instead of canned. They will enhance the chowder's taste and texture. Adjust Creaminess: If you prefer a lighter chowder, you can substitute half-and-half for some of the heavy cream without sacrificing too much richness. Let It Rest: Allowing the chowder to sit for a few minutes after cooking helps it thicken and meld the flavors together beautifully. Garnish Creatively: Elevate presentation by garnishing with crispy bacon bits, a drizzle of olive oil, or a sprinkle of smoked paprika for added depth. {{image_2}} To make clam chowder gluten-free, you can use alternatives like rice flour or cornstarch. These options help keep the texture creamy without gluten. When cooking, always check for cross-contamination. Use clean pots and utensils to avoid gluten from other foods. This is key for those with gluten allergies. For a vegan version, consider using jackfruit or artichokes as clam substitutes. These plant-based options mimic the texture of clams well. For cream, coconut milk works great. It adds a rich, creamy taste without dairy. You can also use cashew cream for a nutty flavor. Both options keep the chowder rich and satisfying. If you want to lower calories, try using skim milk instead of heavy cream. This change cuts fat but keeps a nice taste. You can also reduce the amount of bacon or leave it out entirely. Adjusting portion sizes helps too. Serve smaller bowls if you want to enjoy this dish while watching your calorie intake. To keep your chowder fresh, use airtight containers. Glass or plastic containers work well. If you want to freeze it, make sure to leave space at the top. The chowder will expand as it freezes. Refrigeration is best for short-term storage. Store it in the fridge for up to three days. For long-term, freezing is the way to go. When reheating chowder, use a pot on low heat. Stir it often to avoid burning. You can also use a microwave. If you do, heat it in short bursts. Add a splash of cream or clam juice to keep it creamy. This helps maintain the texture and flavor. Avoid boiling the chowder again, as this can change its taste. Homemade clam chowder lasts about three days in the fridge. If frozen, it can last up to three months. Always check for signs of spoilage. If it smells off or has strange colors, toss it. It’s better to be safe than sorry! New England Clam Chowder is creamy and rich. It uses milk or cream as a base. Manhattan Clam Chowder is broth-based and has tomatoes. The main ingredients vary too. New England chowder often has potatoes, while Manhattan uses more vegetables. New England is popular in the Northeast, while Manhattan is loved in New York. Each has its fans, but they are quite different. Yes, you can use fresh clams! Some great types are littleneck or cherrystone clams. To prepare fresh clams, soak them in water. This helps remove any sand. Steam them until they open, then extract the meat. You can chop them and add them to your chowder. Just be sure to reserve the clam juice for extra flavor. Homemade chowder is often much better than store-bought. It tastes fresher and has more flavor. You control the ingredients, so you can adjust to your taste. Store-bought chowder can have preservatives and less fresh seafood. Making it from scratch is fun and rewarding. Plus, you can share it with family and friends. After exploring clam chowder's ingredients, preparation steps, and variations, you now have the tools to create your own delicious chowder. Remember to adjust flavors to your taste and try different ingredient swaps based on your needs. Homemade clam chowder often tastes better than store-bought, thanks to fresh ingredients and personal touch. Whether you go gluten-free or vegan, enjoy experimenting in the kitchen. Your chowder can be unique, tasty, and satisfying. Happy cooking!
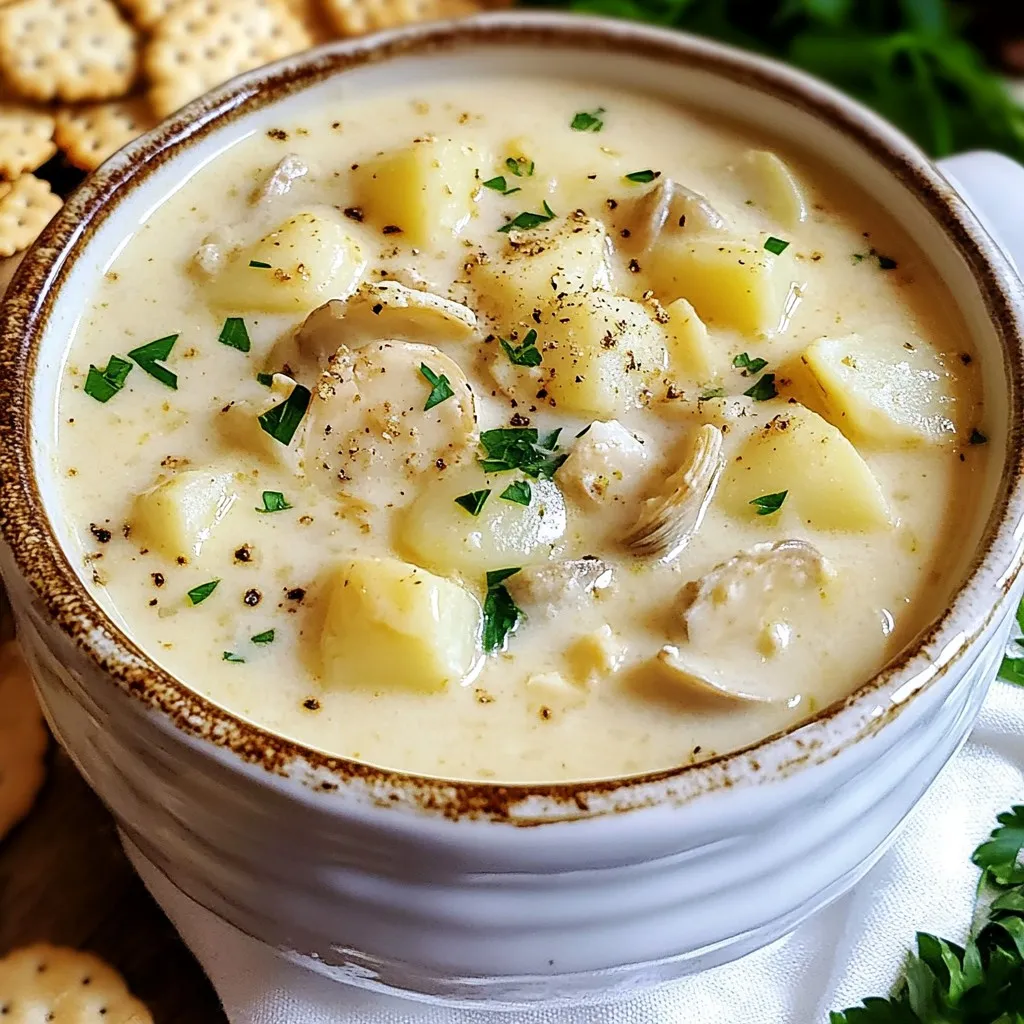
New England Clam Chowder Hearty and Simple Recipe
Are you ready to dive into a warm bowl of New England Clam Chowder? This hearty and simple recipe brings the taste of the coast