Salads
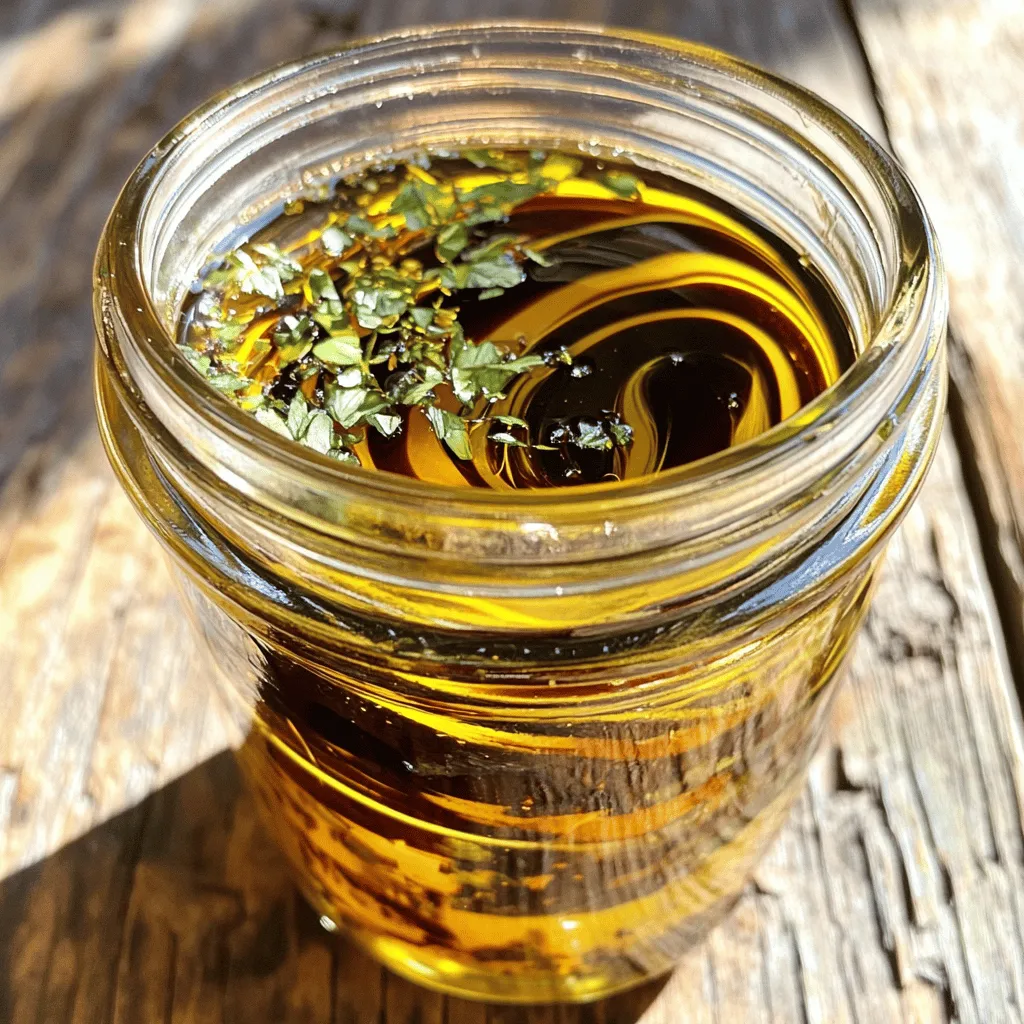
![To make a simple and delicious lemon vinaigrette, you need fresh and quality ingredients. Here’s what you will need: - Fresh lemon juice - Extra virgin olive oil - Dijon mustard - Honey or maple syrup - Garlic - Salt and pepper - Fresh herbs (parsley or basil) These ingredients come together to create a bright, zesty flavor. Fresh lemon juice gives that tartness we love. Extra virgin olive oil adds richness and depth. Dijon mustard brings a bit of spice and helps emulsify the dressing, making it smooth. Honey or maple syrup adds a touch of sweetness to balance the acidity. Garlic gives it a nice kick, while salt and pepper enhance all the flavors. Finally, fresh herbs add freshness and color to your vinaigrette. For the Full Recipe, follow the steps to whip up this tasty dressing. Experiment with the herbs you like best, or stick to classic parsley or basil. Enjoy bringing bright flavors to your meals! 1. Combining the base ingredients: Start by grabbing a small mixing bowl. Pour in 1/4 cup of fresh lemon juice. Add 1 tablespoon of Dijon mustard and 1 tablespoon of honey or maple syrup. Toss in one small minced garlic clove. Whisk these ingredients together until they blend well. 2. Emulsifying with olive oil: Slowly drizzle in 1/2 cup of extra virgin olive oil while you whisk. This step is key. It helps to emulsify the dressing, giving it a creamy texture. Keep whisking until the mixture is smooth and well combined. 3. Adjusting seasoning and flavor balance: Now, add salt and pepper to taste. I like to start with a pinch of each. Taste the dressing and see if you need to adjust it. If it’s too tart, add a bit more honey. If it’s too sweet, add a splash of lemon juice. Stir in 1 teaspoon of finely chopped fresh herbs for that extra pop of flavor. - Best ways to use lemon vinaigrette: This dressing shines on salads. Drizzle it over fresh greens or your favorite mixed salad. It also works great on grilled vegetables or as a marinade for chicken. - Drizzling technique over salads: When serving, use a light hand. Drizzle the vinaigrette in a circular motion across the salad. This technique ensures even coverage and makes your dish look pretty. - Keeping in refrigerator: Store the dressing in a jar with a tight lid. It will keep fresh in your refrigerator. - How long the dressing lasts: Homemade lemon vinaigrette lasts about one week in the fridge. Be sure to give it a good shake before each use, as it may separate over time. Enjoy your zesty creation! For the full recipe, check the ingredients and instructions above. To make your lemon vinaigrette shine, you can adjust the acidity and sweetness. If you like it tangy, add more lemon juice. For a sweeter taste, add a bit more honey or maple syrup. It’s all about finding the balance you enjoy. When mixing your vinaigrette, whisking well is key. Start by whisking the base ingredients in a bowl. Then, slowly drizzle in the olive oil while whisking. This process helps create a smooth texture. If you want an even creamier dressing, try using an immersion blender. Lemon vinaigrette packs a punch with its fresh ingredients. The main components have great nutritional value. Fresh lemon juice is high in vitamin C, which helps boost your immune system. Olive oil is filled with healthy fats that support heart health. Honey adds sweetness but also antioxidants. Using lemon vinaigrette can have several health benefits. It can aid digestion and promote hydration. The fresh herbs you add bring extra vitamins and minerals. This dressing not only tastes great, but it can also contribute to a healthy diet. {{image_2}} You can make your lemon vinaigrette even better. Adding fruits like berries or mango gives it a sweet twist. The burst of flavor pairs well with the tangy lemon. Try mixing in fresh herbs, too. Basil or mint can add a nice kick. You can also infuse the vinaigrette with spices. A pinch of cumin or paprika can change the taste. Experimenting with these flavors makes each batch unique. Lemon vinaigrette is not just for salads. You can pour it over pasta dishes for a zesty flair. Toss it with warm pasta and veggies for a delightful meal. It also works great as a marinade for proteins. Use it on chicken or fish before grilling. This adds flavor and helps keep the meat juicy. The options are endless, so get creative and enjoy! For the full recipe, check [Full Recipe]. To keep your lemon vinaigrette fresh, you need the right jars. A clean glass jar works best. Glass does not hold smells and keeps flavors intact. Always use an airtight container. This helps keep your dressing safe from air and light. For freshness, store your vinaigrette in the fridge. It will stay good for about a week. Before you use it, give it a good shake. The ingredients may separate, but that's normal. If you notice any off smells or colors, it is best to throw it away. Can you freeze lemon vinaigrette? Yes, you can! Freezing can help if you make too much. However, the texture may change a bit. Freezing can break the emulsion. This means it might look a bit different after thawing. To thaw, put it in the fridge overnight. If you need it quicker, run the jar under cool water. Once thawed, whisk it well to mix the ingredients again. If it looks clumpy, use a blender for a smooth finish. Enjoy it fresh on salads or as a dip! You can find the full recipe above to get started. Homemade lemon vinaigrette lasts about one week in the fridge. Store it in a sealed jar. Over time, the flavors may change a bit, but it should still taste good. Always check for signs of spoilage, like off-smells or changes in color. If you notice these, it’s best to toss it. You can use bottled lemon juice, but fresh is better. Fresh lemon juice tastes brighter and more vibrant. Bottled juice may have added preservatives, which can change the flavor. If you choose bottled juice, look for one without any additives for a closer taste to fresh. Lemon vinaigrette works well on many dishes. Drizzle it over mixed greens, spinach salads, or grilled vegetables. You can also use it on chicken, fish, or roasted potatoes. It adds a nice zing to pasta salads too. Feel free to get creative and try it on your favorite dishes! To make this recipe vegan, simply replace honey with maple syrup. Both sweeteners add flavor, but maple syrup is plant-based. Everything else in the recipe is already vegan-friendly, so you’re good to go! This way, everyone can enjoy this tasty lemon vinaigrette. For the full recipe, check the section above. This blog post covered everything you need to know about lemon vinaigrette. We explored key ingredients and how to make the dressing step by step. I shared ideas for serving, storage tips, and delightful variations. You learned about the health benefits and how to adapt the recipe. In summary, lemon vinaigrette is a versatile and healthy addition to your meals. Try it on salads, pasta, or as a marinade. Enjoy adding your own twist to this classic dressing!](https://grilledflavors.com/wp-content/uploads/2025/07/0f2771fb-ae94-4aed-92d8-927c7dfef188.webp)
Lemon Vinaigrette Dressing Simple and Delicious Recipe
Looking for a simple way to elevate your salads? This Lemon Vinaigrette Dressing brings fresh flavor with just a few ingredients. You’ll love how easy
Homemade Balsamic Vinaigrette Dressing Fresh and Easy
Are you ready to elevate your salads with a simple homemade balsamic vinaigrette? This fresh and easy dressing combines basic ingredients to create a burst
Healthy Asparagus with Zucchini Vibrant and Light Meal
Looking for a meal that’s both tasty and healthy? This Healthy Asparagus with Zucchini recipe offers a light, vibrant dish you can make in no
Lemon Herb Couscous Salad Fresh and Flavorful Recipe
Looking for a fresh and tasty salad that’s quick to whip up? You’ve just found it! My Lemon Herb Couscous Salad is packed with flavor
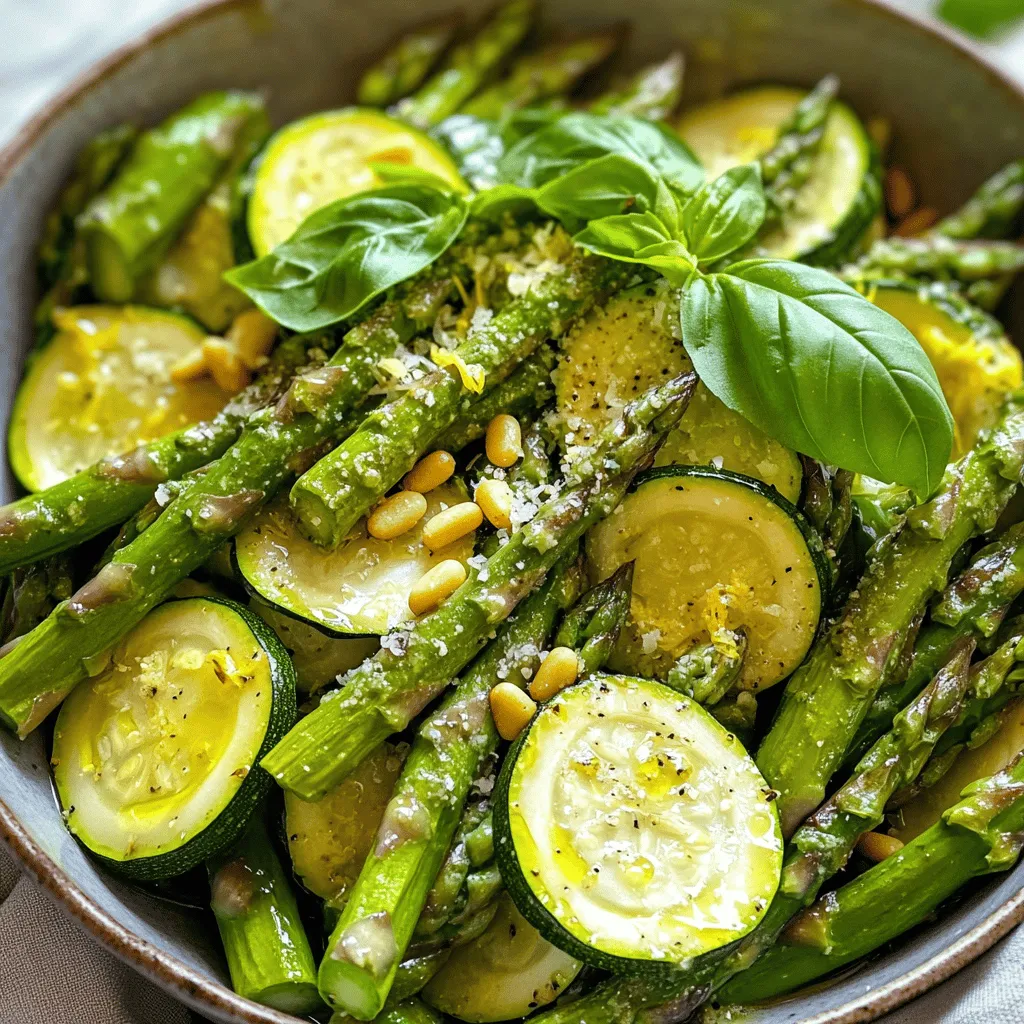
![- 3 medium zucchinis, sliced into 1/4-inch rounds - 1 red bell pepper, sliced - 1 cup cherry tomatoes, halved - 1/2 red onion, thinly sliced - 2 tablespoons olive oil - 1 teaspoon garlic powder - Salt and pepper to taste - 1/4 cup crumbled feta cheese - Fresh basil leaves for garnish - Balsamic glaze for drizzling (optional) To make my grilled zucchini salad, I start with fresh, vibrant ingredients. The zucchinis are the star of the show. I slice them into 1/4-inch rounds. This size helps them grill nicely. The red bell pepper adds a sweet crunch. I slice it thin, too. Cherry tomatoes bring juicy bursts of flavor. Halving them lets their sweetness shine. Next, I thinly slice half a red onion. It adds a sharpness that balances the dish. I use olive oil to coat all the veggies. Just two tablespoons is enough. I sprinkle garlic powder for a nice kick. Salt and pepper round it all out. For a final touch, I add crumbled feta cheese. It gives a creamy, salty flavor. Fresh basil leaves make everything look pretty. If you like, drizzle some balsamic glaze on top. It adds a tangy sweetness. You can find the full recipe at the beginning of this article. This salad is colorful, fresh, and easy to make! 1. Preheat the grill to medium heat. This makes sure that the zucchini cooks evenly. 2. In a large bowl, toss together the vegetables with olive oil, garlic powder, salt, and pepper. Make sure every piece gets a good coat. 3. Place the zucchini and bell pepper slices on the grill. Grill them for about 3-4 minutes on each side. Look for nice grill marks and a tender texture. Once done, remove them from the grill and let them cool slightly. 1. Take a large platter or bowl. Arrange the grilled zucchinis, bell peppers, cherry tomatoes, and red onion in it. 2. Sprinkle crumbled feta cheese over the top. This adds a creamy, salty touch. 3. Finish by garnishing with fresh basil leaves. If you want, drizzle with balsamic glaze for extra flavor. - This salad is best served warm or at room temperature. It’s perfect for picnics or casual dinners. - Drizzle with optional balsamic glaze to enhance the taste. This adds a sweet and tangy flavor that complements the veggies well. For the full recipe, check out the [Full Recipe]. - Choosing the right zucchinis: Pick firm zucchinis that feel heavy for their size. Look for bright green skin without blemishes. Smaller zucchinis are sweeter and more tender. - Avoiding mushy texture when grilling: Slice zucchinis into 1/4-inch rounds. This thickness helps them cook evenly. Avoid overcooking; aim for grill marks and a bit of crunch. - Suggested seasonings and spices: Use garlic powder, salt, and pepper for a simple base. Add a pinch of red pepper flakes for heat. Fresh herbs like thyme or oregano also work well. - Recommended dressings or marinades: A light balsamic vinaigrette adds great flavor. You can also try a lemon herb dressing for a fresh twist. Marinade your veggies for 30 minutes to boost taste. - Creative plating ideas: Serve the salad in a large bowl or on a colorful platter. Layer the grilled zucchinis and peppers for height. - Using colorful garnishes: Fresh basil leaves add a pop of green. Crumbled feta cheese brightens the dish. A drizzle of balsamic glaze gives it a shiny finish. For the complete details on how to prepare this dish, check the Full Recipe. {{image_2}} If you want to swap out feta cheese, try using goat cheese or ricotta. These cheeses add creaminess and flavor. If you prefer a dairy-free option, use avocado or a nut-based cheese. For protein, grilled chicken or chickpeas work well. Chicken adds heartiness, while chickpeas provide plant-based protein. Both options pair nicely with the fresh veggies. You can add other veggies for variety. Try corn, asparagus, or eggplant. These vegetables add different textures and flavors. In summer, fresh herbs like dill or mint can brighten the dish. In fall, consider roasted butternut squash or sweet potatoes. Both add warmth and a bit of sweetness. This way, you can enjoy seasonal flavors year-round. Different dressings can change the whole dish. A lemon vinaigrette offers a zesty kick. Combine olive oil, lemon juice, salt, and pepper for a quick mix. For a healthier option, try yogurt-based dressings. They add creaminess without extra fat. You can also use balsamic glaze for a touch of sweetness. It adds a nice finishing touch to your salad. For the full recipe, check out the earlier section. Enjoy making this dish your own! To keep your grilled zucchini salad fresh, store it in an airtight container. This method prevents air from making the salad soggy. Make sure to cool the salad before sealing the container. You can keep the salad in the fridge for up to three days. After that, the veggies may lose their crunch. Grilled vegetables taste best fresh, but you can reheat them. Heat them gently in a pan over low heat. This method helps maintain their texture. Avoid using a microwave, as it can make them mushy. Just warm them until they are heated through. For quick meals, prepare the salad in advance. Chop the veggies and store them separately. Keep the zucchini and bell peppers in one container, and the cherry tomatoes and onions in another. This way, they stay fresh until you're ready to serve. When you're ready to eat, just grill the zucchini and bell peppers, then mix everything together. Grilling zucchini is quick and easy. I suggest grilling for about 3 to 4 minutes on each side. You want them to get nice grill marks. The zucchini should be tender but not mushy. This cooking time gives you the best results for flavor and texture. Yes, you can grill zucchini without oil. Just slice the zucchini and season it with salt and pepper. Place it on the grill. The natural moisture in the zucchini will help it cook. You can also use a non-stick grill mat. This method is great for those who want to cut down on oil. This salad pairs well with many dishes. You can serve it with grilled chicken, fish, or steak. It also goes great with quinoa or rice for a filling meal. For a light lunch, serve it with crusty bread or a side of hummus. Yes, you can easily make this salad vegan. Simply omit the feta cheese or use a plant-based cheese instead. You can also add chickpeas for protein. This makes the salad hearty and filling while keeping it fresh. This blog post showed you how to make a fresh grilled zucchini salad. You learned what ingredients to use and steps to grill the veggies perfectly. I shared tips for flavor and presentation, along with variations to suit your taste. Storing leftovers and meal prep showed how to keep things easy. Enjoy this salad warm or cold. Have fun with the ingredients and make it your own! You now have the tools to impress with a simple, healthy dish.](https://grilledflavors.com/wp-content/uploads/2025/06/5a1fcff2-7f56-4fbe-a24c-8726cb83807e.webp)
Grilled Zucchini Salad Fresh Flavorful Vegetable Dish
Are you ready to elevate your salad game? In this blog post, I’ll share a simple yet tasty recipe for a Grilled Zucchini Salad that
Crack Corn Salad Fresh and Flavorful Side Dish
Looking for a fresh and tasty side dish? Try making Crack Corn Salad! This bright and colorful recipe is packed with sweet corn and crisp
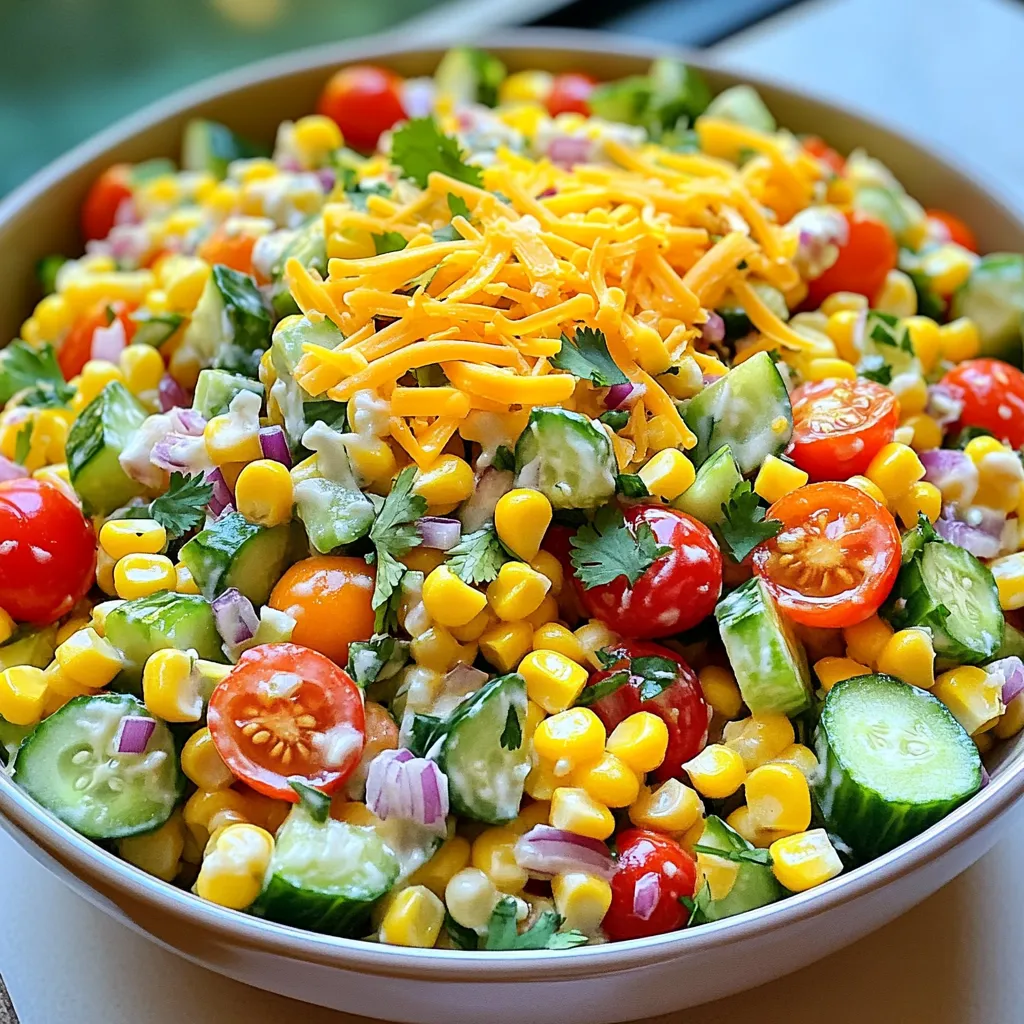
![- 8 oz fusilli pasta - 1 cup corn kernels (fresh or frozen) - 1 red bell pepper, diced - 1/2 red onion, finely chopped - 1 jalapeño, seeded and minced - 1/2 cup cotija cheese, crumbled - 1/4 cup fresh cilantro, chopped - 1/4 cup mayonnaise - 2 tablespoons sour cream - 2 tablespoons lime juice - 1 teaspoon chili powder - Salt and pepper to taste When making Mexican Street Corn Pasta Salad, I focus on fresh and vibrant flavors. The fusilli pasta serves as a great base. Its shape holds onto the dressing and other ingredients well. I often cook the pasta until it’s al dente for the best texture. Next, the corn kernels add sweetness and crunch. Whether you use fresh or frozen corn, it shines in this dish. I usually sauté the corn until it’s lightly charred. This step enhances its natural sweetness and adds depth to the salad. The red bell pepper brings color and a fresh, crisp bite. I dice it finely so it mixes well with the pasta. The red onion adds a sharp flavor. I chop it finely too, as this helps balance the dish. For the extra flavor, I always include jalapeño. It gives a warm kick without overwhelming the other tastes. Cotija cheese is another star here. Its salty and crumbly texture makes each bite exciting. Fresh cilantro adds a burst of freshness. I chop it just before mixing to keep its bright taste. Finally, I create a creamy dressing. The mayonnaise and sour cream blend with lime juice and chili powder. This combination gives the salad a zesty and creamy finish. You can adjust the salt and pepper to fit your taste. For the complete recipe, check out the Full Recipe section. To cook fusilli pasta, boil water in a large pot. Add salt to the water for flavor. Cook the pasta according to package instructions until it is al dente. This means it should be firm but not hard. Drain the pasta in a colander. Rinse it under cold water to stop the cooking process. This step helps keep the pasta from becoming mushy. For the corn, use fresh or frozen kernels. I prefer fresh for that sweet taste. Heat a skillet over medium heat. Add the corn and sauté for about 5 to 7 minutes. You want it to be slightly charred for more flavor. Once done, remove it from the heat and let it cool. This cooling step is key to keep the corn crunchy. In a large mixing bowl, combine the cooled pasta, charred corn, diced red bell pepper, chopped red onion, and minced jalapeño. Stir gently to mix these ingredients without breaking the pasta. In a separate small bowl, whisk together the mayonnaise, sour cream, lime juice, chili powder, salt, and pepper. Make sure the dressing is smooth and well blended. Pour the dressing over the pasta mixture. Toss gently to coat all the ingredients evenly. Next, fold in the crumbled cotija cheese and chopped cilantro. Be careful to mix just until combined, so you don’t break the pasta. Taste the salad and adjust seasoning with more salt, pepper, or lime juice if needed. Refrigerating the pasta salad is very important. This step allows all the flavors to blend nicely. Cover the bowl and chill it for at least 30 minutes. Serve it cold for the best taste. For the full recipe, check out the complete guide. To avoid mushy pasta, cook your fusilli just until al dente. Follow the package instructions closely. Rinsing the pasta under cold water halts the cooking process and keeps it firm. Balancing ingredients is key to achieving the best taste. Use fresh corn for sweetness and flavor. The red bell pepper adds crunch and vibrant color. Jalapeños bring heat, so adjust to your spice level. Mixing cotija cheese adds a creamy, salty touch. You can serve Mexican Street Corn Pasta Salad in many fun ways. Try using a large bowl for family-style sharing. Individual cups can make for a great picnic or potluck idea. Pair this salad with grilled chicken or fish for a complete meal. It also works well with tacos or quesadillas for a fun taco night. Garnishing your salad makes a big difference. A sprinkle of extra cotija cheese on top adds texture. Add a few cilantro leaves for a fresh pop of green. Colorful ingredients are not just pretty; they also bring different flavors. The bright yellow corn, red bell pepper, and green cilantro create a feast for the eyes. Remember, a beautiful dish makes the meal even more enjoyable. For the full recipe and more tips, check out the [Full Recipe]. {{image_2}} To make this salad vegetarian, use vegetable broth to cook the pasta. You can also swap out the cotija cheese for a creamy feta or a vegan cheese option. These substitutes keep the dish rich and tasty. For extra veggies, add diced zucchini or cherry tomatoes. These colorful options add texture and nutrients without changing the flavor. If you love heat, try adding different peppers. Consider using serrano or habanero for a kick. You can also sprinkle some red pepper flakes for extra spice. For those who want a milder version, use bell peppers instead. Remember, you can always adjust the heat to match your taste. To make this pasta salad gluten-free, choose gluten-free pasta, like brown rice or chickpea pasta. These alternatives work well and hold their shape. Always check labels to ensure there are no hidden gluten ingredients. This way, everyone can enjoy the salad without worry. You can find the Full Recipe for more details on how to create this delightful dish. To keep your Mexican street corn pasta salad fresh, store it in an airtight container. Make sure it’s sealed tightly. This helps maintain its flavors and prevents odors from other foods. The salad will stay fresh for about 3 to 5 days in the fridge. If you notice any changes in smell or appearance, it’s best to toss it. If you want to warm up your pasta salad, do it gently. Use a microwave on low power to avoid mushy pasta. Stir it every 30 seconds until it's warm. If you prefer it cold, serve it straight from the fridge. The flavors are bright and refreshing when chilled. Making this salad ahead of time is a great idea! You can cook the pasta and corn a day before. Chop the veggies and store them separately to keep them fresh. When you’re ready to eat, mix everything together with the dressing. This saves time and gives you a quick meal option for busy days. If you can’t find cotija cheese, try feta or queso fresco. Both add saltiness and creaminess. You can also use grated Parmesan for a different twist. Each option gives a unique flavor to the salad. This pasta salad stays fresh in the fridge for about three days. Make sure to keep it in an airtight container. The flavors will continue to blend, making it even tastier over time. Yes, you can make this salad a day in advance. Just mix all the ingredients and refrigerate them. This lets the flavors meld together beautifully. When it's time to serve, just give it a quick stir. To make this salad vegan, swap the mayonnaise and sour cream for plant-based alternatives. Use nutritional yeast for a cheesy flavor instead of cotija cheese. This keeps the salad delicious and satisfying. Fusilli is great for this recipe because it holds the dressing well. However, you can also use rotini or penne. These shapes add a fun texture and help capture all the flavors. Try adding diced avocado, black beans, or even chopped tomatoes. A dash of hot sauce can spice things up, too. Fresh lime zest adds brightness, making each bite exciting and fresh. For the full recipe, check out the detailed instructions above. This blog post covered a tasty Mexican Street Corn Pasta Salad. We explored key ingredients like fusilli pasta, corn, red bell pepper, and special dressings. Each step showed you how to cook and mix the salad for the best taste and texture. In my final thoughts, remember to adjust flavors and try variations that suit your taste. Enjoy this vibrant dish that can bring joy to any meal!](https://grilledflavors.com/wp-content/uploads/2025/06/03121f18-3d3d-4b4e-a2f3-69c6e9a315a8.webp)
Mexican Street Corn Pasta Salad Flavorful and Fresh
Get ready to brighten your meal with my Mexican Street Corn Pasta Salad! This dish combines the sweet crunch of corn, the zing of lime,
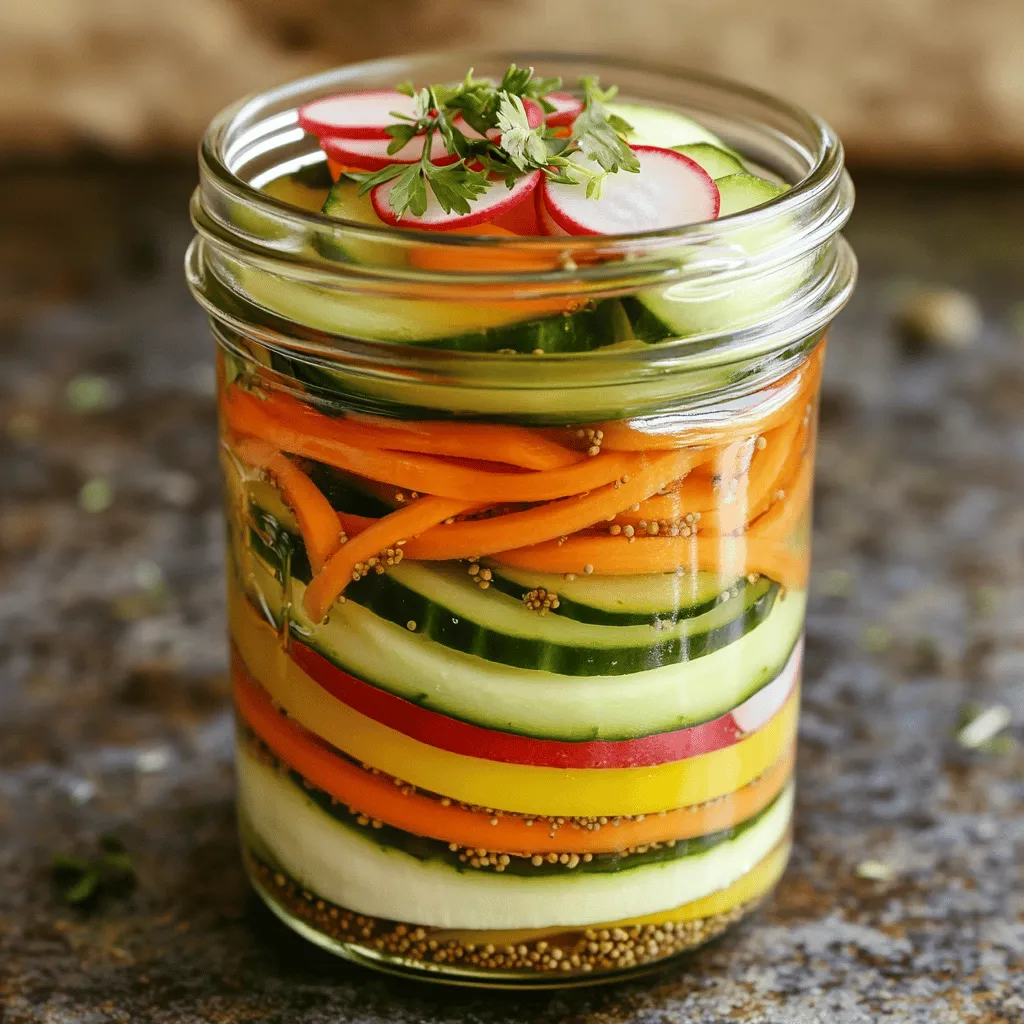
Quick Pickled Vegetables Easy and Flavorful Recipe
Looking for a simple way to enhance your meals? Quick pickled vegetables are the answer! In this easy and flavorful recipe, I’ll show you how

Broccoli Bliss Salad Fresh and Flavorful Delight
Looking for a fresh and vibrant salad that packs a punch? Meet the Broccoli Bliss Salad! This delightful dish combines crunchy broccoli, sweet cherry tomatoes,
![For a tasty Thai Chicken Salad, you need these key items: - 2 cups cooked chicken breast, shredded - 1 cup red cabbage, thinly sliced - 1 cup carrots, grated - 1 cucumber, julienned - 1 red bell pepper, thinly sliced - 1/4 cup fresh cilantro, chopped - 1/4 cup chopped peanuts (for garnish) Nutritional aspects of each ingredient: - Chicken breast: High in protein, low in fat, great for muscle health. - Red cabbage: Rich in vitamins C and K, supports immune function. - Carrots: Full of beta-carotene, good for vision and skin health. - Cucumber: Hydrating and low in calories, helps with digestion. - Red bell pepper: Packed with antioxidants, boosts overall health. - Cilantro: Adds flavor and has anti-inflammatory properties. - Peanuts: Source of healthy fats and protein, adds crunch. For the dressing, gather these items: - 2 tablespoons lime juice - 2 tablespoons fish sauce - 1 tablespoon honey - 1 tablespoon sesame oil - 1 teaspoon grated ginger - 1 garlic clove, minced - Salt and pepper to taste Tips on sourcing fresh ingredients: - Buy herbs like cilantro from your local farmer's market. - Choose colorful vegetables for better taste and nutrition. - Look for fresh lime and garlic at the grocery store. - Always check the labels on sauces for quality. For the full recipe, click here: [Full Recipe]. To make Thai Chicken Salad, follow these easy steps. First, gather all your ingredients. You will need cooked chicken, red cabbage, carrots, cucumber, red bell pepper, cilantro, lime juice, fish sauce, honey, sesame oil, ginger, garlic, and peanuts. 1. In a large mixing bowl, add the shredded chicken, red cabbage, grated carrots, julienned cucumber, thinly sliced red bell pepper, and chopped cilantro. Toss them all together well. 2. In a small bowl, whisk together lime juice, fish sauce, honey, sesame oil, grated ginger, and minced garlic. This mixture will be your dressing. 3. Pour the dressing over the salad mixture. Gently toss to coat everything evenly. 4. Let the salad rest for about 10 minutes. This time is key. It allows the flavors to mix and become more vibrant. 5. Just before serving, sprinkle chopped peanuts on top for a crunchy finish. When serving the salad, think about how to make it look nice. Use a large bowl or individual plates. Garnish with fresh cilantro leaves and a lime wedge on the side. This adds color and freshness. You can pair the salad with spring rolls or jasmine rice. This combination makes for a complete meal. For drinks, consider serving iced tea or coconut water. It’s a refreshing way to enjoy your meal. For the full recipe, refer to the earlier section. Enjoy your delightful Thai Chicken Salad! You can easily change this Thai chicken salad to fit your taste. If you prefer a vegetarian option, swap chicken for tofu. Tofu absorbs flavors well and adds protein. You can also use shrimp for a seafood twist. For a crunchier salad, add sliced radishes or snap peas. If you want a spicy kick, toss in some sliced jalapeños. To enhance the flavor of your dressing, try adding more lime juice or a dash of chili sauce. Fresh herbs like mint or basil can brighten the taste too. Adjust the sweetness by adding more honey or using agave syrup for a vegan option. One common mistake is not shredding the chicken finely. Larger pieces can make the salad hard to eat. Make sure to slice the veggies thinly, too. This helps all the flavors blend well. Another error is not letting the salad sit. Allowing it to rest for ten minutes helps the flavors join together. For storage, keep the salad in a sealed container. This helps keep the veggies crisp. Try to eat the salad within two days to enjoy its freshness. If you add the dressing before storing, it can make the salad soggy. Keep the dressing separate until you are ready to eat. For the full recipe, check out the Full Recipe section above. {{image_2}} You can easily swap the chicken in your Thai Chicken Salad. Tofu is a great choice for a vegetarian option. Use firm tofu, and press it to remove excess water. Cut it into cubes and sauté until golden. This adds a nice texture. Shrimp is another tasty alternative. Cook medium shrimp in a pan with a little oil until pink and opaque. It takes only a few minutes. Both options work well with the salad's fresh flavors. Using seasonal vegetables makes your salad even better. In spring, add snap peas or radishes for a crisp bite. In summer, try ripe tomatoes or sweet corn for a juicy touch. For fall, consider using roasted butternut squash. It adds warmth and a sweet flavor. In winter, crunchy carrots and kale keep the salad vibrant. You can also adjust the dressing with seasonal ingredients. In summer, add a splash of orange juice to brighten it up. In winter, a bit of maple syrup can add a cozy sweetness. Enjoy exploring these options! To keep your Thai Chicken Salad fresh, store it in an airtight container. This helps maintain flavor and crunch. Place the salad in the fridge right after serving. It will stay good for about 3 days. If you notice any wilting or browning, it’s best to toss those bits out. If you want to save some salad for later, you can freeze it. Divide the salad into portions that you can use later. Use freezer-safe bags or containers. When you are ready to eat, thaw the salad overnight in the fridge. Once thawed, give it a good mix. The flavors will come back together nicely. Enjoy it with your favorite sides! For the full recipe, check out the details above. Thai Chicken Salad is a bright and tasty dish. It combines fresh veggies with shredded chicken. Key ingredients include red cabbage, carrots, and cucumbers. These add crunch and color. The salad also has a zesty dressing made from lime juice, fish sauce, honey, and sesame oil. Ginger and garlic add depth to the flavor. This meal is light yet satisfying, making it perfect for lunch or dinner. Yes, you can make Thai Chicken Salad ahead of time. However, I suggest keeping the dressing separate. This helps maintain the salad's crunch. Prepare the salad and store it in the fridge. Add the dressing just before serving. If you mix it too early, the veggies may become soggy. Letting it sit for 10 minutes before serving helps the flavors blend well. To make Thai Chicken Salad gluten-free, swap out certain ingredients. Use gluten-free fish sauce and soy sauce. Check labels to ensure no hidden gluten. You can also use tamari as a soy sauce substitute. Most other ingredients are naturally gluten-free. Fresh veggies and chicken are great choices. With these swaps, you can enjoy a tasty gluten-free salad. For the full recipe, check out the instructions provided above. In this article, we explored the delicious Thai Chicken Salad, starting with its key ingredients and dressing components. I shared easy steps for preparing and serving the salad, along with tips for customization and common mistakes to avoid. We discussed great alternatives for proteins and how to use seasonal veggies to enhance flavor. Finally, I provided storage tips to keep your salad fresh. By using these insights, you can create a tasty and colorful dish that fits your needs and impresses your guests. Enjoy making this vibrant salad!](https://grilledflavors.com/wp-content/uploads/2025/06/84211043-c381-4155-8123-697f594bf271.webp)
Thai Chicken Salad Delightful and Flavorful Meal
Are you ready to spice up your meal routine? This Thai Chicken Salad is a delightful and flavorful dish that combines fresh herbs, crunchy veggies,