Salads
![To make a vibrant rainbow orzo salad, gather these key ingredients: - 1 cup orzo pasta - 1 cup cherry tomatoes, halved - 1 cup cucumber, diced - 1 bell pepper (any color), diced - 1 cup cooked corn (fresh or canned) - 1/2 red onion, finely chopped - 1/2 cup feta cheese, crumbled These ingredients bring colors and textures to your plate. The orzo serves as a hearty base, while the veggies add crunch and freshness. Get creative with optional add-ins that enhance the salad: - Avocado, diced - Black olives, sliced - Fresh herbs like parsley or dill - Chickpeas for added protein These add-ins let you customize your salad. They can also boost flavor and nutrition. A simple dressing ties everything together. For the dressing, you need: - 2 tablespoons olive oil - 1 tablespoon lemon juice - 1 teaspoon dried oregano - Salt and pepper to taste This dressing is light and fresh. It highlights the salad's bright flavors without overpowering them. For the full recipe, check the [Full Recipe]. First, boil water in a large pot. Add salt for flavor. Once the water boils, add 1 cup of orzo pasta. Cook it for about 8 to 10 minutes. You want it to be al dente, which means firm to the bite. After cooking, drain the pasta and rinse it under cold water. This stops the cooking process and cools it down. While the orzo cooks, you can chop the fresh veggies. Start with the cucumber. Dice it into small pieces. Next, take a bell pepper and dice it as well. Any color works great! Then, halve the cherry tomatoes. If you are using fresh corn, now is the time to cook it briefly in boiling water. Cool it down after cooking so it mixes well. In a large mixing bowl, add the cooled orzo. Toss in the halved cherry tomatoes, diced cucumber, and bell pepper. Add the cooked corn and finely chopped red onion. Mix these ingredients gently. The colors and textures should look bright and inviting. Now, let’s make the dressing. In a small bowl, whisk together 2 tablespoons of olive oil, 1 tablespoon of lemon juice, and 1 teaspoon of dried oregano. Season with salt and pepper to taste. Pour this dressing over the salad mix. Stir well to coat everything evenly. For the full recipe, don't forget to check the detailed instructions. Enjoy your vibrant Rainbow Orzo Salad! To cook orzo, bring a large pot of salted water to a boil. Add the orzo pasta and cook it for about 8 to 10 minutes. You want it to be al dente, which means it should be firm but not hard. Once cooked, drain the pasta and rinse it under cold water. This stops the cooking process and cools it down quickly. Serve your rainbow orzo salad chilled for the best taste. You can add fresh herbs like basil or parsley to enhance the flavor. If you want a bit more zing, try squeezing some lemon juice over the top. Pair this salad with grilled chicken or fish for a full meal. It also makes a great side dish for barbecues. A clear glass bowl works best for serving this salad. It shows off the bright colors of the veggies. To make it even more appealing, drizzle a little extra olive oil before serving. Add a few whole basil leaves on top for a pop of green. This not only looks great but also adds fresh flavor. For the full recipe, check out the complete instructions. {{image_2}} You can make this salad purely vegetarian by skipping the feta cheese. Instead, try using avocado for creaminess. You can also add more veggies like spinach or kale for extra nutrients. Roasted chickpeas are another great way to add texture and flavor. They are crunchy and will give your salad a nice bite. If you want to make your salad more filling, add some protein. Grilled chicken or shrimp works well here. You can also use canned beans like black beans or chickpeas. They add protein and fiber, making the salad even healthier. Tofu is another option, and it soaks up flavors nicely. Feel free to swap ingredients based on what’s in season. In spring, add peas or asparagus for freshness. In summer, try adding zucchini or bell peppers for crunch. In fall, diced apples or roasted sweet potatoes can add sweetness. Winter months call for roasted Brussels sprouts or beets for a hearty touch. Each season brings new flavors to explore in your rainbow orzo salad. For the full recipe, check out the details above. To store leftover Rainbow Orzo Salad, place it in an airtight container. Make sure the lid seals tightly. This keeps the salad fresh and tasty. You can keep it in the fridge for up to three days. If you see any liquid in the container, drain it before serving again. The flavors will meld, making the salad even better. When you make this salad, keep the ingredients separate until serving. Store the orzo, veggies, and dressing in different containers. This way, the salad stays crisp. Fresh veggies taste best, so try to use them within a couple of days. If you have leftover feta, store it in its liquid to keep it moist. You can enjoy Rainbow Orzo Salad cold or at room temperature. If you prefer it warm, heat the orzo gently in a pot. Avoid overheating as it can make the salad mushy. Once warmed, add the fresh ingredients and dressing. Mix well before serving. This salad shines with its colors and flavors, making it a delightful dish. For the full recipe, check out the details above. Rainbow Orzo Salad can last about 3 to 5 days in the fridge. Store it in an airtight container. Keep it cool to maintain its fresh taste. If you spot any changes in color or smell, toss it out. Yes, you can use regular pasta instead of orzo. Choose a small shape like fusilli or shells. Cook it according to package instructions. The salad will still taste great. You can try many dressings with this salad. A balsamic vinaigrette adds a sweet touch. A yogurt-based dressing gives a creamy feel. Experiment to find what you love best! Yes, Rainbow Orzo Salad is great for meal prep. Make a batch at the start of the week. It stays tasty and fresh, making it a perfect lunch option. Just keep the dressing separate until you're ready to eat. Check out the Full Recipe for more tips! Rainbow Orzo Salad is a great dish full of flavor and color. We covered key ingredients, from the main orzo to tasty add-ins. The step-by-step instructions help you create it with ease. Tips on cooking orzo and presentation add extra joy. You can also personalize the salad with various options. Storing it right keeps leftovers fresh and tasty. With all these ideas, you now have the perfect recipe for any occasion. Enjoy your cooking journey and share your creations!](https://grilledflavors.com/wp-content/uploads/2025/06/efa6118a-68dc-4c73-8360-73e78a57c51b.webp)
Rainbow Orzo Salad Fresh and Colorful Delight
Looking for a vibrant dish that’s as fun to make as it is to eat? You’ll love my Rainbow Orzo Salad! This colorful delight bursts
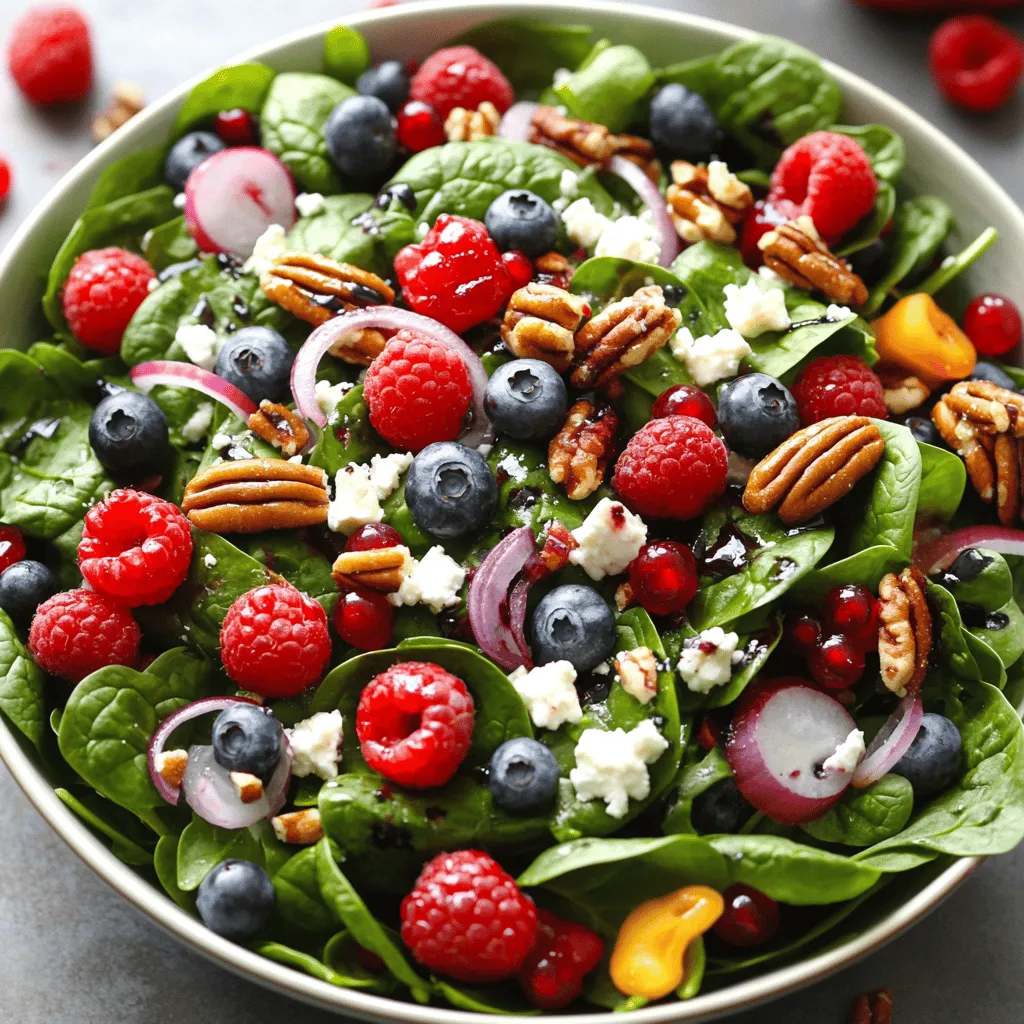
Berry Spinach Salad with Pecans Fresh and Flavorful
Looking for a fresh and flavorful dish that’s quick to make? Try my Berry Spinach Salad with Pecans! This vibrant salad combines sweet berries, crunchy
![- Fresh strawberries - Ripe pineapple - Blueberries - Kiwi - Banana - Honey - Fresh lime juice - Lime zest - Sea salt - Fresh mint leaves To make a great fruit salad, you need fresh and colorful fruits. Start with fresh strawberries. Look for bright red ones without any bruises. Next, use ripe pineapple, which adds sweetness. Blueberries bring a burst of flavor and color. Kiwi adds a unique taste and vibrant green. Finally, bananas provide creaminess. Choose bananas that are yellow with a few spots. For the honey lime dressing, you need just a few simple ingredients. Honey adds natural sweetness. Fresh lime juice gives it a zesty kick. Lime zest adds more flavor and aroma. A pinch of sea salt balances the sweetness. If you want to elevate your salad, consider adding fresh mint leaves. They add a nice touch and a refreshing taste. You can find the complete recipe with all the details [Full Recipe]. Start by washing all your fruits. For strawberries, hull them and slice them into thin pieces. For the pineapple, remove the skin and core, then dice it into small chunks. Next, rinse the blueberries and set them aside. Peel the kiwi and slice it into rounds. Lastly, slice the banana into coins. Once all your fruits are prepped, take a large mixing bowl. Gently combine the strawberries, pineapple, blueberries, kiwi, and banana in the bowl. Mix them carefully so they stay whole and look pretty. In a small bowl, add two tablespoons of honey. Then, squeeze in two tablespoons of fresh lime juice. Next, add the lime zest and a pinch of sea salt. Use a whisk to blend these ingredients together until smooth. If the dressing is too thick, add a tiny bit of water to loosen it up. Keep whisking until the dressing feels just right. A smooth, pourable consistency works best for drizzling. Now, drizzle the honey lime dressing over the mixed fruit. Use a large spoon to gently toss everything together. Be careful not to mash the fruit while mixing. You want those vibrant pieces to stay intact. After tossing, let the salad rest for about 10 minutes. This resting time allows the flavors to mix and makes each bite burst with taste. Enjoy your deliciously fresh fruit salad with honey lime dressing! For the full recipe, check the details above. To make a great fruit salad, choose ripe fruits. Look for bright colors and a pleasant smell. For strawberries, pick ones that are deep red. They should be firm, not mushy. When selecting pineapple, it should feel heavy for its size and have a sweet aroma. Blueberries should be plump and have a deep blue color. For kiwi, choose those that yield slightly to pressure. Bananas should be yellow with a few brown spots for the best flavor. Seasonal fruits can add unique flavors. In spring, use strawberries and cherries. Summer is perfect for peaches and melons. Fall brings apples and pears, while winter allows for citrus fruits like oranges and grapefruits. You can boost the flavor of your salad with extra ingredients. Consider adding a pinch of cinnamon or a splash of vanilla extract for depth. A touch of ginger can bring warmth and spice. Fresh herbs like basil or cilantro can add a surprising twist. To meld flavors, let the salad sit for a bit. Ten minutes is a good time to let the fruits soak in the honey lime dressing. This resting time helps all the tastes blend together nicely. Fruit salad is great for many occasions. Serve it at picnics, barbecues, or brunches. It’s a refreshing side dish for any meal. You can also use it as a healthy dessert. For presentation, use a clear bowl to show off the colorful fruits. Garnish with extra mint leaves on top. To keep it fresh, serve the salad cold. Refrigerate it for about 30 minutes before serving. This way, everyone enjoys it at its best! You can find the full recipe for this refreshing dish [here](#). {{image_2}} For a tropical twist, use fruits like mango, papaya, and coconut. These fruits add sweetness and a fun texture. You can also sprinkle some shredded coconut on top for extra flair. To adjust the dressing, keep the honey and lime juice but add a splash of orange juice. This change brightens the flavors and matches tropical fruits well. If you love berries, try adding raspberries or blackberries to your salad. These berries add a nice tang and color. You can replace some of the blueberries with these berries for a fresh take. For the dressing, you might want to use less honey since berries are sweet. This keeps the salad balanced. Want to make your fruit salad more filling? Add some yogurt or nuts. Greek yogurt gives a creamy texture and protein boost. If you prefer nuts, almonds or walnuts add crunch. They also enhance the nutritional value. You can mix in yogurt right before serving or sprinkle nuts on top for added flavor and fun. For the full recipe, check out the Fruit Fiesta Salad ! After you enjoy your fruit salad, store any leftovers in the fridge. Use an airtight container to keep the flavors fresh. The fruit salad can stay good for about 2-3 days. However, it tastes best within the first day. If you want to freeze the fruit, do so before mixing. Cut the fruits into small pieces. Lay them flat on a baking sheet to freeze individually. Once frozen, transfer them to a freezer bag. When you defrost, let the fruit sit in the fridge overnight. This keeps it nice and soft for serving. Some fruits brown quickly, like bananas and apples. To prevent this, use citrus juice on them before mixing. This keeps your salad looking bright and fresh. You can also add fresh mint leaves for a pop of color. Yes, you can make the honey lime dressing ahead of time. Mix the honey, lime juice, and zest in a small bowl. Store it in a jar in the fridge. This way, the flavors can blend well. Just give it a quick stir before you use it. Some fruits do not mix well in a salad. Avoid using bananas and apples with strong citrus fruits. Bananas can brown fast, and apples can turn soggy. Also, avoid fruits that release too much juice, like watermelon. This can make the salad watery. To add more color and texture, try using a mix of fruits. You can add pomegranate seeds or orange segments for bright colors. Consider using different textures too. For example, add crunchy nuts or creamy yogurt on top. This will make your salad more appealing and tasty. This fruit salad is a fresh and tasty choice that brightens any meal. You learned about selecting ripe fruits and making a sweet honey lime dressing. We discussed fun variations and served tips. Keep your salad colorful, and enjoy it at parties or quiet evenings. Remember to store leftovers properly to keep them fresh. You can make this dish in advance, ensuring a quick treat ready to serve. Try these ideas for a delightful fruit salad and impress family and friends. Enjoy making and sharing this refreshing dish!](https://grilledflavors.com/wp-content/uploads/2025/06/17ad068e-9dbe-411a-8bc0-aa254874417f.webp)
Fruit Salad with Honey Lime Dressing Deliciously Fresh
Looking for a fresh and tasty treat? This Fruit Salad with Honey Lime Dressing is your answer! It’s packed with colorful fruits like strawberries, pineapple,
![- Ground turkey or beef - Black beans (1 can, rinsed and drained) - Corn kernels (1 cup, fresh or frozen) - Romaine lettuce (1 head, chopped) - Cherry tomatoes (1 cup, halved) - Cucumber (1 cup, diced) - Avocado (1, diced) - Shredded cheddar cheese (1/2 cup) - Sour cream (1/2 cup) - Mayonnaise (1/4 cup) - Chipotle sauce (1-2 tablespoons, adjust to taste) - Lime juice (1 tablespoon) - Salt and pepper (to taste) - Tortilla chips (for garnish) - Extra shredded cheese - Crushed tortilla chips - Fresh herbs or spices like cilantro or jalapeños - Large skillet - Salad bowl - Mixing bowls for dressing Using these fresh ingredients, you can create a taco salad that is both tasty and healthy. Each component brings its own flavor and texture. The ground meat adds protein, while beans and corn lend fiber. Fresh veggies like romaine, tomatoes, and avocado provide a refreshing crunch. The cheese and dressing tie it all together, making every bite a delight. For the full recipe, check out the detailed instructions on how to prepare this vibrant dish. Enjoy crafting your taco salad masterpiece! To start, heat a large skillet over medium heat. Add one tablespoon of olive oil. When the oil is hot, add 1 pound of ground turkey or beef. Cook it until it is browned. Use a spatula to break the meat into small pieces. This should take about 5 to 7 minutes. Next, drain any excess fat from the skillet. Now, add one packet of taco seasoning. Follow the package instructions and add water as needed. Stir in one can of black beans and one cup of corn kernels. Cook this mixture for an additional 5 minutes. Season it with salt and pepper to your taste. This savory meat mix is the heart of your taco salad. In a small bowl, combine half a cup of sour cream and a quarter cup of mayonnaise. Next, add 1 to 2 tablespoons of chipotle sauce. Adjust the amount based on how spicy you like it. Then, add one tablespoon of lime juice and a pinch of salt. Mix everything well until it's smooth. This dressing adds a creamy kick to your salad. Grab a large salad bowl and layer it with chopped romaine lettuce as the base. Next, add the cooked meat mixture on top. Then, layer in one cup of halved cherry tomatoes, one cup of diced cucumber, and one diced avocado. Finally, sprinkle half a cup of shredded cheddar cheese over the top. Drizzle the chipotle ranch dressing generously on the salad. For added crunch, crush some tortilla chips and sprinkle them on just before serving. This step makes your taco salad fun and crunchy. For the full recipe and more, check out the [Full Recipe]. To achieve the best taco salad, focus on your meat. Browning the meat well adds flavor. Use medium heat and let it sit for a minute before stirring. This gives it a nice sear. Adjusting the spice levels in the dressing is key. Start with one tablespoon of chipotle sauce. Taste it, then add more if you want heat. Lime juice balances the spice, so don’t skip it. Presentation matters. Serve the salad in clear bowls to show off colorful layers. This makes it look more appealing. Add extra tortilla chips on the side for crunch. Pair your taco salad with a refreshing drink. I recommend iced tea or a light beer. Both complement the flavors well. To boost flavor, consider adding fresh herbs. Chopped cilantro adds a bright taste. You can also try diced jalapeños for extra heat. For more crunch, add radishes or bell peppers. They add a fresh bite. You can also use toasted nuts for a unique twist. For the full recipe, check the section above. Enjoy making your taco salad! {{image_2}} You can easily make a vegetarian taco salad. Instead of meat, use more beans or lentils. Black beans and pinto beans add protein and texture. You can even mix in some quinoa for extra bite. For cheese, use plant-based options like cashew or almond cheese. They melt well and taste great. Plant-based dressings also work well here. Try avocado dressing or a creamy tahini sauce. If you want a low-carb version, swap tortilla chips for lettuce wraps. Use large leaves of romaine or butter lettuce. They hold the toppings well and are crunchy too. You can also skip high-carb items like corn and beans. Instead, focus on more veggies like bell peppers and cucumbers. This keeps the salad light and fresh. You can switch up the dressings for different flavors. Try a classic ranch or a zesty vinaigrette. You might also enjoy a creamy avocado dressing. It adds richness without overpowering the salad. Customize your flavors to match your taste. Add herbs like cilantro or a squeeze of lime for brightness. Feel free to experiment and find your favorite combination. For the full recipe, check the link provided above. To keep your taco salad fresh, store it in an airtight container. Layer the ingredients wisely. Place the meat mixture on the bottom and veggies on top. This method prevents sogginess. Use leftovers within 3 days for the best taste. When reheating the meat mixture, use a skillet over medium heat. Stir often to warm it evenly. Avoid overheating to keep the meat juicy. For the veggies, heat them separately, or add them fresh after reheating. This keeps them crisp and tasty. You can freeze the meat and dressing separately. It helps maintain the quality. Use freezer-safe containers for the meat. For the dressing, pour it into a zip-top bag. When ready to use, thaw overnight in the fridge. Enjoy the salad fresh when you’re ready! Yes, you can make taco salad in advance. I suggest preparing the meat mixture and dressing the day before. Store these in airtight containers in the fridge. Chop your veggies a bit earlier, but keep them separate until serving. Add the tortilla chips just before serving to keep them crunchy. If you need a substitute for chipotle, try smoked paprika or cayenne pepper. Both give a nice heat. You can also use regular ranch dressing and add a bit of hot sauce for kick. Yogurt mixed with lime and garlic can work for a creamier option. To spice things up, add more chipotle sauce to the dressing. You can also use spicy taco seasoning. For a milder flavor, reduce the chipotle sauce or use less spicy seasoning. Always taste as you go to find what works for you. In this blog post, we explored how to make a tasty taco salad. We covered key ingredients like ground turkey or beef, black beans, and fresh vegetables. You'll also find tips for perfecting your salad, plus ideas for variations and storing leftovers. Taco salad allows for easy customization and is great for gatherings. With these steps, you can create a dish that fits your taste perfectly. Enjoy your cooking!](https://grilledflavors.com/wp-content/uploads/2025/06/2d4426f6-0090-4b0b-96fb-6c01869cf93e.webp)
Taco Salad with Chipotle Ranch Dressing Fresh Flavors
Are you ready to enjoy a vibrant and tasty meal? This Taco Salad with Chipotle Ranch Dressing brings fresh flavors to your table. Packed with
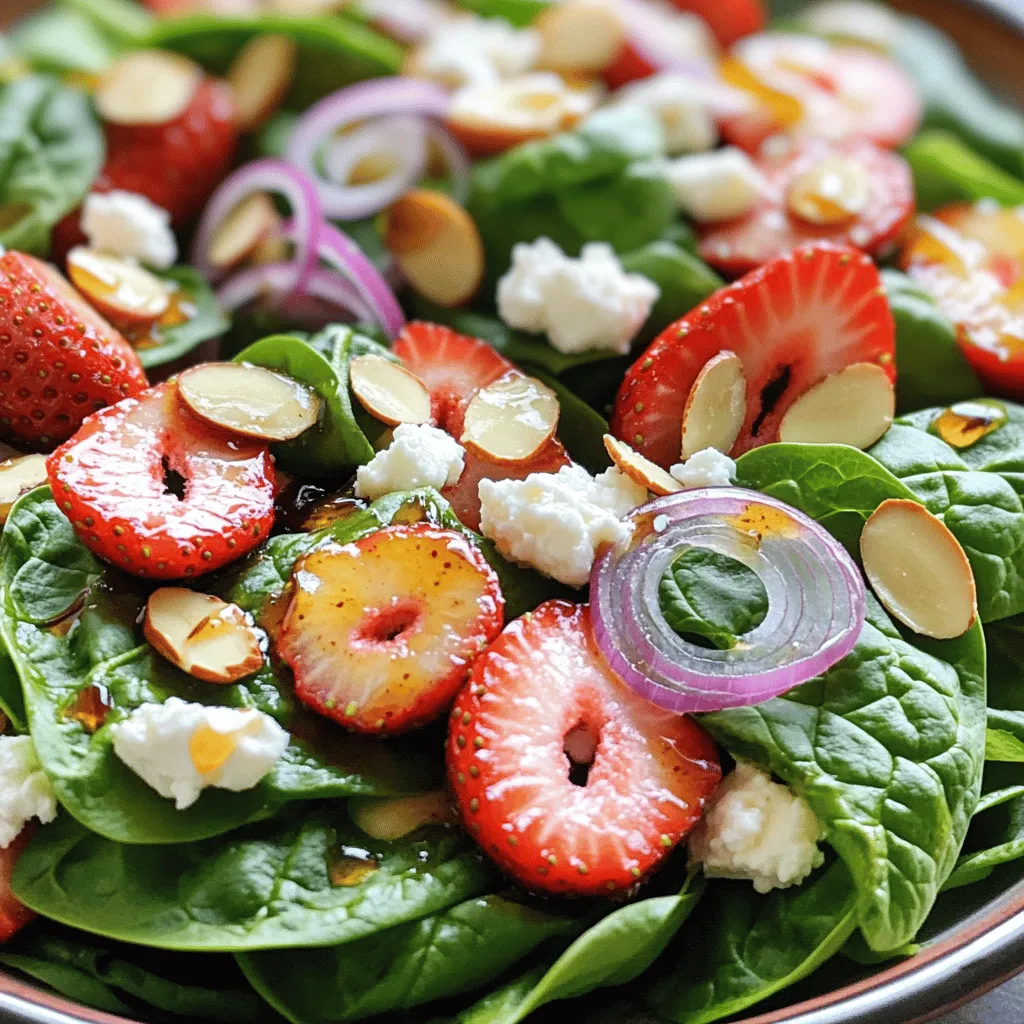
30-Minute Strawberry Spinach Salad Fresh and Tasty Delight
Looking for a quick and delicious salad? This 30-Minute Strawberry Spinach Salad is your answer! It’s fresh, easy, and perfect for any meal. We’ll mix
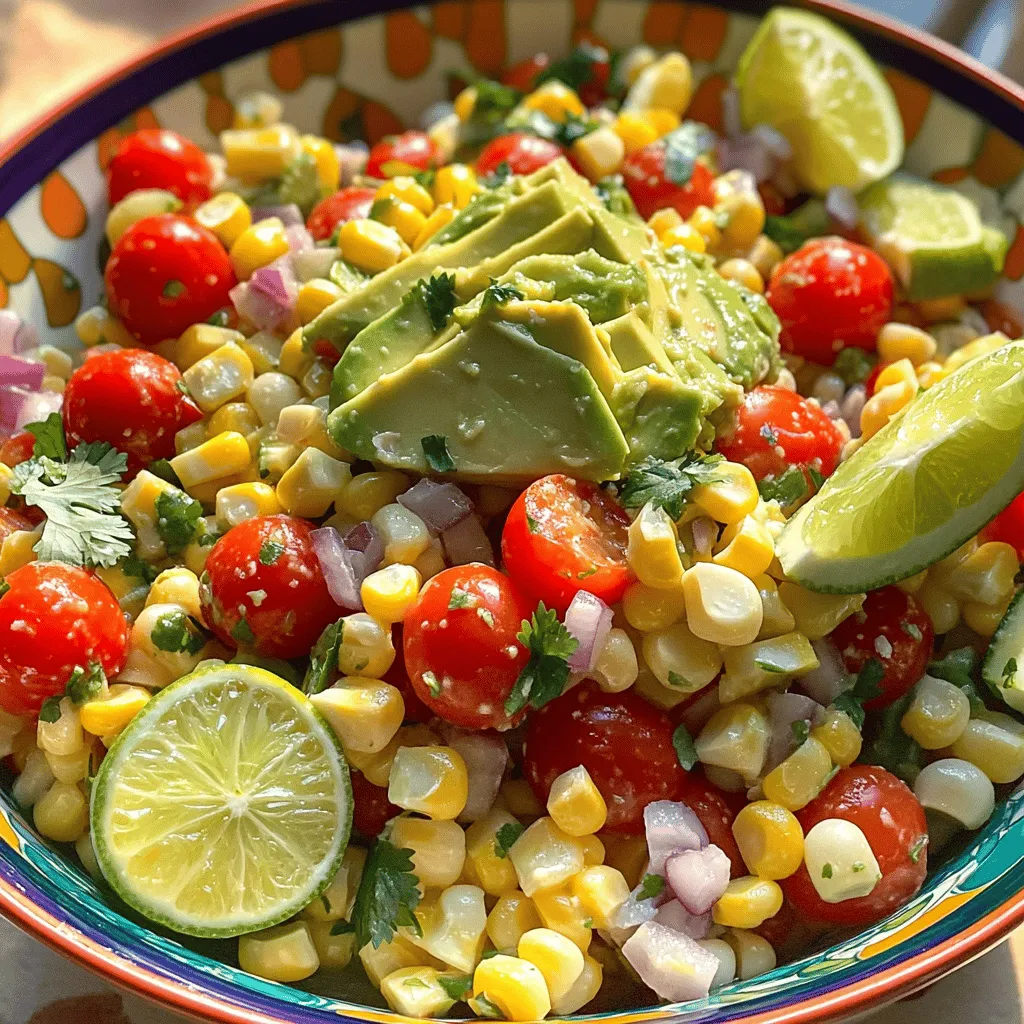
Summer Corn Salad Fresh and Flavorful Delight
When summer hits, fresh corn shines in every dish, and this Summer Corn Salad is no exception. You’ll find it bursting with flavors and colors.
![- 2 cups mixed greens (arugula, spinach, and romaine) - 1 cup cherry tomatoes, halved - 1 cup cucumber, diced - 1 ripe avocado, diced - 1 orange, segmented - 1/4 cup red onion, thinly sliced - 1/4 cup crumbled feta cheese - 1/4 cup sunflower seeds - 3 tablespoons olive oil - 2 tablespoons apple cider vinegar - 1 teaspoon honey - Salt and pepper to taste For a great Sunshine Salad, start with fresh produce. Mixed greens give a nice base. I love using arugula, spinach, and romaine for a mix of flavors. Cherry tomatoes add sweetness, while cucumber brings crunch. Next, add a ripe avocado. It makes the salad creamy. The orange segments add a burst of juicy flavor. Lastly, thinly sliced red onion gives a nice bite. Now, let’s talk about the other ingredients. Crumbled feta cheese adds a salty kick. Sunflower seeds add extra crunch and nutrition. For the dressing, whisk together olive oil, apple cider vinegar, honey, salt, and pepper. This simple mix adds a bright flavor. Make sure to check the Full Recipe for all the details. Enjoy your colorful and tasty Sunshine Salad! - First, wash all the fresh produce. - Dry the greens and place them in a bowl. - Dice the cucumber and avocado into small pieces. - Halve the cherry tomatoes and segment the orange. - Thinly slice the red onion. - Start with the mixed greens as the base in your bowl. - Layer the cherry tomatoes and cucumber on top. - Next, add the diced avocado and orange segments. - Sprinkle the sliced red onion and crumbled feta cheese over the layers. - Finally, add the sunflower seeds for a nice crunch. - In a small bowl, whisk together the olive oil and apple cider vinegar. - Add honey, salt, and pepper to taste. - Mix until the dressing is smooth and well combined. - Drizzle the dressing over the salad before tossing gently. - Be careful not to break the avocado pieces as you mix. This Sunshine Salad is a burst of flavor and color. For the full recipe, check out the [Full Recipe]. To make your Sunshine Salad shine, presentation matters. Serve it in a large, shallow bowl or on individual plates. This way, the colorful ingredients pop! Garnish with extra orange segments. Add a sprinkle of sunflower seeds on top for a fun crunch. This adds color and makes it look fresh and inviting. Feel free to swap ingredients based on your diet. For a vegan option, skip the feta cheese or use a plant-based version. You can replace honey with agave syrup for a vegan dressing. If you don’t like red onion, try green onions or chives for a milder taste. You can also use any leafy green you like, such as kale or mixed greens. Balancing flavors makes this salad a joy to eat. Start with the dressing. Olive oil and apple cider vinegar give a nice tang. Adjust the salt and pepper to taste. If you want more sweetness, add a bit more honey. To mix it up, try adding herbs like basil or mint. They will boost the flavor even more. The crunch from the sunflower seeds pairs well with the creamy avocado. Enjoy the mix of textures! For the [Full Recipe], click here. {{image_2}} You can change the fruits and veggies in the Sunshine Salad based on the seasons. In summer, I love adding sweet peaches or juicy strawberries. These fruits bring a delightful sweetness. In fall, try including crisp apples or juicy pears. They add a nice crunch and flavor. Using seasonal produce gives your salad a fresh taste and bright colors. To make your Sunshine Salad more filling, add some protein. Grilled chicken is a great choice. It pairs well with the salad's tangy flavors. Shrimp also works nicely, adding a touch of the sea. If you prefer a plant-based option, add chickpeas. They are rich in protein and fiber. These additions make your salad hearty and satisfying. While the basic dressing is tasty, you can try other options. A citrus vinaigrette can add a zesty kick. Just mix orange juice, olive oil, and a bit of honey. A creamy dressing like ranch or tahini also goes well. Each dressing will change the flavor, keeping it fresh and fun. Feel free to explore these variations to make the Sunshine Salad your own! For the complete recipe, check out the Full Recipe. To keep your Sunshine Salad fresh, store it in an airtight container. This container should be placed in the fridge. Use the salad within two days for the best taste. Keep the dressing separate until you are ready to eat. This helps prevent sogginess. If you notice any wilting, remove those greens before storing. Prep your ingredients in advance to save time. Wash and chop the mixed greens, tomatoes, and cucumbers. You can store these in separate containers. Dice the avocado and orange just before serving to keep them fresh. Crumble the feta cheese and store it in its own container. This makes it easy to assemble your salad quickly. When you're ready to serve the salad, check its freshness. If the greens look a bit wilted, give them a quick rinse in cold water. This can help revive them. Toss everything together and add the dressing just before serving. This keeps the salad crisp and bright. Enjoy the fresh taste of your Sunshine Salad! Sunshine Salad is a bright, tasty dish full of fresh flavors. It has mixed greens like arugula, spinach, and romaine as a base. You’ll find juicy cherry tomatoes, crisp cucumber, and creamy avocado in each bite. Orange segments add a sweet touch, while red onion adds a nice crunch. Crumbled feta cheese gives it a salty flavor, and sunflower seeds add a satisfying crunch. This salad bursts with colors and flavors, making it a feast for your eyes and taste buds. To make Sunshine Salad for a crowd, simply multiply each ingredient. If you need to serve 8 people, double the amounts. Use 4 cups of mixed greens and 2 cups each of tomatoes and cucumber. For other ingredients, just keep scaling up. A large bowl works best for mixing, so you have plenty of room to toss everything together. Remember, it’s all about keeping the ratios the same for that perfect balance. Yes, you can prepare Sunshine Salad ahead of time! To keep it fresh, store the dressing separately. Mix all the salad ingredients, but don’t add the dressing until you are ready to serve. This way, the greens stay crisp, and the flavors stay bright. You can prepare the salad a few hours in advance. Just cover it tightly in the fridge until serving time. Sunshine Salad is packed with nutrients. Mixed greens are rich in vitamins A and K. Cherry tomatoes are full of antioxidants. Cucumber keeps you hydrated and adds fiber. Avocado provides healthy fats that are good for your heart. Oranges bring vitamin C for a strong immune system. Feta cheese adds protein, and sunflower seeds offer vitamin E. This salad not only tastes good but also fuels your body with essential nutrients. This post covered how to make a vibrant Sunshine Salad. We explored fresh produce, tasty dressings, and smart tips for serving. Remember, you can change ingredients and adapt flavors to fit your taste. Storing leftovers properly helps keep your salad fresh. Finally, enjoy the health benefits that come with each colorful bite. Now, you can make this salad a regular part of your meals!](https://grilledflavors.com/wp-content/uploads/2025/06/e69705c5-c84d-4d11-993e-2bc231d5e708.webp)
Sunshine Salad Fresh and Flavorful Meal Idea
Are you ready to brighten up your meal rotation? The Sunshine Salad is a fresh, vibrant dish packed with colors and flavors. With crisp greens,
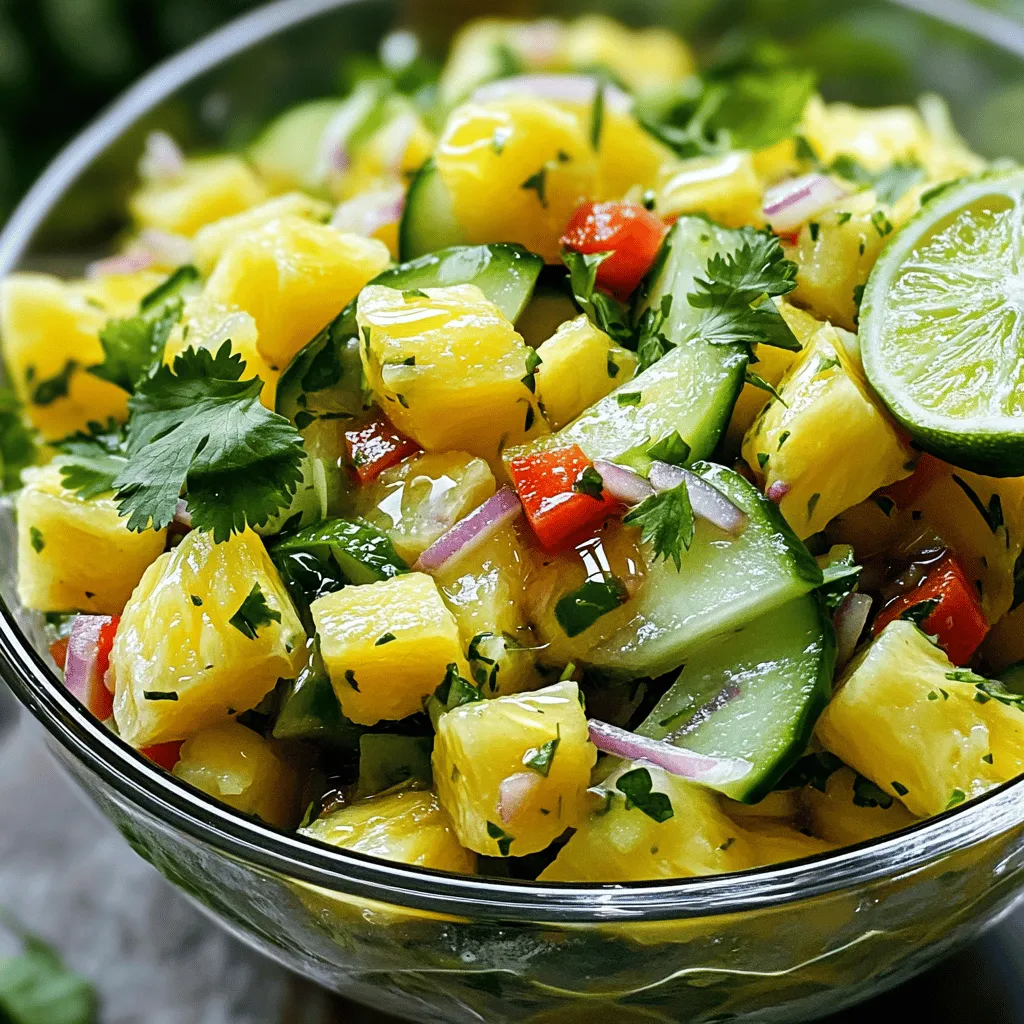
Pineapple Cucumber Salad Fresh and Flavorful Treat
Looking for a refreshing salad that’s both sweet and savory? My Pineapple Cucumber Salad is a bright, tasty treat you’ll love. With vibrant ingredients like
. This blog post covered how to make a delicious fruit salad. We looked at fresh fruits, sweeteners, and garnishes. I shared steps for preparation and mixing, plus serving tips. We explored variations for seasons and dietary needs, and discussed storage best practices. In the end, it’s simple to create a vibrant salad. Using fresh ingredients creates a tasty and healthy dish for any meal. So, gather your fruits, and enjoy making your own unique creation!](https://grilledflavors.com/wp-content/uploads/2025/05/8a41ca65-9849-4edd-a09c-41f031129534.webp)
Peach Berry Fruit Salad Flavorful and Refreshing Treat
Looking for a tasty and healthy snack? Try my Peach Berry Fruit Salad! This vibrant blend of juicy peaches and fresh berries is a treat
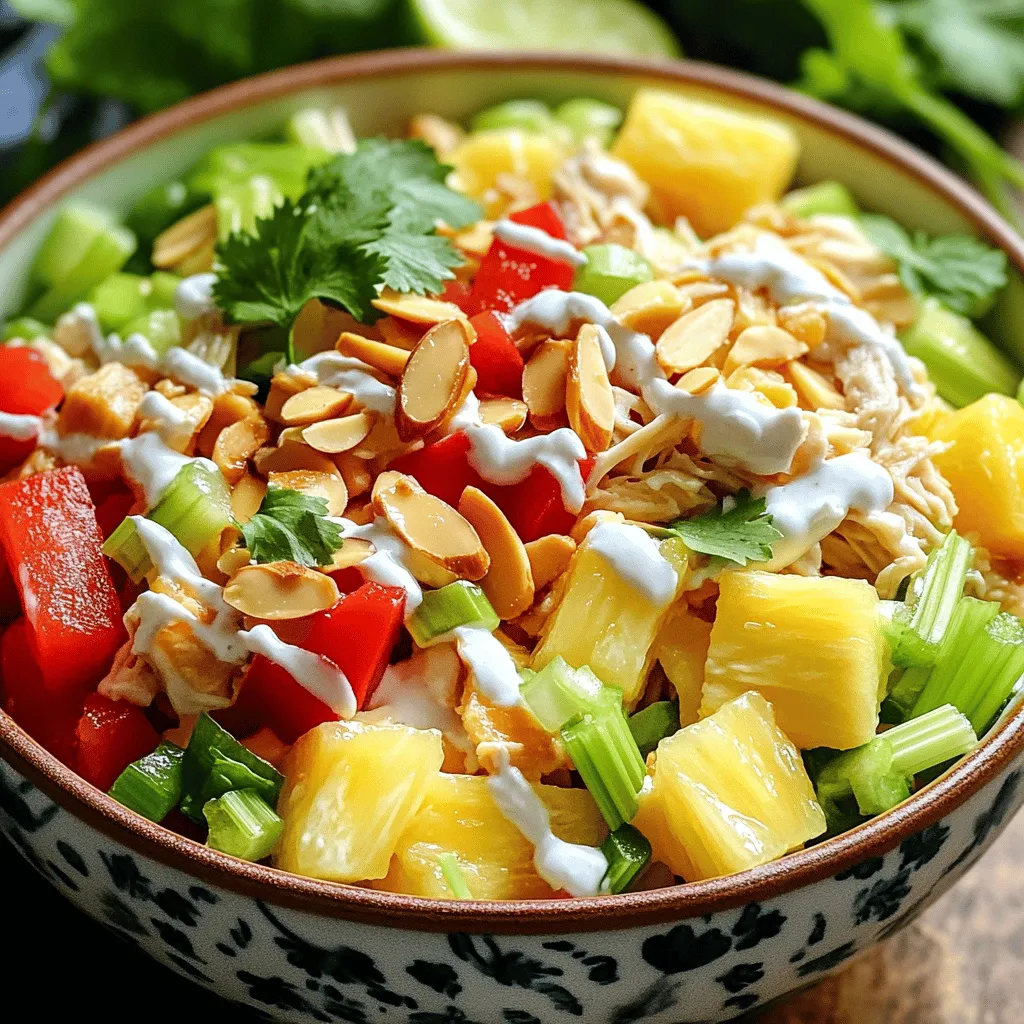
Savory Hawaiian Chicken Salad Simple and Delicious Dish
Looking for a fresh and tasty meal? My Savory Hawaiian Chicken Salad is simple and delicious! This dish brings a taste of the islands to