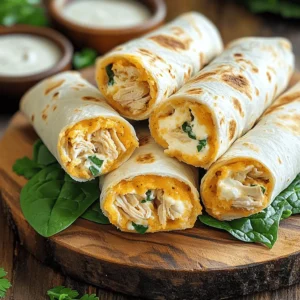
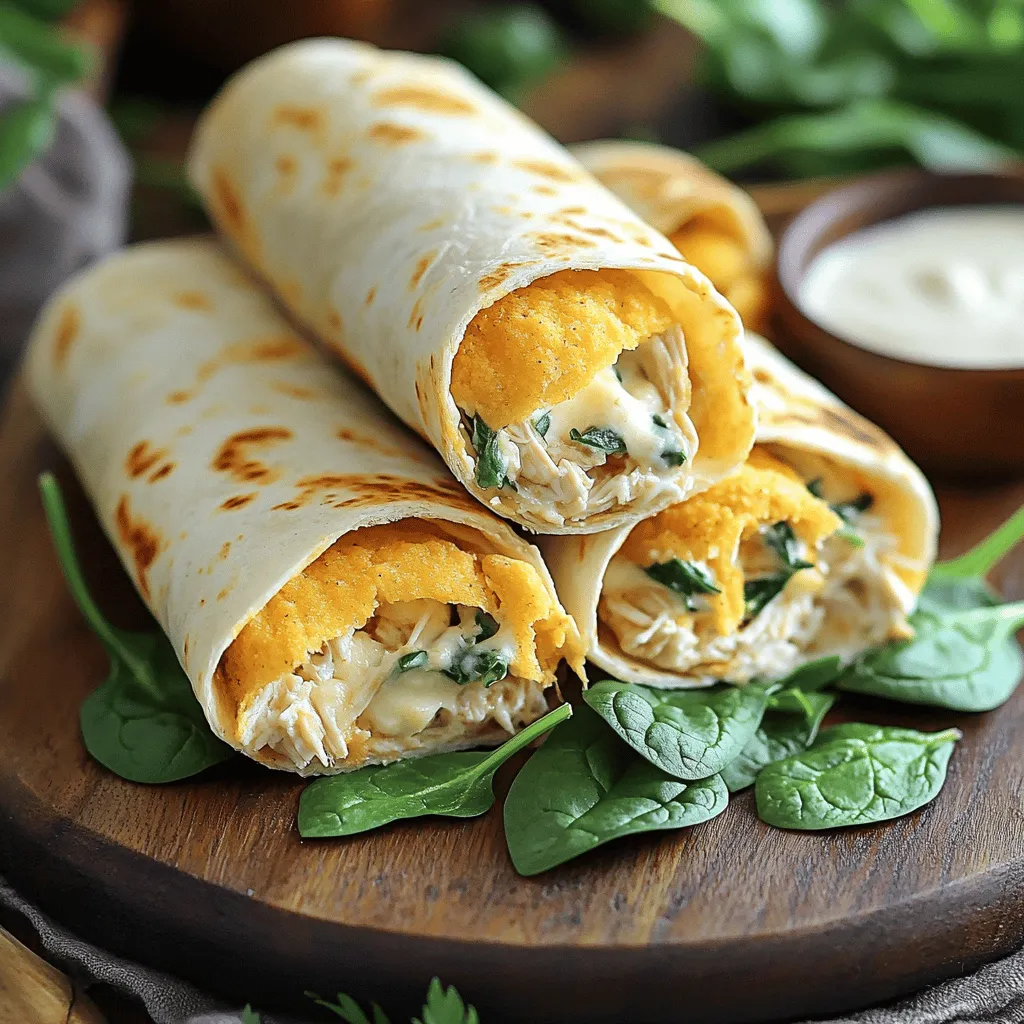
Looking for a quick and tasty meal that the whole family will love? My Cheesy Garlic Chicken Wraps are the perfect solution! Packed with flavor and easy to make, these wraps come together in no time. Whether you’re feeding picky eaters or hosting a gathering, everyone will enjoy these delicious bites. Let’s dive into the ingredients and steps you’ll need to create this mouthwatering dish!
Ingredients
List of Required Ingredients
To make cheesy garlic chicken wraps, gather these ingredients:
– 2 cups cooked chicken, shredded
– 1 cup shredded mozzarella cheese
– 1/2 cup cream cheese, softened
– 3 cloves garlic, minced
– 1 tablespoon olive oil
– 1/2 teaspoon garlic powder
– 1/2 teaspoon paprika
– 4 large flour tortillas
– 1 cup fresh spinach leaves
– Salt and pepper to taste
Optional Ingredients for Extra Flavor
You can add these ingredients for a twist:
– Chopped green onions for a fresh crunch
– Sliced jalapeños for some heat
– Diced bell peppers for sweetness
– A sprinkle of Italian herbs for extra aroma
Kitchen Tools Needed
Here’s what you will need to make these wraps:
– Large mixing bowl
– Non-stick skillet
– Spatula or tongs
– Measuring cups and spoons
– Knife and cutting board
These tools will help you create tasty wraps with ease. Check out the Full Recipe for more details on preparation and cooking!
Step-by-Step Instructions
Preparation of the Chicken Mixture
Start with a large mixing bowl. You will mix the main filling here. Add 2 cups of shredded chicken. Next, include 1 cup of shredded mozzarella cheese. This cheese gives a nice stretch. Then, add 1/2 cup of softened cream cheese. Cream cheese adds creaminess. Now, include 3 cloves of minced garlic for that strong flavor. Drizzle in 1 tablespoon of olive oil to keep it moist. Sprinkle in 1/2 teaspoon of garlic powder and 1/2 teaspoon of paprika for extra taste. Don’t forget to add salt and pepper to your liking. Mix it all together until smooth and combined. This cheesy chicken mixture is the heart of your wrap.
Assembling the Wraps
Now, lay a large tortilla flat on a clean surface. Place a handful of fresh spinach leaves in the center. The spinach adds color and freshness. Spoon a generous amount of the cheesy chicken mixture on top of the spinach. Make sure it’s a good scoop! Next, fold the sides of the tortilla in. This keeps all the tasty filling inside. Roll the tortilla tightly from the bottom to the top. Repeat this step with the other tortillas and the rest of the filling. Each wrap should be full and secure.
Cooking the Wraps to Perfection
Preheat a non-stick skillet over medium heat. This step is key for a crispy wrap. Once hot, place the wraps seam-side down in the skillet. Cook for about 3-4 minutes on one side. You want them golden brown. Then, flip and cook the other side for the same time. Both sides should be crispy and warm. After cooking, remove the wraps from the skillet. Let them cool for a moment. Then, slice each wrap in half diagonally. The melted cheese will ooze out, making it look delicious. Serve them warm and enjoy! For the full recipe, check out the details above.
Tips & Tricks
How to Achieve the Perfect Crunch
To get that perfect crunch, heat your skillet well before cooking. A non-stick skillet works best. Make sure you use medium heat. This allows the wraps to brown without burning. Cook each side for about 3-4 minutes. Look for a golden brown color. If you want extra crunch, brush the wraps lightly with olive oil before cooking. This adds flavor and crispiness.
Best Serving Suggestions
Serve these cheesy garlic chicken wraps warm for the best taste. Slice them in half to show off the filling. Arrange them on a nice platter. A sprinkle of fresh parsley makes them look great. You can also add dips like ranch or garlic sauce on the side. These dips enhance the wrap’s flavor and make it even more fun to eat.
Pairing Ideas for Side Dishes
Pair your wraps with simple sides to make a full meal. A fresh salad with mixed greens works well. You can also serve them with crunchy carrot sticks or sliced cucumbers. For something warm, try oven-baked fries or sweet potato wedges. These sides complement the cheesy garlic chicken wraps perfectly. Plus, they add more color and texture to your plate.
Variations
Vegetarian Version of Cheesy Garlic Wraps
You can make a tasty vegetarian version of these wraps. Start by swapping out the chicken for 2 cups of cooked mushrooms or lentils. Mushrooms add a nice umami flavor. Lentils are packed with protein. Use the same cheese and garlic mix. The fresh spinach adds a crisp texture. These wraps stay just as cheesy and delicious. You can enjoy them without any meat.
Spicy Cheesy Garlic Chicken Wraps
If you like some heat, try spicy cheesy garlic chicken wraps. Add 1 teaspoon of red pepper flakes to the chicken mixture. You can also mix in some diced jalapeños. This adds great flavor and a kick. Use pepper jack cheese instead of mozzarella for extra spice. Serve with a cooling dip like ranch or sour cream. This combo balances the heat and keeps it tasty.
Low-Carb Alternative Wrap Options
For a low-carb option, use lettuce leaves instead of tortillas. Romaine or butter lettuce works well. Simply place the cheesy chicken mix in the center of the leaf. Wrap it like a burrito. This keeps the wrap light and fresh. You can still enjoy all the flavors without the added carbs. It’s a great choice for those watching their carb intake.
For the full recipe, check out the details above.
Storage Info
How to Store Leftover Wraps
To store leftover cheesy garlic chicken wraps, let them cool first. Once cool, wrap each one in plastic wrap or foil. This keeps them fresh. Place the wrapped wraps in an airtight container. Store them in the fridge for up to three days. If you want to eat them later, freezing is a great option.
Reheating Instructions for Best Results
When you’re ready to enjoy your wraps again, I suggest reheating them in a skillet. Heat a non-stick skillet over medium heat. Place the wraps seam-side down in the skillet. Cook for about 3-4 minutes on each side. This restores their crispiness and warms them through. You can also use a microwave if you’re short on time. Just heat them for 30 seconds to 1 minute. However, the skillet gives the best texture.
Freezing Tips for Meal Prep
Freezing wraps is easy and smart for meal prep. After you make the wraps, let them cool completely. Then, wrap each wrap in plastic wrap. Place them in a freezer-safe bag or container. Label them with the date. You can freeze them for up to three months. When you’re ready to eat, thaw in the fridge overnight. Then, reheat them in a skillet for the best taste. If you want, you can check out the Full Recipe for more tips.
FAQs
Can I use different types of cheese?
Yes, you can! Feel free to mix and match cheeses. Cheddar and pepper jack add a nice kick. You could also try gouda for a smoky flavor. The key is to use cheese that melts well. This way, your wraps will stay gooey and delicious.
How can I make these wraps ahead of time?
You can prepare the chicken mixture a day before. Just store it in the fridge. When you are ready, assemble the wraps. You can also roll them up and keep them wrapped in plastic. Just cook them right before serving. This keeps them fresh and warm.
What is the nutritional information for Cheesy Garlic Chicken Wraps?
Each wrap has about 400 calories. It contains protein from the chicken and cheese. You also get vitamins from the spinach. The wraps have about 20 grams of fat and 30 grams of carbs. For exact numbers, check the Full Recipe. Nutrition can vary based on the ingredients you choose.
You learned how to make cheesy garlic wraps with simple steps and ingredients. We discussed flavors, cooking tips, and storage ideas. I shared variations like spicy and vegetarian options for everyone.
Now, you can enjoy tasty wraps that fit your taste and needs. These wraps are easy to make and fun to eat. Try them out and share with friends! Enjoy your cooking adventure!