![- 200g digestive biscuits, crushed - 100g unsalted butter, melted - 600g cream cheese, softened - 200g powdered sugar - 300ml heavy cream, whipped - 2 teaspoons vanilla extract - 100g honeycomb, crushed - 50g dark chocolate, grated (optional for garnish) To make a Crunchy Honeycomb Cheesecake, you need simple yet tasty ingredients. First, the base starts with crushed digestive biscuits. These give the cheesecake a nice crunch and buttery flavor. Next, you use unsalted butter to hold the crust together. For the filling, cream cheese is key. It makes the cheesecake creamy and rich. Powdered sugar adds sweetness, while heavy cream gives it a light texture. Vanilla extract boosts the flavor, making it even better. Honeycomb, the star of this dessert, adds a delightful crunch and sweetness. You can also use dark chocolate as a garnish. It adds a nice touch of bitterness, balancing the sweetness. Gather these ingredients and you're ready to create a delightful dessert! For the full recipe, check out the detailed instructions. 1. Combine crushed biscuits with melted butter. Take your crushed digestive biscuits and mix them well with the melted butter in a bowl. This mixture will form the base of your cheesecake. 2. Firmly press mixture into springform pan. Use your hands or a flat object to press the biscuit mix into the bottom of a 9-inch springform pan. Ensure it is compact so that it holds its shape. 3. Refrigerate to set crust. Place the pan in the fridge for about 30 minutes. This helps the crust to firm up and makes it easier to add the filling later. 1. Beat cream cheese until smooth. In a separate bowl, use an electric mixer to beat the softened cream cheese. Mix it until it becomes creamy and smooth. 2. Gradually add powdered sugar and mix. Slowly add the powdered sugar to the cream cheese. Continue mixing until everything is well combined and fluffy. 3. Fold in whipped cream and vanilla extract. Carefully add the whipped heavy cream and vanilla extract to the cream cheese mixture. Gently fold them in to keep the mixture light and airy. 1. Fold in crushed honeycomb. Gently mix in the crushed honeycomb. Reserve some for topping the cheesecake later. 2. Pour mixture into crust and smooth the top. Carefully pour the cream cheese mix over the set biscuit crust. Use a spatula to smooth the top so it looks nice. 3. Refrigerate until set. Cover the cheesecake with plastic wrap and refrigerate for at least 4 hours or overnight. This helps the cheesecake set properly. For the full recipe, check out the complete instructions. To make a great cheesecake, start by softening the cream cheese. Cold cream cheese can make your mixture lumpy. Let it sit at room temperature for about 30 minutes. This makes mixing easier and gives a smooth texture. When you mix the cream cheese with sugar, use a gentle hand. After you add the whipped cream, fold it in slowly. This keeps the mixture light and fluffy. Use a spatula to fold, and be careful not to stir too hard. You want air in your cheesecake for that perfect bite. Presentation is key for any dessert. Serve your cheesecake on chilled plates for a nice touch. Drizzle some honey over each slice. Add extra honeycomb pieces around the plate for a fun look. For toppings, think about using fresh berries or a scoop of vanilla ice cream. The sweet and creamy flavors pair well. A sprinkle of grated dark chocolate adds a rich finish. These ideas will make your cheesecake shine at any gathering. For the full recipe, check out the [Full Recipe]. {{image_2}} You can switch up the flavor of your Crunchy Honeycomb Cheesecake in exciting ways. - Adding fruit or chocolate flavors: Try mixing in fresh fruit like strawberries or raspberries. These fruits add a sweet and tart taste that pairs well with the creamy filling. You can also stir in cocoa powder or melted chocolate for a rich chocolate cheesecake. This adds depth and a fun twist to the classic flavor. - Swapping honeycomb for other crunchy toppings: If you want a different crunch, consider using crushed cookies or nuts. Crushed pretzels can add a salty touch, while toasted almonds or hazelnuts bring a great nutty flavor. Feel free to experiment with various toppings to find your perfect match. Adjusting your cheesecake recipe for various occasions is easy. - Scaling the recipe for different occasions: If you need to serve a crowd, simply double the ingredients. Use a larger springform pan to hold the extra batter. For smaller gatherings, halve the recipe and use a smaller pan. This way, you get the right amount for any event. - Tips on portioning and serving: When it's time to serve, use a hot knife to cut through the cheesecake. This helps get clean slices. If you want smaller portions, cut the cheesecake into bite-sized squares. This makes it perfect for parties or gatherings. Enjoy the fun of sharing this delightful dessert! To keep your Crunchy Honeycomb Cheesecake fresh, refrigerate leftovers. Place slices in an airtight container. This will help maintain its creamy texture. You can also cover the cheesecake with plastic wrap. This prevents it from absorbing other odors in the fridge. If you want longer-lasting cheesecake, freezing is a good option. Wrap the cheesecake tightly in plastic wrap. Then, wrap it again in aluminum foil. This double layer protects it from freezer burn. When you want to enjoy it again, thaw in the fridge overnight. The shelf life of your cheesecake depends on how you store it. When refrigerated, it stays fresh for about 4 to 5 days. If you have leftovers, try to eat them within this time. If you freeze it, the cheesecake can last up to 2 months. However, for the best taste and texture, I recommend eating it sooner. Always check for any signs of spoilage before enjoying your cheesecake. Honeycomb is a sweet treat made by bees. It has a crunchy texture and a rich flavor. You can find honeycomb in specialty food stores or online. Some local farmers’ markets also sell it. If you can’t find it, you can use crushed honeycomb candy instead. It gives a similar taste and texture. Yes, you can make this cheesecake in advance. It tastes even better after it sits in the fridge. I suggest making it a day ahead. Simply follow the full recipe and store it in the fridge. Cover it well with plastic wrap. This keeps it fresh and prevents any odors from other foods. Absolutely! If you need a gluten-free option, use gluten-free biscuits for the crust. For a vegan version, replace cream cheese with dairy-free cream cheese. Use coconut cream instead of heavy cream. You can also use maple syrup instead of powdered sugar for sweetness. These swaps still give you a tasty cheesecake! This blog post covered the key steps to making a tasty cheesecake. You learned about ingredients, from digestive biscuits to honeycomb, and how to create a smooth filling. I shared helpful tips to perfect the texture and ideas for serving. You can even explore variations for different tastes. Don’t forget about proper storage to keep your cheesecake fresh. Now you have the tools to create a delicious dessert at home. Have fun baking and enjoy sharing your great creations!](https://grilledflavors.com/wp-content/uploads/2025/05/1a48e007-b290-4693-946b-6f99d2f0cdbe.webp)
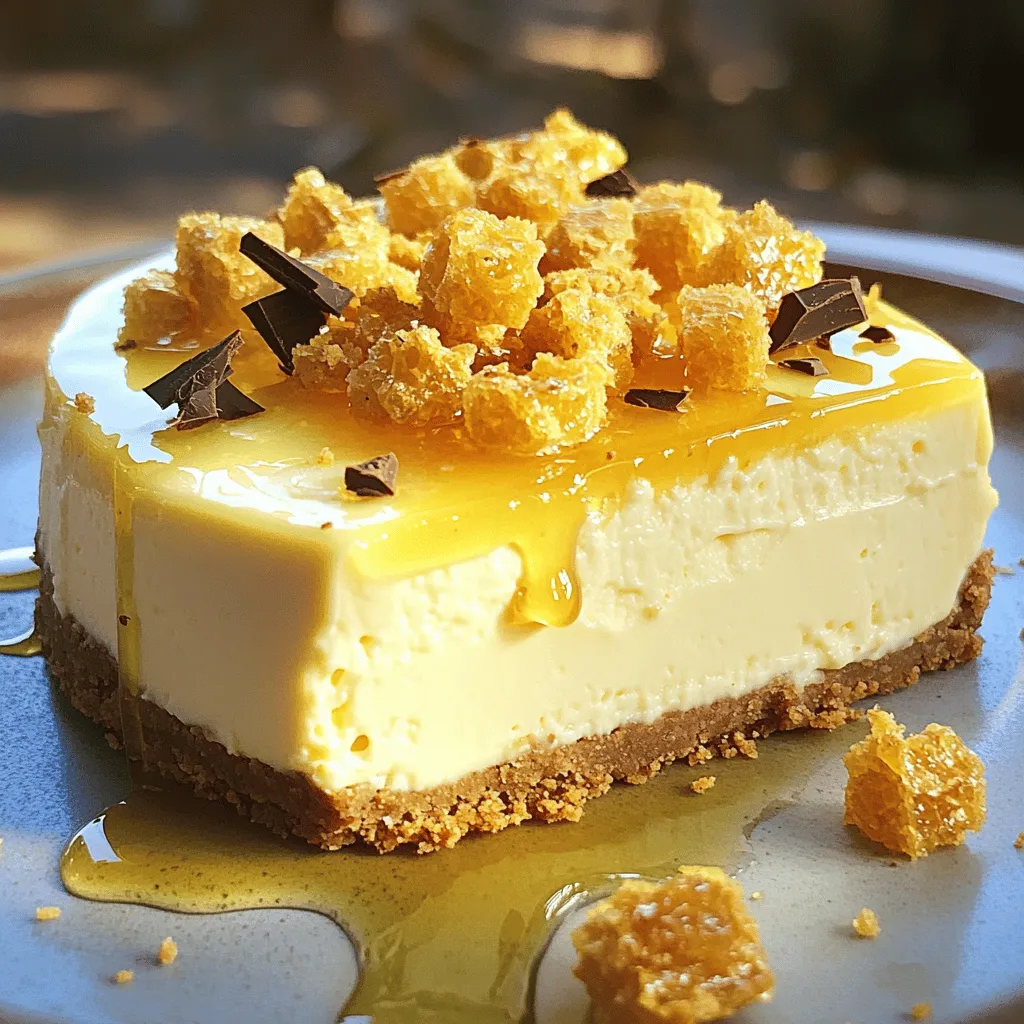
Are you ready to indulge in a dessert that will wow your friends and family? This Crunchy Honeycomb Cheesecake is the perfect mix of creamy and crunchy. With simple ingredients like cream cheese, honeycomb, and digestive biscuits, you can create a treat that tastes gourmet. Follow my easy steps to make this delightful dessert that’s sure to impress. Let’s dive in and get started on your new favorite cheesecake!
Ingredients
List of Ingredients
– 200g digestive biscuits, crushed
– 100g unsalted butter, melted
– 600g cream cheese, softened
– 200g powdered sugar
– 300ml heavy cream, whipped
– 2 teaspoons vanilla extract
– 100g honeycomb, crushed
– 50g dark chocolate, grated (optional for garnish)
To make a Crunchy Honeycomb Cheesecake, you need simple yet tasty ingredients. First, the base starts with crushed digestive biscuits. These give the cheesecake a nice crunch and buttery flavor. Next, you use unsalted butter to hold the crust together.
For the filling, cream cheese is key. It makes the cheesecake creamy and rich. Powdered sugar adds sweetness, while heavy cream gives it a light texture. Vanilla extract boosts the flavor, making it even better.
Honeycomb, the star of this dessert, adds a delightful crunch and sweetness. You can also use dark chocolate as a garnish. It adds a nice touch of bitterness, balancing the sweetness.
Gather these ingredients and you’re ready to create a delightful dessert! For the full recipe, check out the detailed instructions.
Step-by-Step Instructions
Preparing the Biscuit Crust
1. Combine crushed biscuits with melted butter. Take your crushed digestive biscuits and mix them well with the melted butter in a bowl. This mixture will form the base of your cheesecake.
2. Firmly press mixture into springform pan. Use your hands or a flat object to press the biscuit mix into the bottom of a 9-inch springform pan. Ensure it is compact so that it holds its shape.
3. Refrigerate to set crust. Place the pan in the fridge for about 30 minutes. This helps the crust to firm up and makes it easier to add the filling later.
Making the Cream Cheese Mixture
1. Beat cream cheese until smooth. In a separate bowl, use an electric mixer to beat the softened cream cheese. Mix it until it becomes creamy and smooth.
2. Gradually add powdered sugar and mix. Slowly add the powdered sugar to the cream cheese. Continue mixing until everything is well combined and fluffy.
3. Fold in whipped cream and vanilla extract. Carefully add the whipped heavy cream and vanilla extract to the cream cheese mixture. Gently fold them in to keep the mixture light and airy.
Assembling the Cheesecake
1. Fold in crushed honeycomb. Gently mix in the crushed honeycomb. Reserve some for topping the cheesecake later.
2. Pour mixture into crust and smooth the top. Carefully pour the cream cheese mix over the set biscuit crust. Use a spatula to smooth the top so it looks nice.
3. Refrigerate until set. Cover the cheesecake with plastic wrap and refrigerate for at least 4 hours or overnight. This helps the cheesecake set properly.
For the full recipe, check out the complete instructions.
Tips & Tricks
Perfecting the Cheesecake Texture
To make a great cheesecake, start by softening the cream cheese. Cold cream cheese can make your mixture lumpy. Let it sit at room temperature for about 30 minutes. This makes mixing easier and gives a smooth texture.
When you mix the cream cheese with sugar, use a gentle hand. After you add the whipped cream, fold it in slowly. This keeps the mixture light and fluffy. Use a spatula to fold, and be careful not to stir too hard. You want air in your cheesecake for that perfect bite.
Serving Suggestions
Presentation is key for any dessert. Serve your cheesecake on chilled plates for a nice touch. Drizzle some honey over each slice. Add extra honeycomb pieces around the plate for a fun look.
For toppings, think about using fresh berries or a scoop of vanilla ice cream. The sweet and creamy flavors pair well. A sprinkle of grated dark chocolate adds a rich finish. These ideas will make your cheesecake shine at any gathering.
For the full recipe, check out the [Full Recipe].
Variations
Alternative Flavor Additions
You can switch up the flavor of your Crunchy Honeycomb Cheesecake in exciting ways.
– Adding fruit or chocolate flavors: Try mixing in fresh fruit like strawberries or raspberries. These fruits add a sweet and tart taste that pairs well with the creamy filling. You can also stir in cocoa powder or melted chocolate for a rich chocolate cheesecake. This adds depth and a fun twist to the classic flavor.
– Swapping honeycomb for other crunchy toppings: If you want a different crunch, consider using crushed cookies or nuts. Crushed pretzels can add a salty touch, while toasted almonds or hazelnuts bring a great nutty flavor. Feel free to experiment with various toppings to find your perfect match.
Serving Size Adjustments
Adjusting your cheesecake recipe for various occasions is easy.
– Scaling the recipe for different occasions: If you need to serve a crowd, simply double the ingredients. Use a larger springform pan to hold the extra batter. For smaller gatherings, halve the recipe and use a smaller pan. This way, you get the right amount for any event.
– Tips on portioning and serving: When it’s time to serve, use a hot knife to cut through the cheesecake. This helps get clean slices. If you want smaller portions, cut the cheesecake into bite-sized squares. This makes it perfect for parties or gatherings. Enjoy the fun of sharing this delightful dessert!
Storage Info
Proper Storage Techniques
To keep your Crunchy Honeycomb Cheesecake fresh, refrigerate leftovers. Place slices in an airtight container. This will help maintain its creamy texture. You can also cover the cheesecake with plastic wrap. This prevents it from absorbing other odors in the fridge.
If you want longer-lasting cheesecake, freezing is a good option. Wrap the cheesecake tightly in plastic wrap. Then, wrap it again in aluminum foil. This double layer protects it from freezer burn. When you want to enjoy it again, thaw in the fridge overnight.
Shelf Life of Cheesecake
The shelf life of your cheesecake depends on how you store it. When refrigerated, it stays fresh for about 4 to 5 days. If you have leftovers, try to eat them within this time.
If you freeze it, the cheesecake can last up to 2 months. However, for the best taste and texture, I recommend eating it sooner. Always check for any signs of spoilage before enjoying your cheesecake.
FAQs
What is honeycomb and where can I find it?
Honeycomb is a sweet treat made by bees. It has a crunchy texture and a rich flavor. You can find honeycomb in specialty food stores or online. Some local farmers’ markets also sell it. If you can’t find it, you can use crushed honeycomb candy instead. It gives a similar taste and texture.
Can I make this cheesecake ahead of time?
Yes, you can make this cheesecake in advance. It tastes even better after it sits in the fridge. I suggest making it a day ahead. Simply follow the full recipe and store it in the fridge. Cover it well with plastic wrap. This keeps it fresh and prevents any odors from other foods.
Is it possible to substitute ingredients for dietary needs?
Absolutely! If you need a gluten-free option, use gluten-free biscuits for the crust. For a vegan version, replace cream cheese with dairy-free cream cheese. Use coconut cream instead of heavy cream. You can also use maple syrup instead of powdered sugar for sweetness. These swaps still give you a tasty cheesecake!
This blog post covered the key steps to making a tasty cheesecake. You learned about ingredients, from digestive biscuits to honeycomb, and how to create a smooth filling. I shared helpful tips to perfect the texture and ideas for serving. You can even explore variations for different tastes. Don’t forget about proper storage to keep your cheesecake fresh. Now you have the tools to create a delicious dessert at home. Have fun baking and enjoy sharing your great creations!
![- 200g digestive biscuits, crushed - 100g unsalted butter, melted - 600g cream cheese, softened - 200g powdered sugar - 300ml heavy cream, whipped - 2 teaspoons vanilla extract - 100g honeycomb, crushed - 50g dark chocolate, grated (optional for garnish) To make a Crunchy Honeycomb Cheesecake, you need simple yet tasty ingredients. First, the base starts with crushed digestive biscuits. These give the cheesecake a nice crunch and buttery flavor. Next, you use unsalted butter to hold the crust together. For the filling, cream cheese is key. It makes the cheesecake creamy and rich. Powdered sugar adds sweetness, while heavy cream gives it a light texture. Vanilla extract boosts the flavor, making it even better. Honeycomb, the star of this dessert, adds a delightful crunch and sweetness. You can also use dark chocolate as a garnish. It adds a nice touch of bitterness, balancing the sweetness. Gather these ingredients and you're ready to create a delightful dessert! For the full recipe, check out the detailed instructions. 1. Combine crushed biscuits with melted butter. Take your crushed digestive biscuits and mix them well with the melted butter in a bowl. This mixture will form the base of your cheesecake. 2. Firmly press mixture into springform pan. Use your hands or a flat object to press the biscuit mix into the bottom of a 9-inch springform pan. Ensure it is compact so that it holds its shape. 3. Refrigerate to set crust. Place the pan in the fridge for about 30 minutes. This helps the crust to firm up and makes it easier to add the filling later. 1. Beat cream cheese until smooth. In a separate bowl, use an electric mixer to beat the softened cream cheese. Mix it until it becomes creamy and smooth. 2. Gradually add powdered sugar and mix. Slowly add the powdered sugar to the cream cheese. Continue mixing until everything is well combined and fluffy. 3. Fold in whipped cream and vanilla extract. Carefully add the whipped heavy cream and vanilla extract to the cream cheese mixture. Gently fold them in to keep the mixture light and airy. 1. Fold in crushed honeycomb. Gently mix in the crushed honeycomb. Reserve some for topping the cheesecake later. 2. Pour mixture into crust and smooth the top. Carefully pour the cream cheese mix over the set biscuit crust. Use a spatula to smooth the top so it looks nice. 3. Refrigerate until set. Cover the cheesecake with plastic wrap and refrigerate for at least 4 hours or overnight. This helps the cheesecake set properly. For the full recipe, check out the complete instructions. To make a great cheesecake, start by softening the cream cheese. Cold cream cheese can make your mixture lumpy. Let it sit at room temperature for about 30 minutes. This makes mixing easier and gives a smooth texture. When you mix the cream cheese with sugar, use a gentle hand. After you add the whipped cream, fold it in slowly. This keeps the mixture light and fluffy. Use a spatula to fold, and be careful not to stir too hard. You want air in your cheesecake for that perfect bite. Presentation is key for any dessert. Serve your cheesecake on chilled plates for a nice touch. Drizzle some honey over each slice. Add extra honeycomb pieces around the plate for a fun look. For toppings, think about using fresh berries or a scoop of vanilla ice cream. The sweet and creamy flavors pair well. A sprinkle of grated dark chocolate adds a rich finish. These ideas will make your cheesecake shine at any gathering. For the full recipe, check out the [Full Recipe]. {{image_2}} You can switch up the flavor of your Crunchy Honeycomb Cheesecake in exciting ways. - Adding fruit or chocolate flavors: Try mixing in fresh fruit like strawberries or raspberries. These fruits add a sweet and tart taste that pairs well with the creamy filling. You can also stir in cocoa powder or melted chocolate for a rich chocolate cheesecake. This adds depth and a fun twist to the classic flavor. - Swapping honeycomb for other crunchy toppings: If you want a different crunch, consider using crushed cookies or nuts. Crushed pretzels can add a salty touch, while toasted almonds or hazelnuts bring a great nutty flavor. Feel free to experiment with various toppings to find your perfect match. Adjusting your cheesecake recipe for various occasions is easy. - Scaling the recipe for different occasions: If you need to serve a crowd, simply double the ingredients. Use a larger springform pan to hold the extra batter. For smaller gatherings, halve the recipe and use a smaller pan. This way, you get the right amount for any event. - Tips on portioning and serving: When it's time to serve, use a hot knife to cut through the cheesecake. This helps get clean slices. If you want smaller portions, cut the cheesecake into bite-sized squares. This makes it perfect for parties or gatherings. Enjoy the fun of sharing this delightful dessert! To keep your Crunchy Honeycomb Cheesecake fresh, refrigerate leftovers. Place slices in an airtight container. This will help maintain its creamy texture. You can also cover the cheesecake with plastic wrap. This prevents it from absorbing other odors in the fridge. If you want longer-lasting cheesecake, freezing is a good option. Wrap the cheesecake tightly in plastic wrap. Then, wrap it again in aluminum foil. This double layer protects it from freezer burn. When you want to enjoy it again, thaw in the fridge overnight. The shelf life of your cheesecake depends on how you store it. When refrigerated, it stays fresh for about 4 to 5 days. If you have leftovers, try to eat them within this time. If you freeze it, the cheesecake can last up to 2 months. However, for the best taste and texture, I recommend eating it sooner. Always check for any signs of spoilage before enjoying your cheesecake. Honeycomb is a sweet treat made by bees. It has a crunchy texture and a rich flavor. You can find honeycomb in specialty food stores or online. Some local farmers’ markets also sell it. If you can’t find it, you can use crushed honeycomb candy instead. It gives a similar taste and texture. Yes, you can make this cheesecake in advance. It tastes even better after it sits in the fridge. I suggest making it a day ahead. Simply follow the full recipe and store it in the fridge. Cover it well with plastic wrap. This keeps it fresh and prevents any odors from other foods. Absolutely! If you need a gluten-free option, use gluten-free biscuits for the crust. For a vegan version, replace cream cheese with dairy-free cream cheese. Use coconut cream instead of heavy cream. You can also use maple syrup instead of powdered sugar for sweetness. These swaps still give you a tasty cheesecake! This blog post covered the key steps to making a tasty cheesecake. You learned about ingredients, from digestive biscuits to honeycomb, and how to create a smooth filling. I shared helpful tips to perfect the texture and ideas for serving. You can even explore variations for different tastes. Don’t forget about proper storage to keep your cheesecake fresh. Now you have the tools to create a delicious dessert at home. Have fun baking and enjoy sharing your great creations!](https://grilledflavors.com/wp-content/uploads/2025/05/1a48e007-b290-4693-946b-6f99d2f0cdbe-300x300.webp)