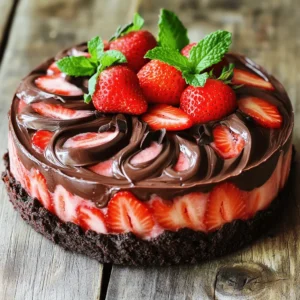
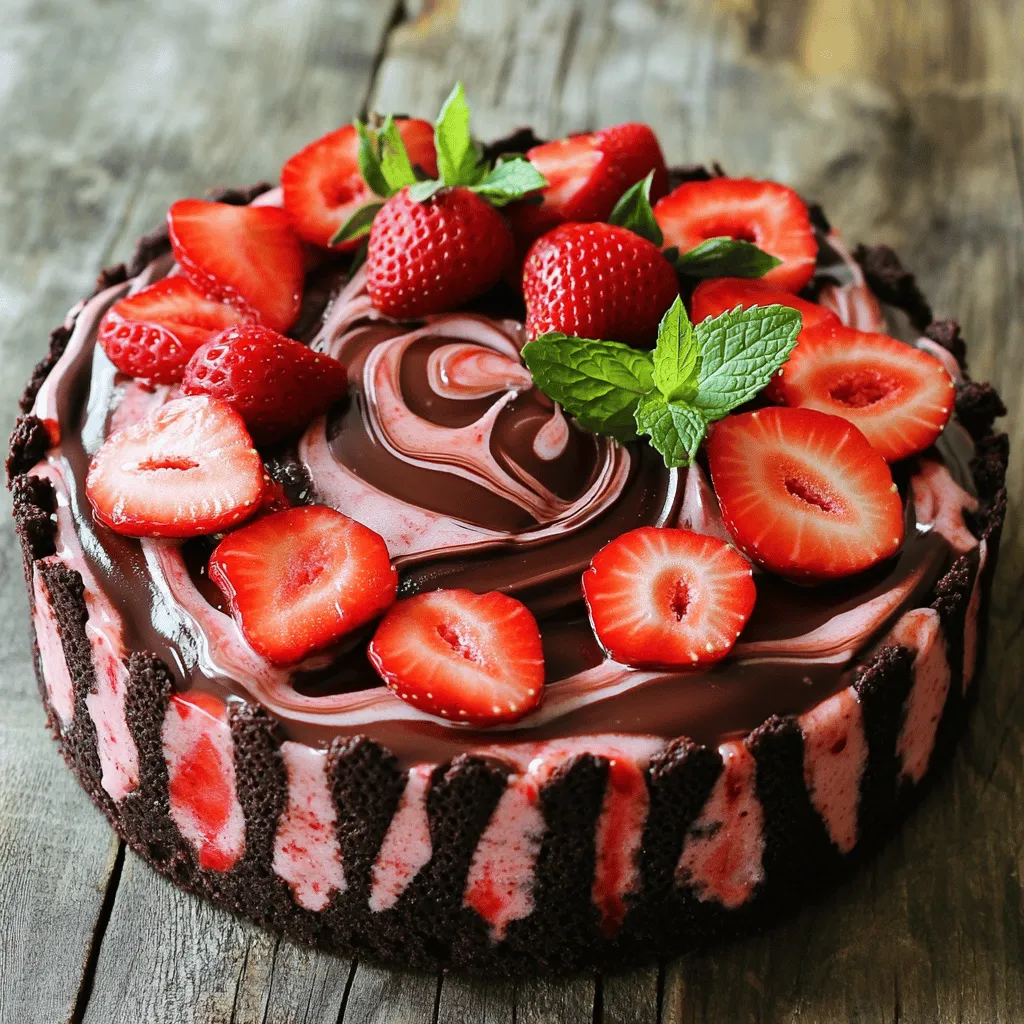
Get ready to enjoy a sweet treat! My Frozen Chocolate Strawberry Cake is a delightful dessert that’s perfect for any occasion. With a crunchy chocolate crust, creamy strawberry filling, and rich chocolate ganache, this cake will impress your family and friends. You don’t need to be a pro baker to whip it up. Follow my easy steps, and soon you’ll have a show-stopping dessert that’s as tasty as it is beautiful!
Ingredients
Complete List of Ingredients
– 1 cup chocolate wafer cookies, crushed
– 4 tablespoons unsalted butter, melted
– 2 cups fresh strawberries, hulled and halved
– 2 cups heavy cream
– 1 cup powdered sugar
– 1 teaspoon vanilla extract
– 1/2 cup chocolate ganache
– Optional: Fresh mint leaves for garnish
To make the Frozen Chocolate Strawberry Cake, you need simple ingredients. First, gather chocolate wafer cookies. These make a crunchy crust. Next, you’ll need unsalted butter to hold the cookies together. Fresh strawberries add a sweet and juicy touch. Heavy cream is essential for that rich filling. Powdered sugar gives it a sweet kick, while vanilla extract enhances the flavor. Lastly, chocolate ganache adds a decadent layer. If you want, add fresh mint leaves for a pop of color and flavor.
I love using fresh strawberries in this recipe. They taste so much better than frozen ones. The chocolate and strawberry mix is a classic that never fails to impress. Remember, each ingredient plays a role in making this cake special. Be sure to check the Full Recipe for detailed amounts and steps. Enjoy the process and have fun in the kitchen!
Step-by-Step Instructions
Preparing the Crust
To start, combine the crushed chocolate wafer cookies and melted butter in a medium bowl. Mix them well until the cookies are fully coated. This mix will be your base. Next, press the mixture into the bottom of a 9-inch springform pan. A flat bottom of a glass works well for this. After you press it down evenly, place the pan in the freezer for about 15 minutes. This will help the crust firm up nicely.
Making the Strawberry Filling
Now it’s time for the strawberry filling. First, take half of the strawberries and puree them in a blender until smooth. Chop the remaining strawberries into small pieces. Set these aside for mixing later. This mix will give your cake a burst of fresh strawberry flavor.
Preparing the Whipped Cream
For the whipped cream, start by whipping the heavy cream in a large mixing bowl. Whip it until it starts to thicken. Then, gradually add the powdered sugar and vanilla extract while you keep whipping. You want to achieve soft peaks. This means the cream should hold its shape but still be smooth and creamy.
Assembling the Cake
With all parts ready, it’s time to assemble the cake. Gently fold the strawberry puree and chopped strawberries into the whipped cream. Be careful not to over-mix; you want to keep that fluffy texture. Next, remove the crust from the freezer and pour the strawberry filling over it. Smooth the top with a spatula. Drizzle the chocolate ganache over the filling. Use a knife or skewer to swirl the ganache into the filling. This adds a marbled effect that looks great.
Freezing the Cake
After assembly, cover the cake with plastic wrap. Place it in the freezer for at least 4 hours, or overnight if you can wait. This time allows the cake to set properly and makes it easier to serve later.
Serving the Cake
When you’re ready to serve, let the cake sit at room temperature for about 10 minutes. This helps soften it just enough for easy slicing. Carefully release the sides of the springform pan and remove the cake. When slicing, use a warm knife for clean cuts. Garnish with fresh mint leaves and extra halved strawberries for a lovely presentation. Enjoy this delightful treat! Don’t forget to check out the Full Recipe for complete details.
Tips & Tricks
Tips for Perfect Texture
To get the right whipped cream, start with cold heavy cream. Whip it until you see soft peaks. This means the cream holds its shape but still has a nice, fluffy look. It’s key not to over-whip. If you do, it can turn grainy and lose its lightness.
When mixing in the strawberry puree, folding is best. This keeps the air in the whipped cream. Mixing can deflate it, making your cake heavy. Gently fold in the puree and chopped strawberries to keep that fluffy texture.
Garnishing Ideas
For a beautiful finish, use fresh mint leaves. Place them on top of the cake in a way that looks natural. Just a few leaves can brighten the look. You can also try nuts or chocolate shavings. These add a nice crunch and extra flavor to each bite.
Ideal Serving Temperature
Before serving, let the cake sit out for about ten minutes. This helps soften it slightly, making it easier to cut. Use a warm knife to slice through the frozen cake. This way, you get clean cuts without breaking the layers apart. Enjoy each slice and celebrate the flavors!
Variations
Dietary Adjustments
You can easily make this cake fit different diets. For a gluten-free crust, swap chocolate wafer cookies for gluten-free ones. Look for brands that use almond or rice flour. This change keeps the cake tasty without gluten.
If you need a dairy-free option, try coconut cream instead of heavy cream. It whips up nicely and adds a hint of coconut flavor. For ganache, use dairy-free chocolate. Just melt it with a splash of coconut milk for a rich taste.
Flavor Swaps
This cake is not just for strawberries. You can use other fruits too. Raspberries add a tart punch, while blueberries bring a sweet note. Simply blend or chop them as you would the strawberries for a fun twist.
For the ganache, experiment with different types of chocolate. Dark chocolate gives a deep flavor, while white chocolate adds sweetness. You can mix chocolates for a unique taste that suits your mood.
Presentation Styles
Presentation can change how your cake looks and feels. Consider layering the cake in individual cups. This way, each guest gets their own portion, making it more personal and fun.
Mini versions are great for parties. Use a muffin tin to create small cakes. They are perfect for single servings and easy to grab. Plus, they look cute on any dessert table.
For the full recipe, check out the main section.
Storage Information
Freezing the Cake
To freeze the cake, wrap it tightly in plastic wrap. Make sure there are no air pockets. Then, place it in an airtight container or a heavy-duty freezer bag. This helps prevent freezer burn. The cake can stay frozen for up to three months. After that, it may lose flavor and texture.
Thawing Tips
To thaw the cake safely, move it from the freezer to the fridge. Let it thaw overnight for the best results. If you are in a hurry, you can leave it at room temperature for about 30 minutes before serving. This way, the cake will soften without melting.
Storing Leftovers
If you have leftover cake, store it in the fridge. Cover it with plastic wrap or aluminum foil. The cake stays fresh for about three days this way. You can re-freeze if you have too much. But keep in mind that the texture may change when thawed again.
FAQs
Can I make this cake a day ahead?
Yes, you can make this cake a day ahead. It will taste even better after chilling overnight. The flavors blend nicely, and the texture firms up well. Just remember to cover it tightly with plastic wrap. This keeps it fresh and prevents ice crystals from forming.
How should I store the cake if I have leftovers?
For leftover cake, wrap it well in plastic wrap or foil. Store it in the freezer if you won’t eat it soon. If you keep it in the fridge, enjoy it within two days. This helps maintain the taste and texture.
Can I use frozen strawberries instead of fresh ones?
You can use frozen strawberries, but the taste and texture will change slightly. Fresh strawberries have a brighter flavor and a firmer texture. Frozen strawberries may be mushier and less flavorful. If you must use frozen ones, thaw and drain them first to remove extra water.
What is the best way to cut the frozen cake?
To cut a frozen cake, use a warm knife. Run the knife under hot water first, then dry it off. This helps make cleaner cuts. Slice quickly to avoid melting the cake. You can also let it sit for a few minutes at room temperature for easier cutting.
This blog post covered how to create a delicious strawberry cake with easy steps. You learned about the ingredients, from the crust to the filling and cream. I shared tips for the best texture and presentation. You can even try different flavors or dietary swaps.
In the end, this cake is fun to make and share. You’ll impress family and friends with your skills. Enjoy your tasty treat!