![To make fudgy chewy brookies, you need simple ingredients. Here’s the list: - 1 cup all-purpose flour - 1/2 teaspoon baking powder - 1/4 teaspoon salt - 1/2 cup unsweetened cocoa powder - 1/2 cup granulated sugar - 1/2 cup brown sugar, packed - 1/2 cup unsalted butter, melted - 1 large egg - 1 teaspoon vanilla extract - 1 cup semi-sweet chocolate chips - 1 cup chocolate chip cookie dough (store-bought or homemade) These items create a rich brownie base and a chewy cookie topping. Quality matters in baking. Using fresh, high-quality ingredients makes a big difference. For example, fresh butter enhances flavor and texture. Good chocolate chips melt beautifully and add richness. When you use the best ingredients, your brookies will taste amazing. You can swap some ingredients if needed. Here are a few options: - For all-purpose flour, try oat flour or almond flour for a gluten-free option. - Instead of unsweetened cocoa powder, you can use Dutch-processed cocoa for a deeper flavor. - Use coconut oil or margarine instead of unsalted butter if you're dairy-free. - For a vegan option, replace the egg with a flax egg (1 tablespoon ground flaxseed + 2.5 tablespoons water). These substitutions allow you to enjoy brookies no matter your dietary needs. Start by preheating your oven to 350°F (175°C). This heat makes the brownies rise and bake well. Next, grab an 8x8 inch baking pan. Line it with parchment paper. Leave some paper hanging over the edges. This makes it easy to lift the brookies out later. In a bowl, mix together the dry ingredients first. Combine 1 cup of flour, 1/2 teaspoon of baking powder, 1/4 teaspoon of salt, and 1/2 cup of cocoa powder. Whisk them well until they blend nicely. In another bowl, mix the wet ingredients. Combine 1/2 cup of granulated sugar, 1/2 cup of brown sugar, and 1/2 cup of melted butter. Stir until the mix is smooth. Then, add 1 large egg and 1 teaspoon of vanilla extract. Beat this mixture well. Gradually stir the dry mix into the wet mix. Keep mixing until just combined. Finally, fold in 1 cup of semi-sweet chocolate chips. Pour the brownie batter into the lined pan. Spread it evenly across the bottom. Now, take 1 cup of cookie dough. Flatten it into small discs. Place these discs on top of the brownie layer. Cover as much of the surface as you can. Use a spatula to swirl the cookie dough gently into the brownie batter. This creates a beautiful marbled look. Now, place the pan in the oven and bake for 25-30 minutes. To check if they are done, stick a toothpick in the center. It should come out with moist crumbs, not wet batter. After baking, let the brookies cool in the pan for 10 minutes. Lift them out using the parchment paper and transfer them to a wire rack. Let them cool completely before cutting into squares. Enjoy your delicious fudgy chewy brookies! For the complete recipe, check out the Full Recipe. To get that fudgy texture, use less flour. Stick to the recipe's exact amounts. Make sure to mix the batter just until combined. Over-mixing can lead to a cake-like texture, which we don’t want. Also, avoid baking too long. Check the brookies around 25 minutes. The toothpick should come out with moist crumbs. This means they are perfectly fudgy! If your brookies turn out dry, it’s likely from overbaking. Always set a timer and check them early. If too crumbly, you might have added too much flour. Use a kitchen scale for accurate measurements. If they stick to the pan, ensure the parchment paper hangs over the edges. This makes it easy to lift them out after baking. For a lovely presentation, cut the brookies into neat squares. Serve them on a rustic wooden board for charm. A scoop of vanilla ice cream on the side elevates the dish. Dust with powdered sugar right before serving for a pretty finish. You can also drizzle some chocolate sauce over the top for extra indulgence. Follow the [Full Recipe] for all the details! {{image_2}} You can add nuts to your brookies for extra crunch. I love using walnuts or pecans. Just chop them into small pieces. Mix about 1/2 cup of nuts into the brownie batter. This gives your brookies a great texture. The nuts add a nice contrast to the soft brownie and cookie layers. Experimenting with extracts can create fun flavors. You can swap vanilla extract for almond or peppermint. A few drops of these extracts will change the taste. Try adding a dash of espresso powder for a coffee kick. This will deepen the chocolate flavor. Be careful not to add too much, as it can be strong. You can easily make brookies gluten-free or vegan. For gluten-free, replace all-purpose flour with a gluten-free blend. Make sure the blend has xanthan gum for best results. For a vegan option, substitute the egg with a flax egg. To make a flax egg, mix one tablespoon of ground flaxseed with three tablespoons of water. Let it sit for five minutes to thicken. You can also use vegan butter instead of regular butter. These swaps let everyone enjoy these tasty treats. For the full recipe, check the [Full Recipe] section. Store your leftover brookies in an airtight container. Keep them at room temperature for up to three days. If you want to keep them fresh longer, refrigerate them. Wrap each brookie in plastic wrap to keep them moist and tasty. Freezing brookies is a great way to save them for later. First, let the brookies cool completely. Then, wrap each one in plastic wrap. Place them in a freezer-safe bag or container. They can last up to three months in the freezer. When you want one, just thaw it at room temperature. To reheat your brookies, use the oven for best results. Preheat your oven to 350°F (175°C). Place the brookies on a baking sheet. Heat them for about 5-10 minutes. This will make them warm and gooey again. You can also use the microwave. Heat one brookie for about 10-15 seconds. This will make it soft but be careful not to overheat! Enjoy your brookies warm! Brookies are a blend of brownies and cookies. They have a rich brownie base topped with cookie dough. This dessert brings together two of the best treats into one. The result is fudgy, chewy, and incredibly delicious. You get the best of both worlds in every bite. Yes, you can use box brownie mix if you like. Just follow the instructions on the box for mixing. Then, add the cookie layer on top as directed in the Full Recipe. This shortcut saves time while still giving you tasty brookies. To check if your brookies are done, insert a toothpick in the center. If it comes out with moist crumbs, they are ready. If it comes out wet, give them a few more minutes. Keep an eye on them to avoid overbaking; you want them fudgy, not dry. You can skip the chocolate chips if you prefer. Use your favorite mix-ins instead, like nuts or dried fruit. You might also add white chocolate chips for a different flavor. Feel free to get creative and make a version you love. For best results, let the brookies cool completely before cutting. Use a sharp knife to cut them into squares. A gentle sawing motion works well to avoid squishing them. You can serve them warm or at room temperature with ice cream if you like! Fudgy chewy brookies mix two favorite treats perfectly. We discussed quality ingredients and substitutions that elevate flavor. I shared clear steps to ensure success, along with tips to avoid mistakes. You can also explore fun variations like nutty or gluten-free options. Storing and reheating brookies keeps them fresh. Enjoy experimenting and sharing these tasty treats. Making brookies is easy, fun, and rewarding! Keep baking and enjoy every bite.](https://grilledflavors.com/wp-content/uploads/2025/05/dc82c059-1856-4ef8-9089-b94fea50beae.webp)
If you love rich desserts, you need to try my Fudgy Chewy Brookies! This cookie-brownie combo gives you the best of both worlds. Imagine biting into warm, gooey brownies topped with soft cookies. You can’t resist these treats! I’ll guide you through every step, from choosing the best ingredients to offering tips for perfect results. Let’s bake your new favorite dessert together!
Ingredients
Required Ingredients for Fudgy Chewy Brookies
To make fudgy chewy brookies, you need simple ingredients. Here’s the list:
– 1 cup all-purpose flour
– 1/2 teaspoon baking powder
– 1/4 teaspoon salt
– 1/2 cup unsweetened cocoa powder
– 1/2 cup granulated sugar
– 1/2 cup brown sugar, packed
– 1/2 cup unsalted butter, melted
– 1 large egg
– 1 teaspoon vanilla extract
– 1 cup semi-sweet chocolate chips
– 1 cup chocolate chip cookie dough (store-bought or homemade)
These items create a rich brownie base and a chewy cookie topping.
Importance of Quality Ingredients
Quality matters in baking. Using fresh, high-quality ingredients makes a big difference. For example, fresh butter enhances flavor and texture. Good chocolate chips melt beautifully and add richness. When you use the best ingredients, your brookies will taste amazing.
Substitutions for Common Ingredients
You can swap some ingredients if needed. Here are a few options:
– For all-purpose flour, try oat flour or almond flour for a gluten-free option.
– Instead of unsweetened cocoa powder, you can use Dutch-processed cocoa for a deeper flavor.
– Use coconut oil or margarine instead of unsalted butter if you’re dairy-free.
– For a vegan option, replace the egg with a flax egg (1 tablespoon ground flaxseed + 2.5 tablespoons water).
These substitutions allow you to enjoy brookies no matter your dietary needs.
Step-by-Step Instructions
Preparation and Preheating the Oven
Start by preheating your oven to 350°F (175°C). This heat makes the brownies rise and bake well. Next, grab an 8×8 inch baking pan. Line it with parchment paper. Leave some paper hanging over the edges. This makes it easy to lift the brookies out later.
Mixing the Brownie Batter
In a bowl, mix together the dry ingredients first. Combine 1 cup of flour, 1/2 teaspoon of baking powder, 1/4 teaspoon of salt, and 1/2 cup of cocoa powder. Whisk them well until they blend nicely. In another bowl, mix the wet ingredients. Combine 1/2 cup of granulated sugar, 1/2 cup of brown sugar, and 1/2 cup of melted butter. Stir until the mix is smooth. Then, add 1 large egg and 1 teaspoon of vanilla extract. Beat this mixture well. Gradually stir the dry mix into the wet mix. Keep mixing until just combined. Finally, fold in 1 cup of semi-sweet chocolate chips.
Adding the Cookie Layer and Baking
Pour the brownie batter into the lined pan. Spread it evenly across the bottom. Now, take 1 cup of cookie dough. Flatten it into small discs. Place these discs on top of the brownie layer. Cover as much of the surface as you can. Use a spatula to swirl the cookie dough gently into the brownie batter. This creates a beautiful marbled look. Now, place the pan in the oven and bake for 25-30 minutes. To check if they are done, stick a toothpick in the center. It should come out with moist crumbs, not wet batter. After baking, let the brookies cool in the pan for 10 minutes. Lift them out using the parchment paper and transfer them to a wire rack. Let them cool completely before cutting into squares. Enjoy your delicious fudgy chewy brookies! For the complete recipe, check out the Full Recipe.
Tips & Tricks
How to Achieve the Perfect Fudgy Texture
To get that fudgy texture, use less flour. Stick to the recipe’s exact amounts. Make sure to mix the batter just until combined. Over-mixing can lead to a cake-like texture, which we don’t want. Also, avoid baking too long. Check the brookies around 25 minutes. The toothpick should come out with moist crumbs. This means they are perfectly fudgy!
Troubleshooting Common Mistakes
If your brookies turn out dry, it’s likely from overbaking. Always set a timer and check them early. If too crumbly, you might have added too much flour. Use a kitchen scale for accurate measurements. If they stick to the pan, ensure the parchment paper hangs over the edges. This makes it easy to lift them out after baking.
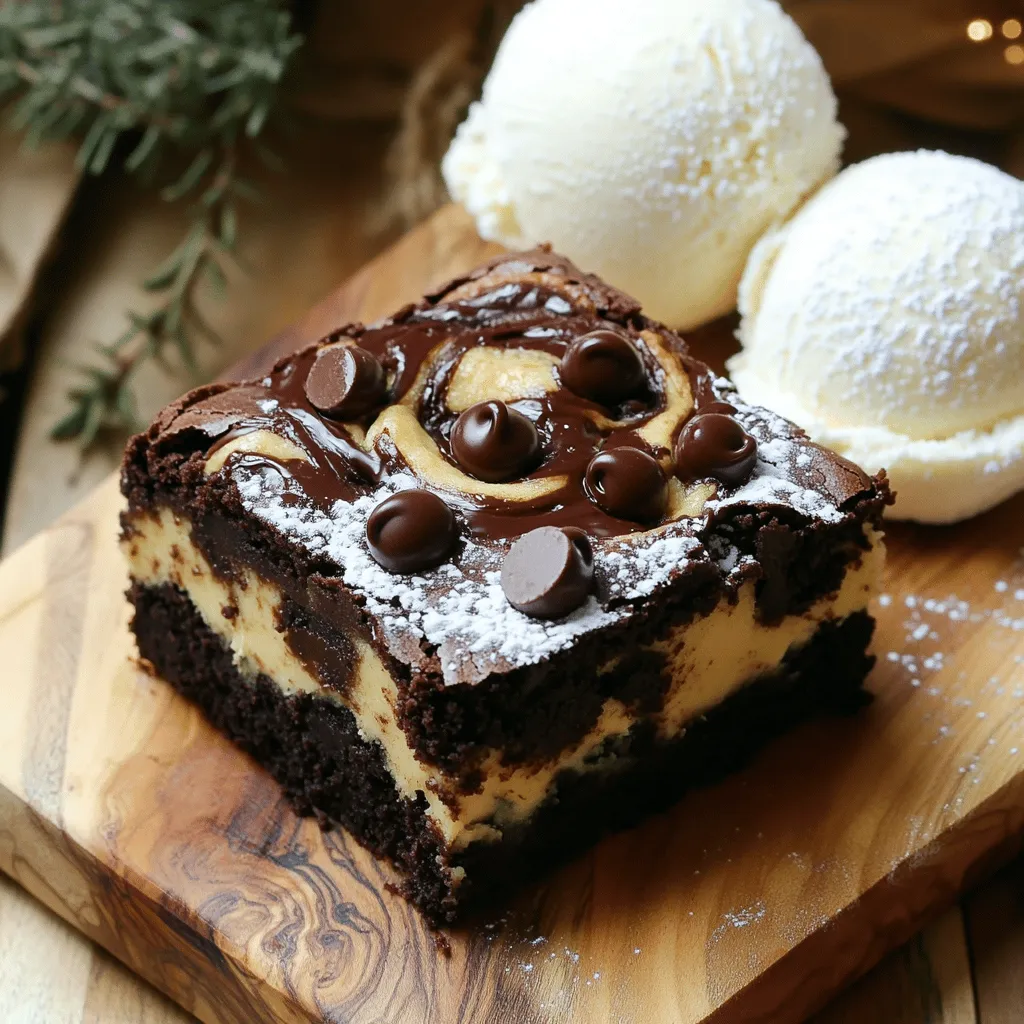
Serving and Presentation Suggestions
For a lovely presentation, cut the brookies into neat squares. Serve them on a rustic wooden board for charm. A scoop of vanilla ice cream on the side elevates the dish. Dust with powdered sugar right before serving for a pretty finish. You can also drizzle some chocolate sauce over the top for extra indulgence. Follow the [Full Recipe] for all the details!
Variations
Nutty Brookies: Adding Nuts for Crunch
You can add nuts to your brookies for extra crunch. I love using walnuts or pecans. Just chop them into small pieces. Mix about 1/2 cup of nuts into the brownie batter. This gives your brookies a great texture. The nuts add a nice contrast to the soft brownie and cookie layers.
Flavor Combinations: Experimenting with Extracts
Experimenting with extracts can create fun flavors. You can swap vanilla extract for almond or peppermint. A few drops of these extracts will change the taste. Try adding a dash of espresso powder for a coffee kick. This will deepen the chocolate flavor. Be careful not to add too much, as it can be strong.
Gluten-Free or Vegan Options
You can easily make brookies gluten-free or vegan. For gluten-free, replace all-purpose flour with a gluten-free blend. Make sure the blend has xanthan gum for best results. For a vegan option, substitute the egg with a flax egg. To make a flax egg, mix one tablespoon of ground flaxseed with three tablespoons of water. Let it sit for five minutes to thicken. You can also use vegan butter instead of regular butter. These swaps let everyone enjoy these tasty treats.
For the full recipe, check the [Full Recipe] section.
Storage Info
How to Store Leftover Brookies
Store your leftover brookies in an airtight container. Keep them at room temperature for up to three days. If you want to keep them fresh longer, refrigerate them. Wrap each brookie in plastic wrap to keep them moist and tasty.
Freezing Brookies for Future Enjoyment
Freezing brookies is a great way to save them for later. First, let the brookies cool completely. Then, wrap each one in plastic wrap. Place them in a freezer-safe bag or container. They can last up to three months in the freezer. When you want one, just thaw it at room temperature.
Best Ways to Reheat for Freshness
To reheat your brookies, use the oven for best results. Preheat your oven to 350°F (175°C). Place the brookies on a baking sheet. Heat them for about 5-10 minutes. This will make them warm and gooey again. You can also use the microwave. Heat one brookie for about 10-15 seconds. This will make it soft but be careful not to overheat! Enjoy your brookies warm!
FAQs
What are Brookies?
Brookies are a blend of brownies and cookies. They have a rich brownie base topped with cookie dough. This dessert brings together two of the best treats into one. The result is fudgy, chewy, and incredibly delicious. You get the best of both worlds in every bite.
Can I use box brownie mix for this recipe?
Yes, you can use box brownie mix if you like. Just follow the instructions on the box for mixing. Then, add the cookie layer on top as directed in the Full Recipe. This shortcut saves time while still giving you tasty brookies.
How do I know when my Brookies are done baking?
To check if your brookies are done, insert a toothpick in the center. If it comes out with moist crumbs, they are ready. If it comes out wet, give them a few more minutes. Keep an eye on them to avoid overbaking; you want them fudgy, not dry.
How can I make Brookies without chocolate chips?
You can skip the chocolate chips if you prefer. Use your favorite mix-ins instead, like nuts or dried fruit. You might also add white chocolate chips for a different flavor. Feel free to get creative and make a version you love.
What is the best way to cut brookies for serving?
For best results, let the brookies cool completely before cutting. Use a sharp knife to cut them into squares. A gentle sawing motion works well to avoid squishing them. You can serve them warm or at room temperature with ice cream if you like!
Fudgy chewy brookies mix two favorite treats perfectly. We discussed quality ingredients and substitutions that elevate flavor. I shared clear steps to ensure success, along with tips to avoid mistakes. You can also explore fun variations like nutty or gluten-free options. Storing and reheating brookies keeps them fresh. Enjoy experimenting and sharing these tasty treats. Making brookies is easy, fun, and rewarding! Keep baking and enjoy every bite.
![To make fudgy chewy brookies, you need simple ingredients. Here’s the list: - 1 cup all-purpose flour - 1/2 teaspoon baking powder - 1/4 teaspoon salt - 1/2 cup unsweetened cocoa powder - 1/2 cup granulated sugar - 1/2 cup brown sugar, packed - 1/2 cup unsalted butter, melted - 1 large egg - 1 teaspoon vanilla extract - 1 cup semi-sweet chocolate chips - 1 cup chocolate chip cookie dough (store-bought or homemade) These items create a rich brownie base and a chewy cookie topping. Quality matters in baking. Using fresh, high-quality ingredients makes a big difference. For example, fresh butter enhances flavor and texture. Good chocolate chips melt beautifully and add richness. When you use the best ingredients, your brookies will taste amazing. You can swap some ingredients if needed. Here are a few options: - For all-purpose flour, try oat flour or almond flour for a gluten-free option. - Instead of unsweetened cocoa powder, you can use Dutch-processed cocoa for a deeper flavor. - Use coconut oil or margarine instead of unsalted butter if you're dairy-free. - For a vegan option, replace the egg with a flax egg (1 tablespoon ground flaxseed + 2.5 tablespoons water). These substitutions allow you to enjoy brookies no matter your dietary needs. Start by preheating your oven to 350°F (175°C). This heat makes the brownies rise and bake well. Next, grab an 8x8 inch baking pan. Line it with parchment paper. Leave some paper hanging over the edges. This makes it easy to lift the brookies out later. In a bowl, mix together the dry ingredients first. Combine 1 cup of flour, 1/2 teaspoon of baking powder, 1/4 teaspoon of salt, and 1/2 cup of cocoa powder. Whisk them well until they blend nicely. In another bowl, mix the wet ingredients. Combine 1/2 cup of granulated sugar, 1/2 cup of brown sugar, and 1/2 cup of melted butter. Stir until the mix is smooth. Then, add 1 large egg and 1 teaspoon of vanilla extract. Beat this mixture well. Gradually stir the dry mix into the wet mix. Keep mixing until just combined. Finally, fold in 1 cup of semi-sweet chocolate chips. Pour the brownie batter into the lined pan. Spread it evenly across the bottom. Now, take 1 cup of cookie dough. Flatten it into small discs. Place these discs on top of the brownie layer. Cover as much of the surface as you can. Use a spatula to swirl the cookie dough gently into the brownie batter. This creates a beautiful marbled look. Now, place the pan in the oven and bake for 25-30 minutes. To check if they are done, stick a toothpick in the center. It should come out with moist crumbs, not wet batter. After baking, let the brookies cool in the pan for 10 minutes. Lift them out using the parchment paper and transfer them to a wire rack. Let them cool completely before cutting into squares. Enjoy your delicious fudgy chewy brookies! For the complete recipe, check out the Full Recipe. To get that fudgy texture, use less flour. Stick to the recipe's exact amounts. Make sure to mix the batter just until combined. Over-mixing can lead to a cake-like texture, which we don’t want. Also, avoid baking too long. Check the brookies around 25 minutes. The toothpick should come out with moist crumbs. This means they are perfectly fudgy! If your brookies turn out dry, it’s likely from overbaking. Always set a timer and check them early. If too crumbly, you might have added too much flour. Use a kitchen scale for accurate measurements. If they stick to the pan, ensure the parchment paper hangs over the edges. This makes it easy to lift them out after baking. For a lovely presentation, cut the brookies into neat squares. Serve them on a rustic wooden board for charm. A scoop of vanilla ice cream on the side elevates the dish. Dust with powdered sugar right before serving for a pretty finish. You can also drizzle some chocolate sauce over the top for extra indulgence. Follow the [Full Recipe] for all the details! {{image_2}} You can add nuts to your brookies for extra crunch. I love using walnuts or pecans. Just chop them into small pieces. Mix about 1/2 cup of nuts into the brownie batter. This gives your brookies a great texture. The nuts add a nice contrast to the soft brownie and cookie layers. Experimenting with extracts can create fun flavors. You can swap vanilla extract for almond or peppermint. A few drops of these extracts will change the taste. Try adding a dash of espresso powder for a coffee kick. This will deepen the chocolate flavor. Be careful not to add too much, as it can be strong. You can easily make brookies gluten-free or vegan. For gluten-free, replace all-purpose flour with a gluten-free blend. Make sure the blend has xanthan gum for best results. For a vegan option, substitute the egg with a flax egg. To make a flax egg, mix one tablespoon of ground flaxseed with three tablespoons of water. Let it sit for five minutes to thicken. You can also use vegan butter instead of regular butter. These swaps let everyone enjoy these tasty treats. For the full recipe, check the [Full Recipe] section. Store your leftover brookies in an airtight container. Keep them at room temperature for up to three days. If you want to keep them fresh longer, refrigerate them. Wrap each brookie in plastic wrap to keep them moist and tasty. Freezing brookies is a great way to save them for later. First, let the brookies cool completely. Then, wrap each one in plastic wrap. Place them in a freezer-safe bag or container. They can last up to three months in the freezer. When you want one, just thaw it at room temperature. To reheat your brookies, use the oven for best results. Preheat your oven to 350°F (175°C). Place the brookies on a baking sheet. Heat them for about 5-10 minutes. This will make them warm and gooey again. You can also use the microwave. Heat one brookie for about 10-15 seconds. This will make it soft but be careful not to overheat! Enjoy your brookies warm! Brookies are a blend of brownies and cookies. They have a rich brownie base topped with cookie dough. This dessert brings together two of the best treats into one. The result is fudgy, chewy, and incredibly delicious. You get the best of both worlds in every bite. Yes, you can use box brownie mix if you like. Just follow the instructions on the box for mixing. Then, add the cookie layer on top as directed in the Full Recipe. This shortcut saves time while still giving you tasty brookies. To check if your brookies are done, insert a toothpick in the center. If it comes out with moist crumbs, they are ready. If it comes out wet, give them a few more minutes. Keep an eye on them to avoid overbaking; you want them fudgy, not dry. You can skip the chocolate chips if you prefer. Use your favorite mix-ins instead, like nuts or dried fruit. You might also add white chocolate chips for a different flavor. Feel free to get creative and make a version you love. For best results, let the brookies cool completely before cutting. Use a sharp knife to cut them into squares. A gentle sawing motion works well to avoid squishing them. You can serve them warm or at room temperature with ice cream if you like! Fudgy chewy brookies mix two favorite treats perfectly. We discussed quality ingredients and substitutions that elevate flavor. I shared clear steps to ensure success, along with tips to avoid mistakes. You can also explore fun variations like nutty or gluten-free options. Storing and reheating brookies keeps them fresh. Enjoy experimenting and sharing these tasty treats. Making brookies is easy, fun, and rewarding! Keep baking and enjoy every bite.](https://grilledflavors.com/wp-content/uploads/2025/05/dc82c059-1856-4ef8-9089-b94fea50beae-300x300.webp)