Fudgy Red Velvet Brownies Irresistible Dessert Treat

WANT TO SAVE THIS RECIPE?

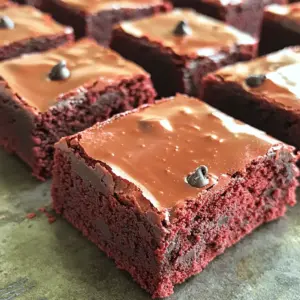
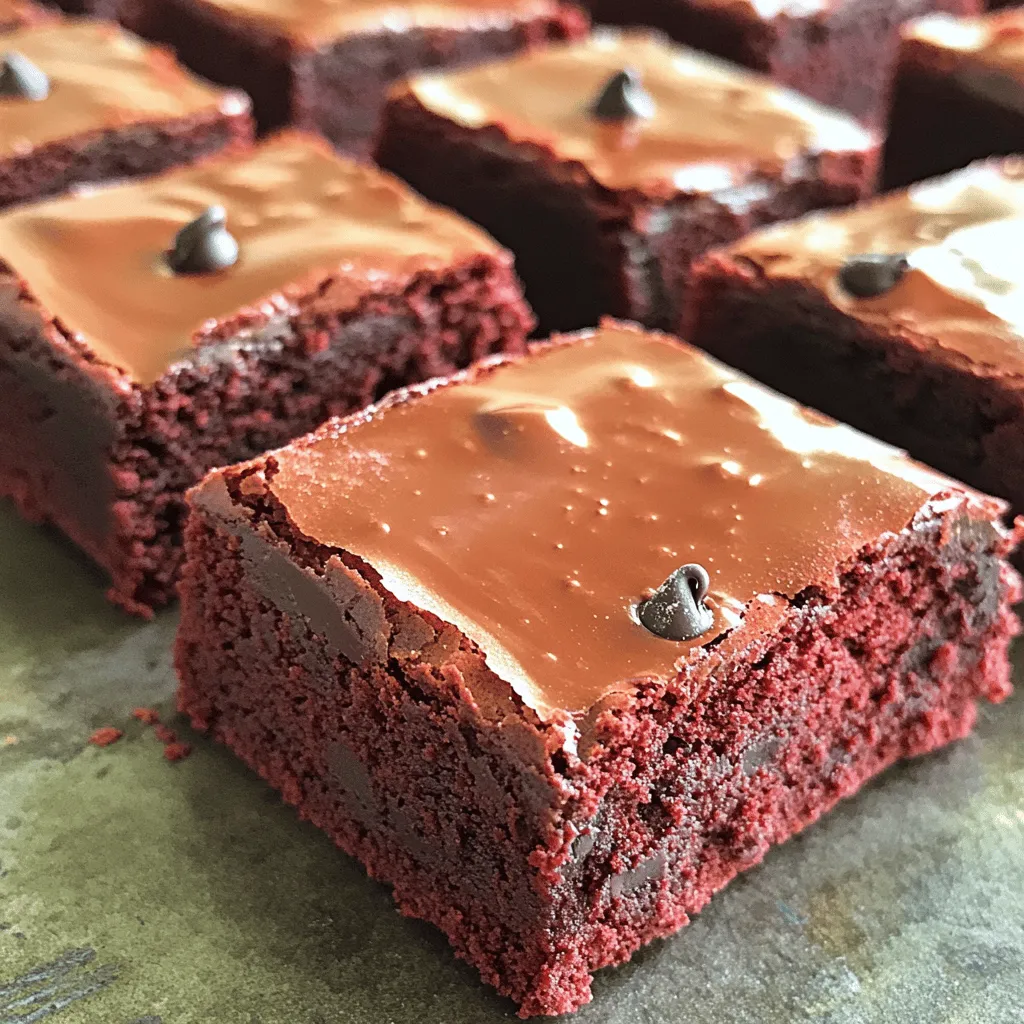
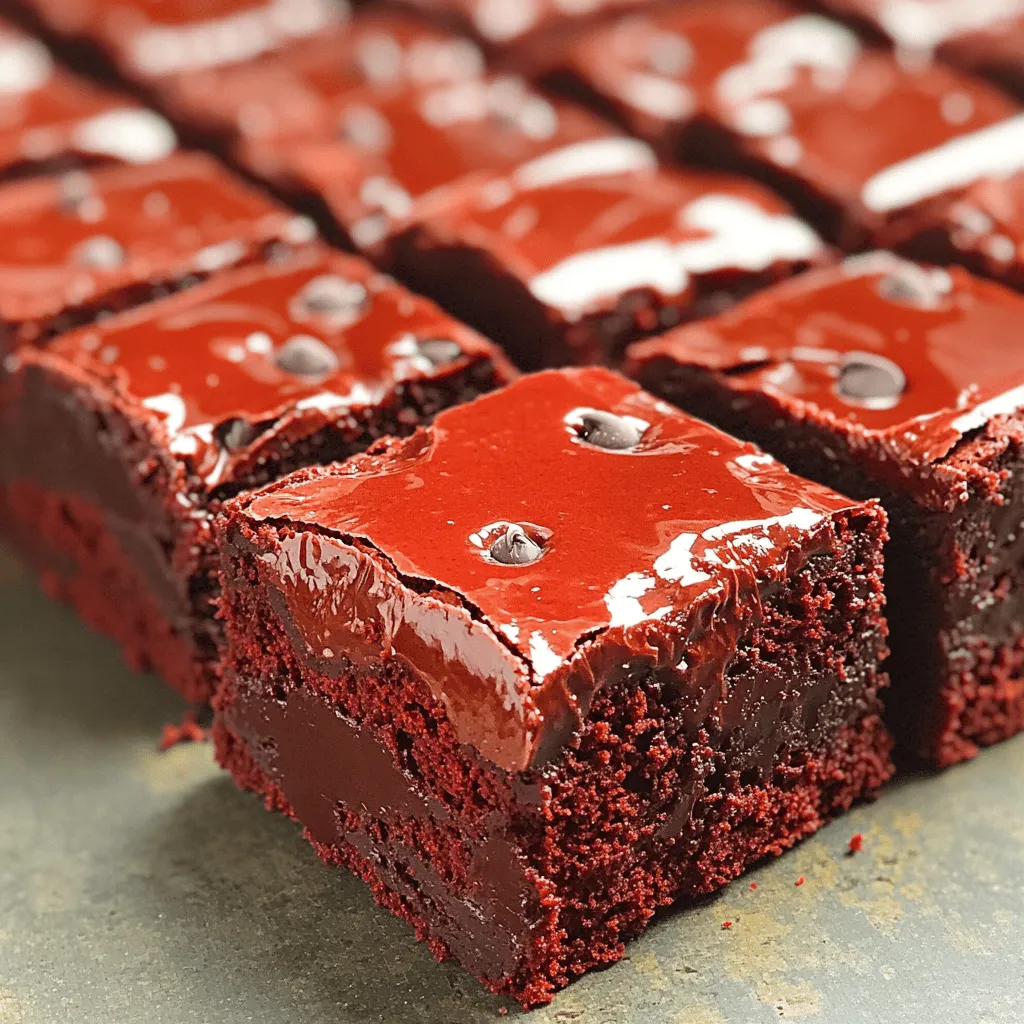
Get ready for a dessert treat that is rich, fudgy, and simply irresistible: Fudgy Red Velvet Brownies! With their deep red hue and velvety texture, these brownies bring a fun twist to classic flavors. In this post, I’ll guide you through the perfect ingredients, easy steps, and pro tips to make these brownies a hit. Whether you’re a baking novice or an expert, you’re about to impress everyone around you!

Ingredients

List of Ingredients for Fudgy Red Velvet Brownies

To make fudgy red velvet brownies, you’ll need the following:

– 1 cup all-purpose flour

– 1/2 cup unsweetened cocoa powder

– 1 cup granulated sugar

– 1/2 cup brown sugar, packed

– 1/2 cup unsalted butter, melted

– 2 large eggs

– 1 tablespoon red food coloring

– 1 teaspoon vanilla extract

– 1/2 teaspoon baking powder

– 1/4 teaspoon salt

– 1/2 cup chocolate chips (optional)

These ingredients blend to create a rich and soft texture.

Tips for Choosing Quality Ingredients

When you pick your ingredients, freshness matters. Look for:

Fresh Eggs: Check the date on the carton. Fresh eggs help with structure.

Quality Cocoa Powder: Use a brand you trust. It impacts the flavor.

Real Vanilla Extract: It adds a deep, warm taste. Avoid imitation.

High-Quality Butter: Go for unsalted and fresh for the best flavor.

Good ingredients make great brownies.

Ingredient Substitutions for Different Diets

You can adjust the recipe to fit different diets. Here are some options:

Gluten-Free: Swap all-purpose flour with a gluten-free flour blend.

Vegan: Use flax eggs (1 tablespoon ground flaxseed mixed with 3 tablespoons water per egg) and coconut oil in place of butter.

Low-Sugar: Substitute granulated sugar with a sugar alternative like stevia or erythritol.

These changes let everyone enjoy fudgy red velvet brownies. For the full recipe, check the link provided.

Step-by-Step Instructions

Preparation and Mixing Process

Start by preheating your oven to 350°F (175°C). Grease a 9×9-inch baking pan or line it with parchment paper. In a large bowl, mix melted butter, granulated sugar, and brown sugar. Stir until smooth. Next, add in the eggs, one at a time. Mix well after each egg. Then, add red food coloring and vanilla extract. In another bowl, combine flour, cocoa powder, baking powder, and salt. Sift these dry ingredients together. Slowly add the dry mix to the wet mix. Stir until just combined, so the brownies stay fudgy. If you love chocolate, fold in chocolate chips.

Baking Technique for Perfect Texture

Pour the thick brownie batter into your prepared pan. Use a spatula to smooth the top. Bake for 25 to 30 minutes. To check if they are done, insert a toothpick into the center. If it comes out with moist crumbs, your brownies are ready. Watch the time closely. Overbaking can make them dry.

Cooling and Cutting Tips

Once baked, let the brownies cool in the pan for about 10 minutes. This helps them set and makes it easier to cut. After 10 minutes, transfer them to a wire rack to cool completely. When cool, cut them into squares. You can serve them plain or with ice cream. Enjoy your fudgy red velvet brownies! For the full recipe, check earlier in the article.

Tips & Tricks

How to Achieve the Fudgiest Texture

For the best fudgy texture, use melted butter. It helps create a rich, moist base. Don’t overmix your batter; just stir until the flour disappears. This keeps your brownies from becoming too cake-like. Bake them just right; pull them out when a toothpick shows moist crumbs. A little underbaking gives you that gooey bite.

Common Mistakes to Avoid

One big mistake is using old ingredients. Fresh baking powder and flour make a big difference. Also, avoid using too much flour. This can dry out your brownies. Don’t skip the cooling step; cutting them too soon makes a mess. Lastly, resist the urge to add too many mix-ins. Keep it simple for the best flavor.

Tools and Equipment for Best Results

Using the right tools helps a lot. A 9×9-inch baking pan works great for even baking. Parchment paper makes it easy to lift out the brownies. A good mixing bowl and spatula ensure everything blends well. An oven thermometer helps keep your temp just right. Lastly, a sharp knife is key for straight, clean cuts.

For the full recipe, check out the details above. Enjoy baking!

Variations

Alternate Flavor Additions

You can change up your fudgy red velvet brownies easily. Try adding nuts for a crunch. Walnuts or pecans work great. You can mix in different chocolates too. White chocolate chips add a sweet twist. Dark chocolate offers a rich flavor. You can even swirl in cream cheese for a cheesecake style. Each addition brings a new taste to your brownies.

Dietary Variations

Want to make these brownies fit your diet? You can go gluten-free by swapping all-purpose flour with almond flour or gluten-free flour. For vegan brownies, use flax eggs instead of regular eggs. Just mix one tablespoon of ground flaxseed with three tablespoons of water. Let it sit for five minutes to thicken. You can also use coconut oil instead of butter for a dairy-free option.

Serving Suggestions and Pairings

Serve these brownies warm for the best taste. A scoop of vanilla ice cream on top makes a perfect match. You can dust them with powdered sugar for a pretty finish. Pair with fresh berries for a tasty contrast. A drizzle of chocolate or caramel sauce adds extra sweetness. Enjoy your fudgy red velvet brownies with a cup of coffee or a glass of milk. Each bite is a delight! For the complete recipe, check the Full Recipe section.

Storage Info

How to Store Brownies for Freshness

To keep your fudgy red velvet brownies fresh, place them in an airtight container. Make sure the brownies are completely cool before sealing them. For extra protection, you can wrap them in plastic wrap first. This helps keep the moisture in and prevents them from drying out. Store them at room temperature for the best taste.

Freezing Fudgy Red Velvet Brownies

If you want to save some for later, freezing is a great option. Cut the brownies into squares and layer them between sheets of parchment paper in a freezer-safe bag. Be sure to squeeze out as much air as possible before sealing the bag. This helps avoid freezer burn. They can last up to three months in the freezer.

How Long Do They Last?

When stored properly, fudgy red velvet brownies last about 4 to 5 days at room temperature. If you refrigerate them, they may last up to a week. However, I find they taste best fresh. For long-term storage, freezing is the way to go. You can enjoy your brownies later, just like they were freshly baked!

FAQs

How do I know when my brownies are done?

Check the center of your brownies with a toothpick. If it comes out with a few moist crumbs, they are ready. If the toothpick has wet batter on it, bake a bit longer. I recommend starting to check around 25 minutes. The edges may look set, but the center should still be soft. This gives you that fudgy texture you want.

Can I use food coloring alternatives?

Yes, you can use beet juice or pomegranate juice for a natural option. These alternatives give a red hue but may change the taste slightly. If you want a classic red velvet look, use gel food coloring. It gives a vibrant color without adding extra liquid to the batter. Always test the color to get your desired shade.

What can I do with leftover red velvet brownies?

You can store them in an airtight container. They stay fresh for up to four days at room temperature. For a fun twist, crumble the brownies over ice cream. This adds a rich flavor and texture. You can also make brownie milkshakes by blending them with vanilla ice cream and milk.

Full Recipe and recommended serving size.

For the full recipe, check above. This recipe makes 16 squares. Each square is a perfect portion for a sweet treat. Enjoy them with coffee or milk for a tasty snack!

You learned how to make fudgy red velvet brownies from start to finish. We covered quality ingredients, mixing techniques, and baking tips. You also saw how to avoid common mistakes and tried new flavors. Remember, storing your brownies right keeps them fresh and tasty. Enjoy sharing these brownies with friends or family. With these tips, you will impress everyone with your baking skills. Happy baking!

To make fudgy red velvet brownies, you'll need the following: - 1 cup all-purpose flour - 1/2 cup unsweetened cocoa powder - 1 cup granulated sugar - 1/2 cup brown sugar, packed - 1/2 cup unsalted butter, melted - 2 large eggs - 1 tablespoon red food coloring - 1 teaspoon vanilla extract - 1/2 teaspoon baking powder - 1/4 teaspoon salt - 1/2 cup chocolate chips (optional) These ingredients blend to create a rich and soft texture. When you pick your ingredients, freshness matters. Look for: - Fresh Eggs: Check the date on the carton. Fresh eggs help with structure. - Quality Cocoa Powder: Use a brand you trust. It impacts the flavor. - Real Vanilla Extract: It adds a deep, warm taste. Avoid imitation. - High-Quality Butter: Go for unsalted and fresh for the best flavor. Good ingredients make great brownies. You can adjust the recipe to fit different diets. Here are some options: - Gluten-Free: Swap all-purpose flour with a gluten-free flour blend. - Vegan: Use flax eggs (1 tablespoon ground flaxseed mixed with 3 tablespoons water per egg) and coconut oil in place of butter. - Low-Sugar: Substitute granulated sugar with a sugar alternative like stevia or erythritol. These changes let everyone enjoy fudgy red velvet brownies. For the full recipe, check the link provided. Start by preheating your oven to 350°F (175°C). Grease a 9x9-inch baking pan or line it with parchment paper. In a large bowl, mix melted butter, granulated sugar, and brown sugar. Stir until smooth. Next, add in the eggs, one at a time. Mix well after each egg. Then, add red food coloring and vanilla extract. In another bowl, combine flour, cocoa powder, baking powder, and salt. Sift these dry ingredients together. Slowly add the dry mix to the wet mix. Stir until just combined, so the brownies stay fudgy. If you love chocolate, fold in chocolate chips. Pour the thick brownie batter into your prepared pan. Use a spatula to smooth the top. Bake for 25 to 30 minutes. To check if they are done, insert a toothpick into the center. If it comes out with moist crumbs, your brownies are ready. Watch the time closely. Overbaking can make them dry. Once baked, let the brownies cool in the pan for about 10 minutes. This helps them set and makes it easier to cut. After 10 minutes, transfer them to a wire rack to cool completely. When cool, cut them into squares. You can serve them plain or with ice cream. Enjoy your fudgy red velvet brownies! For the full recipe, check earlier in the article. For the best fudgy texture, use melted butter. It helps create a rich, moist base. Don’t overmix your batter; just stir until the flour disappears. This keeps your brownies from becoming too cake-like. Bake them just right; pull them out when a toothpick shows moist crumbs. A little underbaking gives you that gooey bite. One big mistake is using old ingredients. Fresh baking powder and flour make a big difference. Also, avoid using too much flour. This can dry out your brownies. Don’t skip the cooling step; cutting them too soon makes a mess. Lastly, resist the urge to add too many mix-ins. Keep it simple for the best flavor. Using the right tools helps a lot. A 9x9-inch baking pan works great for even baking. Parchment paper makes it easy to lift out the brownies. A good mixing bowl and spatula ensure everything blends well. An oven thermometer helps keep your temp just right. Lastly, a sharp knife is key for straight, clean cuts. For the full recipe, check out the details above. Enjoy baking! {{image_2}} You can change up your fudgy red velvet brownies easily. Try adding nuts for a crunch. Walnuts or pecans work great. You can mix in different chocolates too. White chocolate chips add a sweet twist. Dark chocolate offers a rich flavor. You can even swirl in cream cheese for a cheesecake style. Each addition brings a new taste to your brownies. Want to make these brownies fit your diet? You can go gluten-free by swapping all-purpose flour with almond flour or gluten-free flour. For vegan brownies, use flax eggs instead of regular eggs. Just mix one tablespoon of ground flaxseed with three tablespoons of water. Let it sit for five minutes to thicken. You can also use coconut oil instead of butter for a dairy-free option. Serve these brownies warm for the best taste. A scoop of vanilla ice cream on top makes a perfect match. You can dust them with powdered sugar for a pretty finish. Pair with fresh berries for a tasty contrast. A drizzle of chocolate or caramel sauce adds extra sweetness. Enjoy your fudgy red velvet brownies with a cup of coffee or a glass of milk. Each bite is a delight! For the complete recipe, check the Full Recipe section. To keep your fudgy red velvet brownies fresh, place them in an airtight container. Make sure the brownies are completely cool before sealing them. For extra protection, you can wrap them in plastic wrap first. This helps keep the moisture in and prevents them from drying out. Store them at room temperature for the best taste. If you want to save some for later, freezing is a great option. Cut the brownies into squares and layer them between sheets of parchment paper in a freezer-safe bag. Be sure to squeeze out as much air as possible before sealing the bag. This helps avoid freezer burn. They can last up to three months in the freezer. When stored properly, fudgy red velvet brownies last about 4 to 5 days at room temperature. If you refrigerate them, they may last up to a week. However, I find they taste best fresh. For long-term storage, freezing is the way to go. You can enjoy your brownies later, just like they were freshly baked! Check the center of your brownies with a toothpick. If it comes out with a few moist crumbs, they are ready. If the toothpick has wet batter on it, bake a bit longer. I recommend starting to check around 25 minutes. The edges may look set, but the center should still be soft. This gives you that fudgy texture you want. Yes, you can use beet juice or pomegranate juice for a natural option. These alternatives give a red hue but may change the taste slightly. If you want a classic red velvet look, use gel food coloring. It gives a vibrant color without adding extra liquid to the batter. Always test the color to get your desired shade. You can store them in an airtight container. They stay fresh for up to four days at room temperature. For a fun twist, crumble the brownies over ice cream. This adds a rich flavor and texture. You can also make brownie milkshakes by blending them with vanilla ice cream and milk. For the full recipe, check above. This recipe makes 16 squares. Each square is a perfect portion for a sweet treat. Enjoy them with coffee or milk for a tasty snack! You learned how to make fudgy red velvet brownies from start to finish. We covered quality ingredients, mixing techniques, and baking tips. You also saw how to avoid common mistakes and tried new flavors. Remember, storing your brownies right keeps them fresh and tasty. Enjoy sharing these brownies with friends or family. With these tips, you will impress everyone with your baking skills. Happy baking!

Fudgy Red Velvet Brownies

Indulge in these fudgy red velvet brownies that are sure to delight any chocolate lover! With a rich cocoa flavor and a beautiful red hue, these brownies are easy to make and perfect for sharing. Follow our simple step-by-step recipe to bake a batch of 16 delicious squares that will impress your friends and family. Click through to explore the full recipe and treat yourself to these irresistible fudgy delights!

Ingredients
  

1 cup all-purpose flour

1/2 cup unsweetened cocoa powder

1 cup granulated sugar

1/2 cup brown sugar, packed

1/2 cup unsalted butter, melted

2 large eggs

1 tablespoon red food coloring

1 teaspoon vanilla extract

1/2 teaspoon baking powder

1/4 teaspoon salt

1/2 cup chocolate chips (optional)

Instructions
 

Preheat your oven to 350°F (175°C) and grease a 9x9-inch baking pan or line it with parchment paper for easier removal.

    In a large mixing bowl, combine the melted butter, granulated sugar, and brown sugar, stirring until well blended.

      Add the eggs one at a time to the sugar mixture, mixing well after each addition. Then, mix in the red food coloring and vanilla extract.

        In a separate bowl, sift together the flour, cocoa powder, baking powder, and salt. Gradually add the dry ingredients to the wet mixture, stirring just until combined.

          If desired, fold in the chocolate chips for an extra fudgy texture and burst of chocolate flavor.

            Pour the brownie batter into the prepared baking pan, smoothing the top with a spatula.

              Bake for 25-30 minutes, or until a toothpick inserted into the center comes out with a few moist crumbs (not wet batter).

                Allow the brownies to cool in the pan for at least 10 minutes before transferring them to a wire rack to cool completely.

                  Once cool, cut into squares and serve.

                    Prep Time: 15 minutes | Total Time: 45 minutes | Servings: 16 squares

                      WANT TO SAVE THIS RECIPE?