
Looking to make Halloween special this year? Let’s dive into the delightful world of Halloween cookies! These treats are easy to whip up and perfect for parties or family fun. With a simple ingredient list and straightforward steps, you’ll impress your guests in no time. Join me as we create spooky shapes and colorful decorations that will bring cheer to any celebration! You won’t want to miss these tips and tricks!
Ingredients
Complete Ingredient List for Halloween Cookies
– 2 ½ cups all-purpose flour
– 1 teaspoon baking powder
– ½ teaspoon baking soda
– ½ teaspoon salt
– 1 cup unsalted butter, softened
– 1 ½ cups granulated sugar
– 1 large egg
– 1 teaspoon vanilla extract
– 1 teaspoon almond extract
– 2 cups powdered sugar (for icing)
– Food coloring (various colors for decorating)
– Edible glitter (optional)
– Royal icing (for detailing)
Gather these ingredients before you start. The flour gives shape, while baking powder helps the cookies rise. Baking soda and salt boost flavor. Softened butter adds creaminess and sweetness. Sugar brings that perfect sweetness we all love.
The egg binds everything together. Vanilla and almond extracts add rich flavors. For icing, powdered sugar is a must. Food coloring lets you create fun designs. Edible glitter adds sparkle, making the cookies pop! Royal icing is perfect for details.
With this complete ingredient list, you’re ready to start making Halloween cookies. Follow the full recipe for a fun, tasty treat!
Step-by-Step Instructions
Preparing the Cookie Dough
Whisking Dry Ingredients
Start by mixing the flour, baking powder, baking soda, and salt in a bowl. Whisk them well until they blend nicely. This step helps create a good base for your cookies.
Creaming Butter and Sugar
Next, take a large bowl and add the softened butter and granulated sugar. Mix them together until they get light and fluffy. This should take about 3-4 minutes. It’s key for a nice texture.
Combining Wet and Dry Ingredients
Now, beat in the egg, vanilla extract, and almond extract into the butter mix. Once mixed, slowly add the dry ingredients. Mix on low speed until just combined. Remember, do not overmix! This keeps your cookies soft.
Chilling and Baking
Dividing and Wrapping Dough
After mixing, divide the dough into two equal parts. Wrap each piece in plastic wrap. Chill them in the fridge for at least 1 hour. This makes the dough easier to roll out later.
Preheating Oven and Preparing Baking Sheets
While the dough chills, preheat your oven to 350°F (175°C). Line your baking sheets with parchment paper. This helps prevent sticking and makes cleanup easy.
Rolling and Cutting Out Cookie Shapes
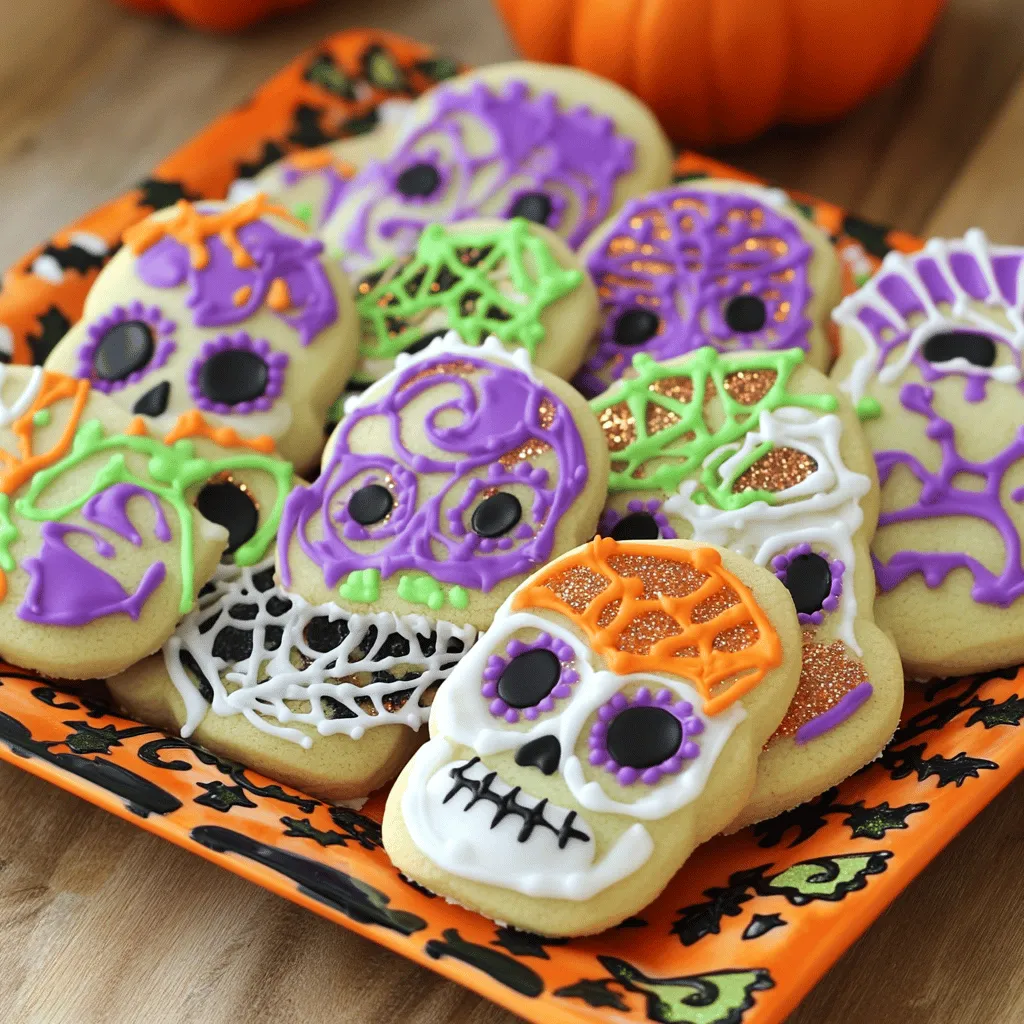
Once the dough is firm, take one portion out of the fridge. Roll it out on a floured surface to about 1/4-inch thick. Use a skull-shaped cookie cutter to cut out your cookies. Place them on the prepared sheets.
Cooling and Icing
Baking Time and Cooling Process
Bake the cookies for 8-10 minutes. Look for lightly golden edges. Once done, remove them from the oven. Let them cool on sheets for 5 minutes, then move to wire racks to cool completely.
Preparing Icing and Adding Color
While the cookies cool, prepare the icing. Mix the powdered sugar with a few tablespoons of water until smooth. Divide this icing into bowls and add food coloring as you like.
Decorating Techniques
Use the colored icing to create spooky designs on your cookies. You can make eyes, flowers, or any fun patterns. For an extra touch, sprinkle on edible glitter. Once the icing sets, use royal icing for detailed designs.
For the full recipe, check out the complete instructions that guide you through every step!
Tips & Tricks
Baking Perfect Cookies
Avoiding Overmixing
When making cookies, you should mix just enough. Overmixing can lead to tough cookies. Once you add the dry ingredients, mix on low speed until you see no flour. This keeps your cookies soft and chewy.
Measuring Flour Accurately
Measuring flour right is key to success. Use a spoon to scoop flour into your measuring cup. Then level it off with a knife. Avoid packing it down. This helps you get the right amount for your spooky sugar skull cookies.
Decorating Ideas
Fun Design Patterns
Let your creativity shine! Use colored icing to create fun designs. You can make spooky eyes, flowers, or even webs. Use a toothpick for fine details. Let each cookie show off your unique style this Halloween.
Using Edible Glitter and Royal Icing
Add a magical touch with edible glitter. It sparkles and catches the eye. For detailed work, royal icing is perfect. It dries hard, so your designs stay intact. Use it for outlines and intricate patterns on your cookies.
Presentation Suggestions
Halloween-Themed Plating Ideas
Make your cookies stand out on a spooky platter. Use black or orange plates to fit the theme. Arrange the cookies in a fun way. You can stack them or place them in a circle. This adds to the Halloween spirit.
Incorporating Seasonal Decor
Add some fun decorations around your cookies. Use plastic spiders, small pumpkins, or fake cobwebs. This makes your cookie display festive and fun. It sets the mood for Halloween and impresses your guests.
Variations
Alternative Shapes and Themes
You can create many fun shapes for Halloween cookies. Think about ghosts, pumpkins, and monsters. Each shape adds its own charm. Use a ghost-shaped cookie cutter for a spooky effect. A pumpkin cutter can bring warmth to your treats.
Cookie cutters come in all sizes and themes. You can find them at baking stores or online. Try making bats, witches, or even spooky skulls. Each cookie can tell a story.
Flavor Variations
Adding different flavors can make your cookies unique. You can use extracts and spices to change the taste. A dash of cinnamon can give a warm, cozy feel. Vanilla adds sweetness, while almond gives a nice twist.
Incorporate chocolate chips or chopped nuts for extra texture. Dark chocolate can add a rich flavor, and nuts can give a nice crunch. Mix and match these choices to find your favorite.
Dietary Modifications
You may want to change the recipe for dietary needs. For gluten-free cookies, use almond or coconut flour instead of all-purpose flour. Many people enjoy these options, and they taste great.
If you’re looking for vegan alternatives, use plant-based butter and flaxseed for the egg. You can also find low-sugar options by reducing the sugar or using natural sweeteners. These changes can help everyone enjoy Halloween cookies.
For the full recipe, check the complete instructions above.
Storage Info
Best Practices for Storing Cookies
When you bake Halloween cookies, you want them to stay fresh and tasty. You can store them at room temperature or in the fridge.
– Room Temperature: Keep cookies in an airtight container. They stay soft and chewy for about a week.
– Refrigeration: If you live in a warm place, put cookies in the fridge. This helps them last longer but may make them a bit hard.
To keep cookies fresh longer, always ensure they are fully cooled before sealing. You can also add a slice of bread in the container. This keeps moisture in the cookies.
Storing Decorated Cookies
Decorated cookies need special care. The icing can be delicate.
– Tips for Preserving Icing: Let the icing dry fully before stacking or storing. This prevents smudging.
– Avoiding Sticking and Breakage: Use wax paper between layers. This stops cookies from sticking together.
When storing decorated cookies, check for any damage. If they break, you can still enjoy them!
Freezing Cookies
You can freeze cookies to save them for later. This works well for both baked and unbaked dough.
– How to Freeze Before Baking: Shape the dough into balls and place them on a baking sheet. Freeze them for about an hour, then transfer to a zip-top bag. They can last for three months.
– Freezing Decorated Cookies: Once the icing is dry, wrap each cookie in plastic wrap. Store them in a container. They can also last for about three months.
Freezing cookies is a great way to enjoy Halloween treats anytime! For a delicious recipe, check out the Full Recipe for spooky sugar skull cookies.
FAQs
Common Questions About Halloween Cookies
How do I prevent my cookies from spreading?
To prevent cookies from spreading, chill the dough before baking. This keeps the butter firm. Use parchment paper on your baking sheets. It helps cookies hold their shape better.
Can I make the dough in advance?
Yes, you can make the dough ahead of time. Wrap it in plastic and refrigerate for up to three days. You can also freeze it for up to three months. Just thaw it in the fridge before rolling out.
What types of food coloring work best for decorating?
Gel food coloring works best for decorating cookies. It provides bright colors without adding too much liquid. Liquid food coloring can water down the icing, making it runny.
Tips for Cookie Cutters
Where can I find unique Halloween-shaped cutters?
You can find unique Halloween-shaped cutters at baking supply stores or online. Many craft stores also sell seasonal cookie cutters. Look for shapes like ghosts, bats, and pumpkins.
Can I use regular cookie cutters for Halloween designs?
Absolutely! You can use any cookie cutters you have. Just decorate them with themed icing to make them Halloween-ready. Get creative with designs to match any shape.
Other Baking Queries
What is the best way to thin royal icing?
To thin royal icing, add a few drops of water at a time. Mix until it reaches a smooth and pourable consistency. Test the icing by drawing a line; it should smooth out in about 10 seconds.
How long do these cookies stay fresh?
These cookies stay fresh for about one week at room temperature. Keep them in an airtight container. They can last longer if you freeze them, up to three months. Enjoy your spooky treats!
In this blog post, we covered all you need to make awesome Halloween cookies. You learned about key ingredients, step-by-step instructions, and helpful tips. We explored fun decorating ideas and tasty variations. Storage tips ensured your cookies stay fresh and tasty.
Baking Halloween cookies is fun and brings joy to all. Use your creativity to make these treats unique. Enjoy the process and share your delicious cookies with friends and family. Let your spooky baking adventure begin!
