Are you ready to indulge in a sweet treat that satisfies every craving? My Irresistible Peanut Butter Caramel Mini Cheesecakes are a dream come true. With a rich, creamy filling and a buttery crust, they’re perfect for any occasion. Plus, I’ll share tips to help you make them just right. Get your taste buds ready, because these mini desserts will have everyone coming back for more!
Ingredients
Main Ingredients for Peanut Butter Caramel Mini Cheesecakes
To make these mini cheesecakes, gather these key ingredients:
– 1 cup graham cracker crumbs
– 1/4 cup unsalted butter, melted
– 2 cups cream cheese, softened
– 1 cup creamy peanut butter
– 3/4 cup granulated sugar
– 1 teaspoon vanilla extract
– 2 large eggs
– 1/2 cup caramel sauce (store-bought or homemade)
– 1/4 cup chopped peanuts (for garnish)
– Sea salt (for garnish)
These ingredients come together to create a rich and creamy dessert. The graham cracker crust adds a sweet crunch, while the peanut butter and cream cheese filling brings a lovely, smooth texture.
Optional Garnishes for Serving
You can dress up these mini cheesecakes with simple garnishes. Consider these options:
– Additional caramel sauce drizzled on top
– Extra chopped peanuts for crunch
– A sprinkle of sea salt to enhance flavor
– Whipped cream for a light touch
These garnishes not only make your dessert look beautiful but also add extra layers of flavor.
Substitutions for Dietary Preferences
If you have special dietary needs, here are some easy swaps:
– Use gluten-free graham crackers for a gluten-free option.
– Substitute the cream cheese with a dairy-free cream cheese for a vegan choice.
– Swap out granulated sugar for coconut sugar or a sugar substitute for lower sugar options.
These substitutions allow everyone to enjoy the deliciousness of these mini cheesecakes, no matter their dietary needs. For the full recipe, check the recipe section above!
Step-by-Step Instructions
Preparing the Mini Cheesecake Crust
To start, preheat your oven to 325°F (160°C). Line a muffin tin with mini cupcake liners. In a medium bowl, combine 1 cup of graham cracker crumbs with 1/4 cup of melted unsalted butter. Mix it until it looks like wet sand. Press about 1 tablespoon of this mixture into the bottom of each liner. This forms the crust base. Bake the crusts for 5-7 minutes, then take them out and let them cool.
Making the Cheesecake Filling
In a large mixing bowl, beat 2 cups of softened cream cheese and 1 cup of creamy peanut butter together until smooth. Slowly add in 3/4 cup of granulated sugar and 1 teaspoon of vanilla extract. Mix until everything is well combined. Then, add 2 large eggs, one at a time. Beat well after each addition. This helps create a creamy and fluffy filling.
Baking and Cooling the Mini Cheesecakes
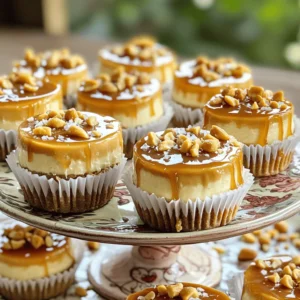
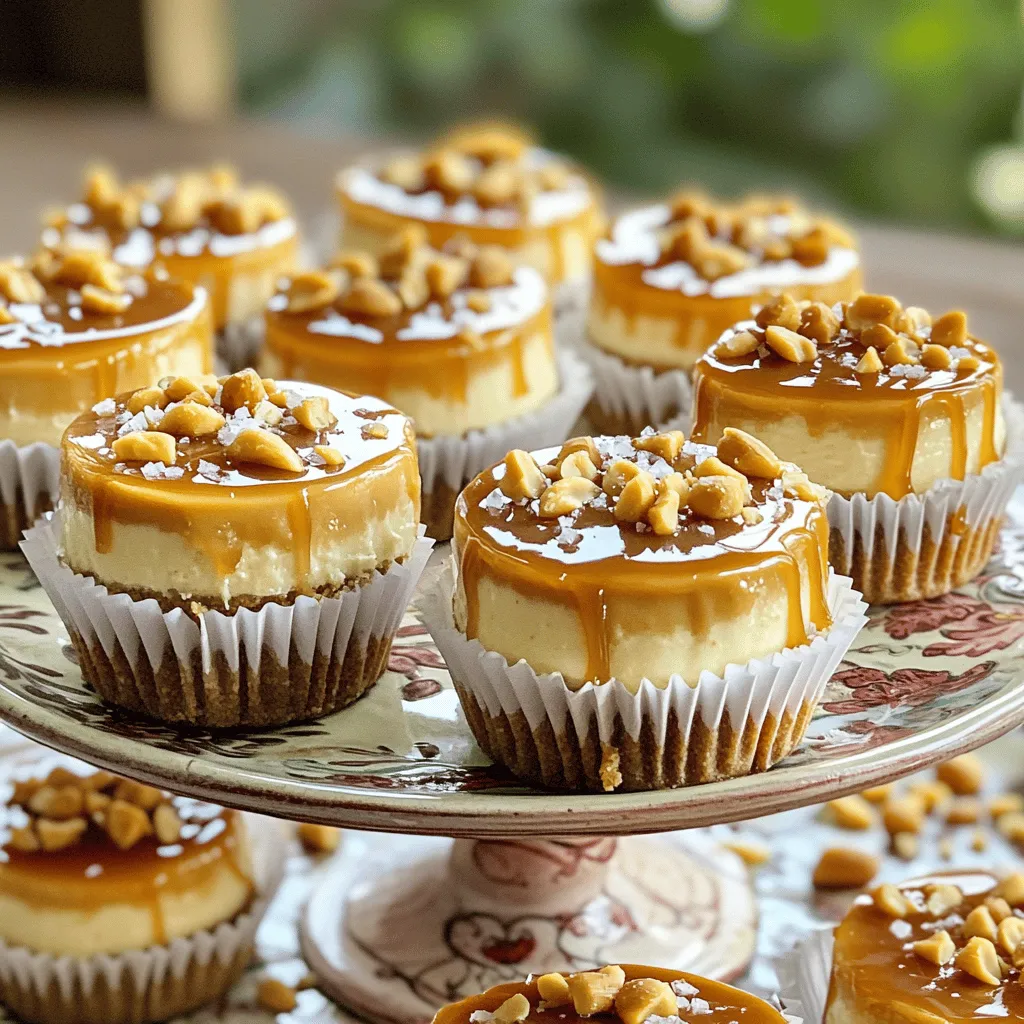
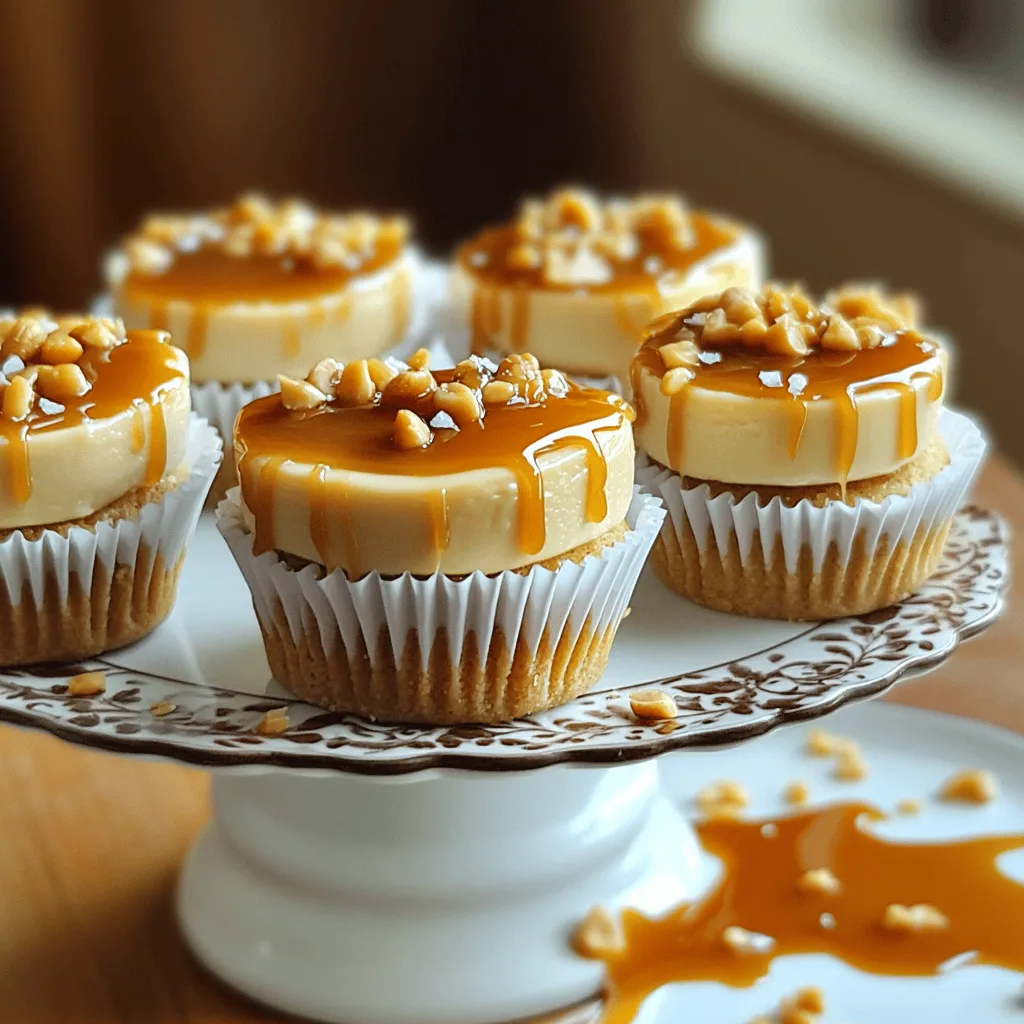
Now, spoon the cheesecake filling over your cooled crusts. Fill each liner almost to the top. Bake them in the oven for 18-20 minutes. The edges should be set, while the center will be a bit jiggly. After baking, remove them from the oven and let them cool completely at room temperature. Once they cool, chill them in the fridge for at least 2 hours until they firm up. Finally, drizzle 1/2 cup of caramel sauce over each cheesecake. Garnish with chopped peanuts and a sprinkle of sea salt for that perfect finishing touch. For the full recipe, refer back to the ingredients list above.
Tips & Tricks
How to Achieve the Perfect Cheesecake Texture
To get that smooth and creamy texture, use room-temperature cream cheese. Softened cream cheese blends better. Always mix it slowly to avoid too much air. Too much air will make the cheesecakes puff up. Also, don’t overmix once you add the eggs. Mix just until combined. This keeps your mini cheesecakes dense and rich.
Common Mistakes to Avoid
One big mistake is baking at too high a temperature. Stick to 325°F (160°C). This helps the cheesecakes cook evenly. Another mistake is taking them out too early. They should be set around the edges but still jiggly in the center. Lastly, don’t skip the chilling time in the fridge. They need at least two hours to firm up.
Serving Suggestions for Irresistible Peanut Butter Caramel Mini Cheesecakes
For a fun presentation, serve on a tiered dessert stand. Drizzle extra caramel sauce around the base for flair. Top each cheesecake with chopped peanuts for crunch. A sprinkle of sea salt adds a nice contrast to the sweetness. You could also pair these with fresh fruit like berries. They add a bright touch to each bite. For the full recipe, be sure to check out the full recipe section.
Variations
Alternative Flavor Combinations
You can try different flavors for a fun twist. Replace peanut butter with almond butter. You can also use Nutella for a chocolatey touch. Add a splash of coffee for a mocha flavor. For a fruity option, blend in some raspberry or strawberry puree. These tweaks create a new taste without losing the cheesecake base.
Gluten-Free and Vegan Options
Making these mini cheesecakes gluten-free is simple. Use gluten-free graham crackers or crushed nuts for the crust. For a vegan version, swap cream cheese with a blend of silken tofu and coconut cream. Replace eggs with flax seeds mixed in water. This keeps the texture creamy while catering to dietary needs.
Seasonal Twists for Different Occasions
Seasonal flavors can make these treats even more special. For fall, add pumpkin puree and spices like cinnamon and nutmeg. In winter, consider peppermint extract and crushed candy canes. Spring is perfect for lemon zest and fresh berries. These ideas help you celebrate each season with a new cheesecake experience.
Storage Info
Best Practices for Refrigeration
After making your mini cheesecakes, let them cool completely. Once cooled, place them in an airtight container. This keeps them fresh and prevents odors from mixing. I recommend using a container that fits them snugly. If you stack them, separate layers with parchment paper. This method helps keep their shape intact.
Freezing Mini Cheesecakes for Later Use
You can freeze these mini cheesecakes for up to three months. First, let them cool and chill in the fridge. Then, wrap each cheesecake in plastic wrap tightly. For extra protection, place them in a freezer bag or container. When you’re ready to enjoy, thaw them in the fridge overnight. This keeps the texture creamy and delicious.
How Long Do They Last?
In the fridge, these mini cheesecakes last about five days. If you freeze them, they can stay fresh for three months. Always check for any signs of spoilage before eating. Trust me; you want to savor every bite of these treats! For the full recipe, check out the link to make your own.
FAQs
Can I make these mini cheesecakes in advance?
Yes, you can make these mini cheesecakes in advance. They store well in the fridge. I recommend chilling them for at least two hours before serving. You can prepare them a day ahead of time, which makes hosting easier. Just cover them tightly and keep them cool. This way, the flavors will meld nicely, and you can enjoy the treat stress-free!
What can I use instead of cream cheese?
If you want to swap cream cheese, use Greek yogurt or silken tofu. Both options provide a similar creamy texture. Greek yogurt adds a nice tang, while silken tofu keeps it dairy-free. Blend either option until smooth for the best results. This way, you can cater to different dietary needs while still enjoying that rich cheesecake flavor.
How do I prevent mini cheesecakes from cracking?
To prevent cracks, avoid overmixing the batter. Mix just until smooth. Also, bake at a low temperature, around 325°F (160°C). This helps the cheesecakes cook evenly. After baking, let them cool slowly in the oven with the door slightly ajar. It helps them set without sudden temperature changes. Finally, chill them in the fridge to firm up before serving. Following these steps will give you perfectly smooth and beautiful mini cheesecakes!
You learned about making tasty Peanut Butter Caramel Mini Cheesecakes. We covered the main ingredients, step-by-step instructions, and helpful tips. You also explored variations and storage methods to keep them fresh.
With these insights, you can create delicious treats for any occasion. Enjoy the process of making them and share with friends and family. Happy baking!