Japanese Katsu Bowls Tasty and Simple Recipe Guide

WANT TO SAVE THIS RECIPE?

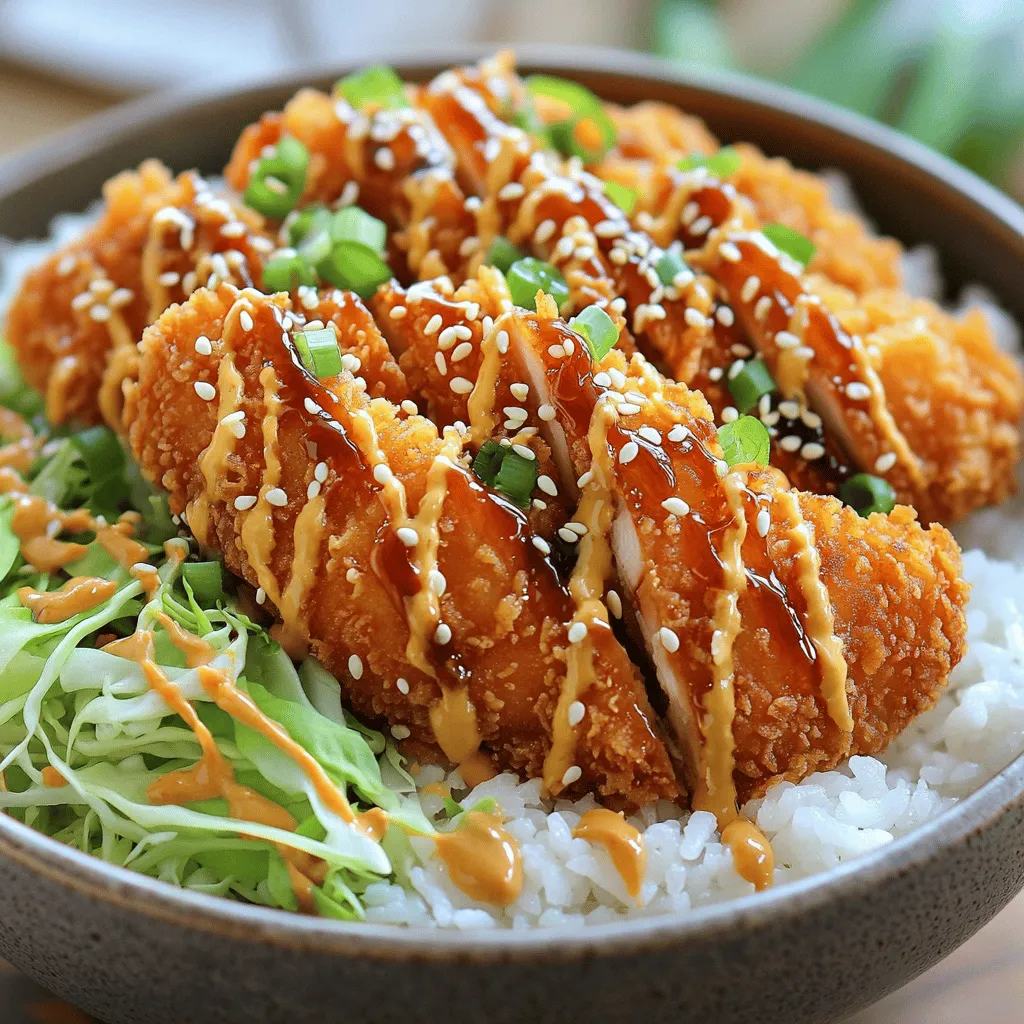
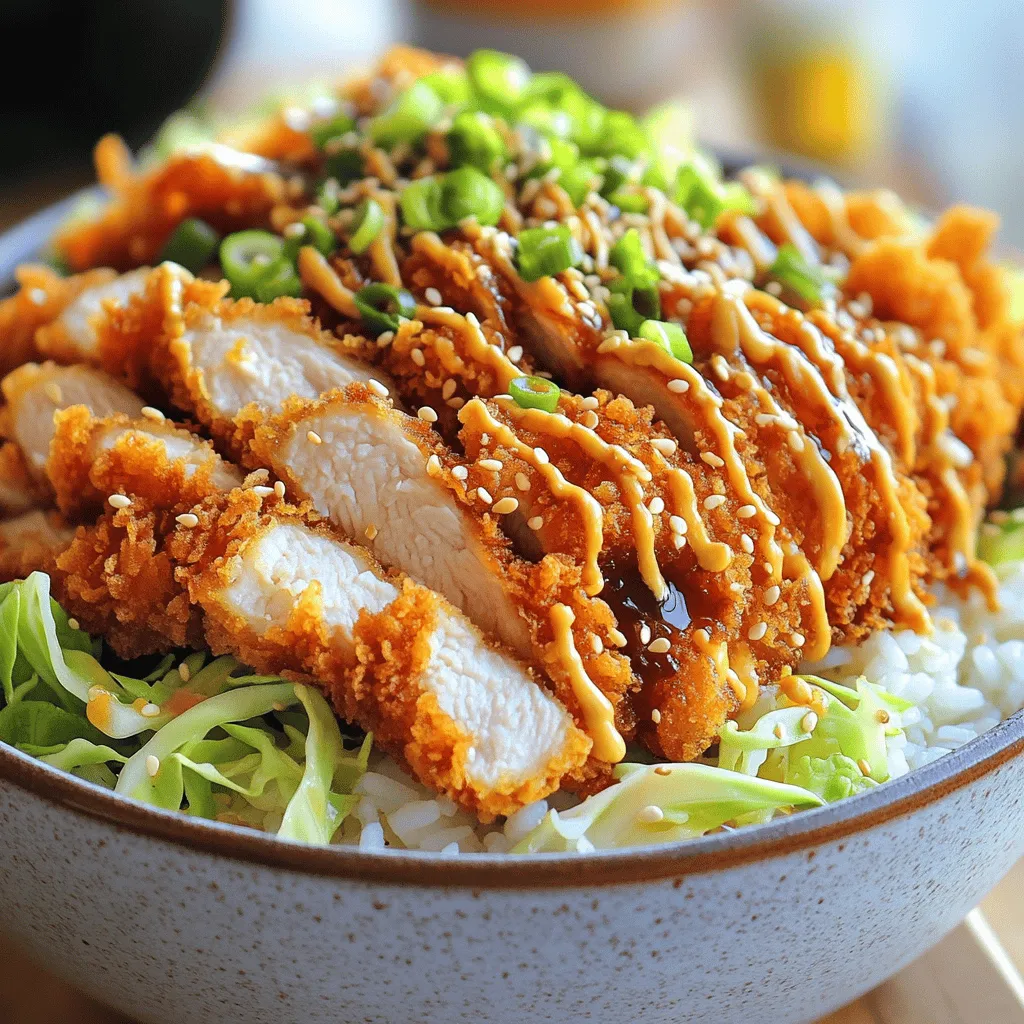
If you’ve ever craved a delicious, crispy Japanese Katsu Bowl, you’re in the right place! In this guide, I’ll share a tasty and simple recipe that anyone can make at home. With just a few key ingredients and easy steps, you’ll whip up this satisfying dish in no time. Let’s dive into the heart of Japanese comfort food and discover how to master Katsu Bowls today!

Ingredients for Japanese Katsu Bowls

Key Ingredients

– 2 boneless chicken breasts

– 1 cup panko breadcrumbs

– 1/2 cup all-purpose flour

To create a great katsu bowl, start with boneless chicken breasts. These cook evenly and stay juicy. Panko breadcrumbs add a nice crunch. They are lighter than regular breadcrumbs. All-purpose flour helps the coating stick well.

Seasonings and Toppings

– 1 teaspoon garlic powder

– 1 teaspoon onion powder

– 1/2 cup tonkatsu sauce

– 2 cups cooked jasmine rice

– 1/2 cup shredded cabbage

– 1/4 cup sliced green onions

Seasonings make the chicken flavorful. Garlic powder and onion powder give it a tasty kick. Tonkatsu sauce is a must-have for serving. It adds a sweet and savory touch. Serve the chicken over jasmine rice for a filling meal. Fresh vegetables like cabbage and green onions add crunch and color.

Optional Ingredients

– Sesame seeds for garnish

– Variations of protein (pork, tofu)

You can add sesame seeds for extra flavor and a nice look. If you want to try something different, use pork or tofu instead of chicken. This keeps the dish exciting and allows for more options.

For the full recipe, check out the details above.

Step-by-Step Instructions

Preparing the Chicken

To make great chicken katsu, start with the chicken. Place the chicken breasts between two sheets of plastic wrap. Use a meat mallet to pound them to about half an inch thick. This helps the chicken cook evenly. If the pieces are too thick, the outside may burn before the inside cooks. Pounding also helps tenderize the meat, making it juicier.

Setting Up the Breading Station

Next, set up your breading station. You will need three shallow dishes. In the first dish, mix flour with salt, pepper, garlic powder, and onion powder. In the second dish, beat two eggs. Put panko breadcrumbs in the third dish. This is a three-step process: flour, egg, and breadcrumbs. Keep everything organized to avoid a mess. You can use one hand for wet ingredients and the other for dry ones. This helps keep your hands clean.

Cooking the Chicken Katsu

Now it’s time to fry the chicken. Heat about half an inch of vegetable oil in a large skillet over medium-high heat. You want the oil to reach about 350°F, or 175°C. To check if it’s ready, drop a small piece of bread in. If it sizzles, the oil is hot enough. Carefully add the breaded chicken breasts. Fry each side for about four to five minutes. They should turn golden brown when done. To check if they are cooked through, slice into the thickest part. Juices should run clear, and the meat should be white. Remove the chicken and place it on a paper towel-lined plate to drain excess oil. Follow these steps for a tasty katsu that you can later use in your delicious katsu bowls. For the full recipe, check the details above.

Tips & Tricks for Perfect Katsu Bowls

Achieving the Right Crispiness

To get crispy katsu, follow these steps:

– Use panko breadcrumbs for crunch.

– Coat the chicken well with flour.

– Dip it in beaten egg before the breadcrumbs.

– Press the breadcrumbs on firmly.

– Fry in hot oil, around 350°F (175°C).

If your katsu turns out soggy, check the oil temperature. Too low oil makes katsu absorb oil. Fry in batches to avoid crowding. Let the fried katsu rest on paper towels to drain oil.

Serving Suggestions

Serve katsu over jasmine rice. The fluffy rice complements the crispy chicken. You can also add shredded cabbage for crunch. Don’t forget the tonkatsu sauce; it adds rich flavor. Consider garnishing with sliced green onions or sesame seeds for a pop of taste.

Meal Prep and Timing

Prep can save time. Pound chicken breasts ahead and store in the fridge. You can also mix the flour and seasonings in advance. Cook rice early and keep it warm. When you’re ready, fry the chicken and assemble your bowls. Timing is key; fry the katsu last to keep it hot and crispy. For the full recipe, check out the link above.

Variations of Katsu Bowls

Protein Alternatives

You can switch up the protein in your katsu bowl. Pork katsu is a tasty choice. It has a rich flavor that pairs well with the toppings. If you want a vegetarian option, try tofu. Just use firm tofu and bread it like chicken. You can customize your meal based on your diet.

Flavor Enhancements

Sauces can change the flavor of your katsu bowl. Besides tonkatsu sauce, try curry sauce for a twist. This adds warmth and spice. You can also explore regional toppings. Some people add pickles or eggs. These small changes can make your bowl unique and exciting.

Grain Options

Jasmine rice is the classic base for katsu bowls. However, you can swap it out for quinoa. Quinoa adds protein and a nutty taste. Other grains like brown rice or barley are great too. This way, you can enjoy a healthy twist on the traditional dish.

For the full recipe, please refer to the previous section.

Storage Information

Refrigerating Leftovers

Store leftover katsu bowls in the fridge. Use an airtight container to keep them fresh. They stay good for about 2-3 days. Make sure the katsu is cool before sealing the container. This helps prevent sogginess.

Reheating Instructions

To reheat katsu, keep it crispy. The oven works best for this. Preheat the oven to 350°F (175°C). Place the katsu on a baking sheet and heat for about 10 minutes. This helps restore the crunch. If you use a microwave, the katsu may become soggy. If you must use the microwave, heat in short bursts.

Freezing Katsu Bowls

You can freeze katsu bowls for later use. First, let the katsu cool completely. Wrap each piece in foil or plastic wrap. Then, place them in a freezer-safe bag or container. When you’re ready to eat, thaw them in the fridge overnight. Reheat in the oven to keep the crispiness. This method helps retain the flavor. For best results, eat frozen katsu within 2 months.

FAQs About Japanese Katsu Bowls

What is the origin of Katsu Bowls?

Katsu has deep roots in Japanese cuisine. It started as a Western dish called “cutlet.” In the late 19th century, Japanese chefs adapted it, creating the katsu we know today. This dish became popular for its crispy texture and rich flavor. Katsu holds cultural significance in Japan. It symbolizes comfort food and is often enjoyed during celebrations and special occasions.

Can I make Katsu Bowls gluten-free?

Yes, you can easily make katsu bowls gluten-free. For the flour, try using rice flour or chickpea flour. These options work well for the breading. For breadcrumbs, use gluten-free panko made from rice or corn. Check sauces too; many tonkatsu sauces contain gluten. Look for gluten-free versions or make your own using soy sauce alternatives.

How can I make Katsu Bowls vegetarian?

You can create tasty vegetarian katsu bowls with ease. Instead of chicken, use eggplant, zucchini, or tofu as your protein. For eggplant or zucchini, slice them thin and bread them just like you would with chicken. Firm tofu also works great; just press it to remove excess water before coating. This way, you can still enjoy a crunchy and satisfying meal.

In this article, we explored the key ingredients for Japanese katsu bowls, including chicken, panko, and sauces. I shared tips for preparing, cooking, and serving the perfect katsu. You learned about variations, storage options, and how to adapt recipes for dietary needs.

Katsu bowls are versatile and delicious. With the right techniques and ingredients, you can create a dish that fits any taste. Now it’s time for you to try it and make it your own!

- 2 boneless chicken breasts - 1 cup panko breadcrumbs - 1/2 cup all-purpose flour To create a great katsu bowl, start with boneless chicken breasts. These cook evenly and stay juicy. Panko breadcrumbs add a nice crunch. They are lighter than regular breadcrumbs. All-purpose flour helps the coating stick well. - 1 teaspoon garlic powder - 1 teaspoon onion powder - 1/2 cup tonkatsu sauce - 2 cups cooked jasmine rice - 1/2 cup shredded cabbage - 1/4 cup sliced green onions Seasonings make the chicken flavorful. Garlic powder and onion powder give it a tasty kick. Tonkatsu sauce is a must-have for serving. It adds a sweet and savory touch. Serve the chicken over jasmine rice for a filling meal. Fresh vegetables like cabbage and green onions add crunch and color. - Sesame seeds for garnish - Variations of protein (pork, tofu) You can add sesame seeds for extra flavor and a nice look. If you want to try something different, use pork or tofu instead of chicken. This keeps the dish exciting and allows for more options. For the full recipe, check out the details above. To make great chicken katsu, start with the chicken. Place the chicken breasts between two sheets of plastic wrap. Use a meat mallet to pound them to about half an inch thick. This helps the chicken cook evenly. If the pieces are too thick, the outside may burn before the inside cooks. Pounding also helps tenderize the meat, making it juicier. Next, set up your breading station. You will need three shallow dishes. In the first dish, mix flour with salt, pepper, garlic powder, and onion powder. In the second dish, beat two eggs. Put panko breadcrumbs in the third dish. This is a three-step process: flour, egg, and breadcrumbs. Keep everything organized to avoid a mess. You can use one hand for wet ingredients and the other for dry ones. This helps keep your hands clean. Now it’s time to fry the chicken. Heat about half an inch of vegetable oil in a large skillet over medium-high heat. You want the oil to reach about 350°F, or 175°C. To check if it’s ready, drop a small piece of bread in. If it sizzles, the oil is hot enough. Carefully add the breaded chicken breasts. Fry each side for about four to five minutes. They should turn golden brown when done. To check if they are cooked through, slice into the thickest part. Juices should run clear, and the meat should be white. Remove the chicken and place it on a paper towel-lined plate to drain excess oil. Follow these steps for a tasty katsu that you can later use in your delicious katsu bowls. For the full recipe, check the details above. To get crispy katsu, follow these steps: - Use panko breadcrumbs for crunch. - Coat the chicken well with flour. - Dip it in beaten egg before the breadcrumbs. - Press the breadcrumbs on firmly. - Fry in hot oil, around 350°F (175°C). If your katsu turns out soggy, check the oil temperature. Too low oil makes katsu absorb oil. Fry in batches to avoid crowding. Let the fried katsu rest on paper towels to drain oil. Serve katsu over jasmine rice. The fluffy rice complements the crispy chicken. You can also add shredded cabbage for crunch. Don't forget the tonkatsu sauce; it adds rich flavor. Consider garnishing with sliced green onions or sesame seeds for a pop of taste. Prep can save time. Pound chicken breasts ahead and store in the fridge. You can also mix the flour and seasonings in advance. Cook rice early and keep it warm. When you’re ready, fry the chicken and assemble your bowls. Timing is key; fry the katsu last to keep it hot and crispy. For the full recipe, check out the link above. {{image_2}} You can switch up the protein in your katsu bowl. Pork katsu is a tasty choice. It has a rich flavor that pairs well with the toppings. If you want a vegetarian option, try tofu. Just use firm tofu and bread it like chicken. You can customize your meal based on your diet. Sauces can change the flavor of your katsu bowl. Besides tonkatsu sauce, try curry sauce for a twist. This adds warmth and spice. You can also explore regional toppings. Some people add pickles or eggs. These small changes can make your bowl unique and exciting. Jasmine rice is the classic base for katsu bowls. However, you can swap it out for quinoa. Quinoa adds protein and a nutty taste. Other grains like brown rice or barley are great too. This way, you can enjoy a healthy twist on the traditional dish. For the full recipe, please refer to the previous section. Store leftover katsu bowls in the fridge. Use an airtight container to keep them fresh. They stay good for about 2-3 days. Make sure the katsu is cool before sealing the container. This helps prevent sogginess. To reheat katsu, keep it crispy. The oven works best for this. Preheat the oven to 350°F (175°C). Place the katsu on a baking sheet and heat for about 10 minutes. This helps restore the crunch. If you use a microwave, the katsu may become soggy. If you must use the microwave, heat in short bursts. You can freeze katsu bowls for later use. First, let the katsu cool completely. Wrap each piece in foil or plastic wrap. Then, place them in a freezer-safe bag or container. When you're ready to eat, thaw them in the fridge overnight. Reheat in the oven to keep the crispiness. This method helps retain the flavor. For best results, eat frozen katsu within 2 months. Katsu has deep roots in Japanese cuisine. It started as a Western dish called "cutlet." In the late 19th century, Japanese chefs adapted it, creating the katsu we know today. This dish became popular for its crispy texture and rich flavor. Katsu holds cultural significance in Japan. It symbolizes comfort food and is often enjoyed during celebrations and special occasions. Yes, you can easily make katsu bowls gluten-free. For the flour, try using rice flour or chickpea flour. These options work well for the breading. For breadcrumbs, use gluten-free panko made from rice or corn. Check sauces too; many tonkatsu sauces contain gluten. Look for gluten-free versions or make your own using soy sauce alternatives. You can create tasty vegetarian katsu bowls with ease. Instead of chicken, use eggplant, zucchini, or tofu as your protein. For eggplant or zucchini, slice them thin and bread them just like you would with chicken. Firm tofu also works great; just press it to remove excess water before coating. This way, you can still enjoy a crunchy and satisfying meal. In this article, we explored the key ingredients for Japanese katsu bowls, including chicken, panko, and sauces. I shared tips for preparing, cooking, and serving the perfect katsu. You learned about variations, storage options, and how to adapt recipes for dietary needs. Katsu bowls are versatile and delicious. With the right techniques and ingredients, you can create a dish that fits any taste. Now it's time for you to try it and make it your own!

Japanese Katsu Bowls

Savor the deliciousness of crispy chicken katsu bowls with this easy recipe! You'll love the perfect blend of seasoned chicken, fluffy jasmine rice, and fresh veggies, all drizzled with savory tonkatsu sauce. This meal is not just satisfying but also fun to prepare. Ready to impress your family with a tasty homemade dinner? Click through to explore the full recipe and elevate your cooking game today!

Ingredients
  

2 boneless chicken breasts

1 cup panko breadcrumbs

1/2 cup all-purpose flour

2 large eggs

1 teaspoon salt

1/2 teaspoon black pepper

1 teaspoon garlic powder

1 teaspoon onion powder

Vegetable oil (for frying)

2 cups cooked jasmine rice

1/2 cup shredded cabbage or lettuce

1/4 cup sliced green onions

1/2 cup tonkatsu sauce

Optional: sesame seeds for garnish

Instructions
 

Prepare the Chicken: Place the chicken breasts between two sheets of plastic wrap and pound them to an even thickness (about 1/2 inch). This will ensure even cooking.

    Seasoning Setup: In three separate shallow dishes, place the flour seasoned with salt, pepper, garlic powder, and onion powder in one; beat the eggs in the second; and put the panko breadcrumbs in the third dish.

      Coating the Chicken: Dip each chicken breast first in the flour, making sure to coat it evenly. Shake off any excess. Next, dip it into the beaten eggs, allowing any excess to fall off. Finally, coat it in the panko breadcrumbs, pressing gently to ensure they stick well.

        Fry the Chicken: Heat about 1/2 inch of vegetable oil in a large skillet over medium-high heat. Once the oil is hot (around 350°F or 175°C), carefully add the breaded chicken breasts. Fry for about 4-5 minutes on each side until golden brown and cooked through. Remove and place on a paper towel-lined plate to drain excess oil.

          Slice the Chicken: Once the chicken has cooled slightly, slice it into strips.

            Assemble the Bowls: In bowls, place a serving of cooked jasmine rice at the base. Top with sliced chicken katsu, followed by a handful of shredded cabbage or lettuce. Drizzle with tonkatsu sauce and sprinkle with sliced green onions and sesame seeds if using.

              Serve: Enjoy the katsu bowls immediately while they are hot.

                Prep Time: 20 minutes | Total Time: 30 minutes | Servings: 2

                  WANT TO SAVE THIS RECIPE?