Are you ready to savor a sweet twist on a classic dessert? The King’s Hawaiian Cheesecake Danish combines soft, buttery dough with a creamy filling, making it a delightful treat. In this blog post, I’ll guide you through easy steps, tips, and delicious variations to create this mouthwatering dish. Whether it’s for breakfast or dessert, you’ll impress everyone with this recipe. Let’s dive in and make something special!
Ingredients
Main Ingredients
– 1 can (8 oz) refrigerated crescent roll dough
– 8 oz cream cheese, softened
– 1/4 cup granulated sugar
– 1 teaspoon vanilla extract
– 1 tablespoon lemon juice
– 1/2 cup powdered sugar
– 1/4 teaspoon salt
– 1 tablespoon melted butter
These main ingredients create a creamy, sweet filling. The crescent roll dough gives a nice, flaky texture. The cream cheese and sugar blend well, making a rich filling.
Optional Ingredients
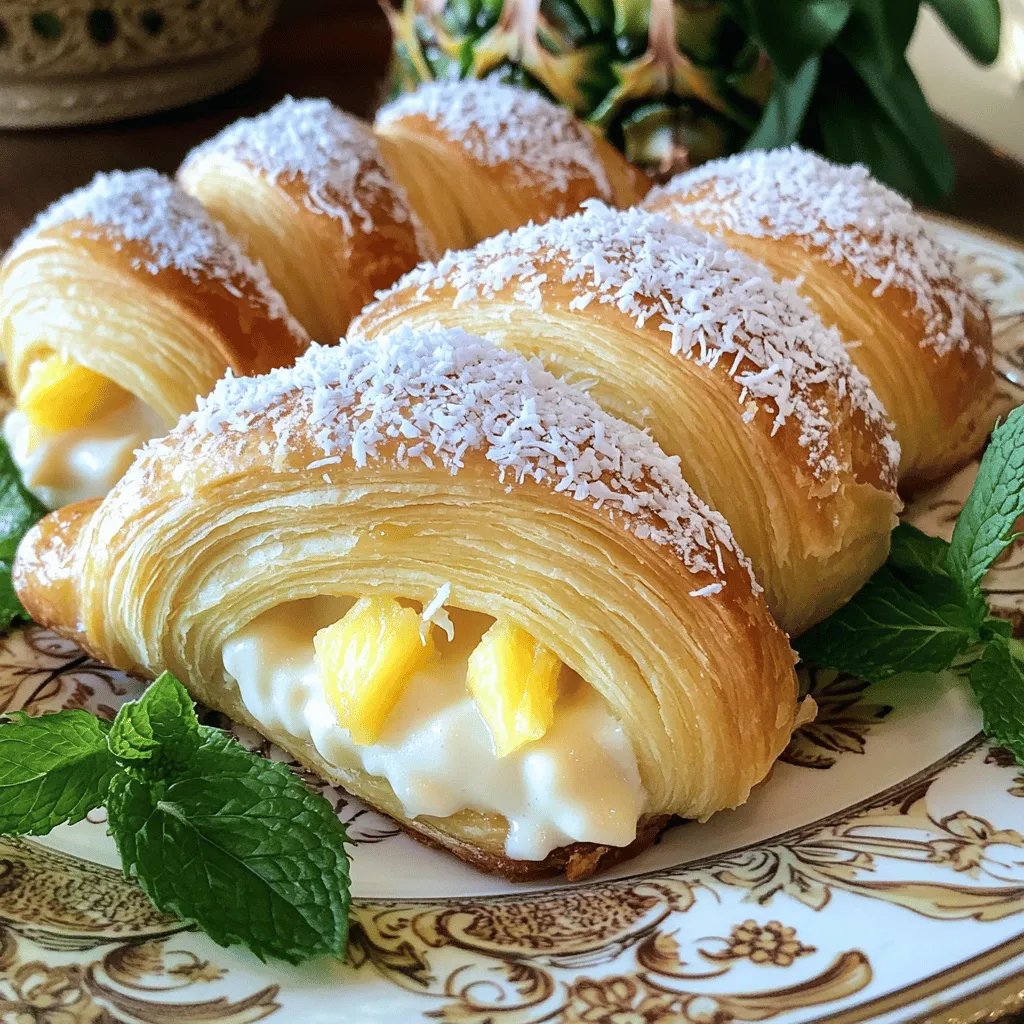
– 1/2 cup pineapple tidbits, drained
– 1 tablespoon shredded coconut (for garnish)
Pineapple adds a tropical twist. It brightens the flavor and adds fun. Shredded coconut on top gives a nice look and extra flavor.
Ingredients Substitutes
– Low-fat cream cheese options: You can use low-fat cream cheese. It cuts some calories but still tastes great.
– Vegan alternatives for the dough: Use vegan crescent roll dough for a dairy-free option. This keeps the treat friendly for all diets.
Using these ingredients, you can craft a delightful King’s Hawaiian Cheesecake Danish. Check out the Full Recipe for more detailed steps!
Step-by-Step Instructions
Preparation Steps
1. Preheat your oven to 375°F (190°C). Line a baking sheet with parchment paper.
2. Unroll the crescent roll dough onto a lightly floured surface. Pinch the seams together.
3. Use a rolling pin to gently roll the dough. This makes it smooth and slightly longer.
4. Cut the dough into equal rectangles. You should get about 6 to 8 pieces.
Filling Preparation
1. In a medium bowl, mix the cream cheese, granulated sugar, vanilla extract, lemon juice, and salt. Blend until smooth.
2. If you like pineapple, add a few tidbits into the cream cheese mixture. This adds a nice twist.
Assembly and Baking
1. Spoon the cream cheese mixture onto the center of each rectangle.
2. Fold the dough edges over the filling. Make sure to leave the center exposed.
3. Brush the tops with melted butter. This gives a nice golden finish.
4. Bake for 12-15 minutes until the pastries are golden brown.
5. Let them cool slightly. Dust with powdered sugar and garnish with shredded coconut before serving.
For the Full Recipe, check the detailed instructions to make your Danish perfect.
Tips & Tricks
Perfecting the Danish
To make your Danish easy to work with, chill the dough before you unroll it. It should be cold but not frozen. This makes it less sticky and easier to shape. Make sure you pinch the seams well. This keeps the filling from leaking out.
For a smooth cream cheese mixture, let the cream cheese sit out for about 30 minutes. It should be soft. Mix it well with sugar, lemon juice, and vanilla until it is creamy. Use a hand mixer if you have one. This helps avoid lumps.
Serving Suggestions
Present your Danish on a nice plate. A decorative plate makes it look fancy. Dust the top with powdered sugar for a sweet touch. You can add fresh mint leaves for color. If you want extra flavor, drizzle honey or chocolate sauce on top.
Pair your Danish with coffee or tea. A glass of fresh juice also works well. This can make for a delightful breakfast or snack.
Common Mistakes to Avoid
One common mistake is overfilling the pastry. If you add too much filling, it spills out while baking. Stick to a tablespoon of filling per Danish.
Another mistake is not baking the Danish long enough. Watch for a golden color on top. If they are pale, they may be raw inside. Overbaking can also happen, making them hard. Keep an eye on them as they bake.

Variations
Flavor Variations
You can make the King’s Hawaiian Cheesecake Danish even more fun by adding fruits. Berries, like strawberries or blueberries, add a fresh burst. Peaches bring a sweet, juicy twist. You can mix and match to find your favorite.
Spices can also change the flavor. A hint of nutmeg warms things up. Cinnamon adds a cozy feel. These spices work well with the cream cheese filling. You can really create your own version!
Dietary Variations
If you need gluten-free options, choose gluten-free crescent dough. Many brands offer this. It tastes great and keeps the same texture. You won’t miss the regular dough at all.
For sugar-free options, use sugar substitutes in the filling. Stevia or erythritol works well. They keep the sweet flavor without the extra sugar.
Serving Variants
You can turn these delightful Danishes into breakfast bites. Cut them smaller for easy eating. They’re perfect for brunch with friends or family.
If you have leftovers, don’t worry. You can transform them into a dessert. Just warm them up and drizzle a bit of chocolate sauce on top. They’ll taste just as good the next day!
For the full recipe, be sure to check out the complete list of ingredients and instructions.
Storage Info
Storage Guidelines
To keep your King’s Hawaiian Cheesecake Danish fresh, store it properly. Place the Danish in an airtight container. This will help retain moisture and flavor. Store it in the fridge for up to three days. If you need to keep them longer, freezing is a great option. Wrap each Danish tightly in plastic wrap and then place them in a freezer bag. This method prevents freezer burn and keeps them tasty. They can last in the freezer for about three months.
Reheating Tips
When it’s time to enjoy your Danish again, reheating needs care. The best method is to use an oven. Preheat the oven to 350°F (175°C). Place the Danish on a baking sheet and cover with foil. Heat them for about 10 minutes. This helps the pastry stay soft and warm. Avoid using the microwave, as it can make the pastry soggy.
Shelf Life
The shelf life of your Danish depends on storage. In the fridge, they last around three days. If you freeze them, they stay fresh for three months. After that, they may lose flavor and texture. Always check for any signs of spoilage before eating. Enjoy your delightful treat without worry!
FAQs
What is a King’s Hawaiian Cheesecake Danish?
A King’s Hawaiian Cheesecake Danish is a sweet pastry. It combines soft dough with a rich cream cheese filling. The dough is light and flaky, making it a delight to eat. Many enjoy this treat for breakfast or dessert. The flavors of cream cheese, vanilla, and lemon blend perfectly. You can even add pineapple for extra sweetness.
Can I make the Danish ahead of time?
Yes, you can prepare the Danish in advance. Make the cream cheese filling and store it in the fridge. You can also roll out the dough ahead of time. Just keep it wrapped to avoid drying out. When you’re ready, fill the dough and bake. This way, you will save time on busy mornings.
Where can I buy King’s Hawaiian Cheesecake Danish?
You can find the Danish in many grocery stores. Look for it in the bakery section. Some stores may sell them frozen. You can also check online for local bakeries. If you’re lucky, you might find them at specialty shops.
Full Recipe Availability
For the full recipe, check online cooking sites or blogs. Many share step-by-step guides. You can find tips and tricks to help you bake. This makes it easy to recreate the King’s Hawaiian Cheesecake Danish at home.
This blog post covered everything you need to make a delicious King’s Hawaiian Cheesecake Danish. We discussed key ingredients, preparation steps, and tips to perfect your dish. Remember, using fresh fruits or spices can add unique flavors. Storage guidelines ensure your danish stays fresh, while reheat tips keep it tasty. With these insights, you can impress anyone with your baking skills. Enjoy making this delightful treat and feel free to customize it to your taste! Happy baking!
