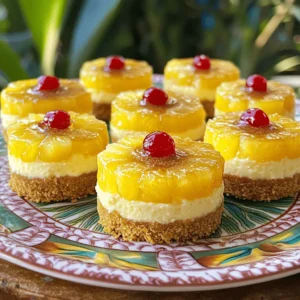
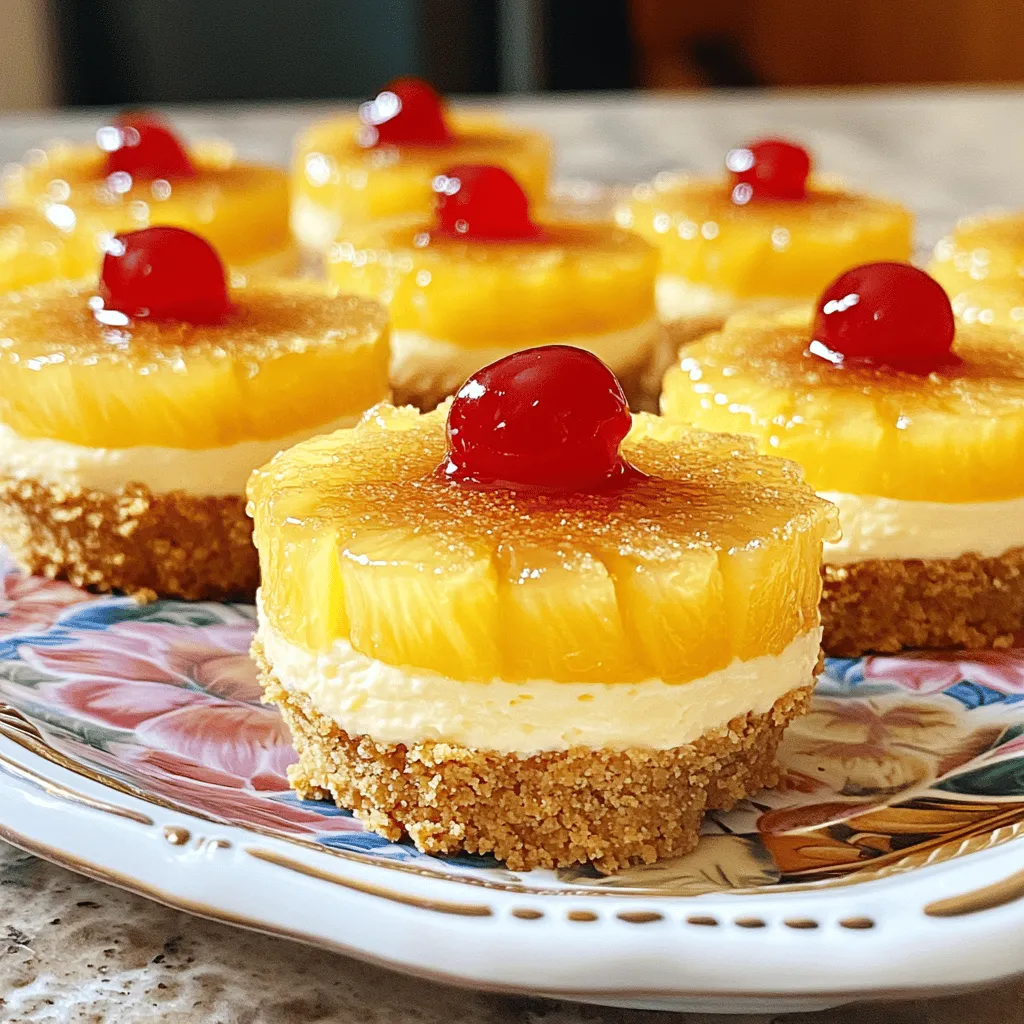
Are you ready to treat your taste buds? These Mini Pineapple Upside-Down Cheesecakes are easy to make and bursting with flavor. With a buttery crust and creamy filling, they bring a tropical twist to your dessert table. Perfect for parties or a cozy night in, these little delights are sure to impress. Let’s dive into the simple ingredients and steps to create this tasty treat that everyone will love!
Ingredients
List of Ingredients
– 1 cup graham cracker crumbs
– 4 tablespoons unsalted butter, melted
– 16 oz cream cheese, softened
– 1/2 cup granulated sugar
– 2 large eggs
– 1 teaspoon vanilla extract
– 1 cup crushed pineapple, drained
– 1/4 cup brown sugar
– Maraschino cherries for garnish
When collecting your ingredients, focus on quality. The graham cracker crumbs form the base, so use fresh ones for the best taste. Melted unsalted butter binds the crumbs, creating a rich crust. Cream cheese is key to a smooth filling, so ensure it’s fully softened. Granulated sugar adds sweetness, while eggs give structure to the cheesecake. Vanilla extract adds a lovely aroma, and crushed pineapple brings in that tropical twist. The brown sugar adds a caramel-like depth to the topping. Don’t forget the Maraschino cherries; they make for a fun and bright garnish.
For equipment, get a muffin tin and cupcake liners ready. A mixing bowl, measuring cups, and a hand mixer are essential for this recipe. This setup makes the process smooth and enjoyable. If you keep these tips in mind, you’ll have everything you need for your mini pineapple upside-down cheesecakes. For the complete preparation method, check the Full Recipe.
Step-by-Step Instructions
Preparation Steps
1. Preheat Oven and Prepare Muffin Tin
Start by preheating your oven to 325°F (160°C). Line a muffin tin with cupcake liners. This makes it easy to remove the cheesecakes later.
2. Prepare the Crust
In a bowl, mix 1 cup of graham cracker crumbs with 4 tablespoons of melted unsalted butter. Stir until it looks crumbly. This will be your crust.
3. Make the Cheesecake Filling
In a large bowl, beat 16 oz of softened cream cheese with 1/2 cup of granulated sugar. Mix until it’s smooth and creamy. Add 2 large eggs one at a time. Beat well after each one. Mix in 1 teaspoon of vanilla extract. Finally, gently fold in 1 cup of drained crushed pineapple.
4. Assemble the Mini Cheesecakes
Press about 1 tablespoon of the crust mixture into the bottom of each muffin liner. Then, spoon the cheesecake mixture on top. Fill each liner about 3/4 full.
5. Bake and Cool
In a small bowl, mix 1/4 cup of brown sugar with any leftover crushed pineapple. Spoon this over each cheesecake for a sweet topping. Bake for 18-20 minutes. They should look set but still jiggle a bit in the center. Let them cool at room temperature. Then, refrigerate for at least 2 hours before serving.
For the full recipe, check out the details above. Enjoy making these delightful mini treats!
Tips & Tricks
Common Mistakes to Avoid
– Overmixing the Batter: Mixing too much makes the batter tough. Beat just until smooth.
– Not Draining the Pineapple Properly: Extra juice makes the cheesecake soggy. Drain well before adding.
– Baking Time Tips: Every oven is different. Check at 18 minutes, and use a toothpick.
Serving Suggestions
– Presentation Tips: Serve the mini cheesecakes on a colorful platter. Adding a mint leaf gives a nice touch.
– Pairing with Drinks: These cheesecakes pair well with iced tea or coconut water. They balance the sweetness perfectly.
Ways to Enhance Flavor
– Adding Zest or Extracts: A little lemon or orange zest brightens the taste. You can add a drop of coconut extract too.
– Using Fresh Pineapple: Fresh pineapple adds a vibrant flavor. Chop it finely and drain before using for best results.
For the complete guide to making these delicious desserts, refer to the Full Recipe.
Variations
Ingredient Substitutions
Gluten-Free Options for the Crust
You can use gluten-free graham crackers for the crust. Just crush them like regular graham crackers. If you can’t find them, try almond flour mixed with melted butter. This mix works well and gives a nutty flavor.
Alternative Sweeteners
If you want to cut sugar, use honey or maple syrup instead of granulated sugar. For a sugar-free option, try stevia or erythritol. Both will give you sweetness without added calories.
Flavor Variants
Different Fruit Toppings
While pineapple is classic, you can use other fruits. Consider peaches, cherries, or berries. Just be sure to drain any juice to keep the cheesecake from getting soggy.
Chocolate Drizzle
For a fun twist, add a chocolate drizzle. Melt dark or white chocolate and drizzle it over your cheesecakes before serving. This adds a rich flavor that pairs well with the fruity taste.
Mini Cheesecake Formats
Converting to Regular Cheesecake
If you prefer a larger cheesecake, use a springform pan. Just pour the filling over the crust and bake longer. Check for doneness with a toothpick; it should come out clean.
Cheesecake Bites
For bite-sized treats, pour the cheesecake batter into mini muffin tins. Bake for a shorter time and enjoy them as little cheesecake bites. They are perfect for parties or snacks.
For the full recipe, check out the Mini Pineapple Upside-Down Cheesecakes.
Storage Info
Best Practices for Storing
– Refrigeration Tips: Store your mini cheesecakes in an airtight container. Place parchment paper between layers to prevent sticking. They stay fresh in the fridge for several days.
– Freezing Instructions: To freeze, wrap each cheesecake in plastic wrap, then place them in a freezer bag. This helps avoid freezer burn.
Shelf Life
– How Long They Last in the Fridge: These mini cheesecakes last for about 5 days in the fridge. Check for any signs of spoilage before enjoying.
– Tips for Thawing: To thaw, move them from the freezer to the fridge. Let them sit overnight for the best texture.
Reheating Tips
– Best Ways to Serve After Storage: Serve chilled for the best flavor. If you prefer them warm, place them in a 300°F (150°C) oven for a few minutes. Keep a close watch to avoid overheating.
FAQs
Can I make these cheesecakes ahead of time?
Yes, you can make these mini cheesecakes in advance. They store well in the fridge. Once they cool, cover them tightly. Place a piece of plastic wrap over each cheesecake. This keeps them fresh and tasty.
– Best Storage Practices for Pre-Made Desserts
– Refrigerate the mini cheesecakes for up to five days.
– For longer storage, freeze them in an airtight container.
– Thaw in the fridge overnight before serving.
What can I use instead of cream cheese?
If you want a dairy-free option, use vegan cream cheese. There are many brands available. Silken tofu is a great alternative too. It gives a smooth texture and works well in cheesecakes.
– Possible Dairy-Free or Vegan Alternatives
– Vegan cream cheese (store-bought)
– Silken tofu blended until smooth
– Cashew cream (soaked cashews blended with a bit of lemon)
How can I make these cheesecakes more flavorful?
To boost flavor, add zest from a lemon or lime. You can also mix in coconut flakes for a tropical twist. Try a splash of rum extract for an extra kick.
– Tips for Flavor Enhancement and Options
– Use fresh vanilla beans instead of extract.
– Fold in chopped nuts for a crunchy texture.
– Add spices like cinnamon or nutmeg for warmth.
Can I use fresh pineapple instead of canned?
Yes, fresh pineapple works well too! Just make sure to chop it finely. If it’s juicy, drain it before mixing. This avoids a watery cheesecake.
– Considerations and Preparation Tips
– Peel and core the fresh pineapple.
– Cut it into small pieces for even distribution.
– Sauté the fresh pineapple briefly for a caramelized flavor.
How do I know when they are done baking?
To check for doneness, look for a slight jiggle in the center. The edges should be set, and the center should not be liquid. They will firm up as they cool.
– Visual and Textural Cues to Look For
– Edges will look slightly puffed and firm.
– The center should look shiny but not wet.
– A toothpick inserted should come out clean or with a few moist crumbs.
In this post, I covered how to make delicious mini cheesecakes. You learned about the key ingredients and step-by-step instructions. I shared tips to avoid common mistakes and offered serving suggestions. Variations for flavors and formats allow for creativity. Lastly, I included best practices for storing and reheating your cheesecakes.
With these techniques, you can create perfect treats every time. Enjoy your mini cheesecakes and impress your friends!