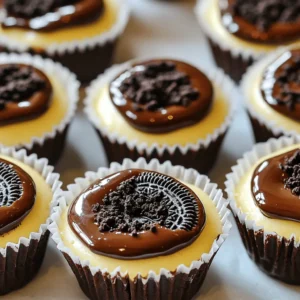
Craving a sweet treat without turning on the oven? Look no further! These No-Bake Oreo Cheesecake Minis are a perfect delight for any dessert lover. With just a handful of simple ingredients, you can create bite-sized wonders that impress everyone. I’ll guide you through easy steps, handy tips, and tasty variations. Let’s whip up this creamy, chocolatey dessert that packs a flavor punch! Get ready to enjoy your new favorite treat!
Ingredients
List of Ingredients
– 24 Oreo cookies, crushed (plus extra for topping)
– 4 tablespoons unsalted butter, melted
– 8 oz cream cheese, softened
– 1/2 cup powdered sugar
– 1 teaspoon vanilla extract
– 1 cup heavy whipping cream
– 1/4 cup chocolate ganache (optional for drizzling)
Necessary Kitchen Tools
– Mini muffin tin
– Cupcake liners
– Mixing bowls
– Electric mixer
– Whisk or hand mixer
– Spoon or piping bag
The ingredients for No-Bake Oreo Cheesecake Minis are simple but full of flavor. First, you need 24 Oreo cookies. Crushing them gives you a great base for the crust. You’ll also need melted unsalted butter to bind the crumbs together.
Next, cream cheese adds that rich and creamy texture we all love. Softening it makes blending easy. You will mix in powdered sugar for sweetness and vanilla extract for flavor.
The heavy whipping cream is key for a light, airy filling. Whipping it until stiff peaks form gives the cheesecake its delightful texture. For a fun twist, you can drizzle chocolate ganache on top. This adds extra chocolatey goodness!
Gather these items before you start. The right tools will make the process smooth. You’ll need a mini muffin tin with cupcake liners, mixing bowls, and an electric mixer. A whisk or hand mixer can work too. Finally, a spoon or piping bag will help you fill the crusts with the cheesecake mixture.
With all these ingredients and tools ready, you are set to create a delicious treat. Check the Full Recipe for more details on how to bring these minis to life!
Step-by-Step Instructions
Preparing the Crust
– First, combine the crushed Oreo cookies with melted butter in a medium bowl.
– Mix them until they look like wet sand.
– Line a mini muffin tin with cupcake liners.
– Spoon about 1 tablespoon of the Oreo mixture into each liner.
– Press the mixture down firmly to create a crust.
Making the Cheesecake Filling
– In a large mixing bowl, beat the cream cheese until smooth.
– Gradually add the powdered sugar and vanilla extract.
– Mix until everything is well blended.
– In another bowl, whip the heavy cream until stiff peaks form.
– Gently fold the whipped cream into the cream cheese mixture.
Assembling the Cheesecake Minis
– Spoon or pipe the cheesecake filling over the crusts in the muffin tin.
– Fill each liner to the top for a nice dome shape.
– Smooth the tops with a spatula.
– Refrigerate for at least 4 hours so they set properly.
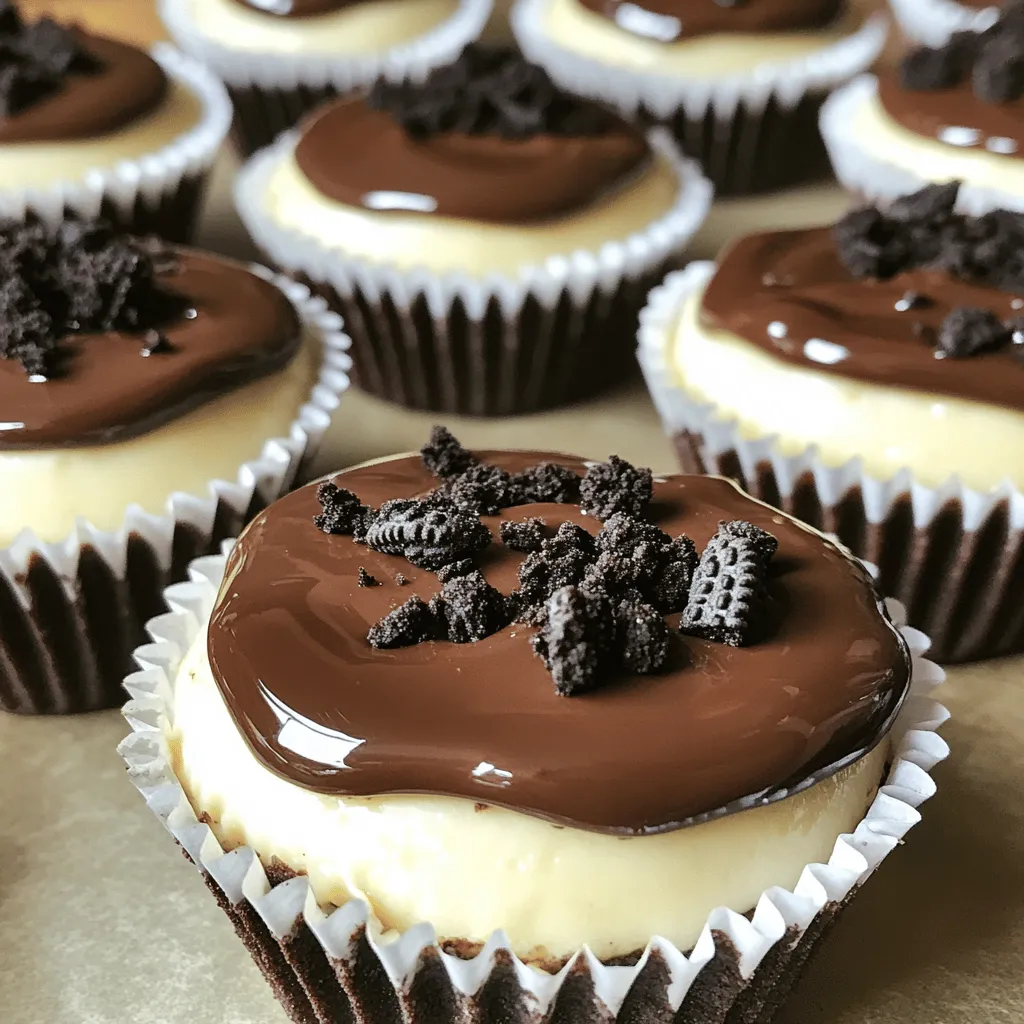
– For extra flair, top with crushed Oreos or drizzle chocolate ganache before serving.
For the complete steps, check the Full Recipe to ensure a perfect treat!
Tips & Tricks
Achieving the Perfect Texture
To get the best texture for your cheesecake minis, whipping the cream is key. Here’s how to whip cream to stiff peaks:
– Start with cold cream. Keep it in the fridge until you use it.
– Use a clean bowl and whisk. This helps the cream whip better.
– Beat on medium speed until soft peaks form, then increase to high speed. Stop when peaks are stiff, not dry.
Next, folding is important to keep the light texture. Here’s how to fold without deflating:
– Add the whipped cream to the cream cheese mixture in parts.
– Use a spatula to gently mix. Scoop from the bottom and fold over.
– Be soft and gentle to keep air in the mixture.
Serving Suggestions
Enhance your cheesecake minis with fun pairings. Here are some ideas:
– Fresh fruits like strawberries or raspberries add a nice touch.
– Serve with chocolate or caramel sauce for extra sweetness.
– A sprinkle of crushed Oreos on top gives a nice crunch.
For garnishing, try these best ways:
– Use a piping bag to add a swirl of whipped cream on top.
– Drizzle chocolate ganache for a rich finish.
– Add a mint leaf for a pop of color and freshness.
Common Mistakes to Avoid
Avoid these common pitfalls to make perfect cheesecake minis:
– Overmixing the filling: Mix just until combined. Overmixing can make it dense.
– Not pressing the crust firmly: Press down hard to make a solid base. This helps hold your cheesecake together.
By following these tips and tricks, you can make your No-Bake Oreo Cheesecake Minis a delightful treat. For the full recipe, check out the instructions above!
Variations
Flavor Modifications
You can change the taste of your No-Bake Oreo Cheesecake Minis easily. Try adding different flavored extracts. Almond or mint extract can bring a fresh twist. Just add a teaspoon to the cream cheese mixture.
You can also use other cookies for the crust. Instead of Oreos, try chocolate chip cookies or graham crackers. Each cookie will give a new flavor and texture.
Allergy-Friendly Options
If you have dietary restrictions, don’t worry! You can make these treats allergy-friendly. Use dairy-free cream cheese and whipped cream for a great taste without dairy. Many brands offer these options now.
For gluten-free versions, substitute regular Oreos with gluten-free cookies. These changes make it easy for everyone to enjoy.
Seasonal Variations
You can adapt this recipe for different seasons. For fall, add pumpkin puree to the cheesecake filling. It adds a lovely flavor and color. Top with whipped cream and a sprinkle of cinnamon for a festive touch.
During the holidays, you can use crushed peppermint candies on top. This adds a fun crunch and a holiday feel. You can modify the recipe to fit any occasion.
Storage Info
Best Practices for Refrigeration
To store leftovers in the fridge, place the cheesecake minis in an airtight container. This keeps them fresh and stops them from absorbing other fridge smells. You can also use plastic wrap if you do not have a container. Just make sure it covers them well.
For storage, use small glass or plastic containers. They are easy to stack and won’t take much room. If you have many, divide them into smaller portions. This way, you can grab just what you need.
Freezing Instructions
To freeze the cheesecake minis, first, let them set in the fridge for at least four hours. After they are firm, you can place them in a single layer on a baking sheet. Freeze them for about two hours until solid. Then, move them to a freezer-safe bag or container. Remove as much air as you can to prevent freezer burn.
Before serving, thaw the cheesecake minis in the fridge overnight. This keeps their texture smooth and creamy. You can also let them sit at room temperature for about 20 minutes if you need them sooner.
Shelf Life
In the fridge, these cheesecake minis last for about five days. If you freeze them, they can last for about two months. Just remember, the longer they sit, the more the texture might change. Enjoy them fresh for the best taste!
FAQs
Can I use low-fat cream cheese?
Yes, you can use low-fat cream cheese. However, it may change the texture and flavor. The cheesecake might not be as rich and creamy. It can also be slightly less stable, making it harder to set.
What can I substitute for Oreos?
You can use other cookies if you want a change. Some great options include chocolate wafer cookies, graham crackers, or even peanut butter cookies. Each will give a unique taste to your cheesecake.
How do I prevent the crust from being too crumbly?
To keep the crust from crumbling, make sure to mix the crushed cookies well with melted butter. Press the mixture firmly into the cupcake liners. You can also add a little more butter if needed to help bind the crust.
In this article, we explored how to make delicious cheesecake minis with simple ingredients. You learned about the necessary kitchen tools, step-by-step instructions, tips for the perfect texture, and variations to try. Remember, the right mix of flavors and texture makes a big difference. Avoid common mistakes for the best results. Enjoy creating these treats for any occasion. They are sure to impress friends and family. Keep experimenting with flavors and toppings to make them your own.