Get ready for a Halloween treat that’s both spooky and fun! In this guide, I’ll show you how to make easy Halloween cookies that will wow your friends and family. From creepy shapes to wild colors, these cookies can be a hit at any Halloween party. With simple ingredients and step-by-step instructions, you’ll make delicious memories this Halloween season. Let’s jump into the world of spooky sweets!
Ingredients
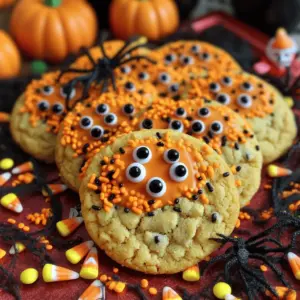
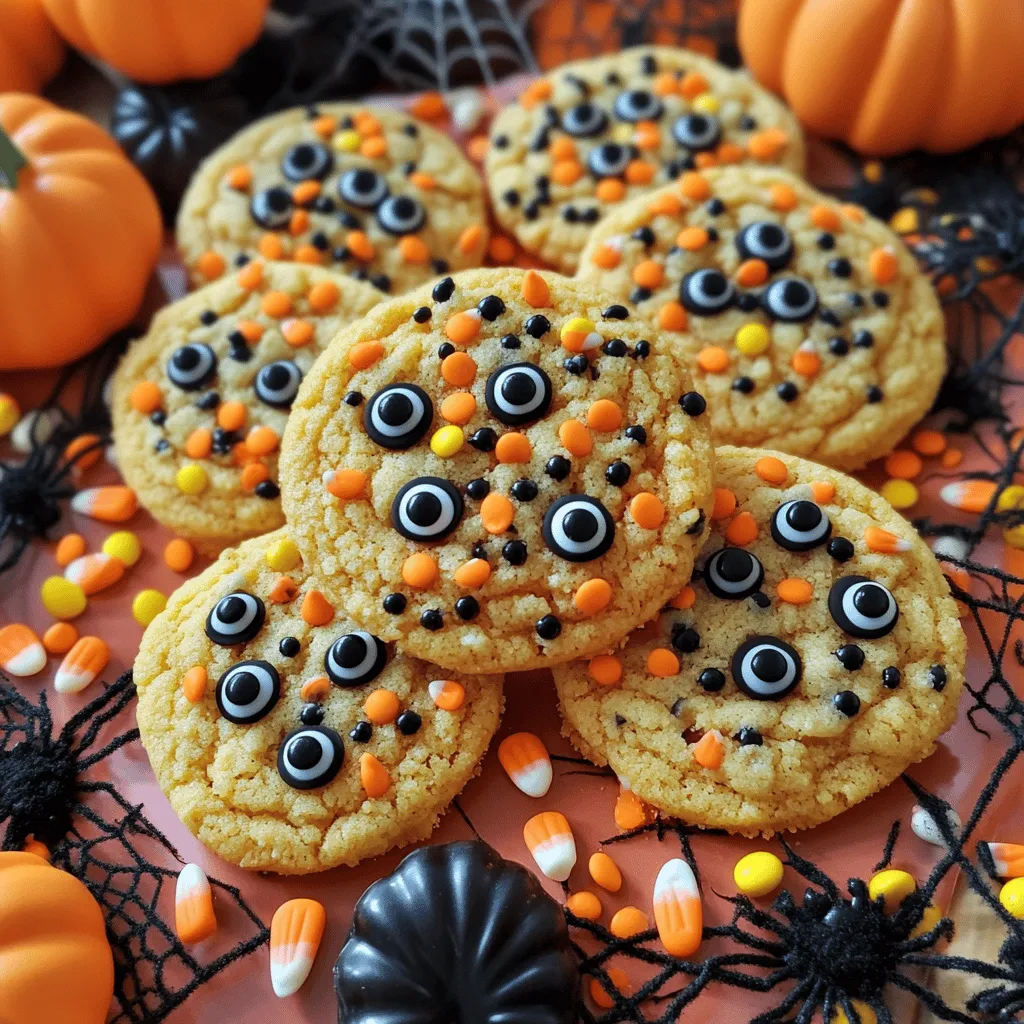
Essential Ingredients for Spooky Fun Halloween Cookies
To make these fun Halloween cookies, you’ll need the following ingredients:
– 2 ½ cups all-purpose flour
– 1 teaspoon baking soda
– 1 teaspoon baking powder
– ½ teaspoon salt
– 1 cup unsalted butter, softened
– 1 cup granulated sugar
– 1 cup brown sugar, packed
– 2 large eggs
– 2 teaspoons vanilla extract
– 2 teaspoons pumpkin pie spice
– ½ cup chocolate chips
– ½ cup candy corn
– Edible googly eyes (for decoration)
– Orange and black sprinkles
These ingredients create a soft and tasty cookie with a spooky twist. The chocolate chips and candy corn add sweetness and fun. The pumpkin pie spice gives a hint of fall flavor, which is perfect for Halloween.
Optional Decorations and Add-ins
You can get creative with decorations! Here are some fun ideas:
– Use white icing to create ghost shapes.
– Add mini chocolate chips for eyes.
– Try colorful sprinkles for a festive touch.
– Use frosting to write spooky messages.
These add-ins can make your cookies stand out and delight your guests. Let your imagination run wild!
Substitutions for Dietary Preferences
If you have dietary needs, here are some simple swaps:
– Use coconut oil instead of butter for a dairy-free option.
– Substitute the all-purpose flour with gluten-free flour for a gluten-free cookie.
– Replace granulated sugar with coconut sugar for a healthier choice.
These substitutions allow everyone to enjoy these spooky treats. Just remember to adjust baking times as needed!
Step-by-Step Instructions
Preparation Steps for Halloween Cookies
To start, gather all your ingredients. This makes the process smooth and fun. You will need:
– 2 ½ cups all-purpose flour
– 1 teaspoon baking soda
– 1 teaspoon baking powder
– ½ teaspoon salt
– 1 cup unsalted butter, softened
– 1 cup granulated sugar
– 1 cup brown sugar, packed
– 2 large eggs
– 2 teaspoons vanilla extract
– 2 teaspoons pumpkin pie spice
– ½ cup chocolate chips
– ½ cup candy corn
– Edible googly eyes (for decoration)
– Orange and black sprinkles
Now, preheat your oven to 350°F (175°C). Next, line two baking sheets with parchment paper. This will help the cookies bake evenly and not stick.
In a medium bowl, whisk together the flour, baking soda, baking powder, salt, and pumpkin pie spice. Set this aside. In a larger bowl, cream the softened butter with granulated and brown sugar. Use an electric mixer until it is light and fluffy.
Add in the eggs one at a time. Mix well after each egg. Then stir in the vanilla extract. Gradually combine the dry mixture with the wet mixture. Be careful, as overmixing can make the cookies tough.
Finally, fold in the chocolate chips and candy corn until they are evenly spread in the dough.
Cookie Baking Guidelines
Using a tablespoon, drop spoonfuls of cookie dough onto the lined baking sheets. Space them about 2 inches apart. This gives them room to spread when baking.
Next, use a fork to flatten each dough ball slightly. This helps them bake evenly and gives a nice look. Decorate the tops with orange and black sprinkles.
Push a few edible googly eyes into each cookie. This adds a fun spooky touch. Bake the cookies for 10-12 minutes. The edges should be lightly golden, while the centers will look soft. They will firm up as they cool.
Once done, let the cookies cool on the baking sheets for 5 minutes. After that, transfer them to wire racks to cool completely.
Decorating Techniques for Spooky Themes
Make your cookies extra spooky! Arrange them on a Halloween-themed platter. You can stack them in a clear jar with a ghostly ribbon. Add some plastic spiders or small pumpkins around them for a festive touch.
Feel free to be creative! You can use different sprinkles or candy for decoration. The goal is to have fun and enjoy the process. Remember, the more spooky, the better! For more details, check out the Full Recipe.
Tips & Tricks
Best Baking Practices for Perfect Cookies
To make perfect spooky cookies, follow these tips:
– Measure Carefully: Use measuring cups for dry and wet ingredients.
– Room Temperature Butter: Use softened butter for easy mixing.
– Don’t Overmix: Mix until just combined to keep cookies soft.
– Chill Dough: If the dough feels too soft, chill it for 30 minutes.
– Use Parchment Paper: It keeps cookies from sticking and helps with even baking.
How to Make the Process Kid-Friendly
Baking with kids can be fun and easy! Here are some tips:
– Assign Tasks: Let kids measure and mix ingredients.
– Safe Tools: Use kid-friendly utensils, like plastic spatulas.
– Decorating Fun: Allow kids to add sprinkles and eyes.
– Create Shapes: Use cookie cutters for Halloween shapes like bats and pumpkins.
– Set a Timer: Teach kids to check the cookies when the timer goes off.
Ideas for a Halloween Cookie Decorating Party
Hosting a decorating party will make Halloween even more exciting! Try these ideas:
– Theme Stations: Set up different decorating stations with sprinkles and candies.
– Costumes: Encourage guests to wear Halloween costumes while decorating.
– Prize for Best Cookie: Offer a small prize for the most creative cookie design.
– Photo Booth: Create a fun backdrop for guests to take pictures with their cookies.
– Spooky Music: Play Halloween-themed music to set the mood while you bake.
Use the Full Recipe to get started on these fun Halloween cookies!
Variations
Alternative Flavor Ideas
You can change up the flavors in your spooky cookies. How about using peanut butter instead of butter? This adds a nice nutty taste. You can also try using almond extract for a sweet twist. Another fun idea is to mix in pumpkin puree for added moisture and flavor. For a minty treat, add peppermint extract and dark chocolate chips.
Creative Shapes and Designs
Getting creative with shapes makes baking fun! Use cookie cutters shaped like ghosts, bats, or pumpkins. You can also roll the dough into balls and flatten them for a spooky look. To add more fun, make a cookie sandwich with frosting between two cookies. Use icing to draw creepy faces or fun designs. Your kids will love helping with this step!
Seasonal Variations and Themes
You can change your Halloween cookies for other seasons. For Christmas, use red and green sprinkles and shapes like stars or trees. For Valentine’s Day, make heart-shaped cookies with pink icing. In spring, use pastel colors and flower shapes. Each season offers a chance to be creative with flavors and themes. The full recipe allows for endless possibilities, making every holiday special!
Storage Info
How to Store Leftover Cookies
After baking your spooky cookies, let them cool completely. Place the cookies in an airtight container. You can stack them, but separate layers with parchment paper. This method helps keep them fresh and soft. If you follow these steps, you can enjoy them for up to a week.
Tips for Freezing Cookie Dough
Freezing cookie dough is easy and smart. First, scoop the cookie dough onto a baking sheet lined with parchment paper. Freeze the dough balls for about an hour. After that, transfer them to a freezer bag. Label the bag with the date and type of cookie. You can freeze the dough for up to three months. When ready to bake, just pop them in the oven straight from the freezer!
Best Ways to Maintain Freshness
To keep your cookies fresh, store them in a cool, dry place. Avoid putting them near heat sources. If you want extra freshness, add a slice of bread to the container. The bread will absorb moisture and keep your cookies soft. For decorated cookies, the best method is to store them in a single layer. Use wax paper to prevent sticking.
For more details on making these cookies, check the Full Recipe.
FAQs
Can I use different types of flour?
Yes, you can use different flours. Whole wheat flour adds a nutty flavor. Almond flour gives a nice texture. Use a mix of flours for fun twists. Just remember, flour affects the cookie’s texture. So, keep an eye on the dough.
How can I make these cookies gluten-free?
To make gluten-free cookies, swap all-purpose flour for a gluten-free blend. Look for one that measures cup-for-cup. This ensures the same texture. You can also add xanthan gum for better structure. Test a small batch first to check taste and texture.
What’s the best way to store decorated cookies?
Store decorated cookies in an airtight container. Keep them at room temperature. If you stack them, use parchment paper between layers. This helps avoid smudges on the icing. Cookies stay fresh for about a week. For longer storage, freeze them in a single layer. Just thaw them at room temperature when ready to eat.
You now know how to make fun Halloween cookies. We covered essential ingredients and tasty decorations. You learned step-by-step baking methods and how to store your cookies too. Remember, the best cookies come from fun and practice. Enjoy these spooky treats with friends and family. Get creative with flavors and shapes. Use kid-friendly tips to share the joy of baking together. Now grab those ingredients and start your Halloween baking adventure!