Go Back
- 6 cups of peeled, cored, and chopped apples - 2 cups of granulated sugar - 1 tablespoon of cinnamon - 1/2 teaspoon of nutmeg - 1/4 teaspoon of allspice - 1/4 teaspoon of cloves - 1 teaspoon of vanilla extract - 1 tablespoon of lemon juice - 1/2 cup of water You need the right apples for this recipe. I suggest using tart apples. They bring balance to the sweetness. You can use 6 cups of peeled, cored, and chopped apples. Granny Smith apples are great. Honeycrisp apples give a sweet twist. Fuji apples are sweet and juicy too. - Granny Smith - Honeycrisp - Fuji If you want to change things up, you can swap sweeteners. Try honey or maple syrup instead of sugar. You can also use dried spices. They work just as well as fresh ones. Just use a little less. - Alternative sweeteners - Using fresh vs. dried spices This recipe is flexible. You can adjust it to suit your taste. Let your creativity flow! - Preparing the apples Start by peeling, coring, and chopping six cups of apples. I love using Granny Smith or Honeycrisp for their great flavor. Aim for small pieces to help them cook evenly. - Mixing initial ingredients In a large pot, mix the chopped apples with 1/2 cup of water, 1 tablespoon of lemon juice, and 2 cups of granulated sugar. Stir until everything is well combined. - Simmering the apple mixture Place the pot over medium heat. Let the mixture simmer. As the apples soften, stir often to stop them from sticking to the bottom. This should take about 15-20 minutes. - Pureeing the apples When the apples are soft, it's time to puree them. I recommend using an immersion blender for ease. If you don't have one, carefully transfer the mixture to a regular blender in batches. Blend until smooth. - Adding spices Pour the pureed apples back into the pot. Add 1 tablespoon of cinnamon, 1/2 teaspoon of nutmeg, 1/4 teaspoon of allspice, 1/4 teaspoon of cloves, and 1 teaspoon of vanilla extract. Stir well to mix in all the spices. - Reducing and thickening Lower the heat and let the apple mixture simmer uncovered for 1.5 to 2 hours. Stir occasionally. This helps the apple butter thicken and gain rich flavors. To check thickness, place a spoonful on a plate. It should hold its shape. Enjoy making this heartwarming traditional apple butter! For the full recipe, check the details above. To make your apple butter shine, balance sweet and spicy. I suggest using less sugar if your apples are very sweet. For a deeper flavor, add more spices like cinnamon and nutmeg. Different apples bring unique tastes. For example, Granny Smith offers tartness, while Honeycrisp adds sweetness. Mix and match to find your favorite blend. Thick apple butter is the goal. To test thickness, place a spoonful on a plate. If it holds its shape, you’re ready. If not, let it simmer longer. Stir often to prevent burning. If you notice sticking, lower the heat. Good stirring helps keep it even. Jarring your apple butter can be fun. Use small glass jars and tie them with rustic ribbons. A simple label makes it personal. For serving, pair it with warm bread or toast. It also goes well with cheese or even pancakes. Your guests will love these tasty combinations! {{image_2}} You can play with flavors in apple butter. Adding fruits like pears or cranberries brightens the taste. Just chop them up and mix them in when cooking. They add sweetness and a unique twist. Another fun idea is to spike your apple butter with bourbon. Just a splash can give it a warm, rich flavor. This works well for adult gatherings. If you want a sugar-free option, use a sweetener like stevia or erythritol. They can replace sugar without losing taste. For vegan-friendly options, skip the honey if a recipe calls for it. This makes it perfect for everyone. Apple butter is not just for toast. You can mix it into baked goods like muffins or pancakes for extra flavor. It makes a great filling for pastries too. Use it as a dip for fresh fruits or spread it on your favorite bread. The full recipe shows you how to make this delightful treat. To keep your apple butter fresh, use proper sealing. Transfer the cooled apple butter into clean, sterilized jars. Seal each jar tightly. Store the jars in the fridge. When sealed well, it can last for about three weeks. To can apple butter safely, you need to use hot water bath canning. Fill sterilized jars with hot apple butter, leaving about a quarter-inch headspace. Wipe the rims clean and seal them with lids. Process jars in boiling water for about ten minutes. Use proper canning jars and equipment to ensure safety. Freezing is a great way to store apple butter long-term. Use freezer-safe containers or bags. Leave some space in the container since apple butter expands when frozen. For best taste, use it within a year. When you're ready to use it, thaw in the fridge overnight. Enjoy it on toast or in recipes! Homemade apple butter can last for several weeks in the fridge. Store it in clean, airtight jars. If you keep it sealed well, it can stay fresh for up to three weeks. For longer storage, consider canning or freezing it. Yes, you can make apple butter without sugar. You might use natural sweeteners like honey or maple syrup. Just remember that the taste will change, and it may not be as sweet. Adjust to your taste as you cook. You can use a slow cooker for this recipe. Just follow the same steps to prepare the apples. Then, cook on low for 6 to 8 hours. Stir occasionally, and check for thickness as it cooks down. To check if your apple butter is done, use a spoon. Scoop some onto a plate and let it cool for a moment. If it holds its shape and does not run, it’s ready. If it's too runny, let it cook longer. Yes! You can add spices like ginger or cardamom for more flavor. Try adding some citrus zest for a fresh twist. Be creative and adjust based on your taste preferences. Mix and match until it feels just right. For the complete recipe, check out the Full Recipe section for all the steps and tips! In this post, we covered everything about making apple butter. We looked at key ingredients, helpful tips, and cooking steps. We also shared ideas for variations and storage methods. Apple butter can be sweetened or flavored to suit your taste. Remember, experimenting with apples and spices can lead to your perfect mix. Enjoy sharing your homemade apple butter with family and friends. It’s a simple, rewarding project that brightens up any meal. Now, get cooking and have fun!

The Best Heartwarming Traditional Apple Butter Recipe

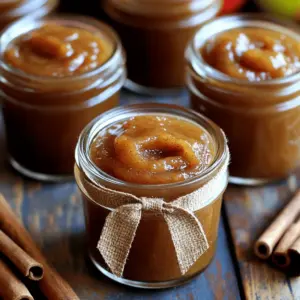
Discover the best heartwarming traditional apple butter recipe that will fill your kitchen with delightful aromas! Made with fresh apples, warm spices, and a touch of sweetness, this homemade apple butter is perfect for spreading on toast or gifting in cute jars. Follow our easy step-by-step instructions to create a delicious batch that your family will love. Click through for the full recipe and start your cozy culinary adventure today!

Ingredients
  

6 cups of peeled, cored, and chopped apples (such as Granny Smith or Honeycrisp)

2 cups of granulated sugar

1 tablespoon of cinnamon

1/2 teaspoon of nutmeg

1/4 teaspoon of allspice

1/4 teaspoon of cloves

1 teaspoon of vanilla extract

1 tablespoon of lemon juice

1/2 cup of water

Instructions
 

Begin by preparing the apples. Peel, core, and chop them into small pieces to ensure even cooking.

    In a large pot, combine the chopped apples, water, lemon juice, and sugar. Stir well to combine.

      Place the pot over medium heat and allow it to simmer. As the apples begin to soften, stir occasionally to prevent sticking.

        Once the apples have cooked down (about 15-20 minutes), use an immersion blender, or carefully transfer to a regular blender in batches, to puree the apples until smooth.

          After pureeing, return the mixture to the pot and add the cinnamon, nutmeg, allspice, cloves, and vanilla extract. Stir well to integrate all spices thoroughly.

            Reduce the heat to low and let the apple mixture simmer uncovered for 1.5 to 2 hours, stirring occasionally. This will allow the mixture to thicken and develop rich flavors.

              To test for thickness, place a spoonful of apple butter on a plate and let it cool for a moment. It should hold its shape and not run off the plate.

                Once the desired thickness is achieved, remove the pot from heat and allow the apple butter to cool for a bit before transferring it to clean, sterilized jars.

                  Seal the jars tightly and store them in the refrigerator, where the apple butter can last for several weeks.

                    Prep Time: 30 minutes | Total Time: 2 hours 30 minutes | Servings: about 4 cups

                      - Presentation Tips: Serve the apple butter in small glass jars tied with a rustic ribbon, and label each jar for a personal touch. It also makes a great gift!